Skim coating a wall with putty properly means applying two thin coats (about 0.5–1 mm each) to a dry, clean wall, applying the second coat only once the first has dried, then sanding and checking with a raking light for high and low spots before priming. Most painted walls that show hairline cracks, trowel marks or chalky powder on your fingers failed because the putty went on too thick, was mixed with the wrong amount of water or was applied to a damp wall, not because the paint was poor. This lesson is written the way a lead painter coaches an apprentice, with a worked example that takes an apartment living room from wall area in m² to bags of putty and cost.
By the end of this lesson, you will be able to:
- Check a wall before skimming: moisture, soundness, dust and cracks, and decide whether more preparation is needed.
- Mix wall putty with the right water ratio and standing time, and apply two thin coats with controlled thickness.
- Sand each coat with the right grit and use a raking light to find high spots, low spots and trowel marks.
- Recognise and fix cracking, chalking, flaking and pinholes before painting.
- Work out putty, water, sandpaper and cost for a room from usage per m², with figures that add up.
Learning house painting properly? Skim coating is step 4 of the roadmap, after scaffold and chemical safety, paint systems, and preparing walls. See the 8-step house painter roadmap to learn in the right order.
What is wall putty, and why two thin coats?
Wall putty (called "matit" or "bot ba" in Vietnam) is a fine powder based on white cement or gypsum, ground stone and polymer additives, mixed with water into a smooth paste that fills pores and flattens a rendered wall. The putty layer gives the primer and topcoat a smooth base. A sand-cement render usually has sand pores, trowel marks and differences of a few millimetres; painting straight onto it shows every flaw under the lights.
Why not one thick coat to save time
Putty shrinks as it dries. In a thick coat the surface dries first and the core later, and the shrinkage stress causes hairline cracking and can lift whole patches. Two thin coats dry evenly: the first fills pores and hollows, the second smooths the surface and hides the marks of the first.
Interior and exterior putty
- Interior: very fine, easy to sand, moderate moisture resistance; for dry indoor walls.
- Exterior: more cement and polymer, harder, weather resistant, harder to sand; for facades, bathroom and kitchen walls.
- Never use interior putty outdoors: in the rain it turns crumbly and chalky and makes the paint peel.
Prepare the wall and tools before skimming
Putty only bonds well to a wall that is dry, sound and clean. The work in the step "Preparing new, old and damp walls" must be finished before you open a bag.
Check moisture and soundness
- New render: usually wait about 21–28 days for the render to dry and lose most of its alkalinity; longer in humid weather.
- Measure moisture: use a wall moisture meter; many putty and paint makers ask for below about 16%, so read the figure on the bag of the brand you use.
- Soundness: scratch with a knife tip; the render should not crumble or shed sand. Tapping should sound solid, not hollow.
Clean and treat old walls
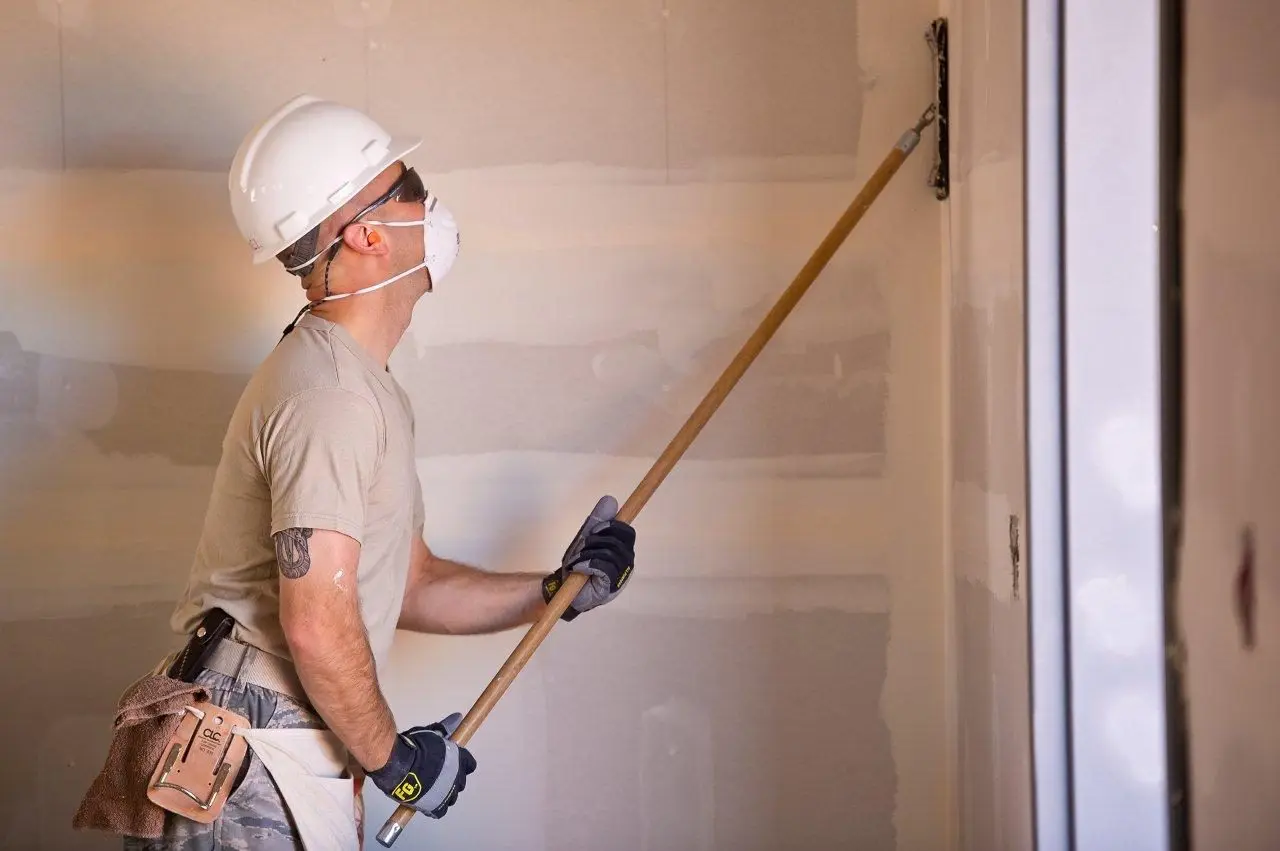
On old walls, scrape off all blistered and flaking paint and crumbly old putty (Figure 1), treat mould, fill cracks, then brush off the dust. A sound old wall in gloss paint needs sanding to key the surface or a bonding primer as the maker instructs. Dust is the number one enemy: putty applied over dust bonds to the dust, not to the wall.

Photo: U.S. Navy photo by Mass Communication Specialist 3rd Class Matthew Bookwalter / Wikimedia Commons, Public domain

Tools you need
A stainless steel skimming trowel (about 30–40 cm wide for walls), small putty knives for loading and corners (Figure 2), a hawk or mud pan, a drill with a mixing paddle, clean buckets, scales or a measuring jug, sandpaper from 180 to 400 grit, a sanding block or pole sander, a work light, a vacuum cleaner, an A-frame ladder or scaffold, a dust mask, goggles and gloves.
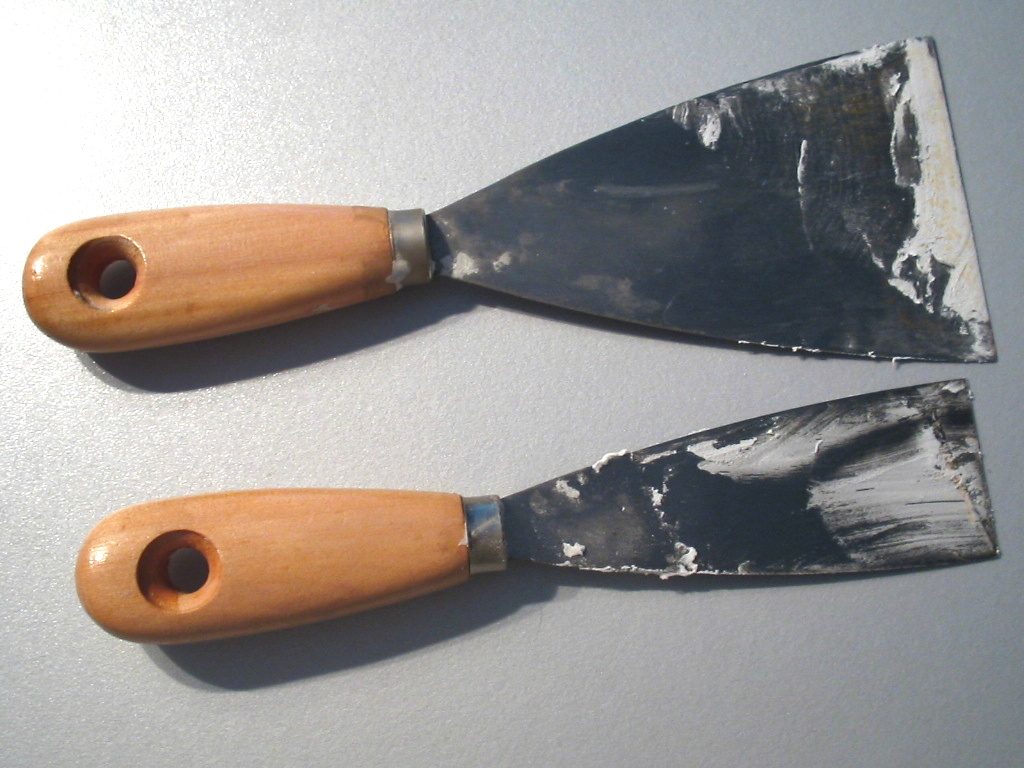
Photo: M.Minderhoud / Wikimedia Commons, CC BY-SA 3.0

Mixing putty with the right ratio
The wrong amount of water is the leading cause of chalky or cracked putty. Too much water makes a runny paste that sags and dries weak and powdery; too little makes it hard to spread and the powder cannot take up enough water to cure.
Mixing method
- Put clean water in the bucket first, using the amount on the bag (typically about 0.35–0.40 litres per kg of powder, depending on the brand).
- Add the powder gradually and mix with a low-speed drill until the paste is uniform and free of lumps.
- Let it stand for about 5–10 minutes so the additives absorb water, then mix again for 1–2 minutes before use.
Pot life and clean buckets
Only mix what you can use within the pot life on the bag (usually a few hours for cement-based putty). Never add water to putty that has started to set in the bucket. Wash the bucket and paddle after every batch so dried crumbs do not get into the next one and scratch the surface as you trowel.
Check the consistency
The paste is right when, scooped onto a knife and tilted, it slides off slowly as a lump without dripping. Draw a test stroke on the wall: the edges should stay clean with no sagging.
The two-coat skim and sanding method
Work from top to bottom, from the ceiling (if you are skimming it) to the walls, in patches of about 1–2 m². Keep the trowel clean and wipe the blade often.
Coat 1: fill pores and hollows
- Put putty on the hawk and load the large trowel with a small knife.
- Hold the trowel at about 30–45 degrees to the wall, spread a band of putty, pressing hard enough to force it into the pores.
- Lower the angle and pull back over it to scrape off the excess, overlapping each pass by about a third of the blade (Figure 3).
- Coat 1 is about 0.5–1 mm thick; fill deeper hollows locally first, let them dry, then skim the whole surface.
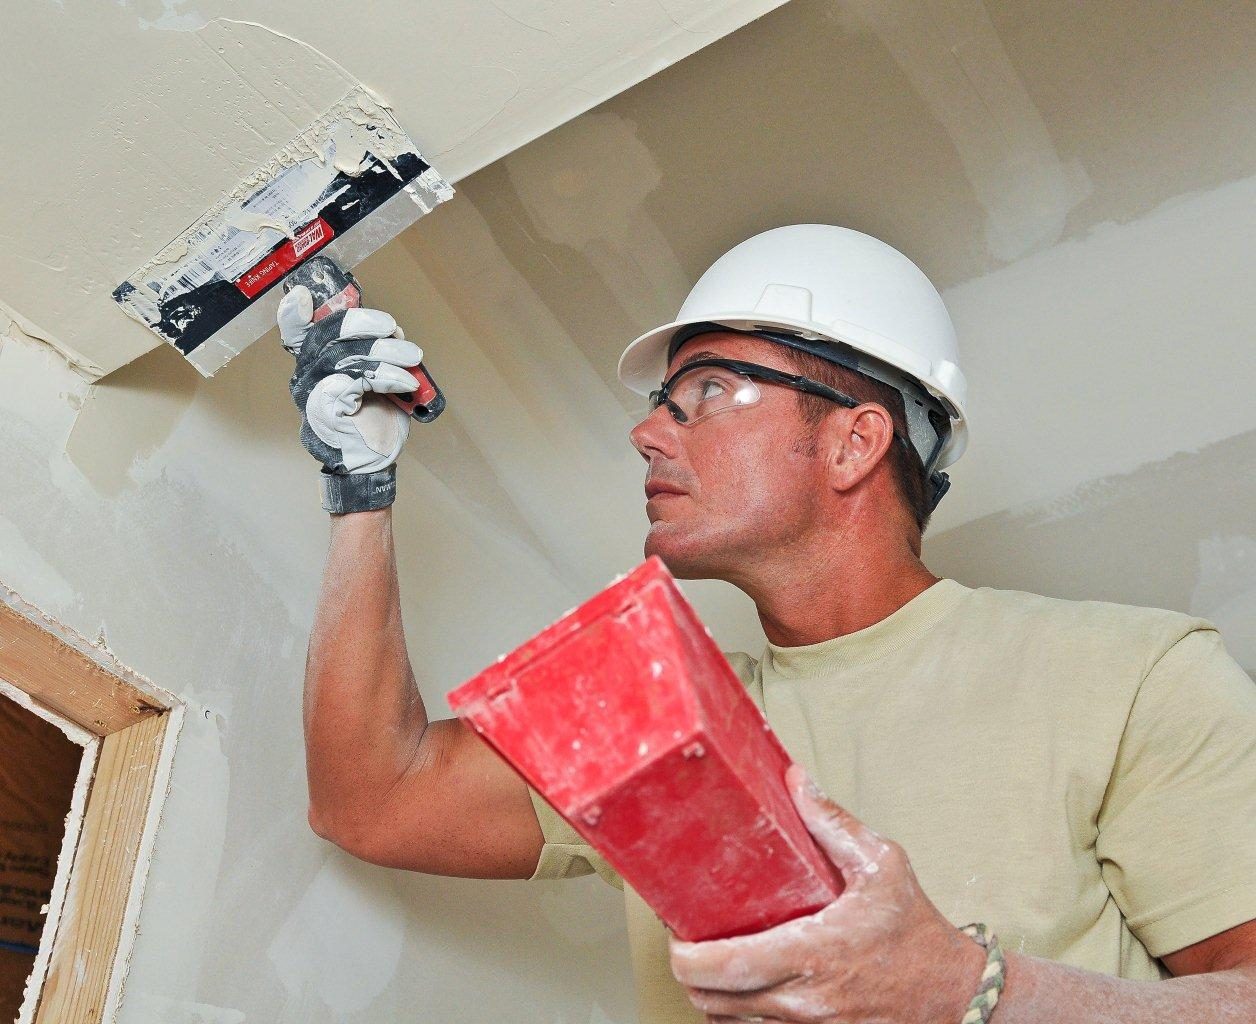
Photo: Georgia National Guard from United States / Wikimedia Commons, CC BY 2.0

Drying and sanding coat 1
Coat 1 is usually touch-dry after about 2–4 hours in dry weather, but wait until it is evenly dry (one uniform colour) before going on. Sand lightly with about 180–240 grit to knock off ridges and trowel marks, without sanding away the filler you just laid. Vacuum off all the dust before coat 2.
Coat 2: smooth it and check with a light
Apply coat 2 thinner than coat 1, trowelling at right angles to coat 1 to erase the marks. Once it is completely dry (usually overnight), sand with about 240–400 grit in circles or a cross pattern with even pressure (Figure 4). Then check with a raking light: hold the lamp close to the wall, shining almost parallel to the surface; high spots cast a shadow behind them and low spots go dark. Circle the faults in pencil, fill, let dry and sand again.
Summary of thickness and timing
| Stage | Thickness / grit | Typical waiting time | Pass check |
|---|---|---|---|
| Coat 1 | 0.5–1 mm | Touch-dry 2–4 hours, evenly dry before sanding | Pores filled, no large hollows |
| Sand coat 1 | 180–240 grit | As soon as evenly dry | Trowel marks gone, render not exposed |
| Coat 2 | Thinner than coat 1 | Fully dry, usually overnight | Even colour, no streaks |
| Sand coat 2 + raking light | 240–400 grit | After fully dry | No shadows of high or low spots under raking light |
| Primer | Per paint system | Per maker, usually 24 hours or more after the last coat | Dust-free, no powder on your hand |
The total thickness of two coats is usually about 1–2 mm. Real drying times depend on humidity; in humid weather wait longer, and never blow a heater straight at the wall to force-dry the surface.
Safety when skimming and sanding
Skim coating looks gentle but carries three risks: fine dust from sanding, alkali in cement-based putty, and falls from ladders and scaffolds.
Safety warning: Putty dust is very fine and irritates the airways: wear a fine-dust mask and goggles when sanding, prefer a sander with dust extraction, ventilate and cover the furniture. Cement-based putty is alkaline: wear gloves, wash wet putty off your skin with water, and if it gets in your eyes rinse with clean water continuously for at least 15 minutes and see a doctor immediately. For work at height use an A-frame ladder locked open on both sides or a scaffold with a proper platform; never stand on the top step or lean out beyond the ladder. Switch off the circuit before skimming around sockets and switches, keep water and putty out of electrical boxes, and only use mains work lights with undamaged cables and plugs.
Protecting an occupied home
Cover furniture with plastic sheeting, tape the gaps around doors to other rooms and lay drop cloths. Vacuum with a filtered machine rather than dry sweeping, so the dust does not spread through the house.
Planning working hours
Sanding is noisy and dusty, so warn the owner and neighbours in an apartment block and work within the hours the building management allows.
Worked example: putty for a 5 × 4 m living room
An apartment living room in Vietnam measures 5.0 × 4.0 m with a 2.8 m ceiling height. The plasterboard ceiling is done by another crew, so we only skim the four walls. The render is new, has cured for 4 weeks and passes the moisture check. There is one door of 0.9 × 2.2 m and one window of 1.4 × 1.4 m.
Work out the area
- Perimeter: 2 × (5.0 + 4.0) = 18 m. Wall area: 18 × 2.8 = 50.4 m².
- Openings: door 0.9 × 2.2 = 1.98 m², window 1.4 × 1.4 = 1.96 m², total 3.94 m².
- Area to skim: 50.4 − 3.94 = 46.46 m², rounded to 46.5 m².
Materials from usage per m²
- Two-coat usage on fairly flat new render: coat 1 about 0.6 kg/m², coat 2 about 0.5 kg/m², total 1.1 kg/m² (a reference; check the usage on the bag).
- Putty: 46.5 × 1.1 = 51.15 kg. With 40 kg bags, 51.15 ÷ 40 ≈ 1.28 bags, so buy 2 bags (about 29 kg left for touch-ups or another room).
- Mixing water: 51.15 kg × 0.38 litres/kg ≈ 19.4 litres.
- Sandpaper: about 10 sheets (both coats).
Cost table (2026 reference, varies by region and brand)
| Item | Quantity × unit price | Amount |
|---|---|---|
| Interior wall putty, 40 kg bag | 2 bags × 350,000 VND | 700,000 VND |
| Sandpaper | 10 sheets × 5,000 VND | 50,000 VND |
| Labour, two coats + sanding | 46.5 m² × 25,000 VND | 1,162,500 VND |
| Total | 1,912,500 VND | |
Check: 700,000 + 50,000 + 1,162,500 = 1,912,500 VND (about 75 USD), or 1,912,500 ÷ 46.5 ≈ 41,130 VND per m² of wall. Counting only the putty actually used (51.15 kg × 350,000 ÷ 40 ≈ 447,600 VND) would be cheaper, but a quote for the owner should be based on the bags that must be bought. Two painters finish this room in about 3 days: day 1 coat 1, day 2 sand coat 1 and apply coat 2, day 3 sand coat 2, raking-light check and touch-ups.
Common skim coating faults and how to fix them
Hairline cracking
Sign: fine, web-like cracks in the putty or after painting. Cause: one coat too thick, render not cured long enough, second coat over a wet first coat, or sun and wind drying the surface too fast. Fix: scrape the cracked area back to a sound base and re-skim in thin coats; where you need to build up, do it in several passes.
Chalking: powder comes off on your hand
Sign: rubbing leaves white powder on your fingers, and paint over it peels like chalk. Cause: too much mixing water, expired or damp powder, interior putty used outdoors, or a very dry wall sucking the water out so the putty cannot cure. Fix: sand off the weak layer, apply a consolidating primer as the maker instructs or re-skim at the right ratio; on a very dry wall in hot weather, dampen it lightly before skimming if the maker allows.
Flaking in patches
Sign: the putty blisters and peels off in sheets. Cause: putty over dust, over unkeyed old gloss paint, or on a damp wall. Fix: scrape off all loose patches, clean, deal with the damp, key or prime, then re-skim.
Trowel marks and pinholes after painting
Sign: once painted, a light shows wavy streaks or tiny holes. Cause: no raking-light check before painting, uneven sanding, or air bubbles from mixing at high speed. Fix: always check with a raking light after coat 2, mix at low speed, and fill and re-sand every circled spot.
Frequently asked questions
Are two coats really necessary?
On ordinary new render, two coats are needed for a flat, smooth finish. A very flat, carefully rendered wall may only need one thin coat plus touch-ups, but still check with a raking light. Use three coats only on very uneven walls, keeping each coat thin.
How soon can I prime after skimming?
Once the putty is completely dry, sanded and vacuumed; usually 24 hours or more after the last coat, longer in humid weather. Follow the times recommended by the makers of your putty and primer.
Do I need a primer before the putty?
Sound, clean new render is usually skimmed directly. Old painted walls, powdery surfaces or very absorbent walls should get a suitable primer before skimming, as the maker instructs.
Can leftover mixed putty be used the next day?
No, not once water has been added. Dry powder left in the bag must be tied shut, raised off the floor, kept somewhere dry and used before the date on the bag.
Practice tasks and self-assessment
- Skim a test area of about 2 m² in two coats, recording the powder, water, and the times you applied and sanded each coat.
- Check the area with a raking light after coat 2, circle the faults, touch up and check again.
- Work out putty and cost for a 3.5 × 4.0 m bedroom, 2.8 m high, with one door and one window, using the table above.
Self-assessment criteria
- Pass: the mixing water is within the maker's range, and the paste has no lumps and does not sag.
- Pass: under a raking light there are no trowel marks or high and low spots; rubbing leaves no powder on your hand.
- Pass: after one week the test area has no hairline cracks.
- Not yet: one thick coat to save time, skimming a wall that failed the moisture check, or skipping the raking-light check.
Photo: Georgia National Guard from United States / Wikimedia Commons, CC BY 2.0

Once your walls are flat and smooth, move on to the next roadmap step: Primer and topcoat by roller and brush, where you learn to thin paint correctly, cut in at ceilings and roll in W patterns.
Keep learning house painting: after skim coating come primer and topcoat, airless spraying for exteriors, a full apartment repaint project and per-m² quoting. See the 8-step house painter roadmap.