A regular client sits down for her monthly facial and says, "While I'm here, can you tint my eyebrows? They're so fair they disappear in photos." It sounds like a quick add-on, and often it is. But brow tint is a chemical dye used a few centimetres from the eyes, and some people react badly to it. A rushed tint can leave a stained forehead, brows that are much too dark, or, in the worst case, an allergic reaction you could have caught with a patch test.
This guide walks trainee spa therapists through eyebrow tinting from start to finish: who should not have it, patch testing, choosing a shade, mixing and applying, timing, removing stains and aftercare.
Scope of this guide. This article covers cosmetic eyebrow tinting with professional brow tint products in a spa or salon. It does not cover eyelash tinting, brow lamination, henna brows, microblading or any other semi-permanent make-up, and a spa therapist does not diagnose skin or eye conditions. Times and other figures here are for reference only. The tint manufacturer's instructions, your spa's written protocol and local rules always come first, and they differ between brands and countries. Practise under supervision before tinting paying clients.
What eyebrow tint is and how it works
Most professional brow tints are sold as two parts:
The tint (colour): a cream, gel or liquid containing dye. Shades usually range from light brown and natural brown to graphite, dark brown and black. Some ranges include a lighter blonde or a red/auburn tone.
The developer (oxidant): a low-strength hydrogen peroxide liquid or cream made by the same brand. When you mix the two, the dye develops colour inside and around the hair.
Because this is an oxidation dye, the colour develops over a few minutes and is then wiped off. The hair keeps the colour for a few weeks; the stain on the skin underneath usually fades much faster, often within a few days (for reference; it depends on the product, skin type and aftercare).
Two points matter for safety:
Many dark tints contain the same types of dye ingredients as permanent hair dye, such as p-phenylenediamine (PPD) or related chemicals. These are well-known causes of allergic contact dermatitis. "PPD-free" products may still contain other dye chemicals that can cause reactions, so "PPD-free" does not mean "no patch test needed".
Only use products sold for eyebrows (and lashes, if your training covers them), from the same brand, mixed as the brand instructs. Never use hair dye from the salon's hair section on brows, never mix one brand's tint with another brand's developer, and never "boost" the developer strength.
Note for readers outside Vietnam. Rules on brow and lash dyes differ between countries. For example, the US Food and Drug Administration has stated that no colour additives are approved for permanently dyeing or tinting eyelashes and eyebrows. Check what applies where you work before offering the service.
Who should not have a brow tint today
Run through these questions in the consultation before every tint, not only the first one. Record the answers in the client's notes.
Do not tint, and suggest the client seek medical advice if appropriate
Any previous reaction to brow or lash tint, hair dye or a "black henna" temporary tattoo (itching, swelling, redness, weeping or rash).
A positive or doubtful patch test result for this product.
Eye infection, styes, conjunctivitis or a red, sore or watery eye on the day.
Broken skin, cuts, scratches, sunburn or active spots on or around the brows.
Skin conditions flaring in the area, such as eczema or psoriasis around the brows, or swelling of unknown cause.
Ask more and check with your supervisor before going ahead
Recent eye surgery or eye treatment: the client should follow their doctor's advice about when they can have treatments near the eye.
Recent chemical peel, retinoid or acid products, waxing, laser or other treatments on the brow area: the skin may be more reactive. Many manufacturers give a waiting time; follow it.
Medication or conditions that make the skin very sensitive: you do not diagnose, but the client may need to check with their doctor first.
Clients under the minimum age stated by the manufacturer or your spa policy, or clients who cannot keep still with eyes closed for several minutes.
Pregnancy: there is no single rule that suits every product, so follow the manufacturer's guidance and your spa's policy. Many spas still require a patch test and some decline.
If in doubt, do not tint. A brow pencil or brow powder gives a similar look for the day with no dye on the skin.
The patch test: never skip it
A patch test (also called a skin allergy test) shows whether the client reacts to the tint before you put it next to their eyes.
When to patch test
Before the first tint with you or your spa.
When you change brand or product.
If the client has had a reaction to any dye, cosmetic or tattoo since their last tint, or has started new medication. Many spas decline the service in this case and only re-test with the supervisor's approval.
If it has been a long time since the last tint. Manufacturers and spas set this period themselves; follow your product's instructions and your spa's written rule.
Most brands ask for the test at least 24–48 hours before the treatment (for reference; check the instructions for your product).
How to do it
Clean a small area of skin, usually behind the ear or on the inner elbow. Use the place your product instructions recommend.
Mix a very small amount of the tint and developer exactly as you would for the treatment. Use the darkest shade the client may have, or the exact shade you plan to use, following the brand's instructions.
Apply a dot about the size of a small coin with a clean cotton bud.
Leave it for the time the instructions state, then wipe it off if the instructions say so.
Tell the client what a reaction looks like: itching, redness, swelling, burning, small blisters or a rash at the test site or anywhere else. Ask them to wash the area and contact you straight away if any of these happen, and not to come in for the tint.
Record the date, time, product, shade and batch number (if your spa records it), test site and result in the client's notes. Some spas ask the client to sign.
If the client reports any reaction, do not tint. A severe or spreading reaction, swelling of the face, lips or eyes, or difficulty breathing needs urgent medical help.
Tools and products for one brow tint
Set everything out on a clean tray before the client lies down:
Brow tint and matching developer from the same brand, within their use-by dates.
A clean glass or plastic mixing dish (follow the brand's advice; some brands say avoid metal).
Fine angled brush or disposable applicator sticks, and a clean spoolie (brow brush). Use new disposables for each client.
Cotton pads, cotton buds and a small bowl of clean water.
Oil-free cleanser or make-up remover suitable for the eye area.
Barrier product such as petroleum jelly or the barrier cream the tint brand recommends.
Tint stain remover made for skin, if your spa uses one.
Disposable gloves for the therapist, and a towel or cape to protect the client's clothes.
A timer, good lighting and a hand mirror.
Client record with the patch test result.
Choosing the right shade
The aim is brows that look natural with the client's hair, skin and lashes. A general guide many therapists use (for reference; brands give their own shade charts):
Client's natural hair colour | Shade often chosen | Watch out for |
|---|---|---|
Very fair, light blonde | Light brown, or a mix of light brown with a little natural brown | Black or dark brown can look harsh and very different from the hair |
Medium blonde to light brown | Light to medium brown | Develop for less time first; you can always go darker next time |
Medium to dark brown | Natural brown or dark brown | Very warm tones can look reddish on some skin |
Black or very dark brown | Dark brown, graphite or black | Little visible change on very dark hair; tint mainly helps fine, fair hairs at the ends |
Red or auburn | Light brown, or a red/auburn tone if your range has one | Black can look unnatural |
Grey or white hairs | Light or natural brown, or graphite for a cooler look | Grey hairs can take colour less easily; follow the brand's advice on timing |
Agree the shade with the client using the shade chart in good light before you mix. When unsure, go lighter: a brow that is too light can be tinted again later (following the brand's advice), but a brow that is too dark is much harder to fix. Ask whether the client dyes or bleaches their brows at home, as this can change the result.
How to tint eyebrows step by step
The steps below are a typical routine. The exact order, amounts and times come from your product's instructions.
Step 1: Confirm consultation and patch test
Check the client's record: a negative patch test within the time your spa allows, no new contraindications, and the agreed shade. Ask again: "Any itching, redness or swelling since the test? Any eye problems today?"
Step 2: Position the client and protect clothes
Seat the client reclined or lying down with the head supported so they can keep still, and cover their clothes. Ask them to remove contact lenses if your instructions or protocol require it, and to keep their eyes gently closed during application and development.
Step 3: Clean the brows
Wash your hands and put on gloves. Remove all make-up, oil and moisturiser from the brows and the skin around them with an oil-free cleanser on a cotton pad. Oil on the hairs stops the tint taking evenly. Let the area dry.
Step 4: Map the shape
Brush the hairs into place with a clean spoolie. Look at the client's natural brow and agree where the brow starts, where the arch is and where the tail ends. Some therapists use a brow pencil, a ruler or a mapping string to check that both brows match. Tint follows the hairs you cover: if you plan to tidy with tweezers or wax, decide which hairs will be removed so you do not waste time tinting them.
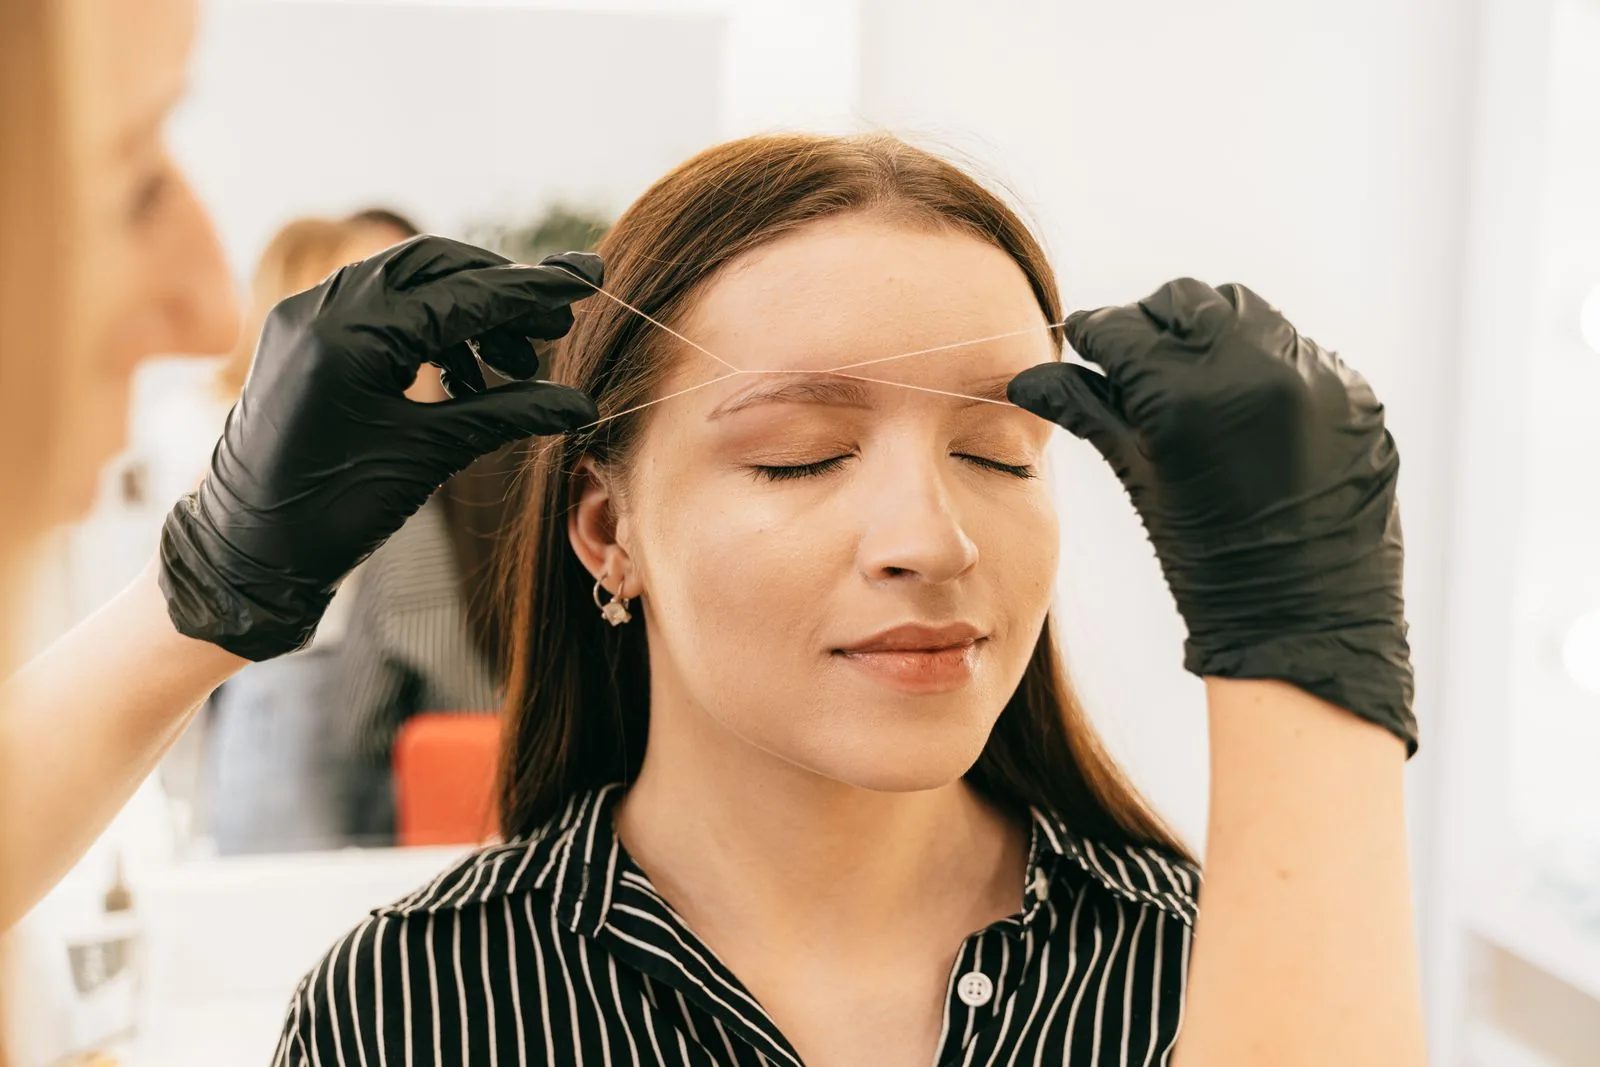
Figure 1. A therapist in black disposable gloves holds a fine thread stretched across the client's eyebrows while the client keeps her eyes closed. A straight thread or mapping string like this can help you compare the start, arch and tail of both brows before you tint. (Photo: Antoni Shkraba, Pexels)
Step 5: Apply the barrier
With a cotton bud, apply a thin layer of barrier product to the skin around the brow shape: above, below and at the ends. Keep it off the brow hairs themselves, or the tint will not take there. The barrier also helps keep tint from running towards the eyes.
Step 6: Mix the tint
Mix only enough for one client, just before you use it. Follow the brand's ratio, which is usually measured in centimetres of tint from the tube and a few drops of developer (for reference; ratios vary a lot between brands). Stir until smooth. A mixture that is too runny is more likely to drip, so follow the consistency the instructions describe. Throw away any leftover mixture at the end; it cannot be stored.
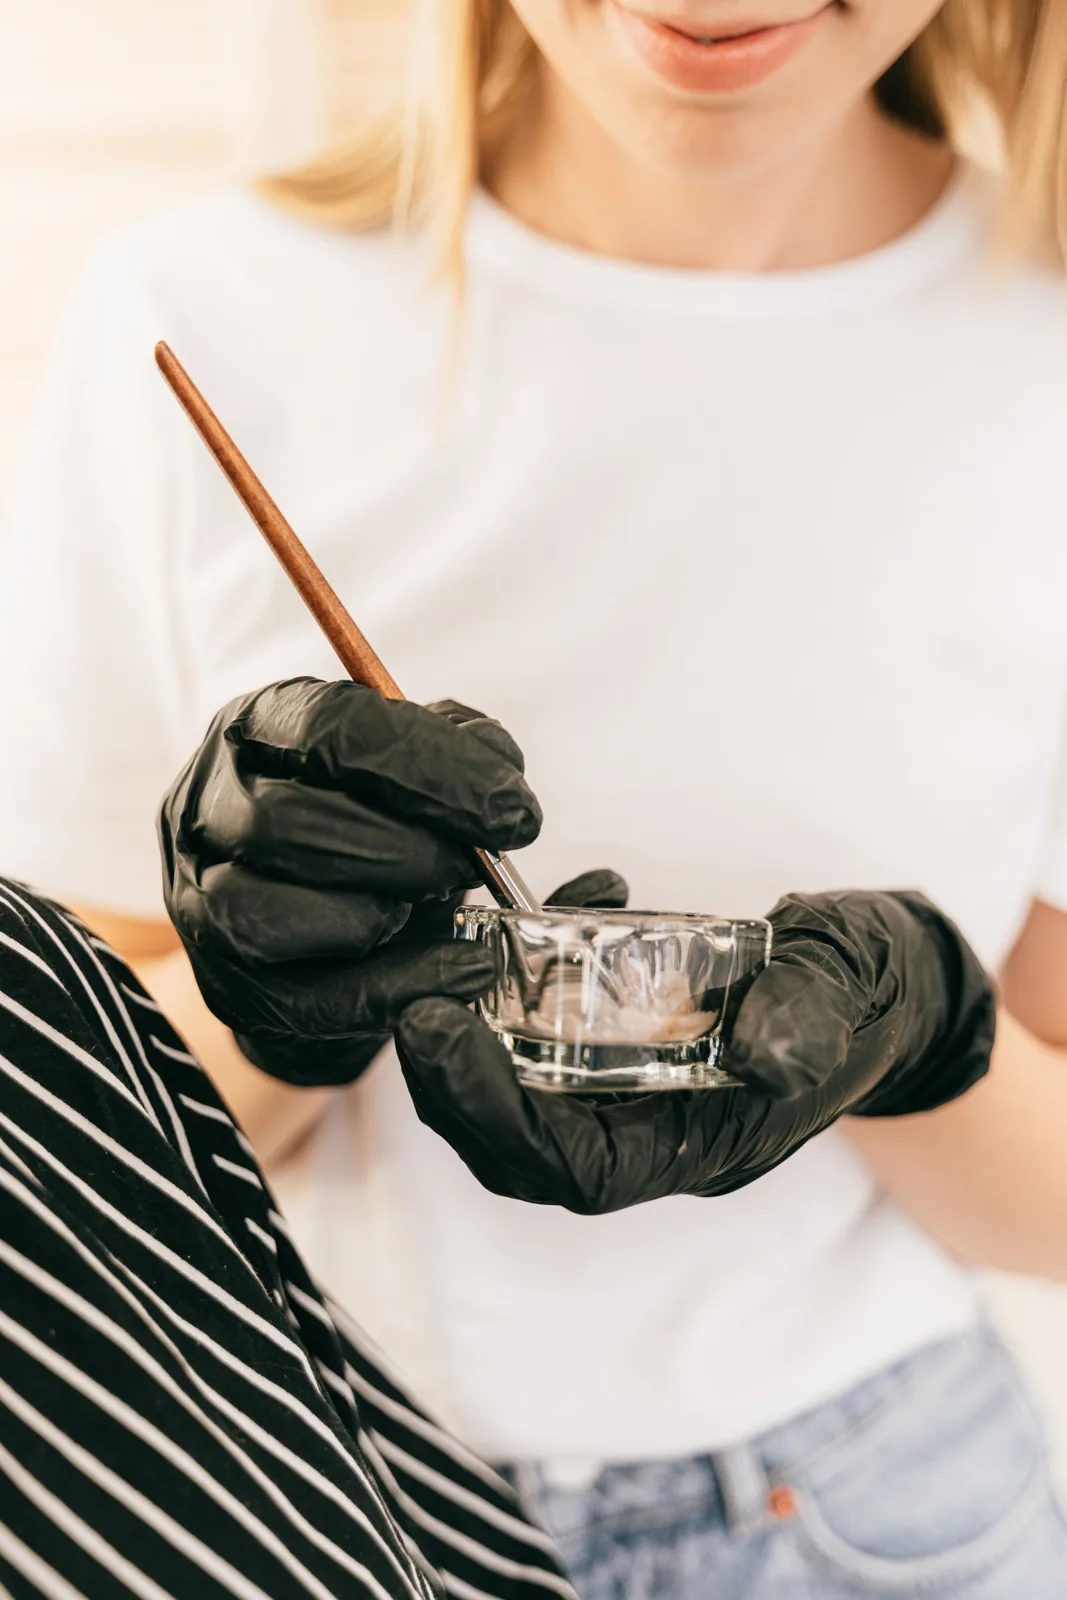
Figure 2. A therapist in disposable gloves stirs a small amount of mixture in a clear glass dish with a wooden-handled brush. Mix only enough tint for one client, in a clean dish of the type the manufacturer recommends, and use it straight away. (Photo: Antoni Shkraba, Pexels)
Step 7: Apply the tint
Using a fine brush or applicator, apply the tint along the hairs. A common approach is:
Start with the outer part of the brow and the tail, where hairs are often finest and lightest.
Work towards the inner brow (the "head"). Many therapists apply less or leave the head for the last minute or two so it develops lighter and looks softer.
Coat the hairs evenly from the root, following their direction, without loading the skin with thick tint.
Tint one brow, then the other, and check symmetry with the client's eyes closed and their face relaxed.
Keep the brush well away from the eye, and never work above an open eye. Wipe up any drip at once with a slightly damp cotton bud.
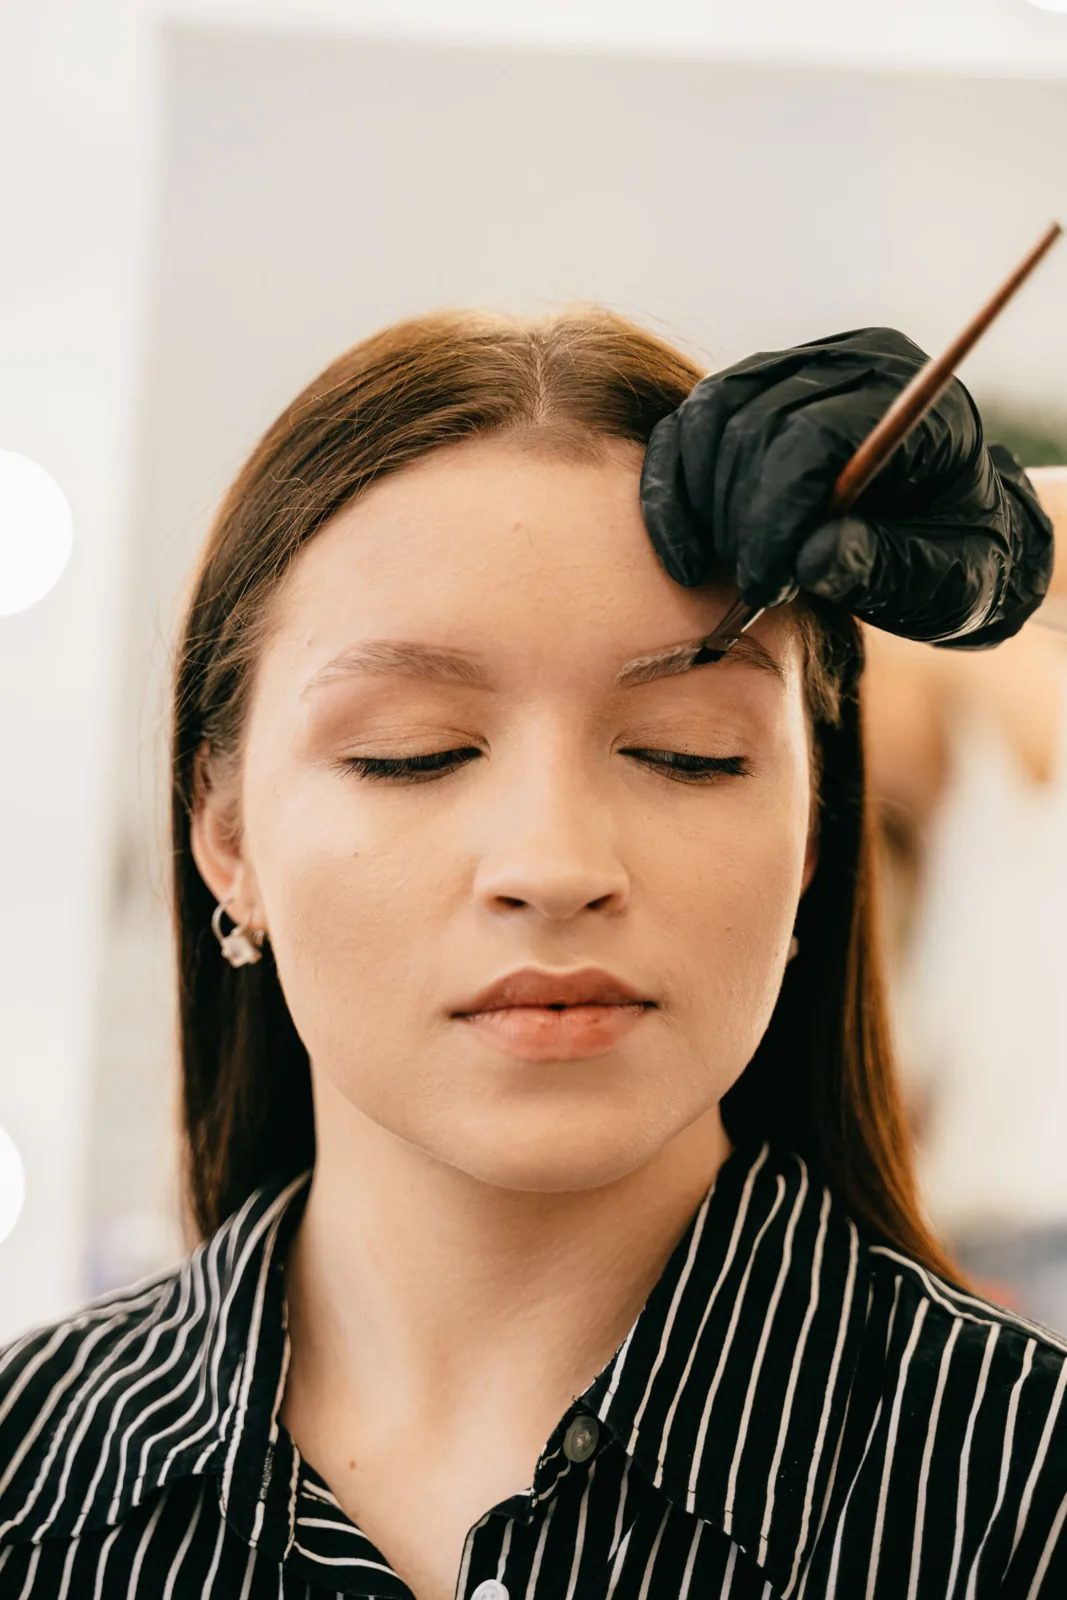
Figure 3. With the client's eyes closed and head still, a therapist in a black disposable glove applies tint along the eyebrow with a fine angled brush, keeping the brush above the brow and away from the eye. (Photo: Antoni Shkraba, Pexels)
Step 8: Time the development
Start the timer as soon as both brows are covered. Most brow tints develop for a few minutes up to around ten minutes (for reference only; follow your product's instructions exactly). Stay with the client. Check that:
The client is comfortable and their eyes are closed.
There is no burning, stinging that gets worse, itching or swelling.
The tint is not running towards the eyes.
If the client reports burning, stinging or itching, remove the tint immediately (see "If something goes wrong" below). Do not wait for the timer.
Step 9: Remove the tint
When the time is up, remove the tint with cotton pads dampened with clean water, wiping gently in the direction of hair growth and away from the eyes. Use fresh pads until no colour comes away. Clean the barrier product off at the same time.
Check the result with the client in a mirror. If the brows are lighter than agreed and the product instructions allow, you can reapply for a short extra time. If they are too dark, do not scrub; see the troubleshooting section.
Step 10: Remove skin stains
A light stain on the skin under the hairs is normal and fades. Remove stains outside the brow shape with a tint stain remover made for skin, used on a cotton bud as the brand instructs. Keep stain remover away from the eyes, and avoid it on the brow hairs if you want to keep the colour there.
Step 11: Tidy the shape
If the treatment includes shaping, tidy stray hairs with tweezers or wax after tinting, when the fine hairs are easier to see. Some spas wax before tinting; follow your training, but do not put tint on skin that is red, raw or broken from waxing.
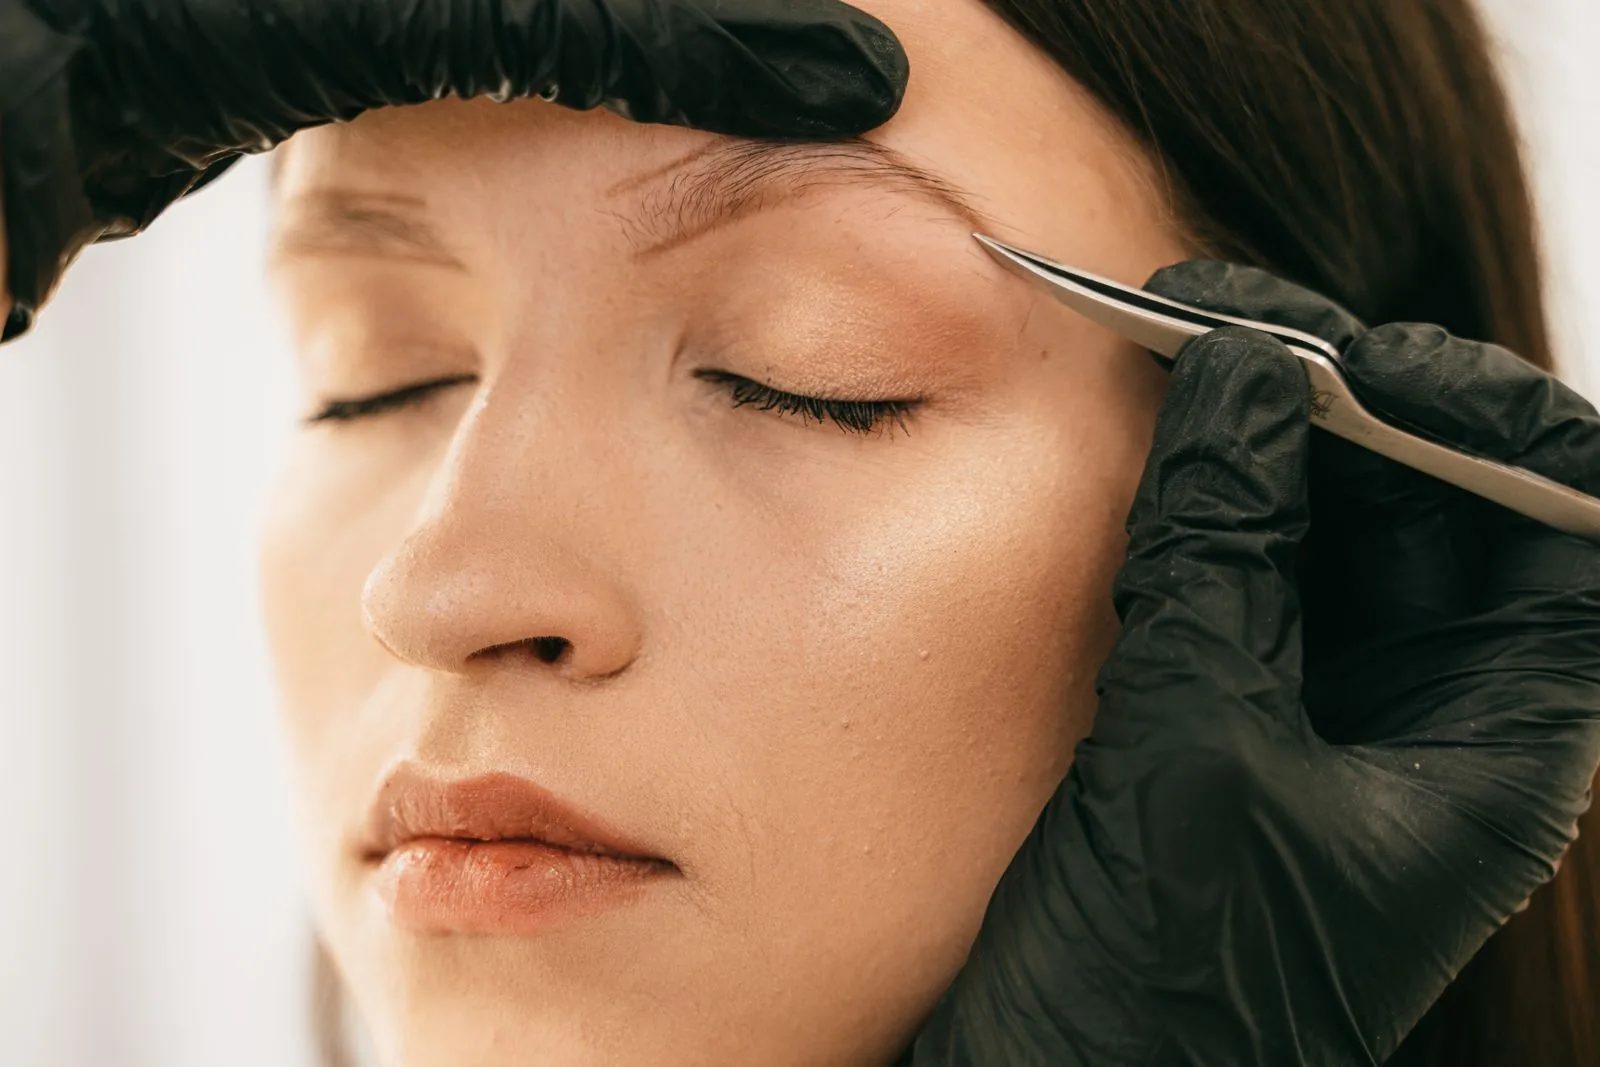
Figure 4. A therapist in black disposable gloves holds the skin above the brow taut and uses slanted tweezers on stray hairs just under the eyebrow. Tidying the shape after tinting makes fine hairs easier to see; use clean tweezers for every client. (Photo: Antoni Shkraba, Pexels)
Step 12: Aftercare and records
Give aftercare advice (below), then record the product, shade, mixing ratio, development time and result so you can repeat or adjust it next time.
Aftercare advice for the client
Explain the following in simple words, and give it in writing if your spa has an aftercare card:
For the rest of the day, avoid rubbing the brows, heavy sweating, swimming, saunas and steam. Many brands advise keeping the brows dry for some hours after tinting (for reference; follow the product's guidance).
For a day or two, avoid exfoliating scrubs, acids, retinoids and oil-based cleansers on the brows. These can fade the colour faster and may irritate freshly tinted skin.
Protect the brow area from strong sun.
Expect the colour on the skin to fade over a few days and the colour on the hairs to soften over a few weeks (for reference; it depends on the client).
Contact the spa straight away if itching, redness, swelling or rash appears, even a day or two later, and seek medical advice if it is severe or near the eye. Delayed allergic reactions can happen even after earlier tints without problems.
If something goes wrong
Tint in the eye
Stop at once. Rinse the eye gently but thoroughly with plenty of clean, lukewarm water while the client keeps the eye open or holds the eyelids apart, and continue for as long as the product's safety instructions say. Do not rub the eye or put any other product into it. Seek medical advice, especially if there is pain, redness or blurred vision afterwards. Report the incident to your supervisor and record it. Keep the product packaging so you can tell the doctor exactly what was used.
Burning, itching or swelling during the treatment
Remove all tint straight away with cotton pads and clean water. Do not apply more products. Tell your supervisor, keep the client comfortable and watch for spreading redness or swelling. If the swelling spreads to the eyes, lips or face, or the client feels unwell or has difficulty breathing, call emergency services immediately. Record what happened and the product used.
Brows too dark
Do not scrub or use strong solvents near the eye. Wipe gently with damp cotton pads, use the brand's stain remover on the skin only, and explain that the colour softens over the following days. Note a lighter shade or shorter time for next time.
Reference table: common brow tint problems
Problem | Likely causes | What to do (for reference; follow your product's instructions) |
|---|---|---|
Stained forehead or skin outside the shape | No barrier, tint applied too thickly, client touched the area | Stain remover on skin only; use barrier and finer application next time |
Brows too dark | Shade too dark, development too long, inner brow covered too early | Gentle damp wipes, stain remover on skin; lighter shade or shorter time next time |
Brows patchy | Oil or make-up on hairs, thin mixture, uneven coverage | Clean brows thoroughly, mix to the right consistency, coat hairs evenly |
Little or no colour | Very coarse or grey hair, too short development, old product | Check timing and product expiry; consider pencil or powder |
Stinging or itching during development | Irritation or allergic reaction | Remove tint immediately, stop, inform supervisor, seek medical help if severe |
Redness or rash the next day | Delayed allergic reaction or irritation | Client should contact the spa and seek medical advice; record it; no further tints until cleared |
Hygiene for brow tinting
Wash your hands before and after each client, and wear fresh disposable gloves.
Use new disposable applicators, spoolies and cotton for each client. Never put a used brush or spoolie back into the tint tube, the barrier jar or the mixing dish of another client.
Scoop barrier cream out of the jar with a clean spatula, never with fingers or a used cotton bud.
Clean reusable tools such as tweezers and glass dishes, then disinfect them as your spa's procedure for cleaning and disinfecting tools describes.
Recap tint and developer straight away and store them as the label says.
Throw away all mixed tint after each client.
Safety checklist before, during and after every brow tint
Before the treatment
Consultation completed and recorded; no contraindications.
Patch test done within the time your product and spa require; result negative and recorded.
Shade agreed with the client using the shade chart.
Products are eyebrow tints from one brand, within date; developer is the brand's own.
Clean tray set up with new disposables, barrier, cotton, water, stain remover and timer.
During the treatment
Gloves on; client's clothes protected.
Brows cleaned of make-up and oil.
Barrier applied around, not on, the brow hairs.
Tint mixed fresh, only for this client, at the ratio in the instructions.
Eyes closed; brush kept away from the eye at all times.
Timer running; therapist stays with the client and checks comfort.
Tint removed immediately if the client reports burning, itching or stinging.
After the treatment
Tint and stains removed gently, away from the eyes.
Aftercare explained, including what to do about a delayed reaction.
Leftover mixture and disposables thrown away; tools cleaned and disinfected.
Record updated with product, shade, ratio, time and result.
Frequently Asked Questions
How long does eyebrow tint last?
On the hairs, the colour usually lasts a few weeks; on the skin, the stain usually fades within a few days (for reference). It depends on the product, the client's hair and skin, how often they wash and exfoliate, and sun exposure.
Do I really need a patch test every time?
Follow the product instructions and your spa's rule. Most require a test before the first tint and again after a change of product, after any reaction, or after a set period since the last tint. It is quick and protects both the client and you.
Should I tint before or after waxing or tweezing?
Many therapists tint first and tidy afterwards, because the fine light hairs are easier to see once tinted and the tint does not go onto freshly waxed skin. Some protocols do it the other way round. Follow your training, and never tint over red, raw or broken skin.
Can I tint a client's eyebrows if they are pregnant?
There is no single answer for every product. Follow the manufacturer's guidance and your spa's policy, and always patch test. If the client or the spa is unsure, offer brow pencil or powder instead.
What is the difference between brow tint and henna brows?
Henna brows use a henna-based paste that is designed to stain the skin more than a standard tint, so the shape can look fuller for longer. It is a different product with its own instructions, development times and patch test, and some henna brow products also contain added dyes. Do not apply this guide's timings to henna.
Practice Exercises
Consultation role-play. With a colleague playing the client, run through the contraindication questions and record the answers. Then repeat it with your supervisor playing a client who had a reaction to a black henna tattoo last year. Decide what you would say and do.
Patch test practice. Under supervision, carry out a patch test on a colleague behind the ear using your spa's product, following the instructions exactly. Write up the record including product, shade, site, date and time.
Shade matching. Look at photos or practice models with five different hair colours (very fair, medium blonde, brown, black, grey). Using your brand's shade chart, choose a shade for each and explain why.
Barrier and application drill. On a practice head or a colleague (without tint), apply barrier around both brows without touching the hairs, then use a clean brush with water to practise the application order from tail to head. Ask your supervisor to check that the barrier is off the hairs and the brush stays away from the eyes.
Troubleshooting quiz. For each case, write what likely went wrong and what you would do: (a) the client's brows are patchy and the inner part is much lighter than the tail; (b) there is a dark stain on the forehead above the arch; (c) the client says her eyelid is itching three minutes into development; (d) the client phones the next day with red, itchy skin around one brow.