A new client lies down on the couch and says, "I think my skin is oily, but it also feels tight and flaky around my nose." If you take her word for it and choose a strong oil-control facial, you may leave her skin tighter and redder than before. If you take a few minutes to look, touch and ask the right questions first, you can choose a facial that actually suits her skin on that day.
That short check is called a skin analysis, and every product and step of a facial depends on it. This guide walks you through a practical skin analysis from start to finish: the questions to ask, what to look for under the magnifying lamp, how to work zone by zone, how to record your findings on a skin record card and how to turn them into a treatment plan.
Scope of this guide. A spa therapist observes and describes the skin; a therapist does not diagnose skin diseases or prescribe treatment. Words such as "congested", "dehydrated" or "uneven pigmentation" in this article describe what you can see and feel, not a medical diagnosis. When something looks unusual, the right action is to pause and suggest the client sees a doctor or dermatologist. Times in this article are for reference only. Your spa's written protocol and the product instructions always come first.
Skin type vs. skin condition: the key idea
Skin type describes the skin's general, long-term behaviour, mainly how much oil it tends to produce. Most training uses four basic types:
Normal: balanced, not obviously oily or dry, with small to medium pores and an even surface.
Oily: shine across most of the face, often visible pores, especially on the nose, forehead and chin.
Dry: produces little oil; can look matt, feel rough or tight, and pores are usually small.
Combination: oilier in the T-zone (forehead, nose and chin) and normal or dry on the cheeks.
Skin condition describes how the skin is behaving right now. It can change with weather, stress, products, age, hormones and lifestyle. Common conditions a therapist notes include:
Dehydrated: lacking water rather than oil. The skin may feel tight and show fine, criss-cross lines that soften once it is moisturised. Oily skin can be dehydrated too, which may explain how the client in our opening example feels.
Sensitive or reactive: reddens, stings or itches easily, for example after cleansing, heat or a new product.
Congested: blackheads, whiteheads, rough bumps or blocked-looking pores.
Uneven pigmentation: darker patches, freckles or marks left after spots, or areas that look lighter.
Visible ageing: fine lines, deeper wrinkles, loss of firmness and a duller surface.
A useful way to write it is: type + condition(s). For example: "combination skin, dehydrated on the cheeks, mild congestion on the nose." Your choice of products depends on both parts.
What you need before you start
Fresh linen, a headband or towel for the hair, and a blanket to keep the client covered and warm.
A gentle cleanser, makeup remover, cotton pads or clean sponges, and water.
A magnifying lamp with a clean lens, and moist cotton eye pads.
Disposable gloves if that is your spa's protocol, or freshly washed and dried hands.
Oil-blotting papers or thin tissue (optional).
Your spa's consultation form and a skin record card, paper or digital.
The consultation form (see our article "Spa client consultation and health forms") records health information and consent; the skin record card records what you observe on the skin at each visit.
Step-by-step skin analysis
Step 1: Wash your hands and prepare the area
Wash your hands, and put on gloves if your spa requires them. Wipe the magnifying lamp's lens and handle with the product your spa approves, following the manufacturer's advice so you do not scratch the lens. Close the door or curtain for privacy, and keep the client's card out of sight of others.
Step 2: Ask consultation questions first
Talk before you touch. Use plain language and explain why you are asking. Cover:
Main concern: "What would you most like to improve about your skin?"
Daily routine: how often they cleanse, which moisturiser they use, whether they use sunscreen and how they remove makeup.
Active products: do they use retinoids (such as retinol or prescription vitamin A creams), exfoliating acids (such as glycolic, lactic or salicylic acid), benzoyl peroxide or scrubs? These can make the skin more sensitive to exfoliation, waxing, heat and massage.
Medicines: prescribed skin creams or tablets, and other medicines your form asks about. Do not interpret them; record them, follow your protocol and ask a senior therapist if unsure.
Allergies: to skincare ingredients, fragrance, nuts, latex or anything else.
Recent procedures: peels, laser, microneedling, injections, waxing or threading, and when they were done.
Sun exposure: recent beach trips, outdoor work, sunburn, and whether they burn or tan easily.
Reactions: "Has any facial or product ever made your skin red, itchy or swollen?"
Anything that rules out or changes the facial (contraindications) should be handled as described in our article "Skin structure and the contraindications every spa therapist must know". If an answer worries you, stop and ask your supervisor before going further.
Step 3: Take a first look before cleansing
In good light, look at the whole face before you remove anything. Note makeup or sunscreen and anything obvious such as redness, peeling or sunburn. Do not draw conclusions yet: makeup and products used that morning can hide or change what you see.
Step 4: Cleanse gently, then observe
Remove eye makeup and lipstick, then cleanse the face with a gentle cleanser, using light pressure and lukewarm water. Avoid scrubbing, strong toners or hot towels at this stage, because they make the skin redder and can hide or exaggerate what you are trying to see. Pat dry with a clean towel or tissue.
Then wait and look: note any redness from cleansing, how quickly it fades, and whether the skin looks tight.
The blotting paper test (for reference only). Some trainers wait a little after cleansing, then press oil-blotting paper lightly on the forehead, nose, chin and cheeks to see how much oil each area leaves. In a salon there is rarely time for a long wait, so this only gives a rough idea. The result also depends on the room temperature, the time of day and what the client has used, so treat it as one clue among many, never as the answer on its own.
Step 5: Protect the eyes and position the magnifying lamp
Tell the client what you will do: "I'm going to look at your skin under a bright magnifying lamp, so I'll cover your eyes." Place moist cotton pads over the closed eyes and check that the client is warm and comfortable.
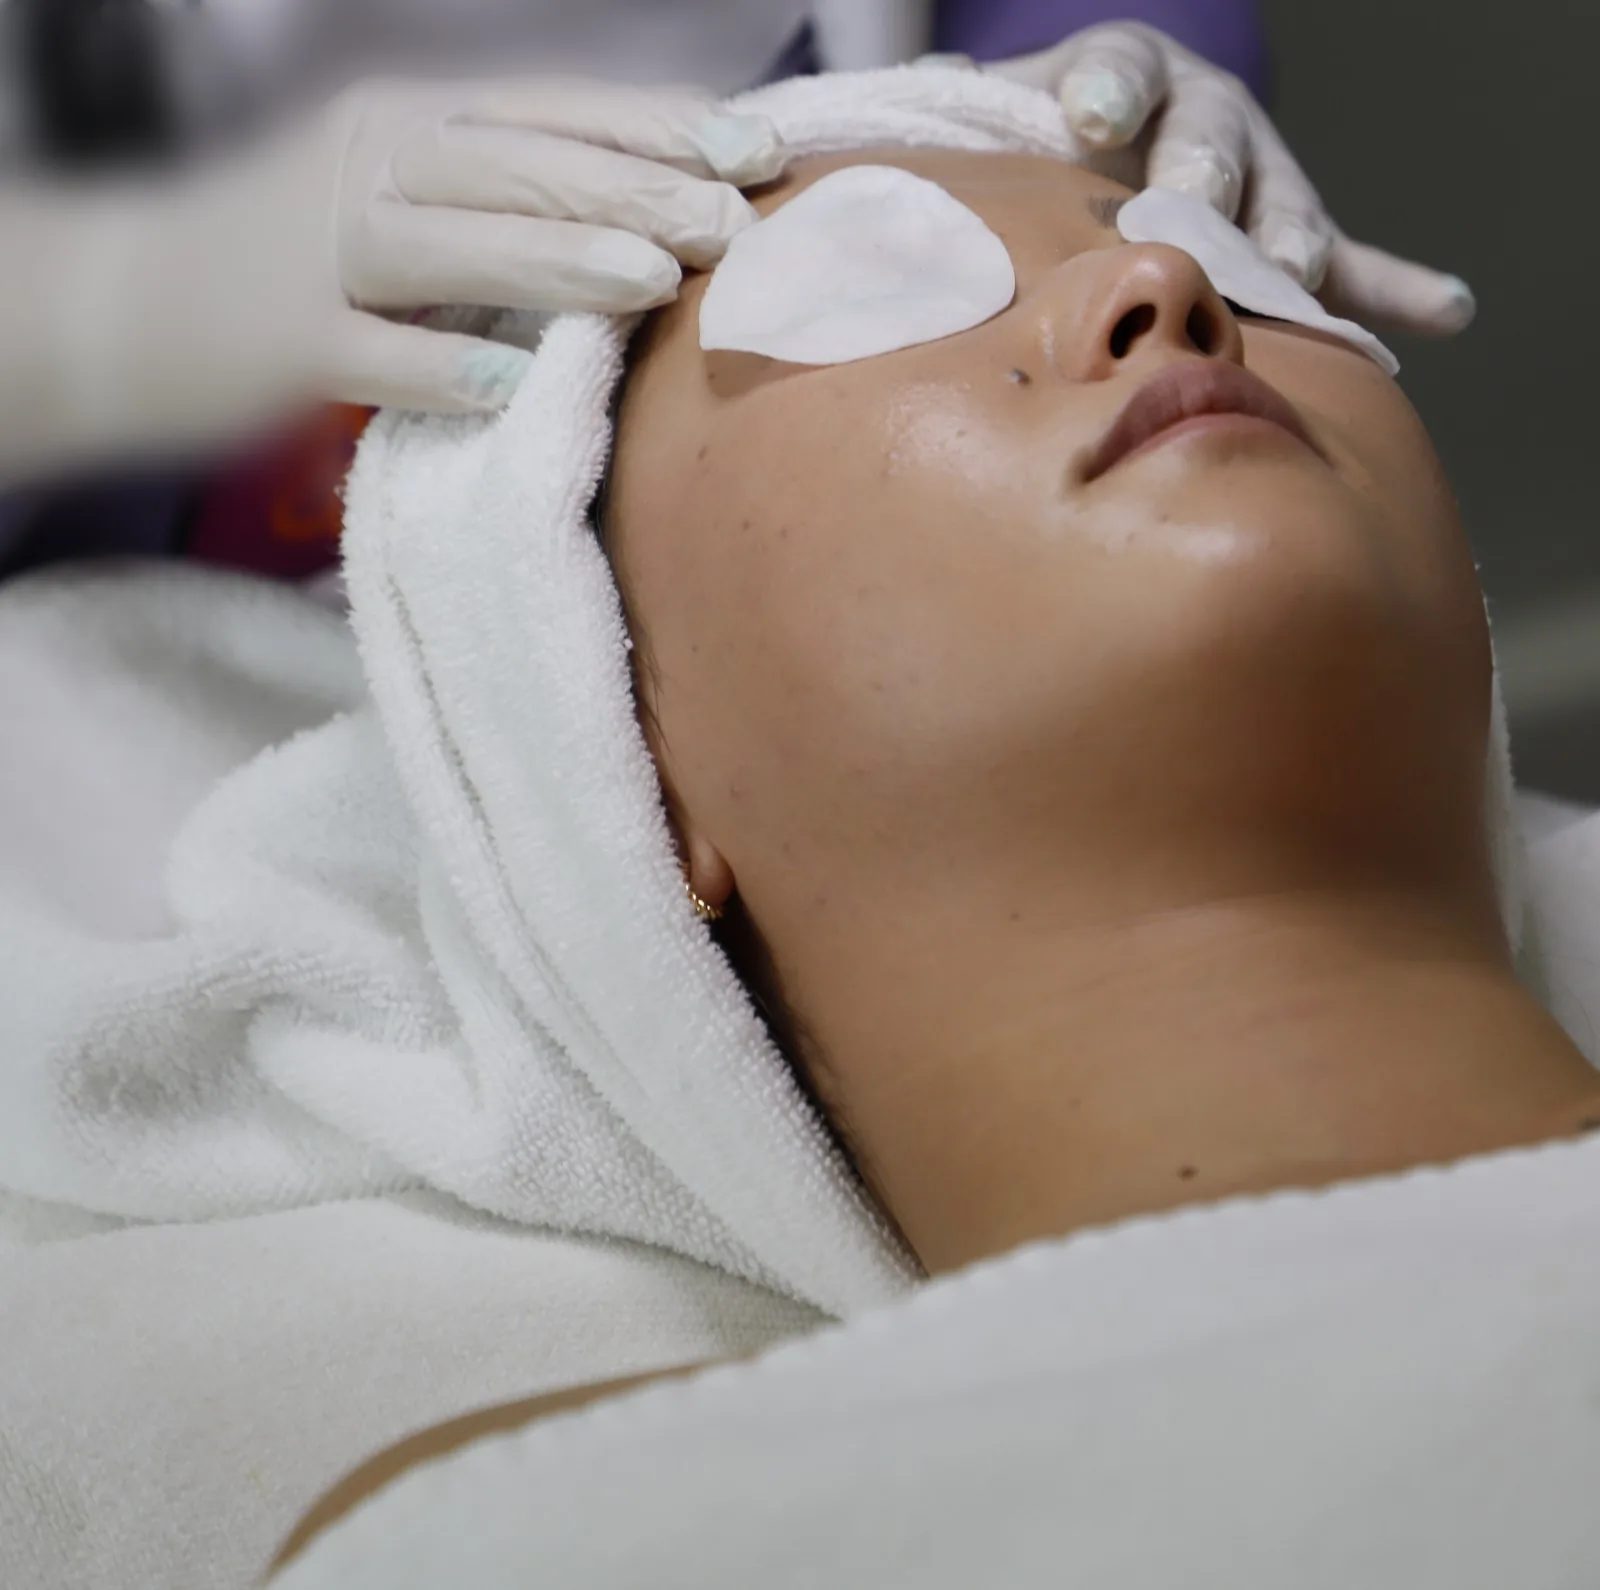
Figure 1. A therapist in disposable gloves places round cotton pads over the closed eyes of a client lying on a couch with her hair wrapped in a white towel. Cover the eyes before you bring a bright magnifying lamp close to the face. (Photo: Keyfwellness, Wikimedia Commons, CC0)
Switch the lamp on with the head turned away from the face, then bring it slowly into position, at the distance recommended for your lamp. Never let it rest on or bump the client, and tell the client before you move it.
Step 6: Observe under the magnifying lamp
Move the lamp slowly over the face section by section. Under magnification, look for:
Pores: size and where they are most visible.
Oil and shine: where the surface reflects light.
Texture: smooth, rough, flaky or bumpy areas.
Congestion: blackheads, whiteheads and small bumps under the surface.
Colour: redness, visible small blood vessels, darker or lighter patches.
Lines: fine dehydration lines and deeper expression lines.
Anything unusual: moles, raised spots, broken skin, rashes or crusts. Describe them in neutral words and do not touch broken or inflamed skin.
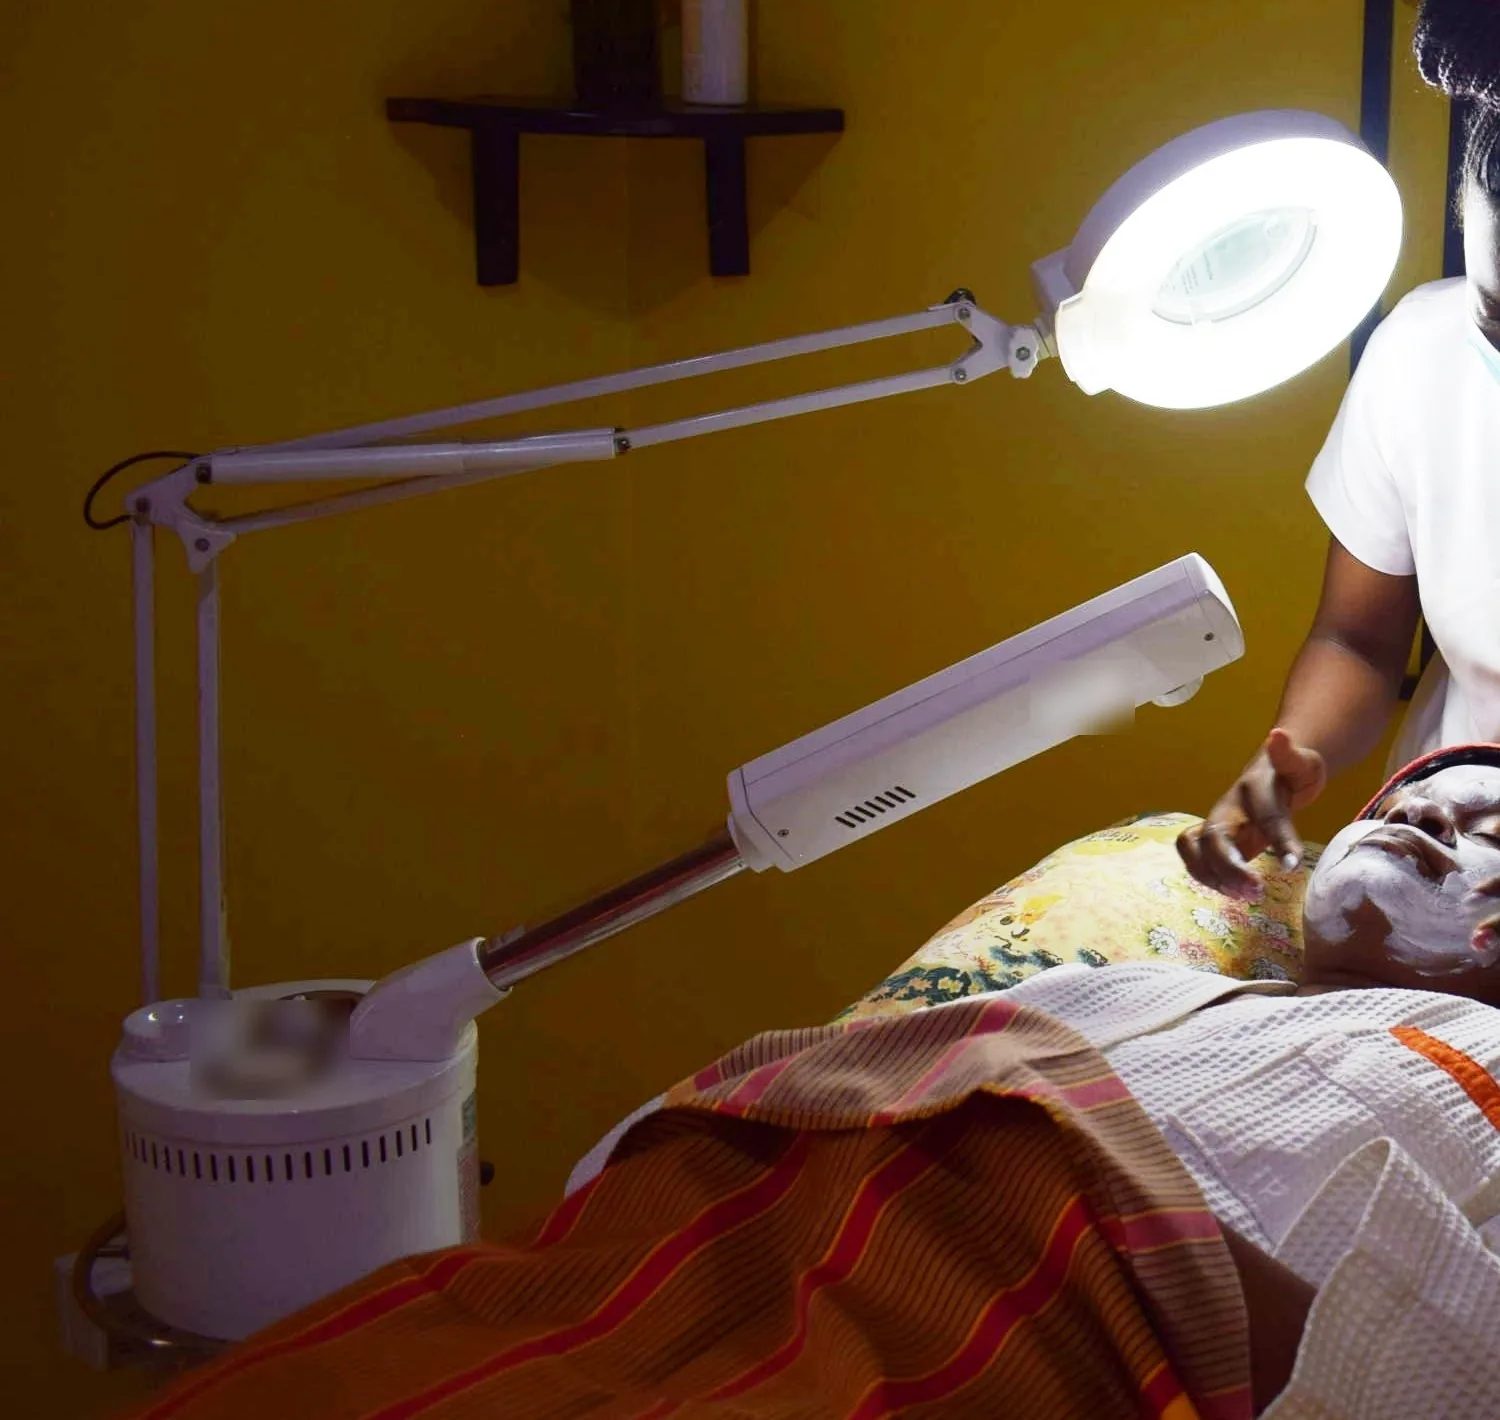
Figure 2. A magnifying lamp with a round lit lens on a long adjustable arm stands beside a facial steamer in a treatment room; the client on the couch already has a mask on. For skin analysis, the face should be clean and the eyes covered. (Photo: Alvinategyeka, Wikimedia Commons, CC BY-SA 4.0)
Step 7: Touch and feel the texture
With clean or gloved hands, glide your fingertips lightly over the forehead, cheeks and jawline. Notice whether the skin feels smooth, rough, slightly oily, dry or bumpy. Press very gently with one fingertip to see how quickly the skin springs back, which gives a rough idea of firmness. On the cheek, gently push the skin together between two fingers: very fine, crepey lines that appear easily may suggest dehydration.
Keep pressure light and never pinch, stretch or squeeze spots during the analysis. Do not touch open wounds, crusts, weeping areas or anything that looks infected.
Step 8: Work zone by zone
Many faces behave differently in different areas, so check each zone separately and write down what you find for each one.
T-zone (forehead, nose, chin): shine, visible pores, blackheads (most common on the nose), congestion along the hairline, flaking at the sides of the nose.
Cheeks: often drier or more sensitive than the T-zone; look for redness, visible small vessels, pigmentation and dehydration lines.
Jawline: bumps or congestion, and rough areas from shaving in male clients.
Around the eyes: fine lines, puffiness or dryness. The skin here is thin, so observe more than you touch.
Neck: often forgotten; check for dryness and sensitivity if you will treat it.
Step 9: Note the client's sun sensitivity
Many trainers use the Fitzpatrick skin type concept to describe how a person's skin reacts to the sun. It was created to describe sun sensitivity, not oiliness or dryness. It is usually shown as six types, from very fair skin that always burns and rarely or never tans, to deeply pigmented skin that rarely burns. You do not need to measure anything: ask how the client's skin usually reacts to strong sun ("Do you burn easily? Do you tan?") and note it in words.
This helps you plan. Fair skin that burns easily may redden quickly after heat or exfoliation, while darker skin may be more prone to dark marks after irritation or picking, so gentle handling matters for everyone. Recommend daily sun protection to every client.
Optional: the Wood's lamp (use with caution)
Some spas have a Wood's lamp, which uses ultraviolet light to show differences on the skin surface. Treat it with caution: use it only if you have been trained on that device and your spa's protocol includes it, protect the client's eyes and follow the manufacturer's safety instructions. Never use what you see under it to tell a client they have a skin disease. Good light, magnification, touch and questions are enough for a salon analysis.
Recording findings on a skin record card
Write your findings down before you start the facial. A record card lets the next therapist see what was used and how the skin reacted, and lets you compare visits. Use neutral, descriptive words and keep it confidential.
Here is an example card for the client from the opening example (your spa's card may differ):
Section | Example entry |
|---|---|
Client, date, therapist | Ms. A., first visit, therapist initials |
Main concern | "Oily but tight and flaky around the nose" |
Routine and products | Foaming cleanser twice daily, no moisturiser, sunscreen sometimes; started a retinol serum about two weeks ago |
Medicines, allergies, procedures | None reported; no recent procedures; no known allergies |
Sun sensitivity | Burns at first, then tans; outdoor work at weekends |
Skin type | Combination |
Forehead / nose / chin | Shine on forehead and nose; open blackheads on the nose; light flaking at the sides of the nose |
Cheeks | Feel tight; fine criss-cross lines; slight redness after cleansing that faded within a few minutes |
Jawline / neck | A few small closed bumps along the jaw; neck normal |
Conditions noted | Dehydrated; mild congestion on the nose; slight sensitivity on the cheeks |
Treatment chosen | Gentle cleanse; no scrub or strong acids; clay mask on nose and forehead only, hydrating mask on cheeks; light massage; non-comedogenic moisturiser and sunscreen |
Home care advice and next visit | Add a moisturiser, use sunscreen daily, check the retinol serum's instructions; review in a few weeks |
Turning your findings into a treatment plan
A skin analysis is only useful if it changes what you do. The table below is a general reference for beginners; always check product instructions, your spa's protocol and the consultation form, and adjust to what you see on the day.
Finding | Suitable approach (general reference) | Avoid or take care |
|---|---|---|
Oily skin | Gentle foaming or gel cleanser, light non-comedogenic moisturiser, clay mask on oily areas | Stripping the skin with harsh products or over-cleansing; heavy creams over the whole face |
Dry skin | Cream or milk cleanser, nourishing mask, richer moisturiser, slower massage | Foaming cleansers that leave the skin tight; drying clay masks over the whole face |
Combination skin | Treat zones differently, for example clay on the T-zone and a hydrating mask on the cheeks | Using one strong product for the whole face |
Normal skin | Maintenance facial: cleanse, mild exfoliation if suitable, hydrating mask, moisturiser, sunscreen | Over-treating skin that is already balanced |
Dehydrated (any type) | Hydrating products, gentle cleansing, a moisturiser that suits the skin type | Hot steam for long periods, alcohol-heavy toners, strong exfoliation |
Sensitive or reactive | Few, mild, fragrance-free products where possible; patch test new products as your protocol requires; lukewarm water; light pressure | Scrubs, strong acids, heat, vigorous massage, new or strongly fragranced products |
Congested | Thorough but gentle cleansing, suitable exfoliation, clay mask, extraction only if trained and the skin is suitable | Squeezing inflamed spots; working on painful, widespread or cystic acne (refer instead) |
Uneven pigmentation | Gentle care, calm skin, strong emphasis on daily sunscreen | Anything that irritates the skin; promising to "remove" marks |
Visible ageing | Hydration, gentle massage, sun protection advice | Over-exfoliating thin skin; promising to remove wrinkles |
Client uses retinoids or acids | Gentle facial; follow your contraindication rules | Exfoliation, peels, waxing on treated areas unless your protocol allows it |
For exfoliation choices by skin type, see our article "Facial exfoliation by skin type". For the full facial sequence, see "Basic facial care in 8 steps".
Practical example
For Ms. A., you might plan: a gentle cleanser instead of her foaming one; no scrub, because her cheeks are tight and she has just started retinol; a clay mask on the nose and forehead only, and a hydrating mask on the cheeks; a light, non-comedogenic moisturiser and sunscreen. At home, suggest she adds a moisturiser and asks her pharmacist or doctor if she is unsure how to use her retinol serum.
Explaining your findings to the client
Share what you saw in simple, calm language. Say "I can see some blackheads on your nose and your cheeks feel a little tight", not "your skin is bad" or "you have a skin disease". Offering a mirror helps the client understand what you mean.
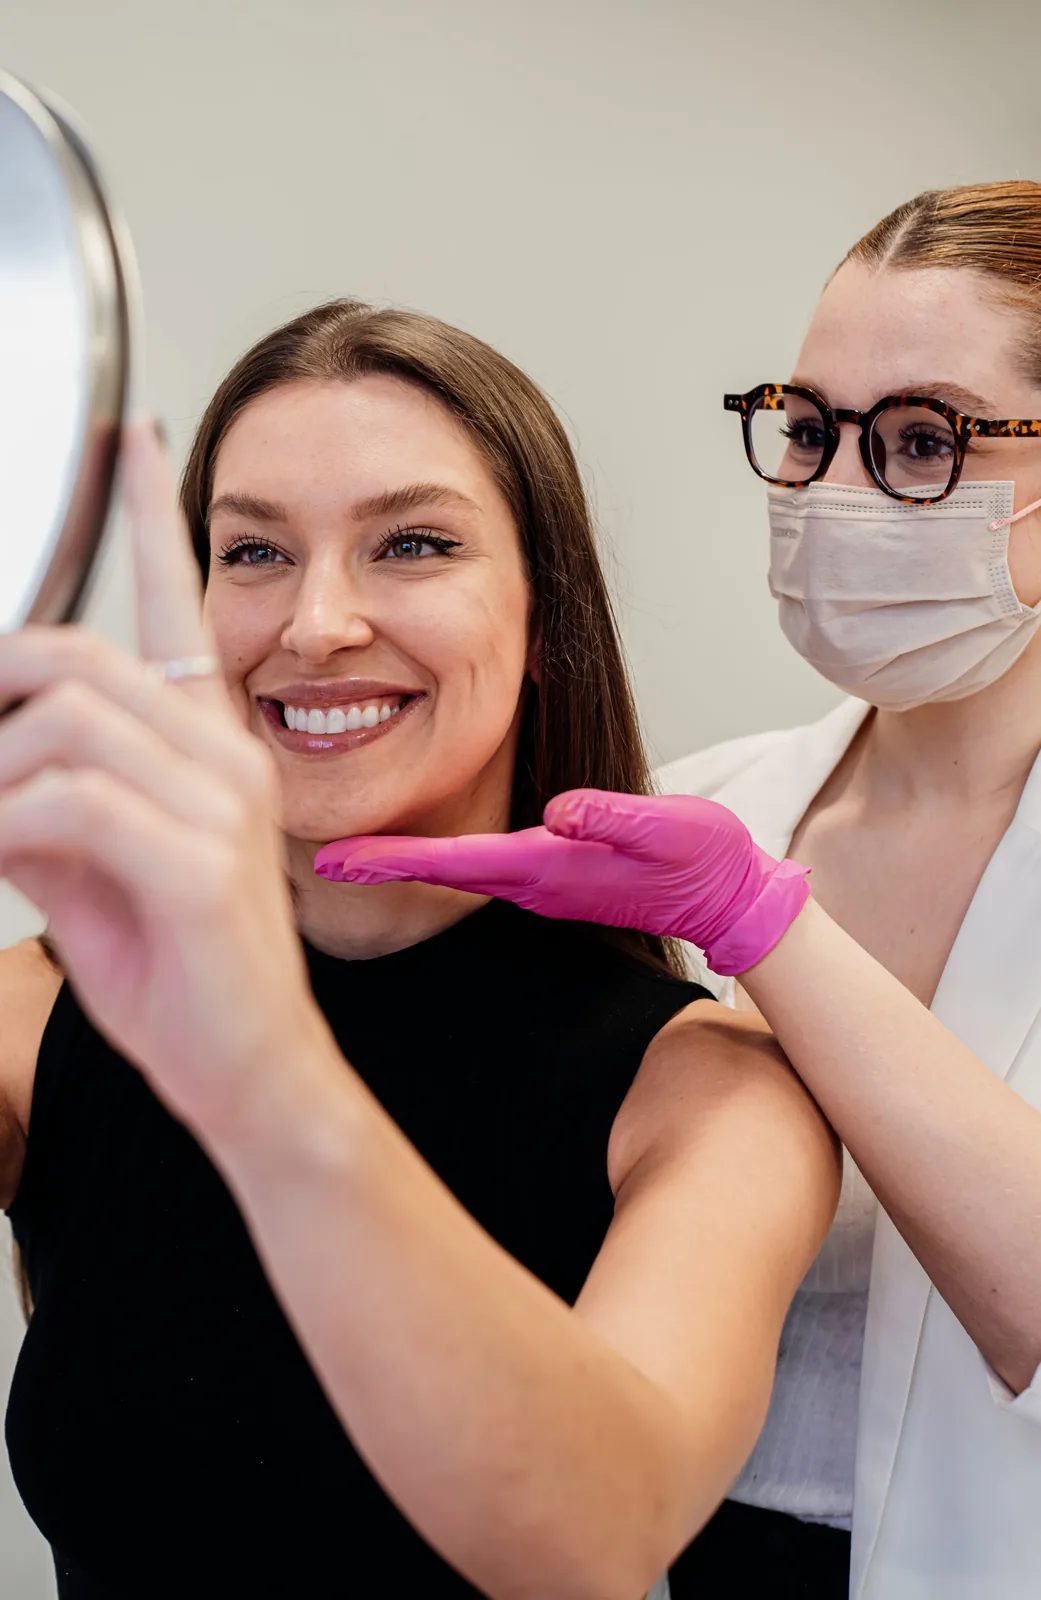
Figure 3. A smiling client looks into a round hand mirror while a therapist in a disposable face mask, glasses and pink disposable gloves holds a hand lightly under her chin. A mirror helps when you explain what you observed. (Photo: Stephanie Lima, Pexels)
Be honest about what a facial can do: never promise to "clear acne" or "remove dark spots". Explain the plan and get the client's agreement before you start.
When to stop and refer
A therapist never diagnoses, but you are often the first person to look closely at a client's skin. If you notice any of the following, do not treat that area (or postpone the facial as your protocol says), and suggest calmly that the client sees a doctor or dermatologist:
A mole or spot that the client says has changed in size, shape or colour, or that bleeds, itches or has not healed.
Signs that might be an infection: swelling, heat, pus, crusts, weeping, cold sores or spreading redness.
Severe, painful or widespread acne, or deep, painful lumps.
Rashes, unexplained swelling, or skin that is peeling or burning.
Open wounds, cuts or very recently treated skin.
Eye redness, discharge or swelling.
Use gentle wording such as: "I noticed this mole and I'm not able to say what it is. It would be a good idea to show it to a doctor." Record your observation and what you advised on the card. If a client's skin reacts during or after a treatment, see our article "Client skin red/burning after a spa treatment".
Reassess at every visit
Skin changes with the seasons, hormones, stress, new products and medicines, so repeat a shorter analysis at every visit. Ask what has changed, look again under the lamp and compare with the previous card. If the skin is calmer, you may add steps; if it is more sensitive, scale the facial back.
Safety and hygiene checklist
Hands washed before and after; gloves used where required by your spa.
Magnifying lamp lens, arm and handle wiped with an approved product before each client.
Fresh linen, headband and towels for every client.
Consultation form completed and signed before the analysis.
Eyes covered with moist pads before the lamp is used.
No touching of broken, inflamed or infected-looking skin.
Wood's lamp used only if trained and permitted, with eye protection.
Findings recorded in neutral words; no diagnosis given.
Referral advice given and recorded when needed.
Record cards kept confidential and stored securely.
Client covered, warm and in a private room.
Frequently Asked Questions
How long should a skin analysis take?
For a first visit, many therapists spend somewhere around five to fifteen minutes on the consultation questions and the skin check together (for reference). Returning clients usually need a shorter check. Follow the time your spa allows in its treatment plan.
Can a client's skin type change?
The basic type tends to be fairly stable, but it can shift over the years with age, hormones and climate. Skin conditions change much more often, which is why you reassess at every visit rather than copying the last card.
How do I tell dry skin from dehydrated skin?
Dry skin is a type: it produces little oil and usually looks matt, with small pores. Dehydrated skin is a condition: it lacks water, feels tight and shows fine lines that soften with hydration. Oily or combination skin can be dehydrated, so look for shine and tightness together.
Is a skin analysis machine better than a magnifying lamp?
Handheld skin scanners and camera systems can be helpful to show the client pictures, but they are a support tool, not a replacement for questions, observation and touch. Readings depend on the device and conditions, so do not use them to diagnose or to make claims about results.
Practice Exercises
Type or condition? Sort these words into "skin type" and "skin condition": oily, dehydrated, combination, sensitive, dry, congested, normal, uneven pigmentation. Explain your choices to a colleague.
Consultation role-play. With a colleague playing the client, practise the consultation questions in Step 2 in your own words. Ask your trainer whether you missed retinoids, acids, recent procedures or sun exposure.
Zone map. Under supervision, analyse a training partner's skin zone by zone and fill in a skin record card. Compare your card with your trainer's and discuss any differences.
From findings to plan. Using the treatment table, write a short facial plan for: (a) oily skin with dehydration; (b) dry, sensitive skin; (c) combination skin with congestion on the nose and a client who uses an acid toner every night.
Referral wording. Write two calm sentences you could say to a client with a mole that has recently changed, without frightening them or suggesting a diagnosis.
Ask honest questions, look carefully, touch gently and write down what you find. Practise this before every facial, and your treatments will become safer and more personal.