
A fade haircut uses clippers with guards (attachment combs) from short to long so that the sides and back move gradually from very short at the bottom to longer at the top, with no visible steps. The four common fades differ in where the transition starts: a low fade starts just above the ear, a mid fade around the temple, a high fade near the parietal ridge (where the head starts curving to the crown), and a skin fade is any fade whose bottom is shaved down to the skin. This lesson shows you how to choose guards, set the guide line, cut the base, blend the guards, erase lines with the flicking technique and check your work under light, the way barbershop staff do every day.
By the end of this lesson, you will be able to:
- Tell low, mid, high and skin fades apart by guide-line height and point to the right spot on a client's head.
- Read a clipper guard chart in millimetres and use the taper lever to get a "half guard".
- Cut a mid fade in 8 steps in about 45–50 minutes with no visible lines under strong light.
- Spot and fix 5 common mistakes: lines, uneven sides, fade too high, holes and irritated skin.
- Clean and disinfect clippers and guards between clients and know when not to shave close to the scalp.
Learning barbering in the right order? The fade is step 4 of the path — after tool hygiene, reading head shape and scissor-over-comb. See the 8-step barber learning path.
What is a fade? Low, mid, high and skin fade compared
A fade is the part of the sides and back cut with a gradual change in length. The styles differ in where the change starts (the guide line) and how short the bottom is. Figure 1 shows a typical fade: tight at the bottom, longer as it rises, blending softly into the top.
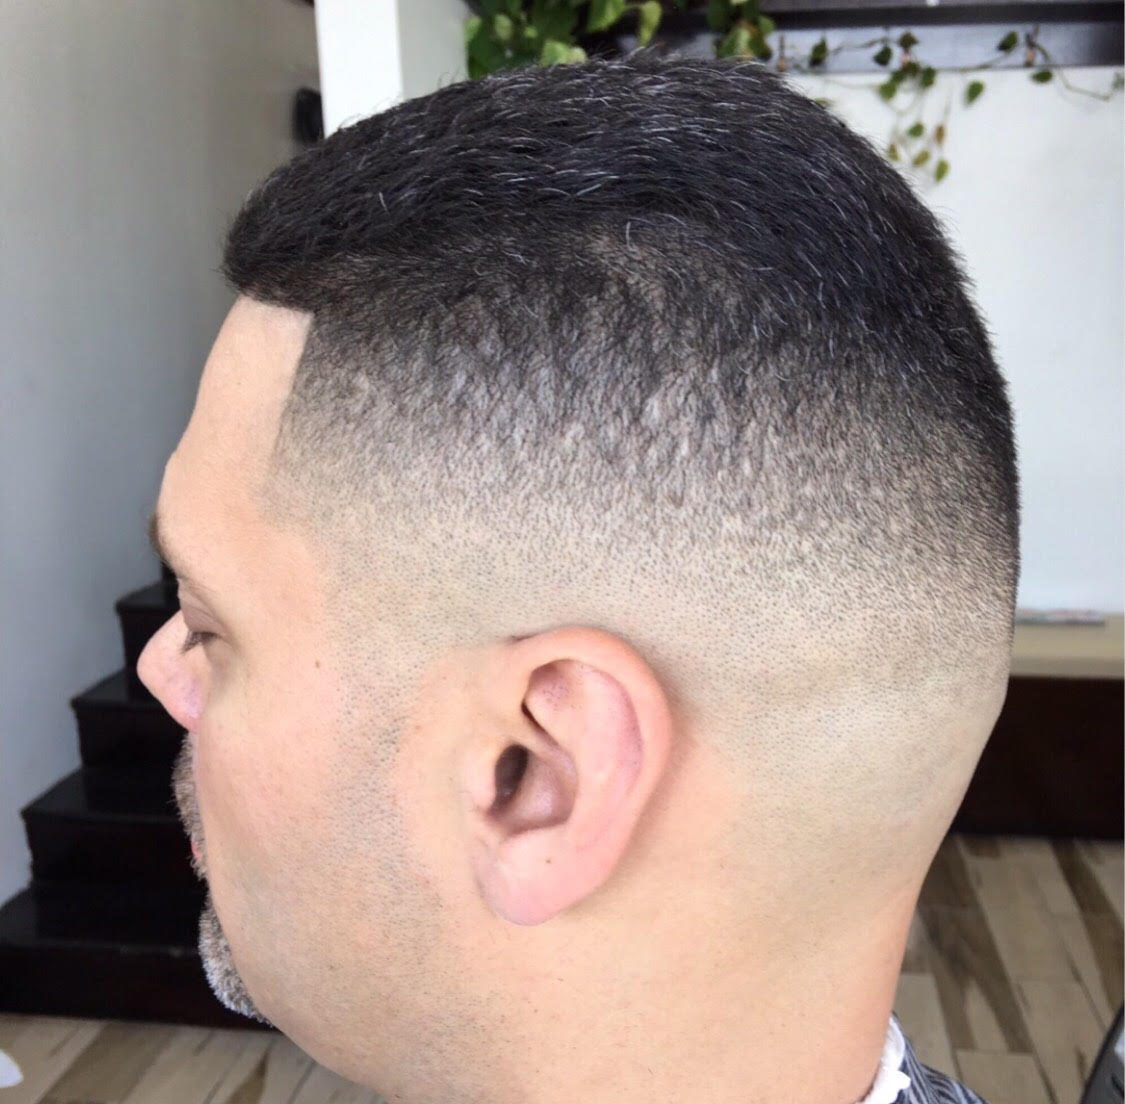
Photo: Truth678 / Wikimedia Commons, CC BY-SA 4.0

| Style | Where the guide line starts | Suits | Notes |
|---|---|---|---|
| Low fade | About 1–2 cm above the ear, running low around the nape | Office workers, first-time fade clients | Little scalp shows; grows out neatly |
| Mid fade | Level with the temple, halfway between ear and parietal ridge | Most young clients; pairs with side parts, undercuts | The most requested style |
| High fade | Near the parietal ridge | Clients who want a sharp look, thick top | Shows head shape; read dips and bumps carefully |
| Skin fade | At any low/mid/high height, with the bottom shaved to skin | Clients who want crisp lines, healthy scalp | Never over inflamed acne or raised moles |
Choose by head shape and hair type
Vietnamese and many Asian clients have thick, coarse, straight hair; dark roots on lighter skin make lines very visible, so the fade must be erased more carefully than on fine, light hair. A flat back of the head should avoid a very tight high fade, which exposes the dip; a bump at the parietal ridge means dropping the guide line below it. You learned head-shape reading in step 2 of the path.
Consult with photos, not style names
A client's "mid fade" may be your low fade. Ask for a photo, point on their head to where the short part starts, ask whether they want to see skin, and how long the top should stay. Also ask about their job: some workplaces do not allow very sharp styles.
Clipper guards and hair length: a reference chart
Clippers (Figure 2) cut to a length set by the guard. Most clippers use the US guard number system (inches); some brands label guards in millimetres. The chart below shows common conversions. Brands vary slightly, so measure with a ruler the first time you use a new set of guards.
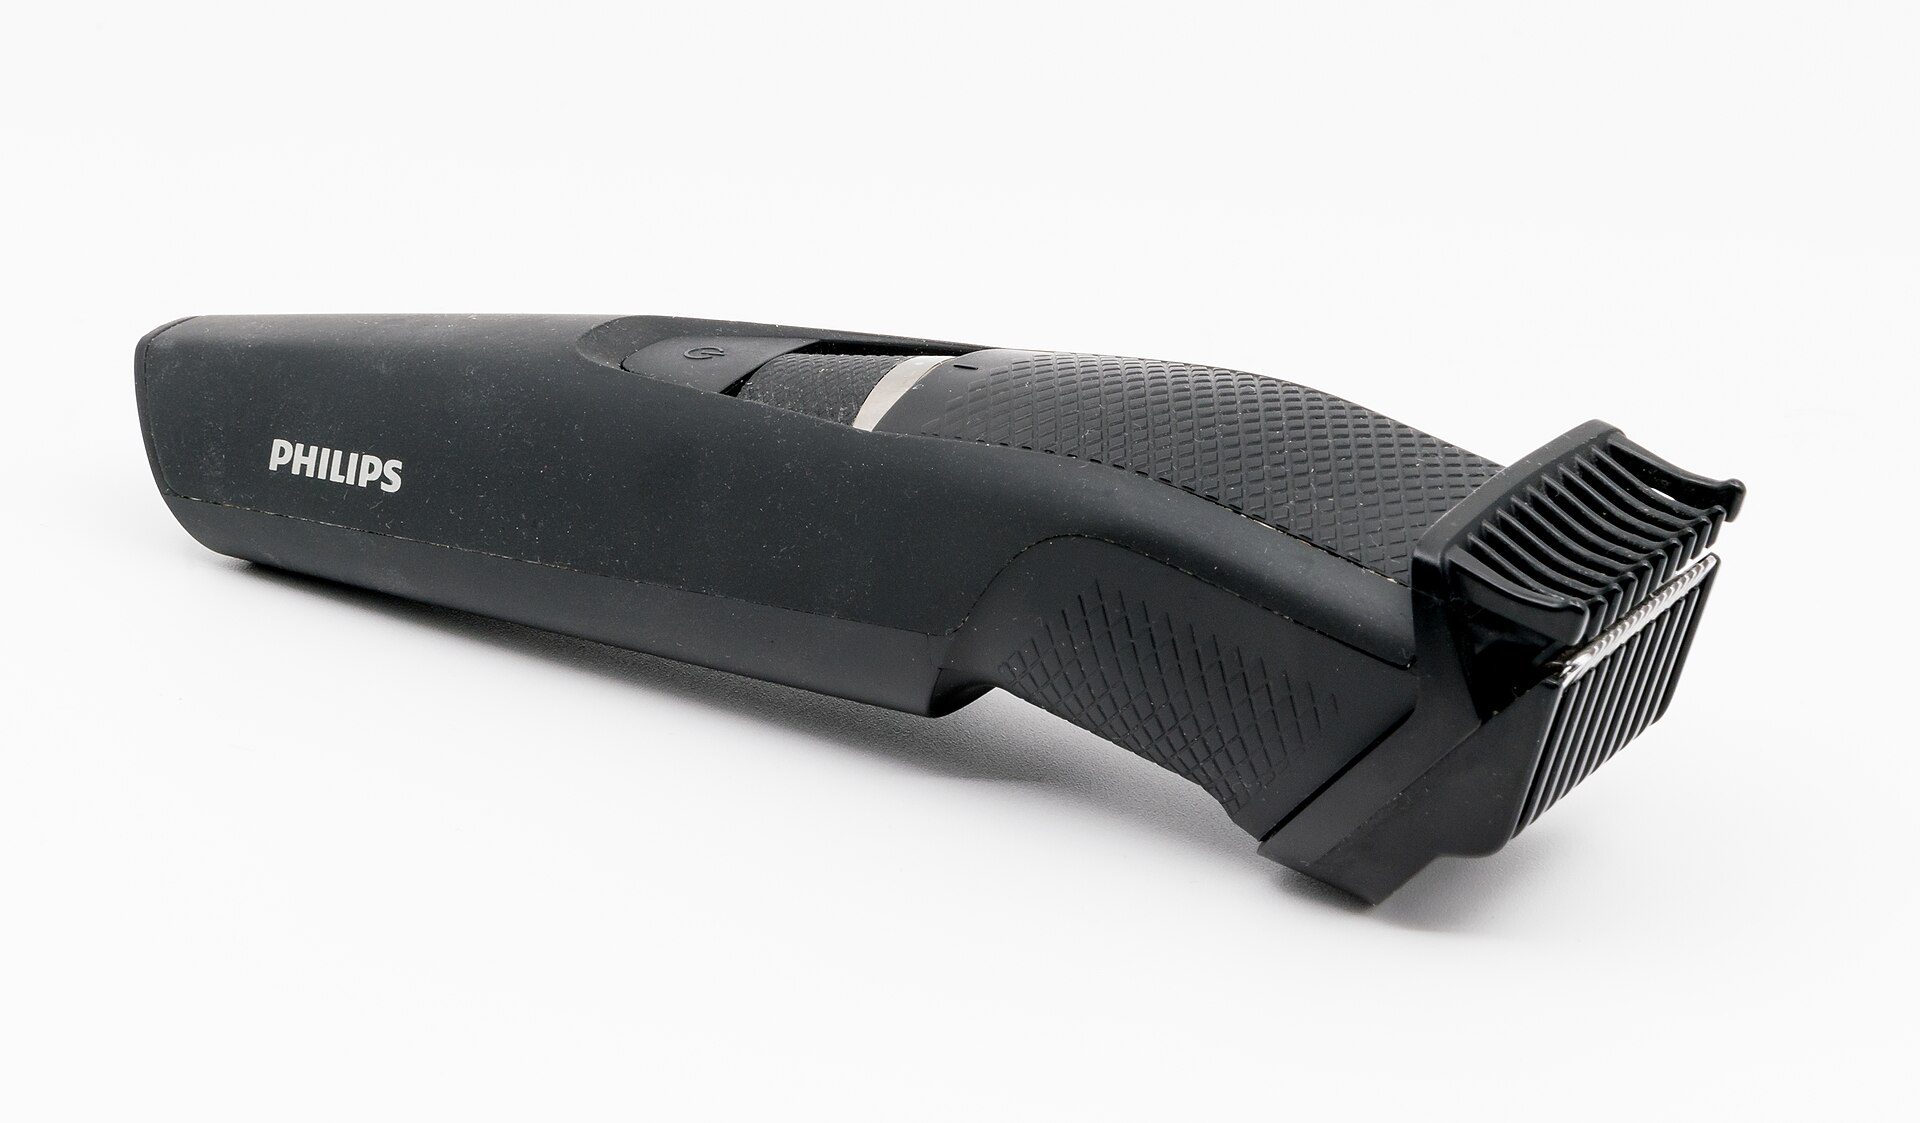
Photo: Jacek Halicki / Wikimedia Commons, CC BY-SA 4.0

| Guard | Approximate length | Use in a fade |
|---|---|---|
| No guard, lever closed | about 0.5 mm | Guide line of a tight fade |
| No guard, lever open | about 1.5 mm | Start blending from the bottom |
| Foil shaver | near skin, under 0.5 mm | Bottom of a skin fade |
| #0.5 | about 1.5 mm | Bottom blend |
| #1 | 3 mm | Guide line of a non-skin low/mid fade |
| #1.5 | 4.5 mm | Middle blend |
| #2 | 6 mm | Middle-to-upper blend |
| #3 | 10 mm | Base cut on the sides, upper blend |
| #4 | 13 mm | Base cut when the top stays long |
| #6 – #8 | 19–25 mm | Rare in fades; mainly for even buzz cuts |
The taper lever: a free "half guard"
The lever on the side moves the bottom blade, changing length by about 1 mm. A #1 with the lever open cuts slightly longer than a #1 with the lever closed. Fade barbers use the lever to make smaller steps between guards, especially near the bottom, where every millimetre shows.
Rules for choosing guards
The shortest guard sets the guide line; the longest guard must be shorter than the top so you can connect. If the top is 5–6 cm, cut the base with a #3 or #4; if the top is only 2 cm, a #2 base is enough. More in-between guards give a softer fade but take longer.
Preparing to cut a fade
Tools you need
- Main clipper with a taper lever and guards from #0.5 to #4 (or 1.5–13 mm).
- Trimmer for outlining ears, nape and sideburns; a foil shaver for skin fades.
- Wide comb, cutting comb, scissors and thinning shears for the top; spray bottle; neck duster; cape and neck strips.
- Tool disinfectant, blade oil and a blade brush.
- Strong, even light from above and a hand mirror to check the back (Figure 3).
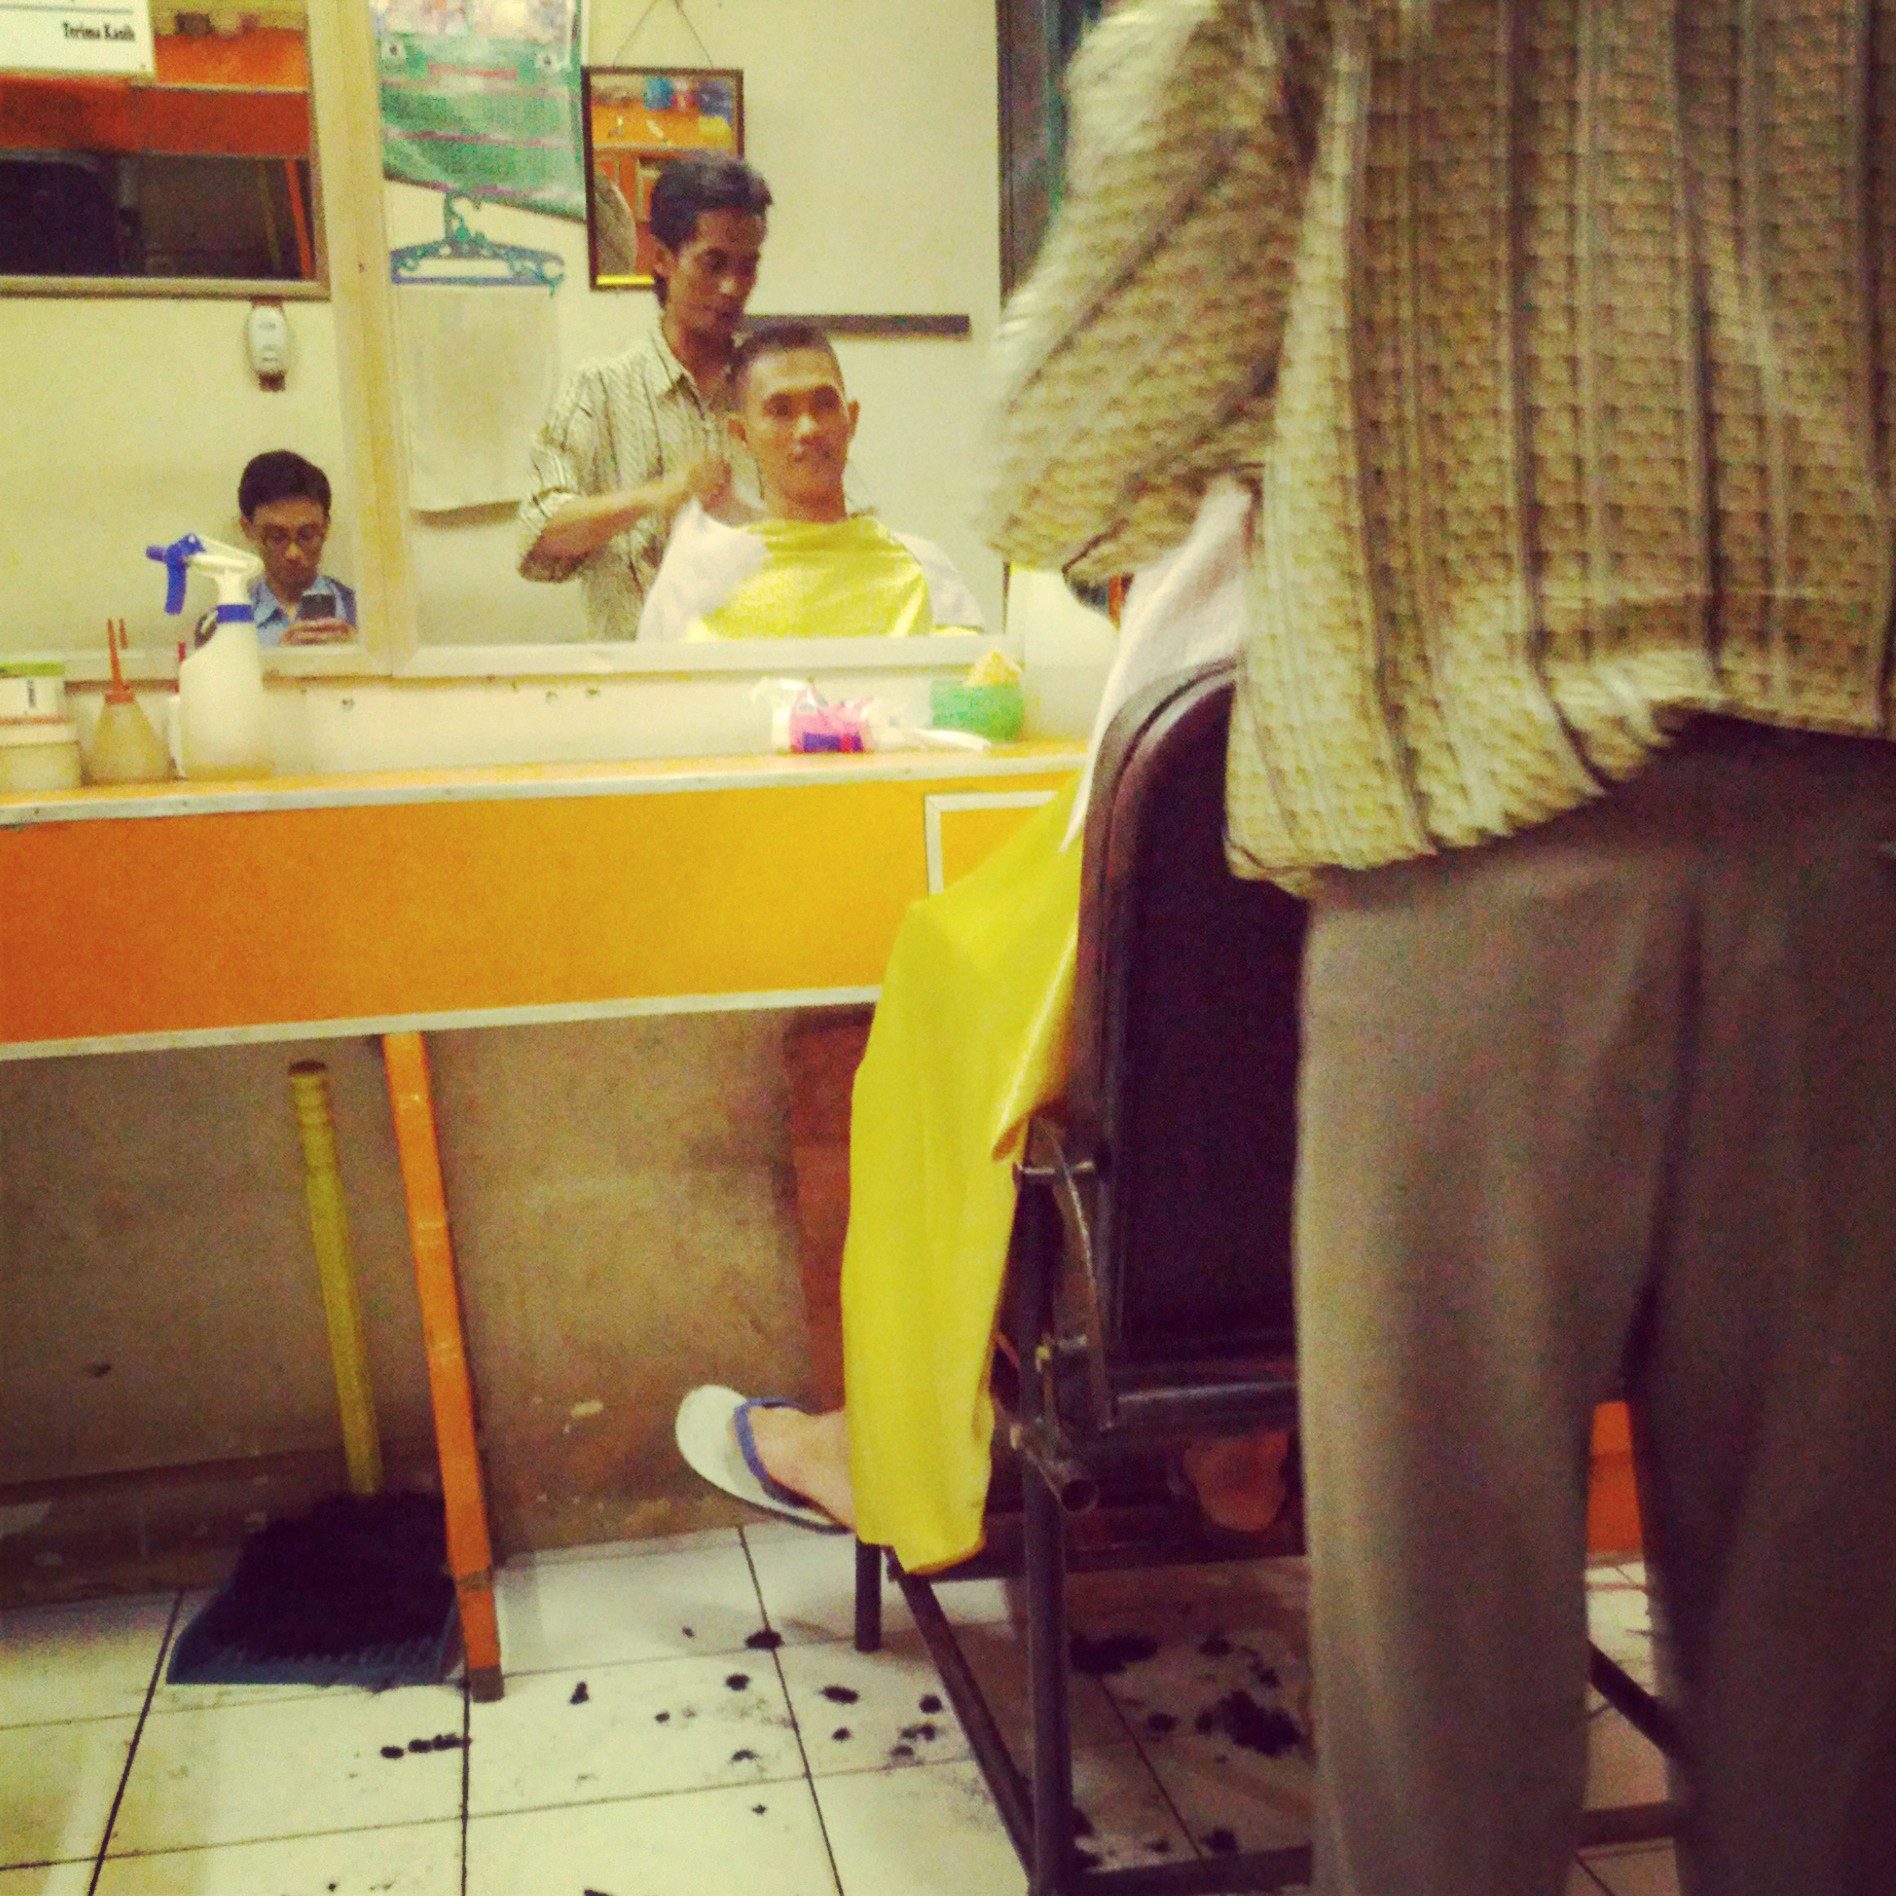
Photo: Akhlispurnomo / Wikimedia Commons, CC BY-SA 3.0

Check the scalp before picking up the clipper
Comb the hair and look closely at the sides and back: raised moles, red swollen acne, scaling, patches that look fungal, wounds. If you find these where you planned to go tight, change the plan: keep a longer guard over that area, or switch from a skin fade to a non-skin fade. Explain why to the client — most will thank you for noticing.
Dry or wet hair?
Clipper fades are done on clean, dry hair with no wax or gel. Wet hair clumps and lies differently from dry hair, hiding real lines. If the client has product in, give a quick wash and blow-dry first.
How to cut a fade step by step
The process below is for a non-skin mid fade with a #1 (3 mm) as the shortest guard and a #3 (10 mm) base. Low and high fades are identical except for the guide-line height; a skin fade adds a shaving step at the bottom.
- Cut the base: with a #3, cut the whole of the sides and back from the bottom up to the parietal ridge, against the direction of growth. The goal is to bring everything to 10 mm so the next steps start from an even surface.
- Set the guide line: with a #1, cut a line level with the temple, running around the back and dropping towards the nape following the head shape. Stand directly in front of the client to compare both sides. This is the most important line — if it is off, the whole fade is off.
- Clear below the guide: with the #1, cut all hair below the guide line down to the hairline.
- Blend the guards: with a #1.5, cut from the guide line up about 1.5–2 cm; with a #2, cut another 1.5–2 cm above that; each guard stops higher than the last. Move up with an outward scooping motion rather than pushing straight up.
- Erase lines with the flick: at each boundary between guards, lay the clipper flat below the line, push up to the line, then rotate your wrist so the blade leaves the head in an arc. Cut at the line with an in-between guard or by opening and closing the lever.
- Work the bottom: no guard, lever open, clean up the very bottom, then flick up into the #1. For a skin fade, use the foil shaver or trimmer on the lowest 1–2 cm.
- Outline: use the trimmer to shape around the ears, sideburns and nape. Square, rounded or natural nape, as the client prefers.
- Check under light: turn on strong overhead light, swivel the chair so light falls across each side, and comb the hair upwards. Any band darker or lighter than its surroundings needs another flick. Show the client the back with the hand mirror.
After these 8 steps, you connect the fade to the top using scissor-over-comb or clipper-over-comb (learned in step 3), then wash, dry and style.
The flick: why it erases lines
A line forms where a guard stops: 4.5 mm below, 6 mm above. When you rotate your wrist, the blade leaves the head gradually, so hair is cut shorter at the bottom and gets longer over roughly 1 cm. Common errors are flicking too early (the line stays) or not flicking and pushing straight up (the line just moves higher).
Where to stand and how to hold the clipper
Stand on the left to cut the left side, on the right for the right side, and ask the client to tilt the head slightly forward for the back. Hold the clipper like a phone, thumb near the lever so you can adjust as needed. Rest your other hand lightly on the client's head to steady it, without pressing.
Safety warning: do not shave close or run a foil shaver over raised moles, red swollen acne, scaling or skin that looks fungal — the blade can cut, cause bleeding and spread infection to the next client. If you nick the skin: stop, apply pressure with clean gauze, use antiseptic as directed, and record it; any tool with blood on it must be cleaned and disinfected thoroughly before reuse, and razor blades replaced. Mains-powered clippers (220V in Vietnam): never use with damaged cords or loose plugs, with wet hands, or near a sink. Clients with slow-healing wounds, unusual hair-loss patches or widespread scalp inflammation should be advised to see a dermatologist.
Worked example: a mid fade for a 25-year-old office worker
Tuan, 25, has thick, coarse hair, about 6 cm on top, and wants a mid fade with no skin showing because his workplace expects a tidy look. The scalp check shows no inflamed acne; there is one small mole behind his right ear. The barber decides: #3 base, #1 guide, no shaving, and keep a #1.5 around the mole instead of taking the clipper tighter.
| Step | Task | Time |
|---|---|---|
| 1 | Photo consultation, scalp check | 3 min |
| 2 | Base cut with #3 | 5 min |
| 3 | Set #1 guide line, compare both sides | 4 min |
| 4 | Blend #1.5 – #2 – #3 | 10 min |
| 5 | Flick out lines, work the bottom | 8 min |
| 6 | Outline ears, sideburns, nape | 4 min |
| 7 | Cut and connect the top with scissor-over-comb | 8 min |
| 8 | Wash, dry, apply wax | 6 min |
| 9 | Check under light, show the back in the mirror | 2 min |
| Total | 50 min |
Adding up: 3 + 5 + 4 + 10 + 8 + 4 + 8 + 6 + 2 = 50 minutes. New barbers usually take 60–75 minutes for the same job; the 30-model project in step 7 of the path aims to bring the cutting part (excluding washing) down to about 30–40 minutes.
Result and feedback
Under the light, the barber spots a small line on the left side where #1.5 meets #2 behind the ear — the left side of Tuan's head has a slight dip. Another flick with the #1.5 and lever open removes it. Tuan books his next cut in 3 weeks, when the fade starts growing out and the guide line softens.
Reference prices
Reference figures for Vietnam in 2026, varying by area: a basic neighbourhood barber charges about 40,000–80,000 VND per cut; a modern barbershop about 100,000–250,000 VND (~4–10 USD), usually including wash, dry and styling; a skin fade or a well-known barber may charge about 150,000–350,000 VND. Fade clients usually return every 2–4 weeks, so a clean fade brings in more regulars than any advertising.
Common fade mistakes and how to fix them
Visible lines (steps)
Sign: a dark horizontal band where guards change. Cause: pushing straight up and lifting off without a flick; jumping guards too far (#1 straight to #3). Fix: add an in-between guard or use the lever, and flick right at the line.
Uneven sides
Sign: the guide line is higher on one side. Cause: setting the guide while standing off-centre, or the client's head tilted. Fix: always compare from directly in front; use a shared landmark such as the end of the eyebrow or the outer corner of the eye to place both guides.
Fade too high
Sign: the client wanted mid but got high. Cause: each guard went up too far, adding up. Fix: stop each guard within 1.5–2 cm; once too high, you cannot bring it down, so agree a new plan with the client.
Holes from digging in
Sign: a patch noticeably shorter than its surroundings. Cause: holding the clipper upright so the blade corner digs in, or a guard popping off. Fix: keep the blade flat against the head and check the guard is locked before cutting; if there is already a hole, bring the surrounding area down to match.
Red, sore skin or bumps after a skin fade
Sign: a few hours later the client has redness, stinging or bumps at the nape. Cause: too many passes against the grain on sensitive skin, a hot or dirty blade. Fix: limit passes, check blade temperature, and leave sensitive clients at #0.5 instead of shaving.
Cleaning clippers between clients
Clippers touch every client's scalp, so cleaning between cuts is mandatory, not "when you have time". The routine below takes about 2–3 minutes.
- Unplug or switch off the clipper and remove the guard.
- Brush all loose hair from the blade and the gap between blades.
- Wash plastic guards in soapy water and dry them.
- Spray or wipe disinfectant on the blade and guards, leave for the contact time on the label, and never submerge the whole clipper body.
- Dry, add 2–3 drops of blade oil, run the clipper for a few seconds, then wipe off excess oil.
Regular maintenance
Dull or misaligned blades pull hair, hurt the client and leave lines. Each week, check blade tension and alignment; clean the inside following the manufacturer's instructions; replace blades that still pull after sharpening. Figure 4 shows a stylist repairing a clipper — a skill every barber should know at a basic level.
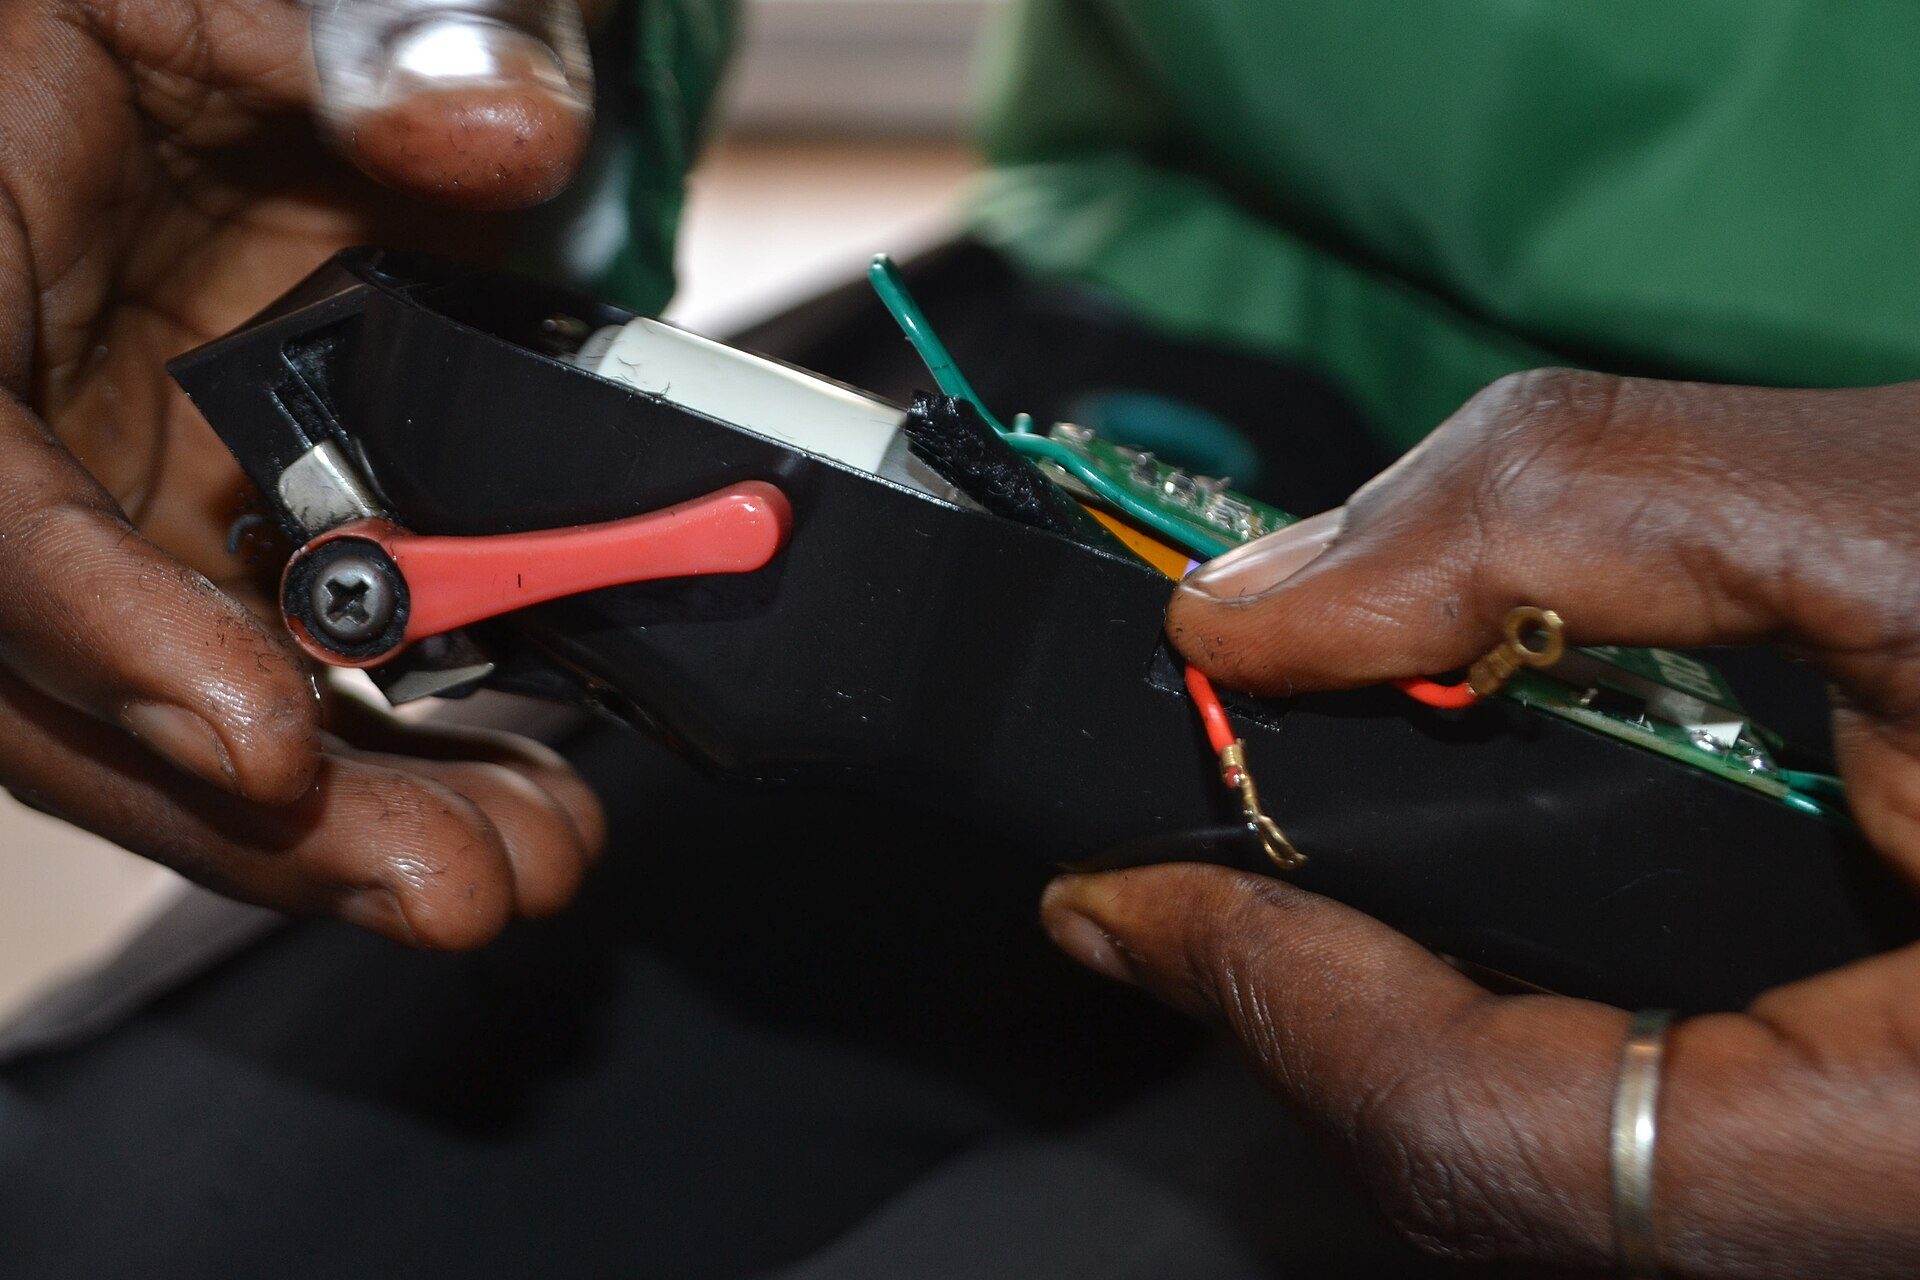
Photo: Kwamitsey / Wikimedia Commons, CC BY 4.0

Towels, capes and neck dusters
Use a clean towel and a fresh neck strip for each client; wash or disinfect the neck duster regularly. Keep clean and used tools in separate places so they never mix.
Frequently asked questions
What is the difference between a low, mid and high fade?
The height where the transition starts: low just above the ear, mid at the temple, high near the parietal ridge. A skin fade is when the bottom is shaved to the skin, at any height.
Which clipper guards are used for a fade?
Typically a #3 (10 mm) or #4 (13 mm) base, a #1 (3 mm) or no-guard guide, blended with #1.5 and #2. Skin fades add a foil shaver for the bottom.
How often should a fade be recut?
Every 2–4 weeks. Skin and high fades show regrowth faster, so usually 2–3 weeks; a low fade can go 3–4 weeks.
How long does it take a beginner to learn fades?
Usually around 30–50 heads with someone grading your work before you can produce line-free fades consistently. Practise on a mannequin head first, then friends, and only then paying clients.
Should I do a skin fade on a client with acne on the nape?
Do not shave close over inflamed acne. Keep a longer guard over that area or switch to a non-skin fade, and suggest the client see a dermatologist if the acne is extensive or long-lasting.
Practice exercises and self-assessment
- On a mannequin head, cut a low, mid and high fade and photograph 4 angles under the same light.
- Measure hair length after each guard in your own set with a ruler and make your own chart.
- On 3 models, cut a mid fade timing each step as in the worked example, and record the total.
- Carry out the 5-step clipper cleaning routine between two models with someone observing.
Self-assessment criteria
- Pass: under strong light, no line is visible at 50 cm; the guide line differs by no more than 0.5 cm between sides.
- Pass: step times add up to your total; all 5 cleaning steps done between clients; no shaving over damaged skin.
- Not yet: lines or holes remain, the fade is higher than agreed, or the disinfection step was skipped.
Once your fades are consistent, you are ready for the next step on the path: Popular men's styles: side part, undercut, mohican — applying the fade to each style and adjusting for thick, coarse Asian hair. See the 8-step barber learning path.