Stick welding for beginners comes down to five things: wear the right protective gear, pick an easy-running 2.5 mm or 3.2 mm rod such as E6013, set the current for the rod diameter (roughly 60–90 A for 2.5 mm and 90–130 A for 3.2 mm), strike the arc with a match-like scratch, then hold a short arc about one rod diameter long and drag the rod steadily, tilted 10–20° back toward the finished weld. Most beginners fail not because their hands are clumsy but because the current is wrong and the arc is too long. This lesson goes step by step the way a senior welder coaches an apprentice in a Vietnamese workshop, with a defect table and a 7-session practice plan that has rod and plate costs already worked out.
By the end of this lesson, you will be able to:
- Prepare full protective gear, choose the correct helmet shade and set up a work area that is safe from fire and electric shock.
- Choose a 2.5 mm or 3.2 mm rod for the plate thickness, set a starting current from the chart, and fine-tune it by ±10 A using your eyes and ears.
- Strike an arc within two attempts and keep arc length and rod angle steady for a whole rod.
- Run a straight 150–200 mm bead on flat plate with an even width, remove the slag cleanly and grade it pass or not yet.
- Recognise porosity, slag inclusion, undercut and a stuck rod, and correct them on the next run.
Want to learn welding in the right order? Stick welding in the flat and vertical positions is step 4 of the roadmap — after arc safety, reading weld symbols, and cutting and bevelling. See the 8-step welder roadmap to know what to learn first and what comes next.
What is stick welding, and why should beginners start here?
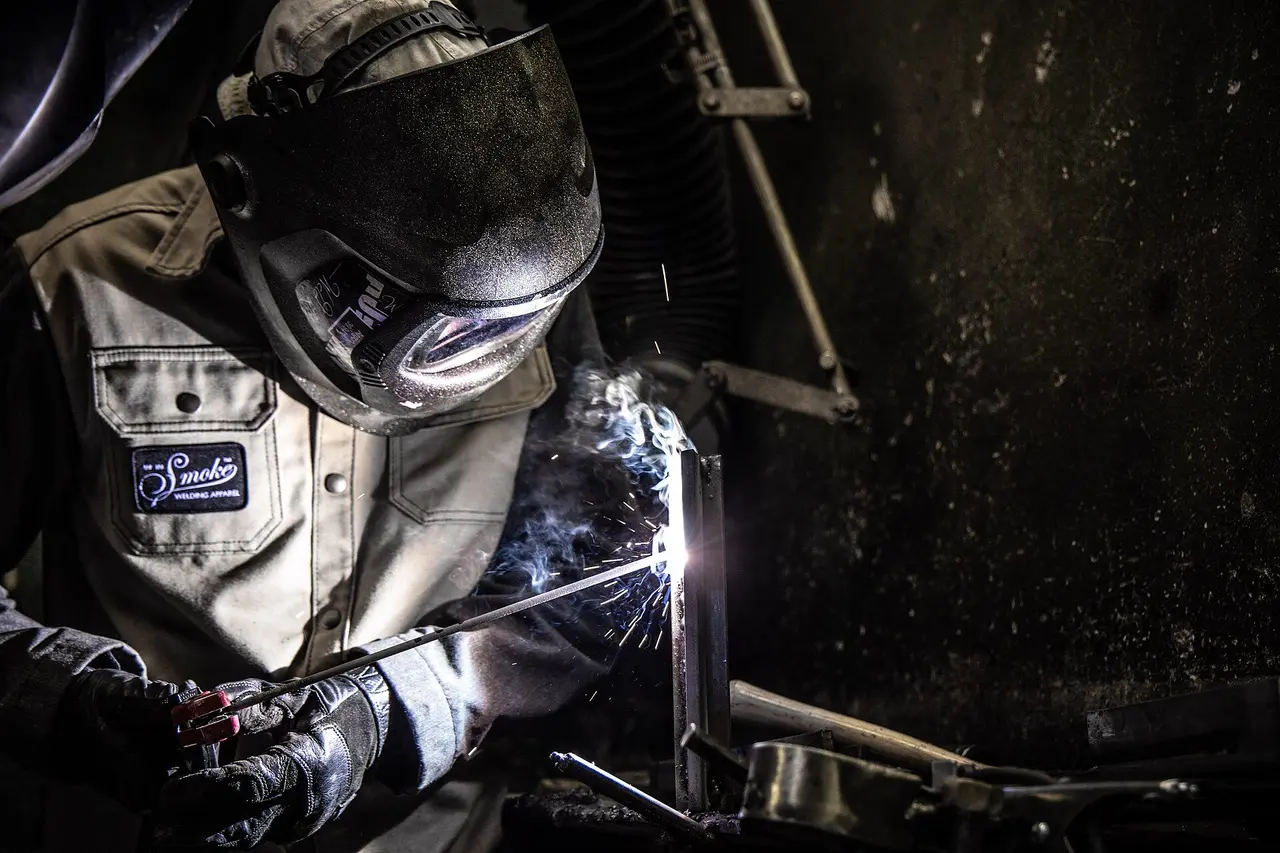
Stick welding, known internationally as SMAW (shielded metal arc welding) or MMA (manual metal arc), uses a welding machine to create an electric arc between the tip of a coated rod and the steel workpiece. The heat melts the rod's core wire and the edges of the plate into a weld pool; the flux coating on the rod burns to produce gas and slag that shield the hot metal from the air. When the weld cools, the slag forms a crust on top which you chip away. Figure 1 shows a welder at work with a stick electrode.
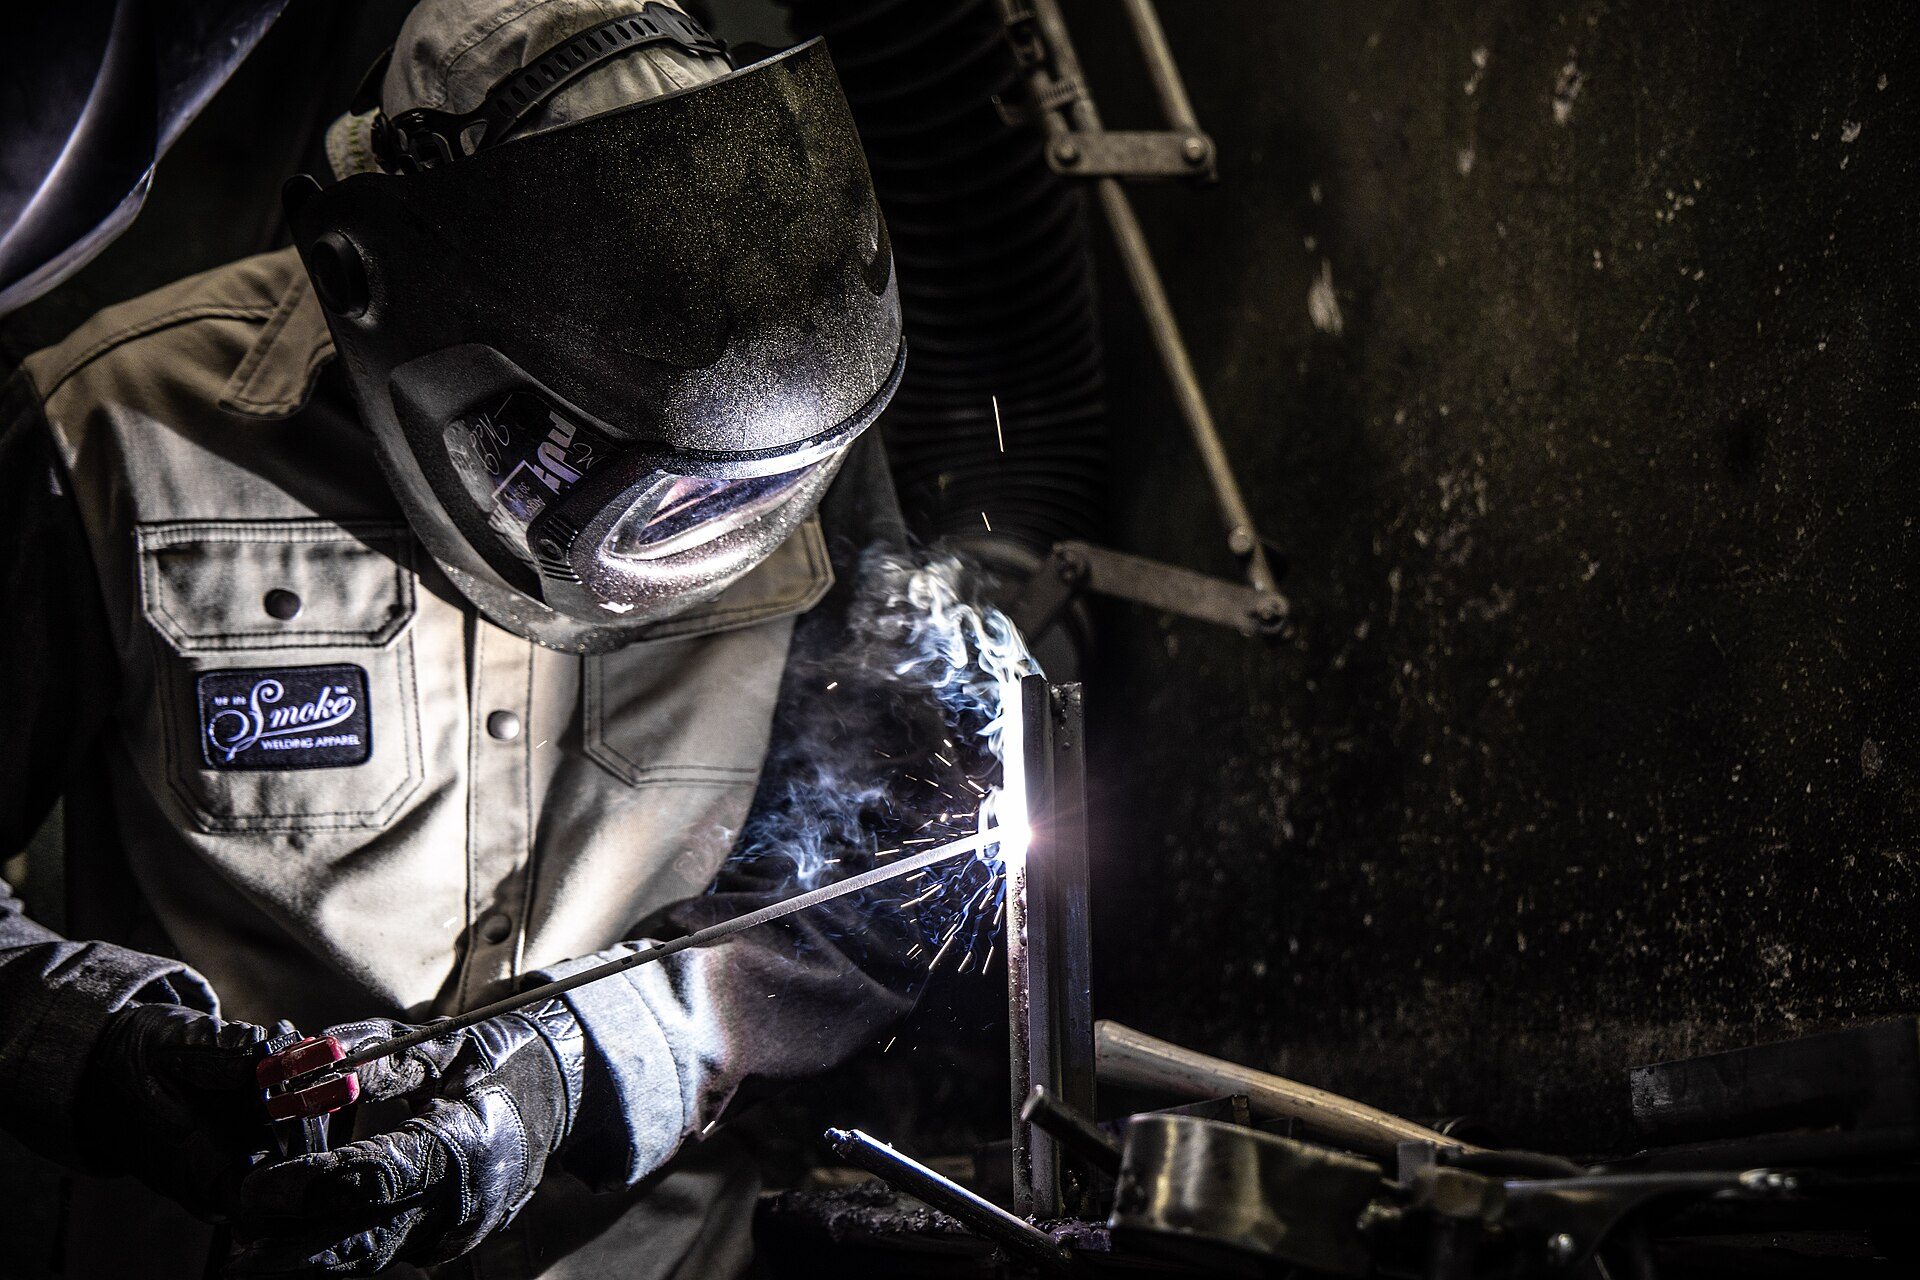
Photo: Weldscientist / Wikimedia Commons, CC BY-SA 4.0

Why it suits apprentices in Vietnam
A 200 A inverter stick welder is compact, runs on a 220V single-phase supply, and costs roughly 1.5–4 million VND in 2026 (about 60–160 USD). It needs no gas cylinder and can work outdoors in a light breeze, which makes it a good fit for steel gates, roof frames and on-site repairs.
Why it is harder than it looks
The rod gets shorter as it burns, so your hand has to move forward and, at the same time, feed the rod down steadily to keep the gap between the rod tip and the weld pool (the arc length) constant. Welders who are solid at stick welding pick up MIG/MAG and TIG much faster.
Safety before you strike an arc
The arc gives off ultraviolet light that can burn your eyes and skin within seconds, sparks can start fires, and the electrode holder is connected directly to the machine's welding circuit. Safety is not optional reading.
A helmet with the right shade
The filter shade (darkness, rated by DIN number) is chosen by current. For stick welding at roughly 60–150 A, the usual choice is shade 10–11; above about 150 A use shade 11–12. An auto-darkening helmet (typically adjustable from shade 9 to 13) helps beginners because they can see the plate clearly before striking. Never use sunglasses in place of a welding filter.
Gloves, clothing and boots
Wear long-cuff leather welding gloves that are dry and free of holes. Wear a long-sleeved shirt and long trousers made of heavy cotton or flame-resistant fabric; do not wear nylon, polyester or synthetic blends, because hot spatter melts synthetic fibres and sticks them to your skin. Button the collar, keep pockets closed, and let your trouser legs cover the top of your insulated safety boots. Figure 2 shows typical full-coverage gear.
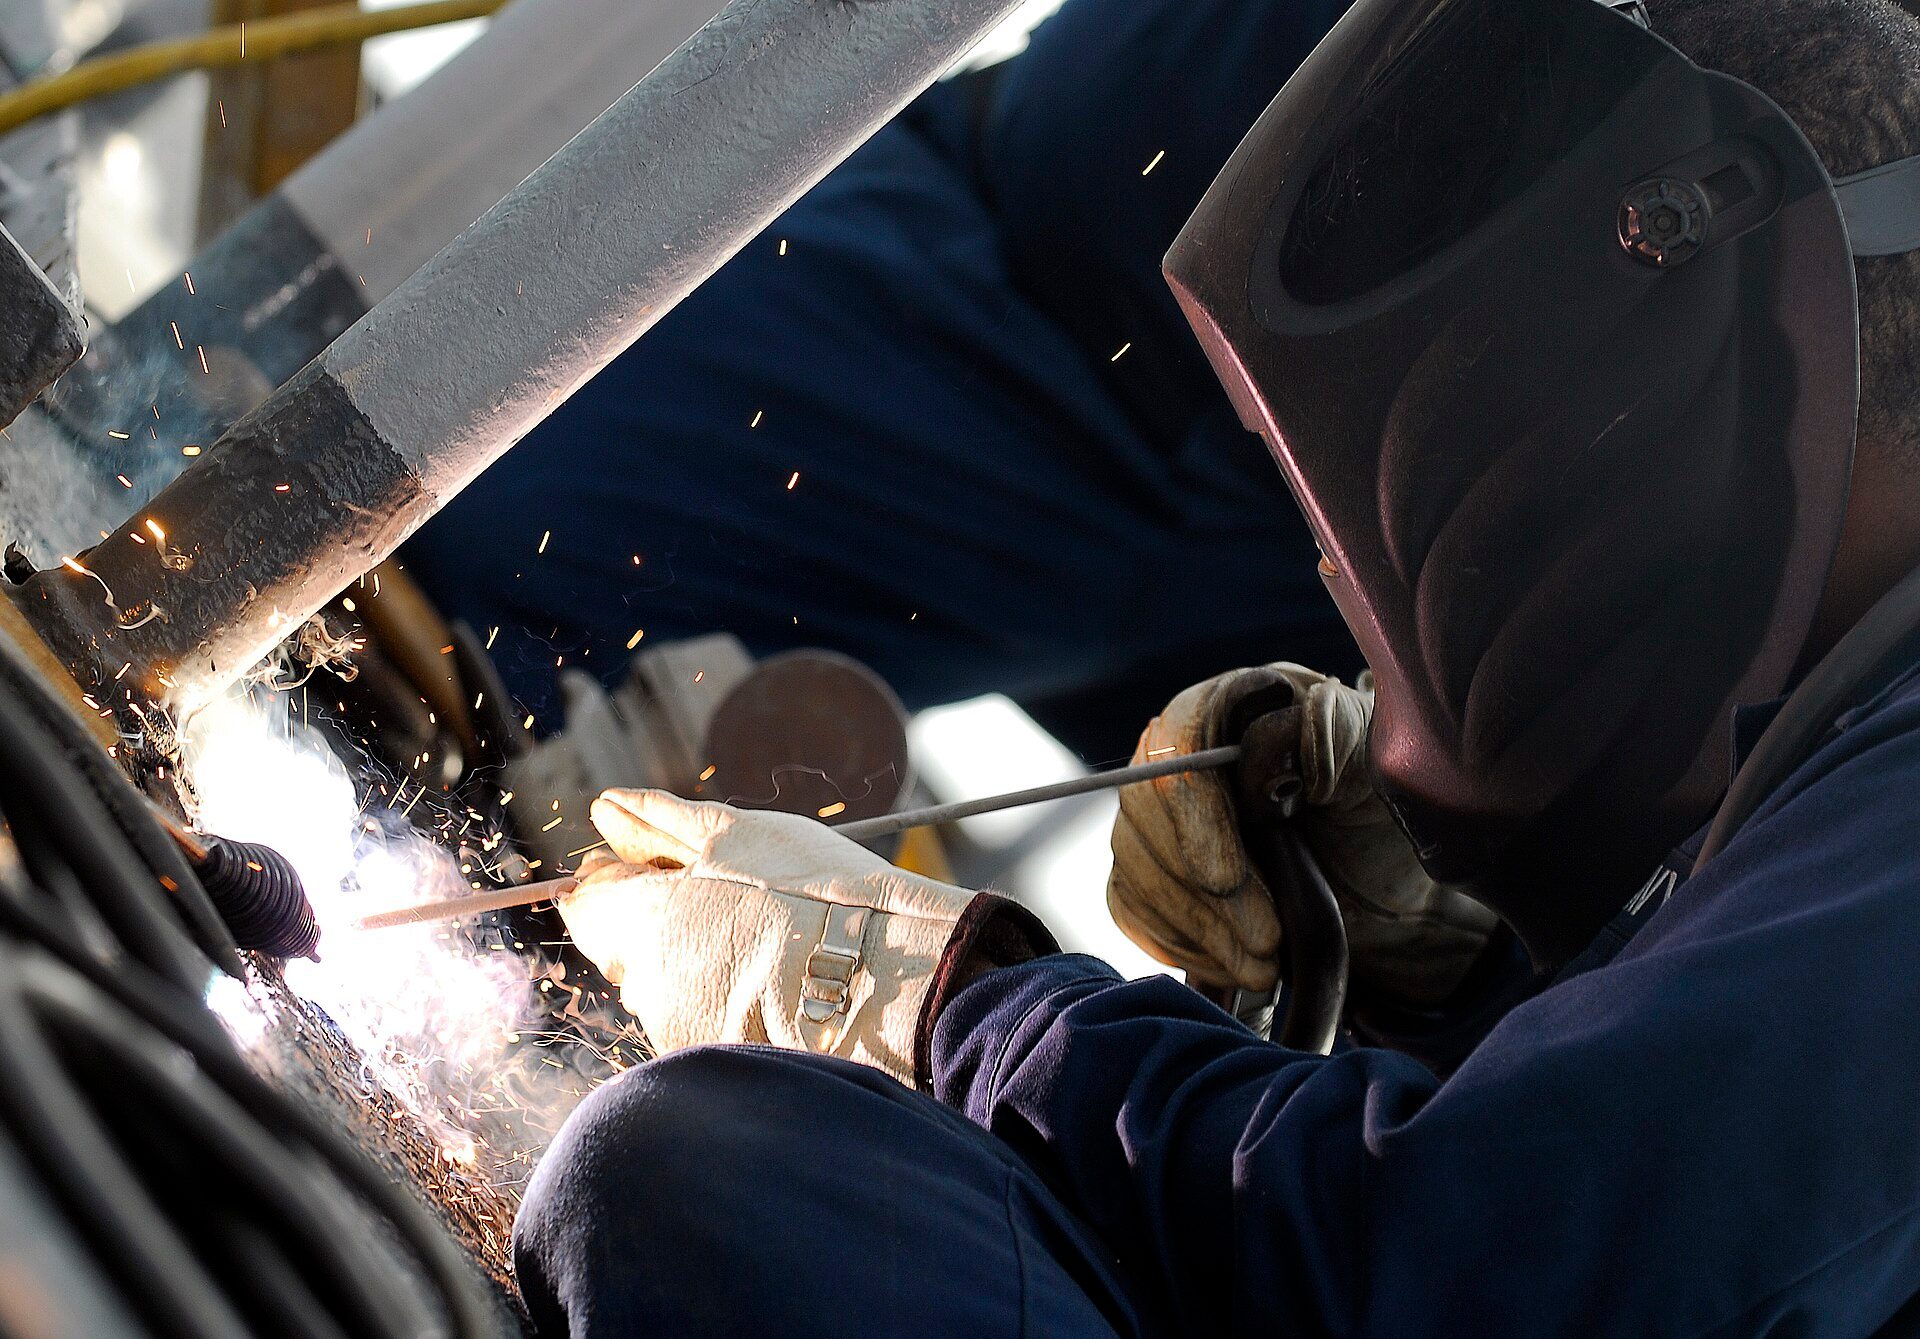
Photo: U.S. Navy photo by Mass Communication Specialist 2nd Class Joshua J. Wahl / Wikimedia Commons, Public domain

Fumes, fire and electric shock
Welding fume contains metal dust and toxic gases. Weld in a ventilated space or with an extraction fan that pulls the fume away from your face, and keep your head out of the plume. Do not weld galvanised sheet, painted steel or oily steel until it has been ground clean and fume extraction is in place — zinc fume causes "metal fume fever".
Safety warning: clear paper, wood, fuel and gas cylinders from a radius of about 10 m around the work, and keep a fire extinguisher and a bucket of water ready; after welding, watch the area for at least 30 minutes because sparks can smoulder. Never weld drums or tanks that have held petrol, oil or chemicals. Wet conditions make electric shock far more likely: do not stand on wet floors, do not weld with wet gloves or sweat-soaked clothes, stand on dry wood or a rubber mat, check that welding cables have no cracked insulation, clamp the earth (work) lead firmly close to the joint, never wrap cables around your body, and change rods only with dry gloves. If the machine makes strange noises, smells burnt or gives you a tingle through the casing, switch off at the breaker and have a qualified person check it. If your eyes feel gritty, water and become sensitive to light after a session ("arc eye"), see an eye doctor rather than using drops of unknown type.
Machine, tools and choosing your rods
The minimum kit is a 200 A inverter stick welder, an electrode holder, an earth clamp (which connects the second cable to the plate or bench), a helmet, leather gloves, a chipping hammer, a wire brush and an angle grinder (see Figure 3).
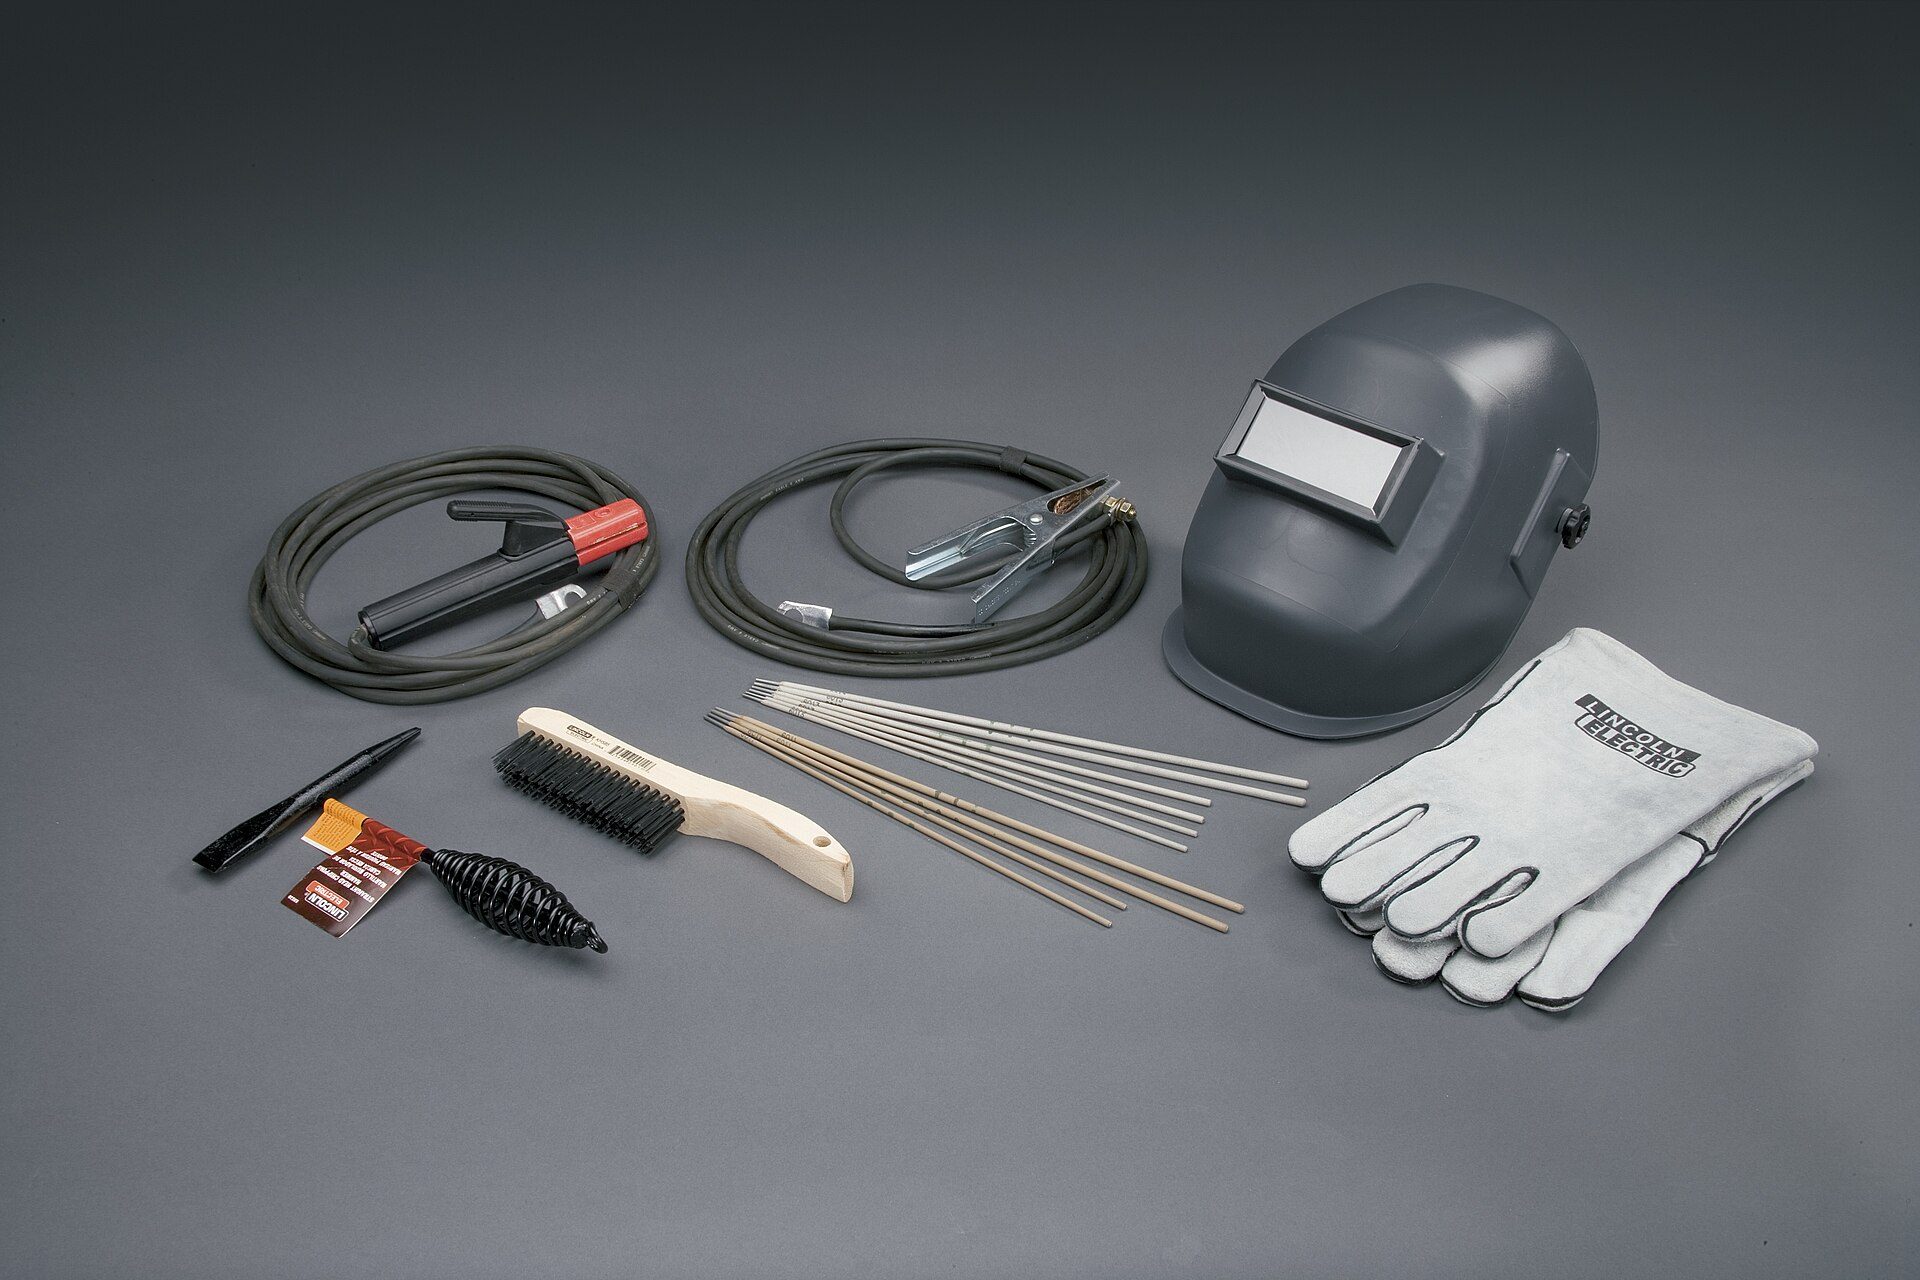
Photo: Mgschuler / Wikimedia Commons, CC BY 3.0

Reading E6013 and E7016
In the widely used AWS classification, the letter E means an arc welding electrode; the first two digits give the minimum tensile strength (60 is about 60,000 psi, 70 about 70,000 psi); the third digit shows the usable positions (1 means all positions); and the last digit indicates the flux type and current type. Boxes sold in Vietnam may also carry codes from other standards, so read the label for the coating type, recommended current and drying requirements.
| Feature | E6013 group (rutile coating) | E7016 group (low hydrogen) |
|---|---|---|
| Ease of striking | Easy, smooth arc | Harder, sticks easily for beginners |
| Slag | Peels off easily, smooth bead surface | Clings more, needs thorough chipping |
| Weld strength and toughness | Enough for gates, frames, light structures | High, for load-bearing structures and thick steel |
| Storage | Keep dry; dry lightly per the label if damp | Must be kept dry and baked per the label before use |
| Suits beginners | Very well — use it for the first 4 sessions | Only once you can hold a steady arc |
Choosing rod diameter by plate thickness
Rule of thumb: 2–4 mm plate takes a 2.5 mm rod; 4–8 mm plate takes a 3.2 mm rod; thicker plate and multi-pass work move up to 4.0 mm. A rod that is too small will not penetrate; a rod that is too large on thin plate burns through and undercuts. Beginners should practise on 5–6 mm plate because it rarely burns through.
Holding the rod in the electrode holder
Clamp the bare core wire at the end of the rod in the jaws, either square to the holder or angled in the jaw groove (Figure 4). A loose grip heats the holder and makes the arc unstable. Change the rod when about 30–40 mm of stub remains.
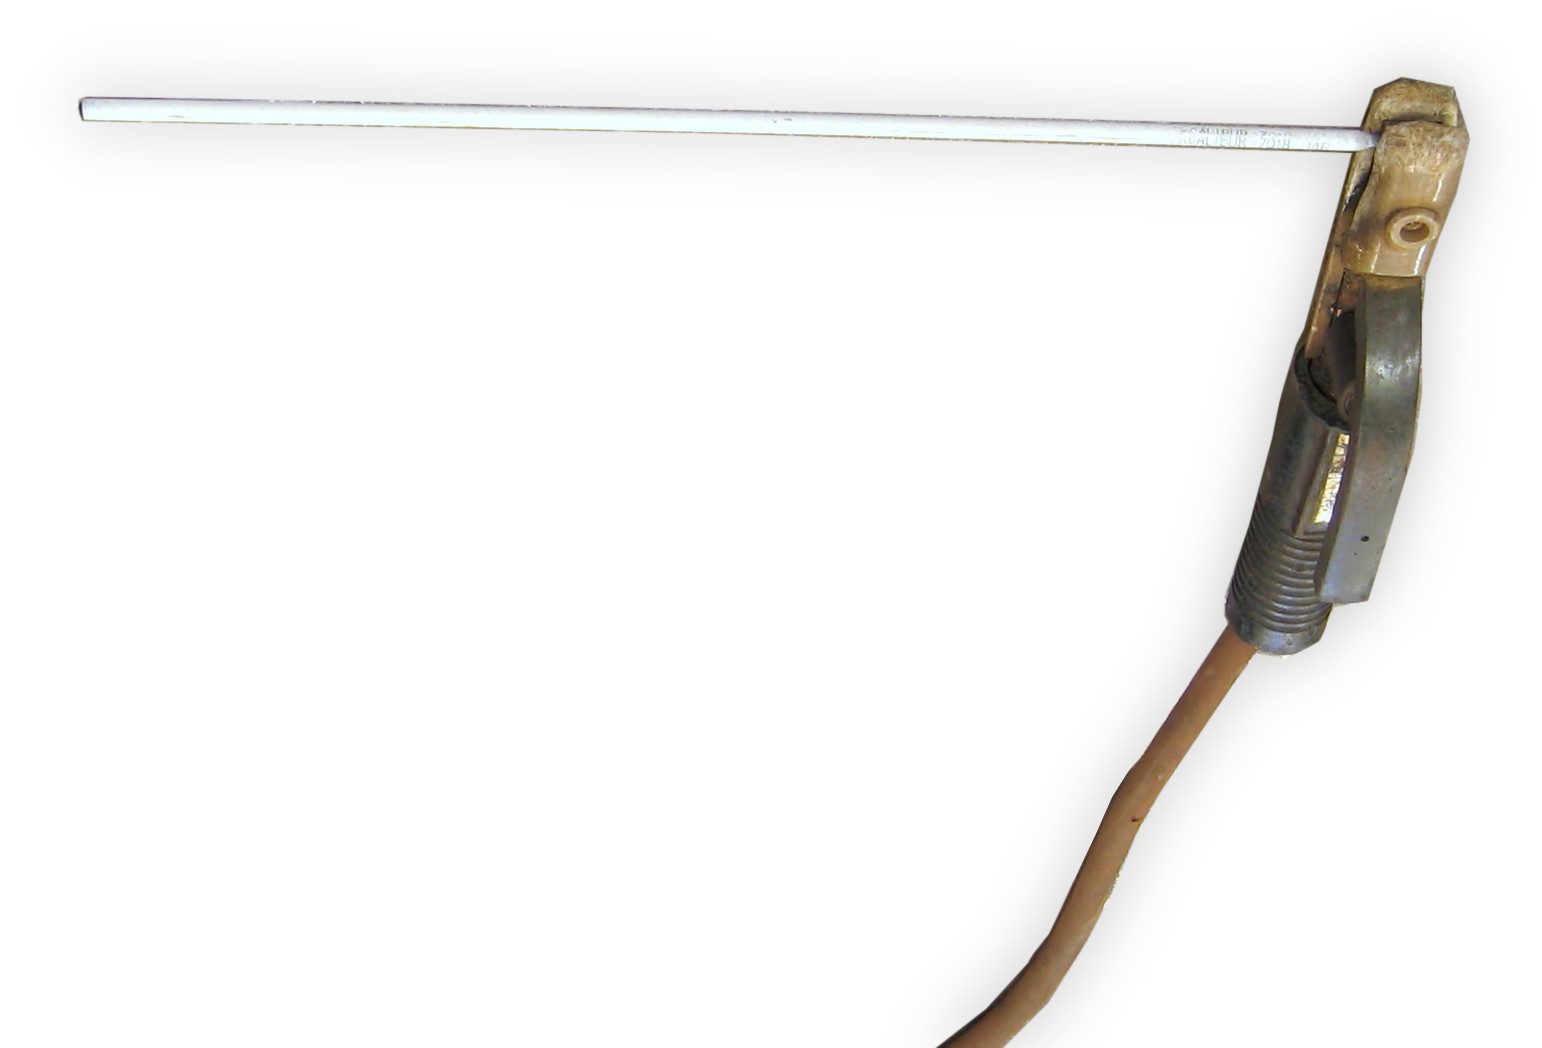
Photo: Wikipedia:en:User:Triddle (original), Curkuma Putz (cut) / Wikimedia Commons, CC BY-SA 4.0

Setting the current for the rod diameter
Current (amps) controls heat. Too low and the rod sticks, the bead sits high and rounded with poor fusion; too high and you get heavy spatter, a rod glowing red along its back half, and edges gouged out (undercut). The chart gives starting currents for E6013 rods in the flat position; always prefer the range printed on the box if it differs.
| Rod diameter | Suggested plate thickness | Starting current (A) |
|---|---|---|
| 2.0 mm | 1.5–3 mm | 40–70 |
| 2.5 mm | 2–4 mm | 60–90 |
| 3.2 mm | 4–8 mm | 90–130 |
| 4.0 mm | 6 mm and up, multi-pass | 130–170 |
For vertical welding (3F), current is usually about 10–15% lower than in the flat position.
Quick rule: about 30–40 A per millimetre of diameter
A 3.2 mm rod × 35 A ≈ 112 A, right in the middle of 90–130 A. Start mid-range, run a 50 mm test bead on scrap, then adjust in steps of 5–10 A. The dial on a cheap machine can be well off, so the weld pool is the final judge.
Listen and look to confirm the setting
- Right: a steady "frying bacon" sizzle, the pool wets out to both edges, slag flows behind.
- Too low: the rod keeps sticking, the arc goes out, the bead sits tall and round like a worm.
- Too high: loud popping, large spatter, a glowing rod, grooves along the edges.
Core technique: striking, rod angle, arc length, travel speed
Correct one factor at a time; do not change all four at once.
Striking the arc: scratch it like a match
- Hold the rod tip about 20 mm from the start point and lower your helmet (or have the auto-darkening helmet ready).
- Scratch the tip lightly across the plate for 10–20 mm like striking a match; as soon as it sparks, lift it about 3–5 mm.
- Bring the rod back to the start point, lower it to a short arc about one rod diameter long, then begin to travel.
- The tapping method (touch straight down and lift) is for tight spots where you cannot scratch; it is harder and sticks more often for beginners.
If the rod sticks: twist your wrist sharply to snap it free; if that fails, open the holder to release the rod, let it cool and remove it with pliers, never with bare hands.
Rod angle: 70–80° to the plate, dragging toward the finished weld
In the flat position, keep the rod square to the plate side to side and tilt it 10–20° back toward the finished weld, so it sits about 70–80° from the plate surface. This "drag" pushes the slag behind the pool so it cannot run ahead and get trapped.
Arc length: about one rod diameter
For a 2.5 mm rod keep a gap of about 2.5 mm; for 3.2 mm about 3 mm. A long arc hisses and causes spatter, porosity and undercut; too short and the rod sticks. Watch the weld pool, not the bright light, and feed the rod down at the same rate it burns away.
Travel speed: bead width about 2–3 times the rod diameter
A 3.2 mm rod run straight without weaving gives a bead about 6–9 mm wide. Narrow and tall means you are going too fast or the current is low; wide and flat with the plate glowing red means too slow. One 350 mm long 3.2 mm rod usually lays about 150–200 mm of bead.
Practising straight beads on flat plate
Every welder's first exercise is running straight, parallel beads on a flat steel plate ("bead on plate") to train your hand to keep the four factors steady.
Preparing the plate
Take a 5–6 mm carbon steel plate about 150 × 200 mm and grind off rust, paint and oil down to bright metal. Mark straight lines 20–25 mm apart with soapstone. Lay the plate flat on the bench and clamp the earth lead to a clean spot.
Running a complete bead
- Strike the arc at the start of the line and hold for 1–2 seconds until the pool forms.
- Drag along the line at 70–80°, short arc, even speed. Counting a rhythm in your head helps.
- At the end of the line, pause briefly to fill the crater, then lift the rod quickly to break the arc.
- Wait until the bead turns from red to grey, chip the slag with the hammer striking away from your face, then brush it clean (see Figure 6).
A good bead has an even width, regular ripples, and both edges fused smoothly into the plate. Compare the ripple pattern with Figure 5.
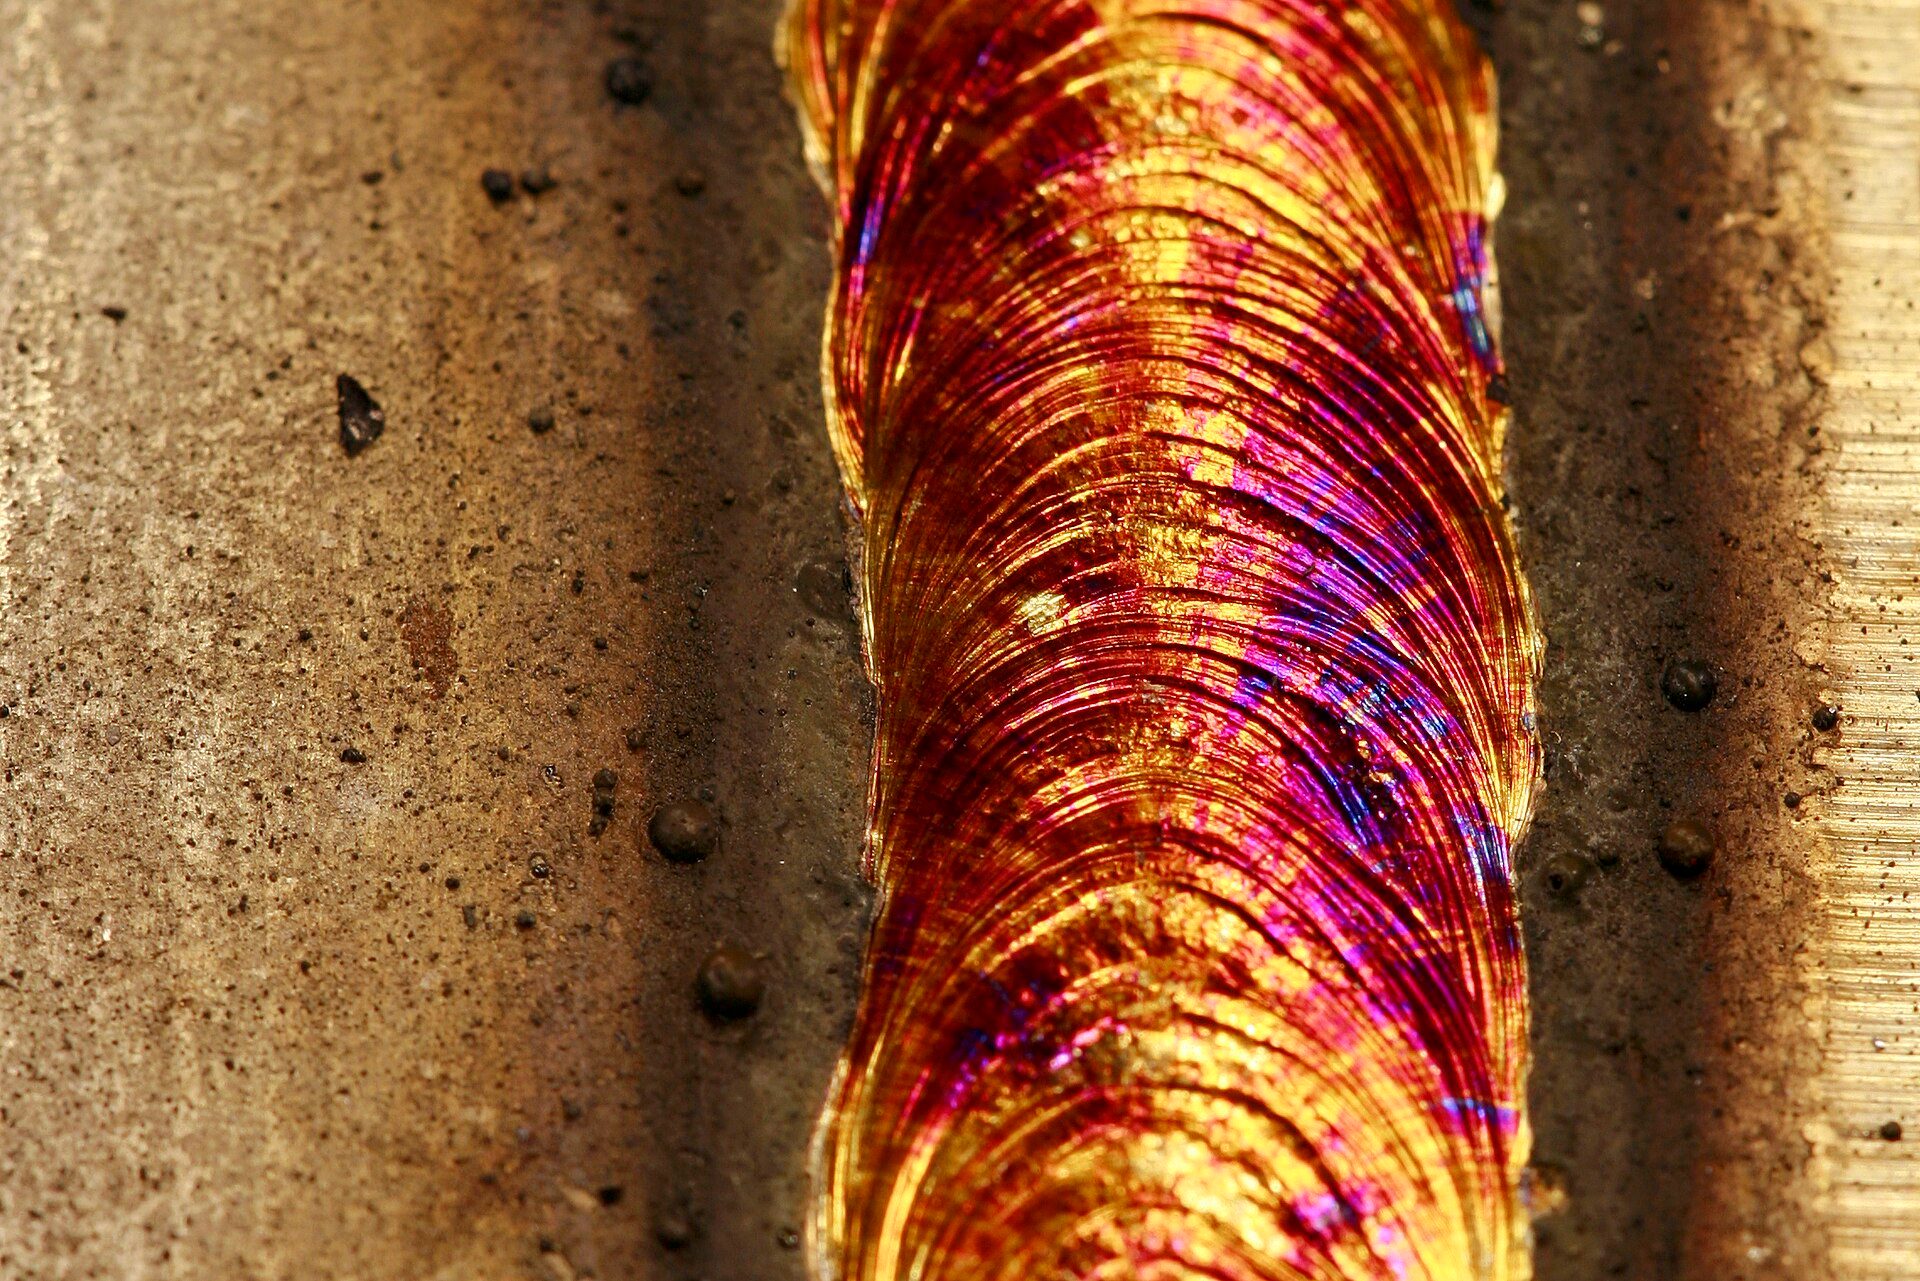
Photo: Tanel Eensoo / Wikimedia Commons, CC BY-SA 3.0

Restarting with a new rod
When a rod runs out mid-bead, chip the slag from the end crater, strike the new rod 10–15 mm ahead of the crater, drag back to the middle of the crater and continue. A good tie-in has no lump and no dip.
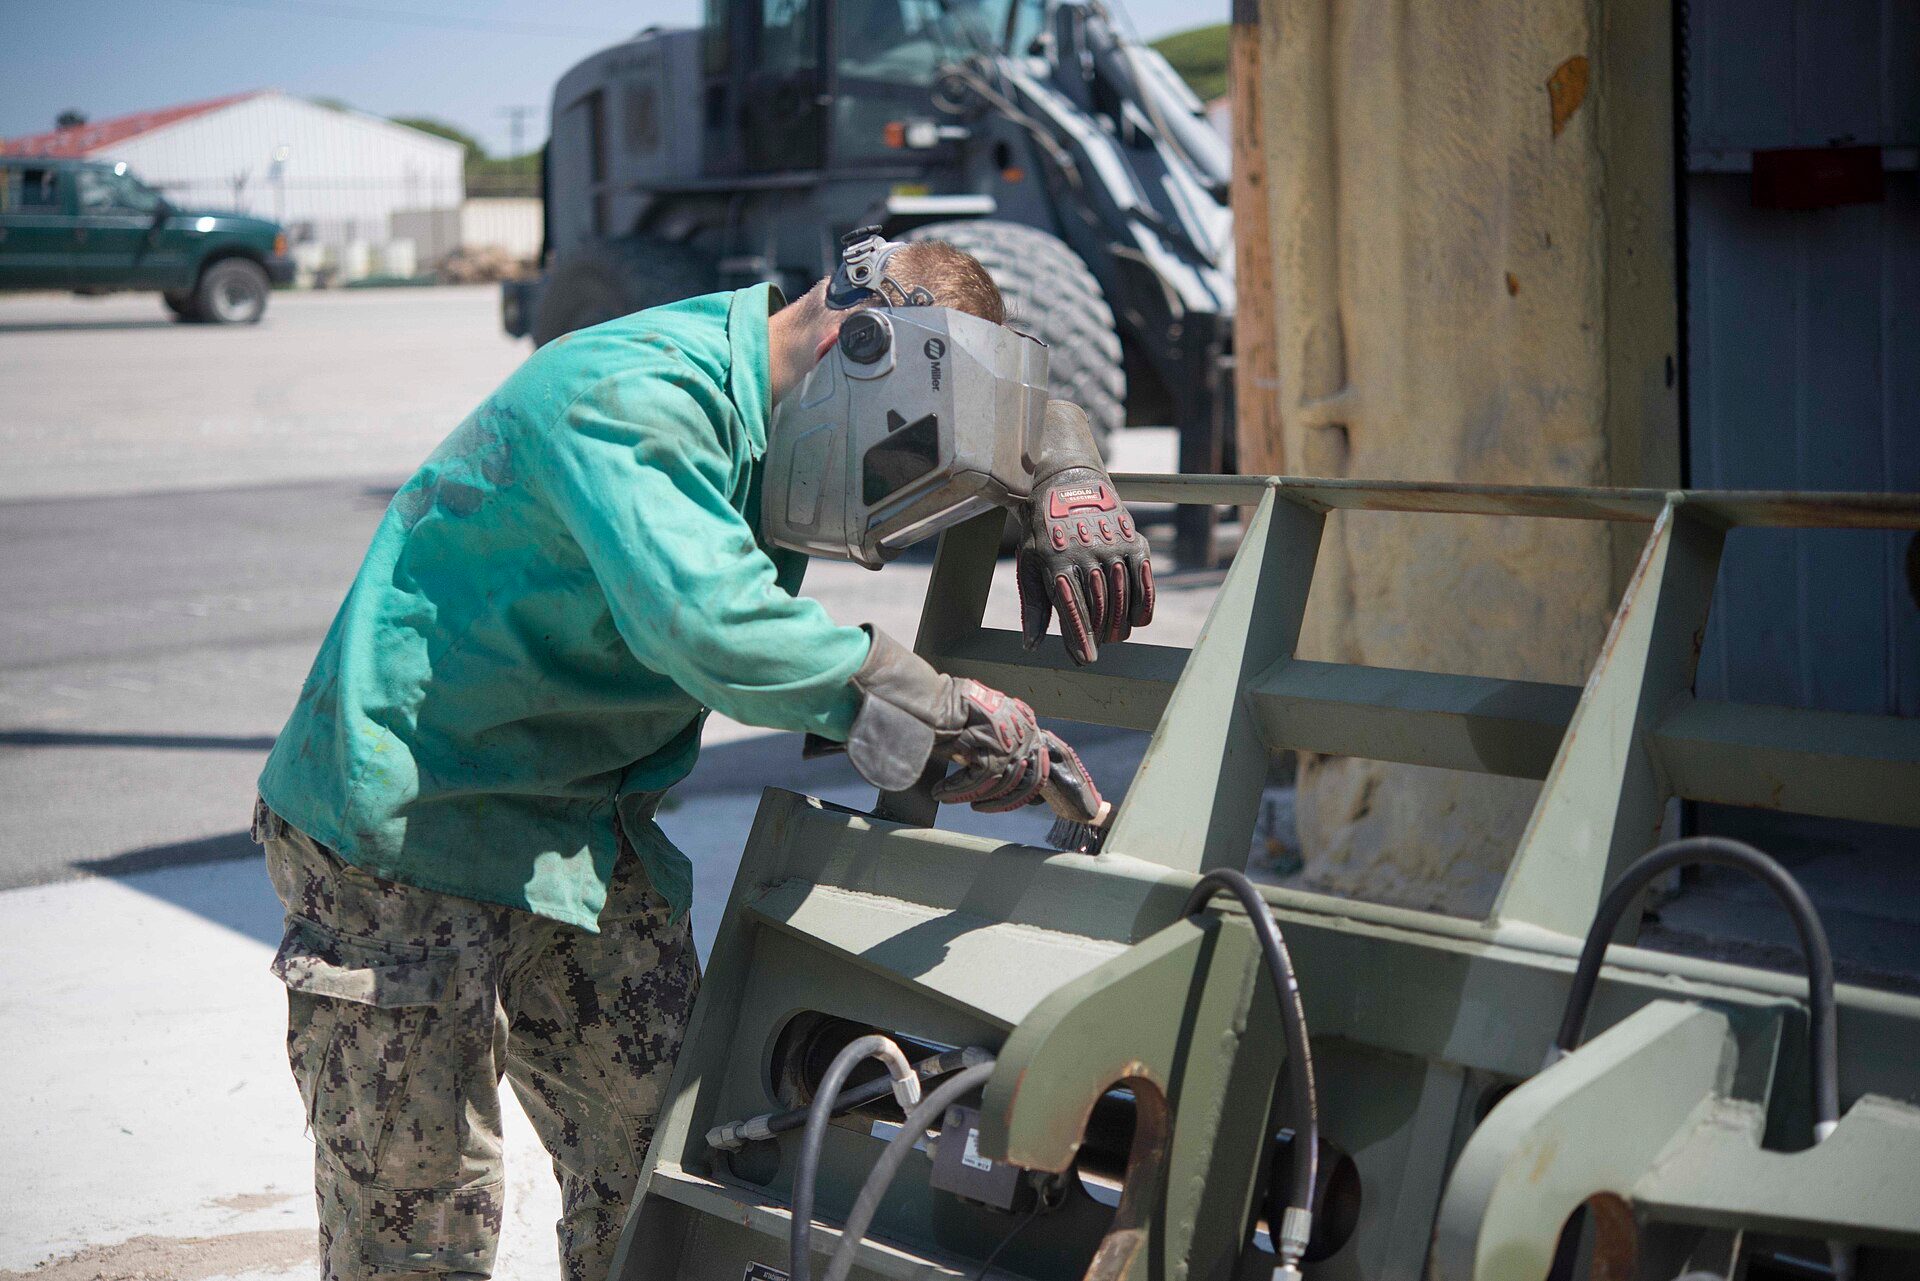
Photo: U.S. Navy photo by [null Courtesy] / Wikimedia Commons, Public domain

Common stick welding defects and how to fix them
Note the defect after each rod, check it against the table, and correct one cause on the next rod.
| Defect | Sign | Common causes | Fix |
|---|---|---|---|
| Porosity | Small holes on or inside the bead | Damp rods, long arc, draughts, rust, oil or paint on the plate | Dry rods per the label, keep a short arc, block the wind, grind the plate clean |
| Slag inclusion | Dark slag streaks trapped in the bead or between passes | Slag not cleaned from the previous pass, wrong angle letting slag run ahead, low current | Chip and brush between passes; drag at 10–20°; add 5–10 A |
| Undercut | A groove along the edge of the bead | High current, long arc, travelling fast, rod leaning to one side | Drop 5–10 A, short arc, rod square side to side, slow slightly at the edges |
| Stuck rod | The rod welds itself to the plate when striking | Low current, heavy tapping, damp rod, pushing the rod in too far | Add 5–10 A, scratch-start, lift as soon as it sparks |
| Tall bead, poor fusion | A rounded bead whose edges do not flow into the plate | Low current, travelling too slowly or too fast | Raise current, adjust speed for a width of 2–3 rod diameters |
| Heavy spatter | Metal beads stuck around the weld | High current, long arc, damp rods | Lower current, short arc, dry rods |
Grinding out defects and habits that help
On practice beads, grind out porosity or slag inclusions back to clean metal and reweld; on real structural welds, follow the shop's repair procedure. Run one test rod on scrap at the start of every session to lock in the current, keep rods in a closed box, and rest your elbow on the bench to steady your hand.
Worked example: a 7-session practice plan with rod and plate costs
Tuan, 24, has been allowed to use a corner of a friend's steel-gate workshop in the evenings: 3 hours per session, 7 sessions, 21 hours in total. He uses the workshop's welder and safety gear and buys his own rods and plate. Prices are 2026 references and vary by region and shop (1,000 VND is roughly 4 US cents).
Schedule and rod count
| Session | Content | Rod | Rods used |
|---|---|---|---|
| 1 | Safety, machine set-up, scratch and tap starts | 2.5 mm E6013, 80 A | 20 |
| 2 | Hold a short arc, run short beads of 80–100 mm | 2.5 mm E6013 | 30 |
| 3 | Straight 150 mm beads with an even width | 2.5 mm E6013 | 35 |
| 4 | Restarts, parallel beads overlapping by 1/3 | 2.5 mm E6013 | 35 |
| 5 | Move to 3.2 mm rods on 6 mm plate, 200 mm beads | 3.2 mm E6013, 110 A | 30 |
| 6 | Flat T-joint fillet weld (1F), tacked at both ends | 3.2 mm E6013 | 30 |
| 7 | Test: 3 straight 200 mm beads + 1 fillet weld 1F, self-graded | 3.2 mm E6013 | 20 |
| Total | 2.5 mm: 120 rods · 3.2 mm: 80 rods | ||
Check: 2.5 mm = 20 + 30 + 35 + 35 = 120 rods; 3.2 mm = 30 + 30 + 20 = 80 rods. One kilogram of 300 mm long 2.5 mm rods holds about 40 rods, so 120 rods ≈ 3 kg. One kilogram of 350 mm long 3.2 mm rods holds about 27 rods, so 80 rods ≈ 3 kg (27 × 3 = 81 rods, one spare). The count per kilogram varies slightly by coating; check the box.
Reference costs
| Item | Quantity × unit price | Amount |
|---|---|---|
| E6013 rods, 2.5 mm | 3 kg × 50,000 VND | 150,000 VND |
| E6013 rods, 3.2 mm | 3 kg × 50,000 VND | 150,000 VND |
| Scrap steel plate 5–6 mm (cut to about 150 × 200 mm) | 20 kg × 20,000 VND | 400,000 VND |
| Grinding and cutting discs | 5 discs × 15,000 VND | 75,000 VND |
| Electricity (estimated 3 kWh per session) | 21 kWh × 3,000 VND | 63,000 VND |
| Total | 838,000 VND (about 33 USD) | |
Adding up: 150,000 + 150,000 + 400,000 + 75,000 + 63,000 = 838,000 VND. Reference 2026 prices are about 40,000–70,000 VND/kg for rods and 15,000–25,000 VND/kg for scrap plate, depending on the area. A 150 × 200 × 6 mm plate weighs about 1.4 kg and can be welded on both sides, so 20 kg (about 14 plates) covers all 7 sessions. If you have no gear of your own, add an auto-darkening helmet and leather gloves for about 400,000–1,200,000 VND.
How Tuan tuned the current in session 5
3.2 mm rod, 6 mm plate: he set 110 A. The first test rod stuck twice and the bead sat tall, so he raised it to 120 A. The second rod ran smoothly but left a small groove on the left edge, so he kept 120 A and squared the rod side to side. The third rod passed; he wrote "3.2 mm – 120 A – shop machine" in his notebook.
Frequently asked questions
Can a beginner teach themselves stick welding?
You can practise the hand skills alone, but have an experienced welder with you at least for the first session. To work in a fabrication shop or on an overseas contract, you will need a position certification, which is the final step of the roadmap.
How long does it take to weld neatly?
Usually about 20–30 hours of guided practice to run even straight beads in the flat position; vertical and overhead welds that pass a bend test take a few more months.
Should I start with E7016 rods?
No. Low-hydrogen rods are harder to strike, stick easily and must be kept dry. Practise with E6013 until you can hold a steady arc, then move to E7016 rods that have been baked according to the label.
What should I do if my eyes hurt after welding?
Gritty, red, watering eyes a few hours after seeing an unshielded arc are signs of an ultraviolet burn. Stop welding, do not rub your eyes, and see an eye specialist, especially if the pain is severe or your vision is blurred. Next time check your filter shade and warn people standing nearby.
Practice exercises and self-assessment
- Strike the arc 10 times in a row with the scratch method on a 2.5 mm rod and record how many times it sticks.
- Run 5 straight 150 mm beads on 5–6 mm plate, chip the slag and measure the width at 3 points on each bead.
- Run 3 beads at 3 current settings (low, right, high) and note the differences in sound, spatter and shape.
Self-assessment criteria
- Pass: you strike the arc at least 8 times out of 10 without sticking; your gear is complete, you wear no synthetic fabric, and combustibles have been cleared.
- Pass: a 150 mm bead varies in width by no more than about 2 mm between measuring points, with no porosity, no visible slag inclusion and no obvious undercut.
- Not yet: you lift the helmet while the arc is still burning, weld on a wet floor, or the bead has porosity or slag inclusions in more than 2 places.
Once you can run even straight beads and a defect-free 1F fillet, keep practising vertical 3F welds within this step, then move on to the next step of the roadmap: MIG/MAG welding for steel structures — setting voltage, wire speed and gas flow and welding factory frames and steel gates.
Keep going in welding: after stick welding come MIG/MAG, TIG on stainless and aluminium, out-of-position welding and 3G–6G certification. See the 8-step welder roadmap to track your progress.