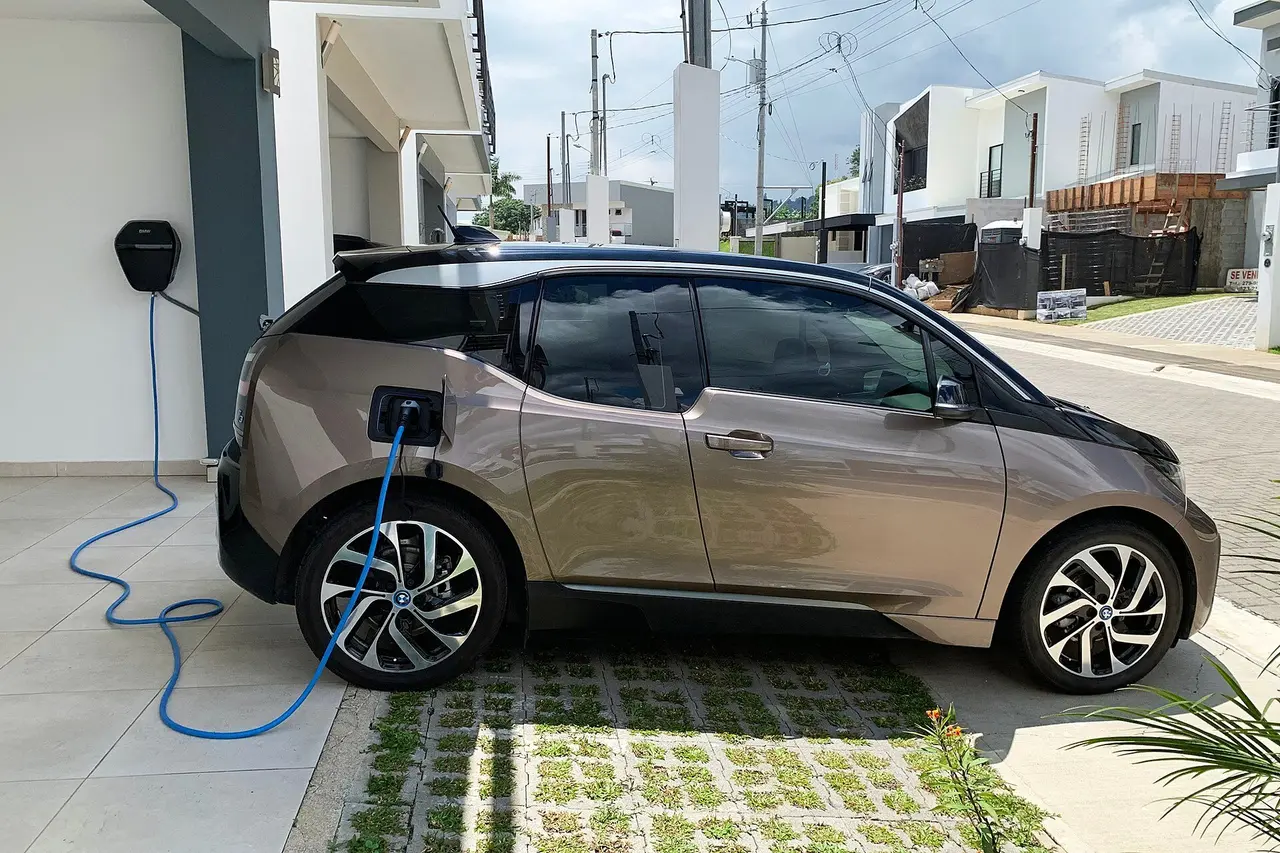
The most common way to charge an electric car at home is an AC wall-mounted charger (wallbox) of about 7 kW on single-phase 220 V, drawing up to 32 A, fed by a dedicated circuit from the consumer unit with its own circuit breaker, the right type of residual current protection, a cable of adequate size and good earthing. If the car is not driven much, a portable charger plugged into a 10–16 A socket may be enough: slower, but with almost no installation cost. Before installing, survey the meter rating, the consumer unit and the parking spot; in an apartment building you need the management board's approval. All final values follow the car maker's and charger maker's guidance and the regulations in force.
By the end of this lesson, you will be able to:
- Explain why AC charging power is limited by the on-board charger, the wallbox and the household supply.
- Compare a 7 kW wallbox with a portable charger in charging time, supply requirements and cost.
- Survey a house: meter rating, existing loads, mounting position and cable route.
- Choose cable size, circuit breaker, type of residual current protection (Type A, Type B, 6 mA DC detection) and check the earthing.
- Prepare an installation quote and estimate the monthly charging cost.
Learning to be an EV technician properly? AC and DC charging, wallboxes and stations is step 5 of the roadmap — after high-voltage safety, vehicle architecture, batteries and electric motors. See the 8-step electric vehicle technician roadmap to learn in the right order.
How AC home charging works
The car's high-voltage battery only accepts direct current (DC). When charging on AC at home, the wallbox does not "charge" the battery directly: it supplies alternating current safely and tells the car how many amps it may draw. Converting AC into DC is done by the charger built into the car (the OBC, on-board charger).
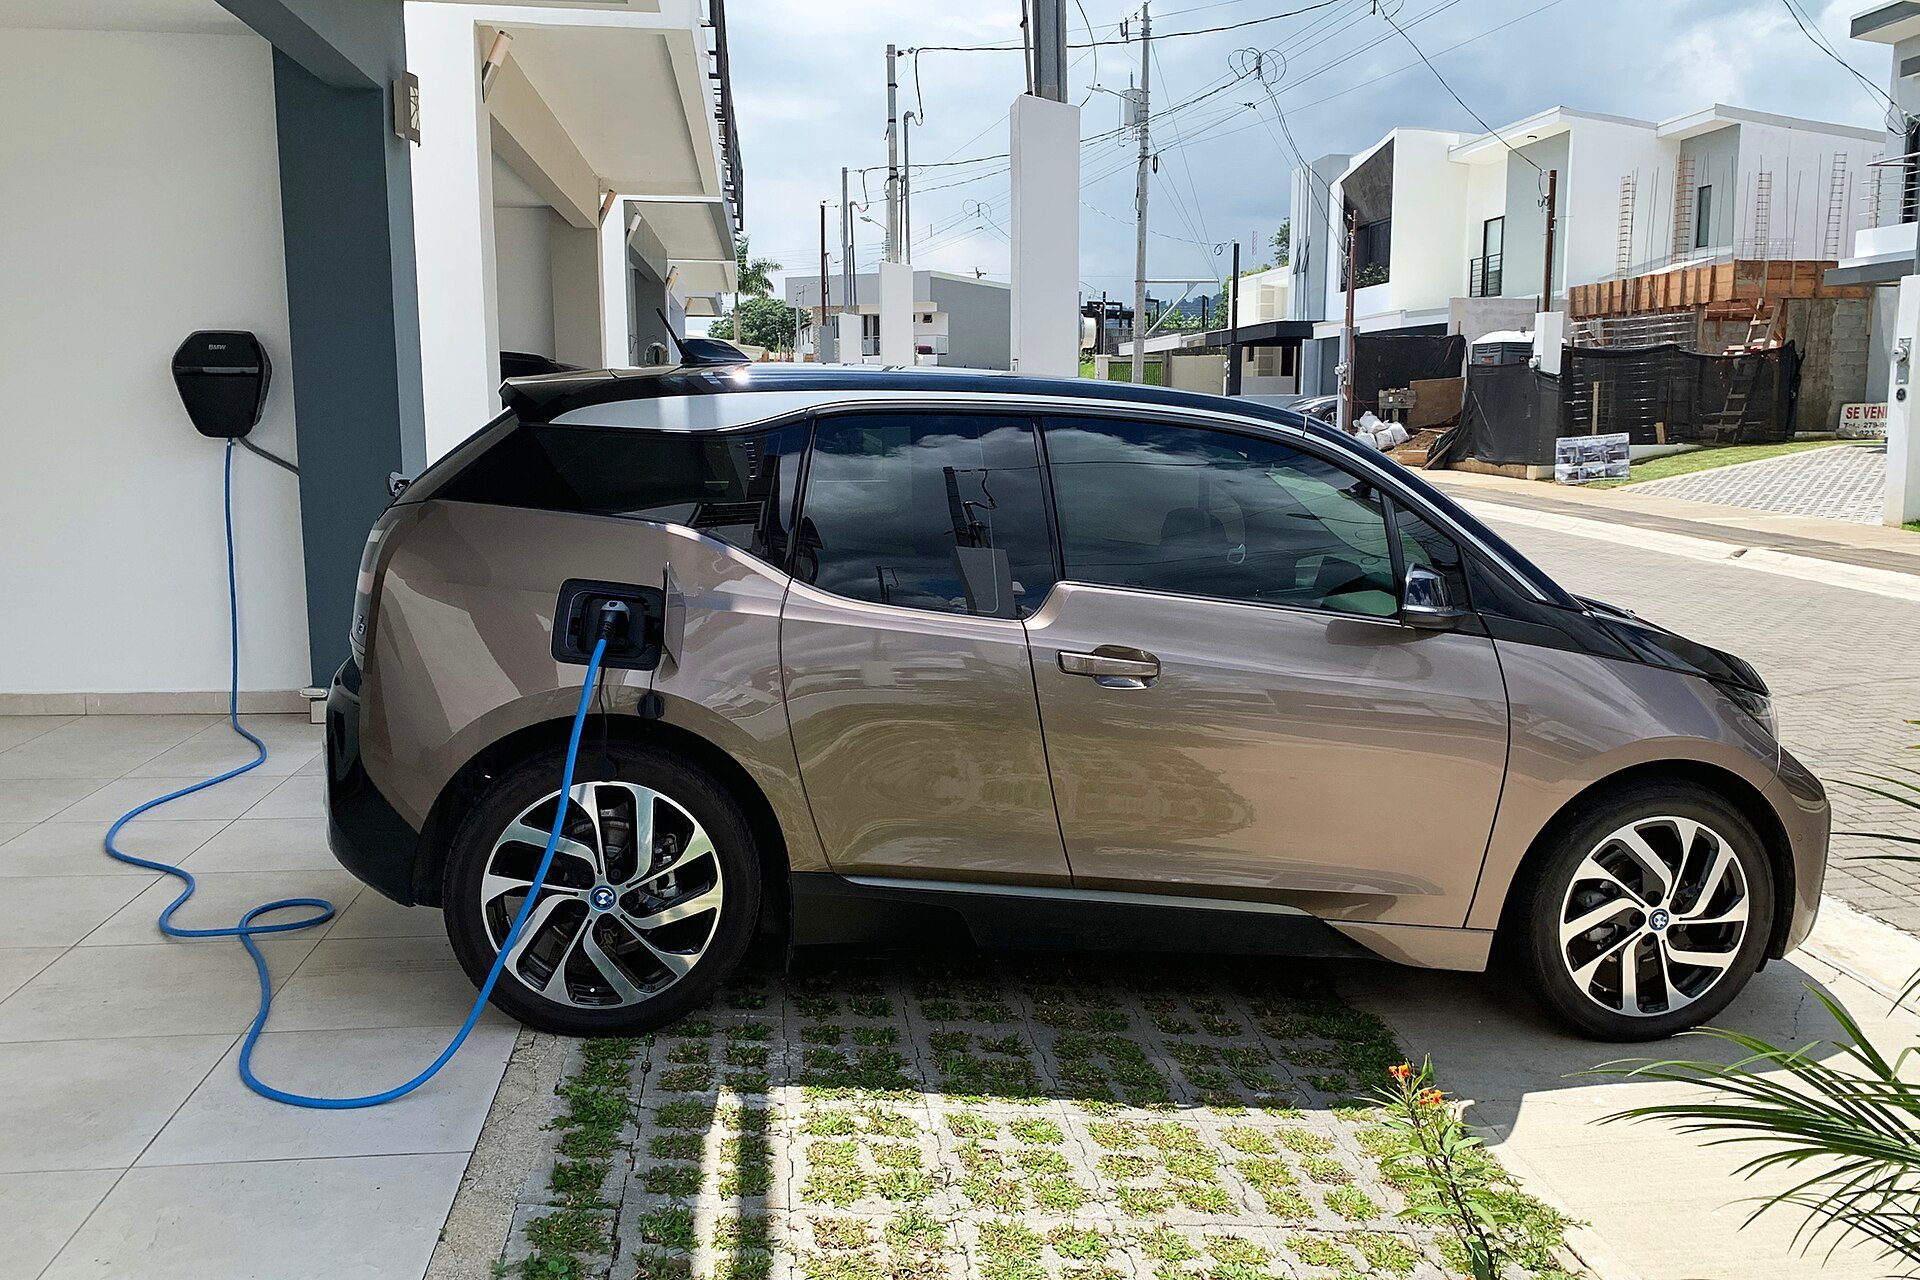
Photo: Mariordo (Mario Roberto Durán Ortiz) / Wikimedia Commons, CC BY-SA 4.0
Power is limited by the weakest link
Actual charging power is the smallest of three values: the on-board charger, the wallbox and the household supply. A car with a 7 kW OBC plugged into an 11 kW wallbox still charges at 7 kW. Conversely, a 7 kW wallbox limited to 16 A delivers only about 3.5 kW. Check the car's maximum AC charging power in the owner's manual before advising a customer to buy a large wallbox.
The Type 2 connector and control signals
Most electric cars sold in Vietnam use a Type 2 AC inlet (IEC 62196 standard), with CCS2 for DC fast charging — CCS2 is Type 2 with two large DC pins added underneath (see Figure 2). Besides the phase, neutral and earth pins, Type 2 has two signal pins: CP, which lets the wallbox and car "agree" on the current, and PP, which tells the car how many amps the cable can carry. This is why power only flows once the plug is firmly seated in the car.
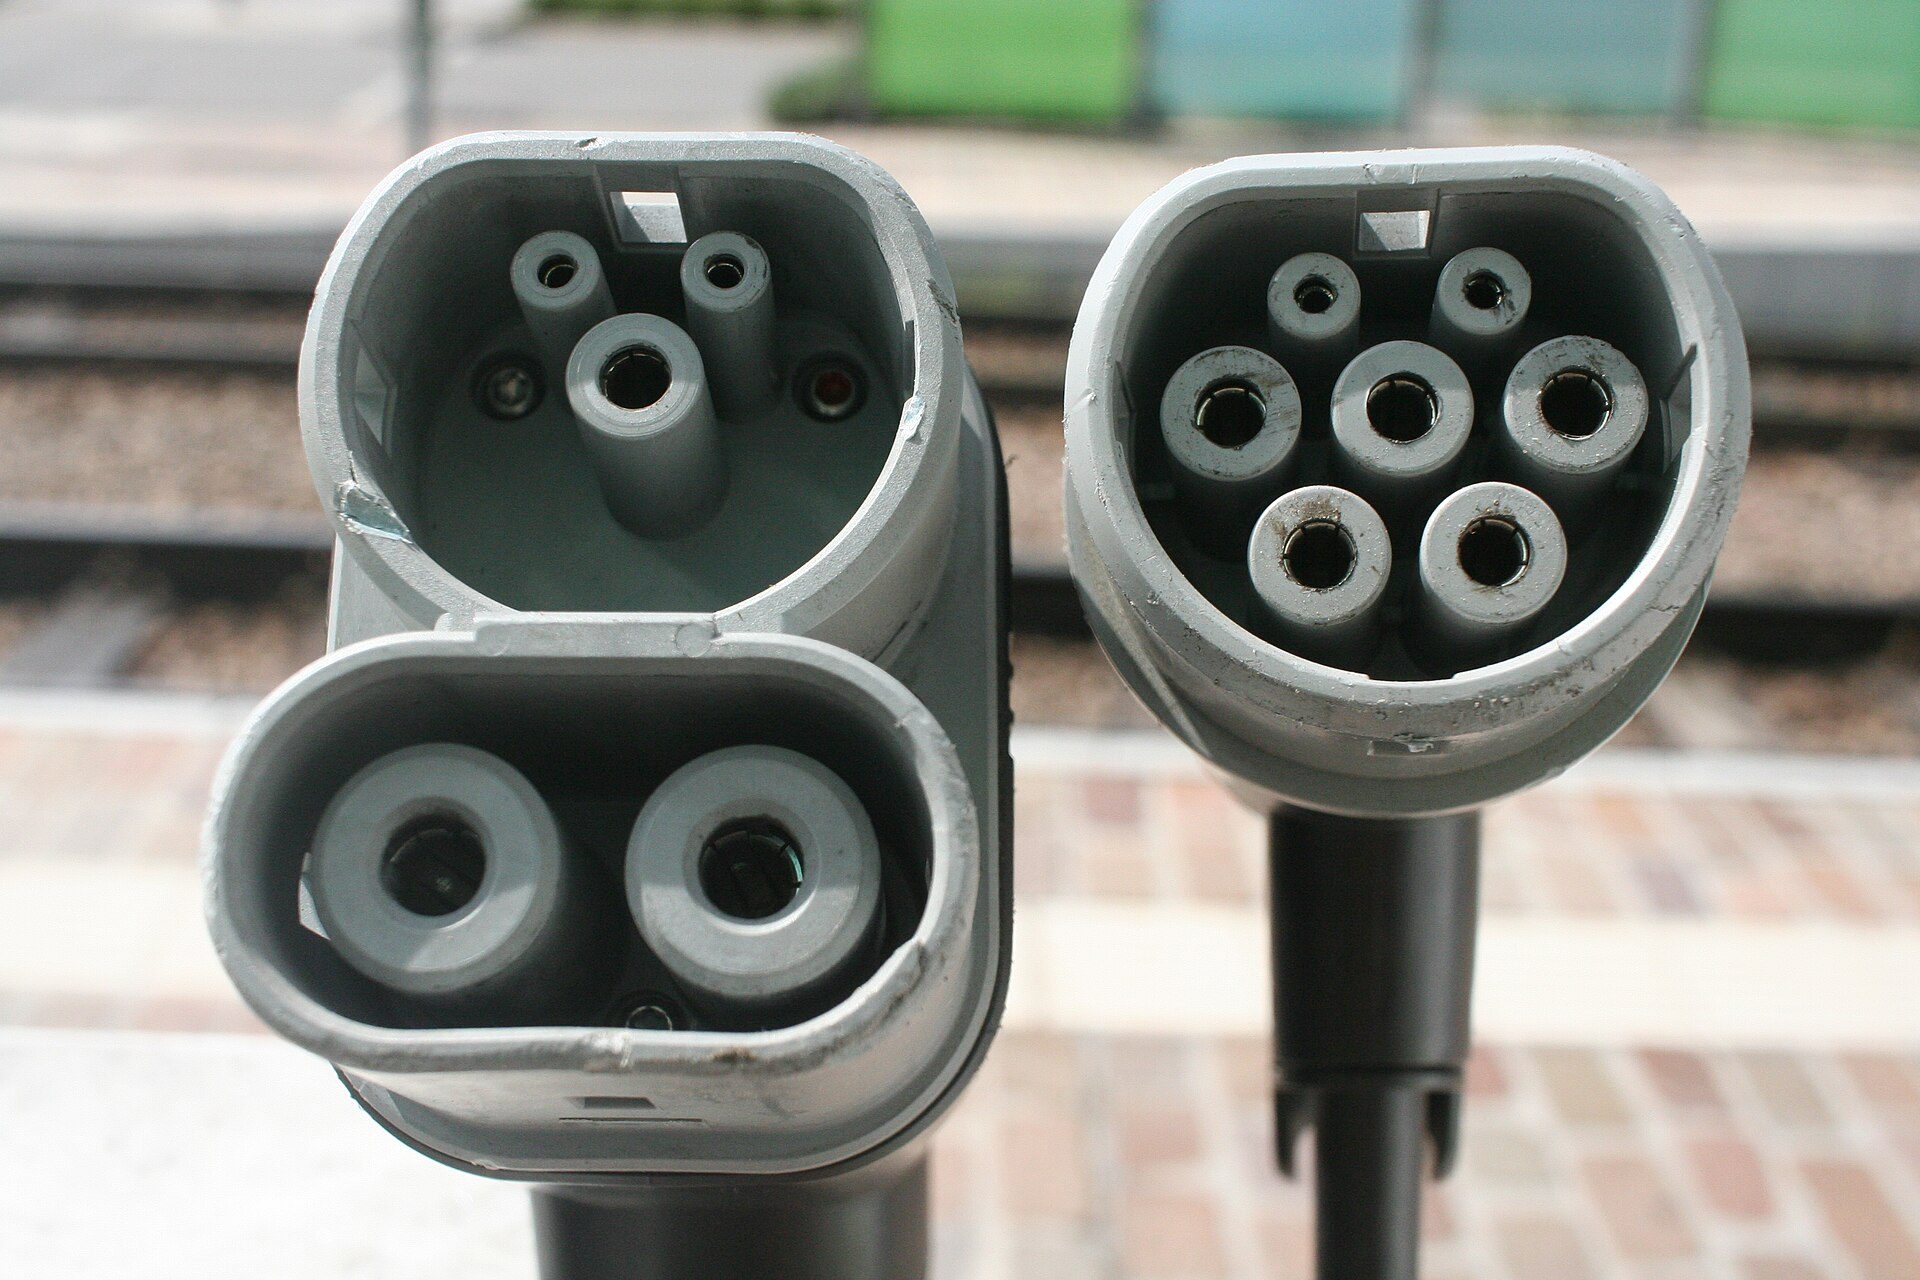
Photo: Paul Sladen / Wikimedia Commons, CC0
Working out charging time
Charging time (hours) ≈ energy needed (kWh) ÷ charging power (kW), plus about 10% for losses. A 60 kWh battery charged from 20% to 80% needs 36 kWh. At 7 kW: 36 ÷ 7 ≈ 5.1 hours, about 5.7 hours with losses. With a 2.2 kW portable charger (10 A): 36 ÷ 2.2 ≈ 16.4 hours, about 18 hours with losses.
7 kW wallbox or portable charger
A portable charger (a cable with a control box in the middle that plugs into an ordinary socket) is often supplied with the car or sold as an extra. A wallbox is fixed, more powerful, and many models offer an app for scheduling, current limiting and energy metering. The table gives 2026 reference values for Vietnam, varying by model, brand and area.
| Criterion | Portable 10 A | Portable 16 A | Wallbox 7 kW (32 A) |
|---|---|---|---|
| Power at 220 V | about 2.2 kW | about 3.5 kW | about 7 kW |
| Adding 36 kWh (with losses) | about 18 hours | about 11 hours | about 5.7 hours |
| Supply needed | Earthed socket, dedicated circuit | 16 A industrial socket, dedicated circuit | Dedicated circuit from the consumer unit |
| Equipment cost | Often included with the car or a few million VND | a few million VND | about 10–25 million VND |
| Best for | Under about 40 km a day | Average driving, overnight charging | Heavy use, fast overnight charging |
When a portable charger is enough
A car driving 30 km a day at about 15–18 kWh/100 km needs only 5–6 kWh a night — around 3 hours on 10 A. Conditions: a sound, earthed socket on a dedicated circuit with residual current protection; no multi-plug adapters or extension leads.
When to install a wallbox
When the customer drives for ride-hailing, covers 100 km a day or more, has several electric cars, or wants scheduling, current limiting and energy monitoring. A wallbox is also safer for daily charging because the terminals, cable and protective devices are all sized for a high current over many hours.
Surveying the supply before installing
A 7 kW charger is a 32 A load running for hours — bigger than a water heater or induction hob. A careful survey before quoting avoids tripping the main breaker, overheating cables and burnt terminals.
Meter rating and existing loads
Note the meter rating (for example 10(40) A means a rated current of 10 A and a maximum of 40 A), the main breaker and the size of the incoming cable. List the large loads that often run together in the evening: air conditioners, water heater, induction hob, washer-dryer. If the total plus charging exceeds what the meter, cable or main breaker can carry, there are two options: limit the charging current and schedule charging at night, or contact the local power company about upgrading the supply under current rules.
Mounting position
Mount the wallbox near the parking spot so the charging cable (usually 5–7.5 m) reaches the car's port without strain and without crossing a walkway (Figure 3). Outdoors, choose equipment with a suitable water and dust rating (for example IP54 or higher as recommended by the maker), ideally still under cover. Mounting height follows the charger maker's instructions.
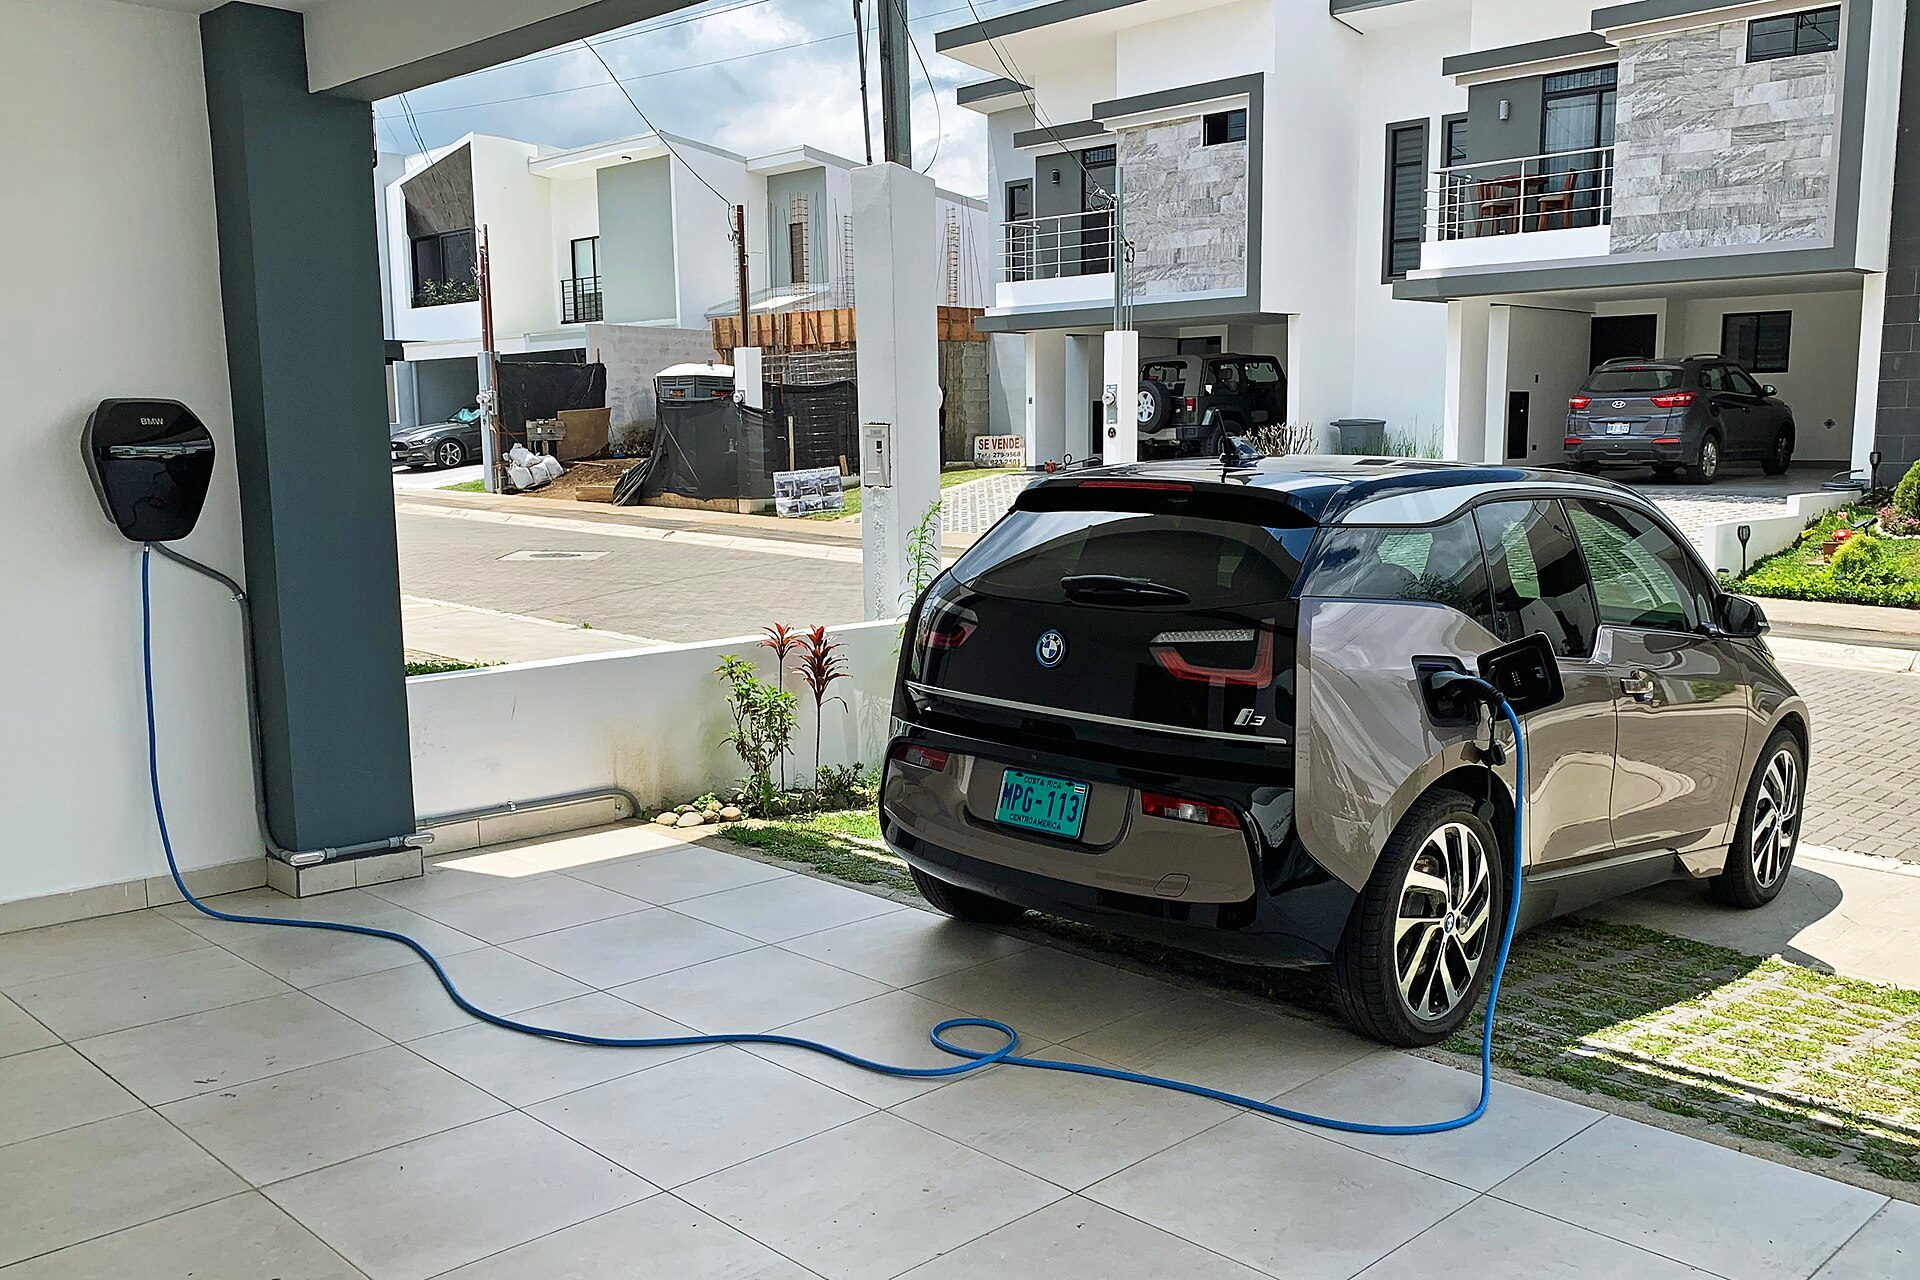
Photo: Mariordo (Mario Roberto Durán Ortiz) / Wikimedia Commons, CC BY-SA 4.0
Cable route
Measure the actual length from the consumer unit to the mounting point, including runs up and down walls. Run the cable in conduit or trunking, and avoid sharing a conduit with many other high-power circuits, which makes it run hotter. This length is used to size the cable for voltage drop in the next section.
Choosing cable, breaker, residual current protection and earthing
The table gives reference values for copper cable in conduit over a moderate length. A qualified installer must recalculate based on the installation method, length, ambient temperature and the charger maker's installation guide.
| Charger | Charging current | Reference breaker | Reference copper cable |
|---|---|---|---|
| Portable 3.5 kW | 16 A | 20 A, 2-pole | 2.5–4 mm² |
| Single-phase 7 kW wallbox | 32 A | 40 A, 2-pole | 6 mm², 10 mm² for long runs |
| Three-phase 11 kW wallbox | 16 A per phase | 20 A, 4-pole | 4 mm² per core |
Cable size: design for a continuous load
A charging car runs at full power for hours, so never choose a cable that is "just enough". The usual practice is to add a margin (for example sizing at 125% of the load current for continuous loads), then check voltage drop, usually keeping it under about 3–5% for a final circuit. If you are not confident with the calculation, see the lesson on choosing cable size by current and voltage drop (in Vietnamese) from the residential electrician career.
Residual current protection: Type A, Type B and 6 mA DC
The charging circuit must have residual current protection with a 30 mA trip threshold (Figure 4). The difference from an ordinary circuit: a charging car can produce DC leakage current. DC leakage above about 6 mA can make Type AC and Type A RCDs respond poorly, so makers usually require either a Type B RCD, or a Type A RCD combined with a 6 mA DC leakage detector (built into many wallboxes). A Type AC RCD is not suitable for an EV charging circuit. For wiring and testing RCDs, see the lesson on wiring an RCD for a home (in Vietnamese).
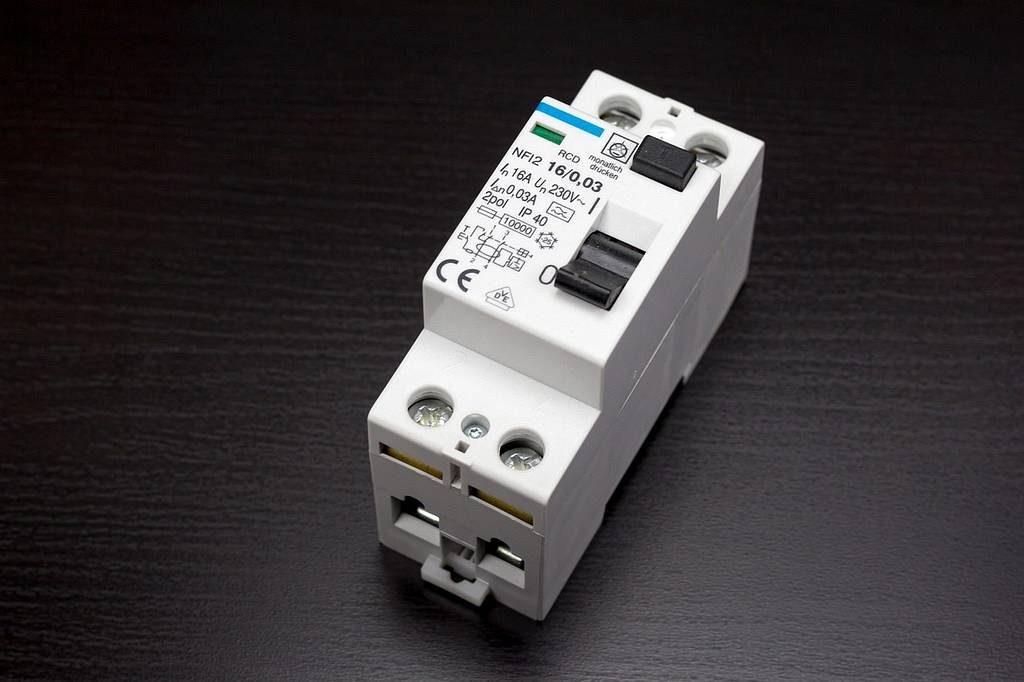
Photo: Diermaier / Wikimedia Commons, CC0
Earthing
The car's metal body is connected to the earth conductor through the charging cable, so poor earthing means the body could become live in a fault. Many wallboxes check the earth and show an error if it is missing. The earthing system must be measured with a proper earth resistance tester and meet the value the charger maker requires. Never link neutral to the earth rod to "trick" the charger.
Step-by-step installation
- Survey: meter, main breaker, existing loads, parking spot, cable length; in an apartment building, written approval from the management board.
- Agree equipment and quote: wallbox model, set current, breaker, RCD, cable size, earthing.
- Switch off at the main breaker, lock it and tag it, then test for dead with a voltage tester or meter before touching any conductor.
- Run the cable in conduit, fit a dedicated breaker and RCD for the charging circuit in the consumer unit, and label the circuit.
- Mount the wallbox at the correct height, wire it to the maker's diagram and tighten the terminals to the specified torque.
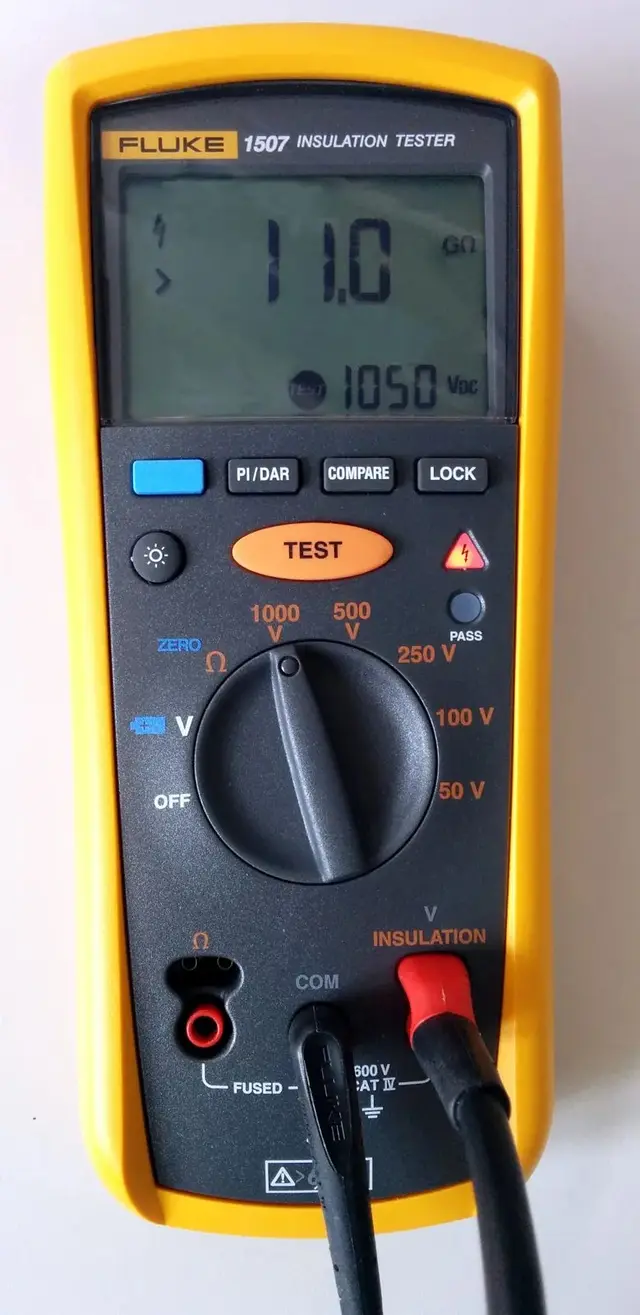
- Test: insulation resistance, earth continuity, earth resistance; energise and press the RCD's TEST button.
- Set the maximum charging current in the app or on the wallbox's switch to suit the meter, cable and breaker.
- Run a 30–60 minute test charge and check breaker and terminal temperatures with an infrared thermometer; hand over and brief the customer.
Apartments and townhouses: practical constraints
Apartments
Basement parking is common property or centrally managed, so any cable run or equipment needs the management board's approval and must meet the building's fire safety requirements. Power for a parking space usually needs its own meter. Many buildings choose managed shared charging points (Figure 5) instead of letting each household run its own cable. An installer never connects to the building's shared distribution board on their own.
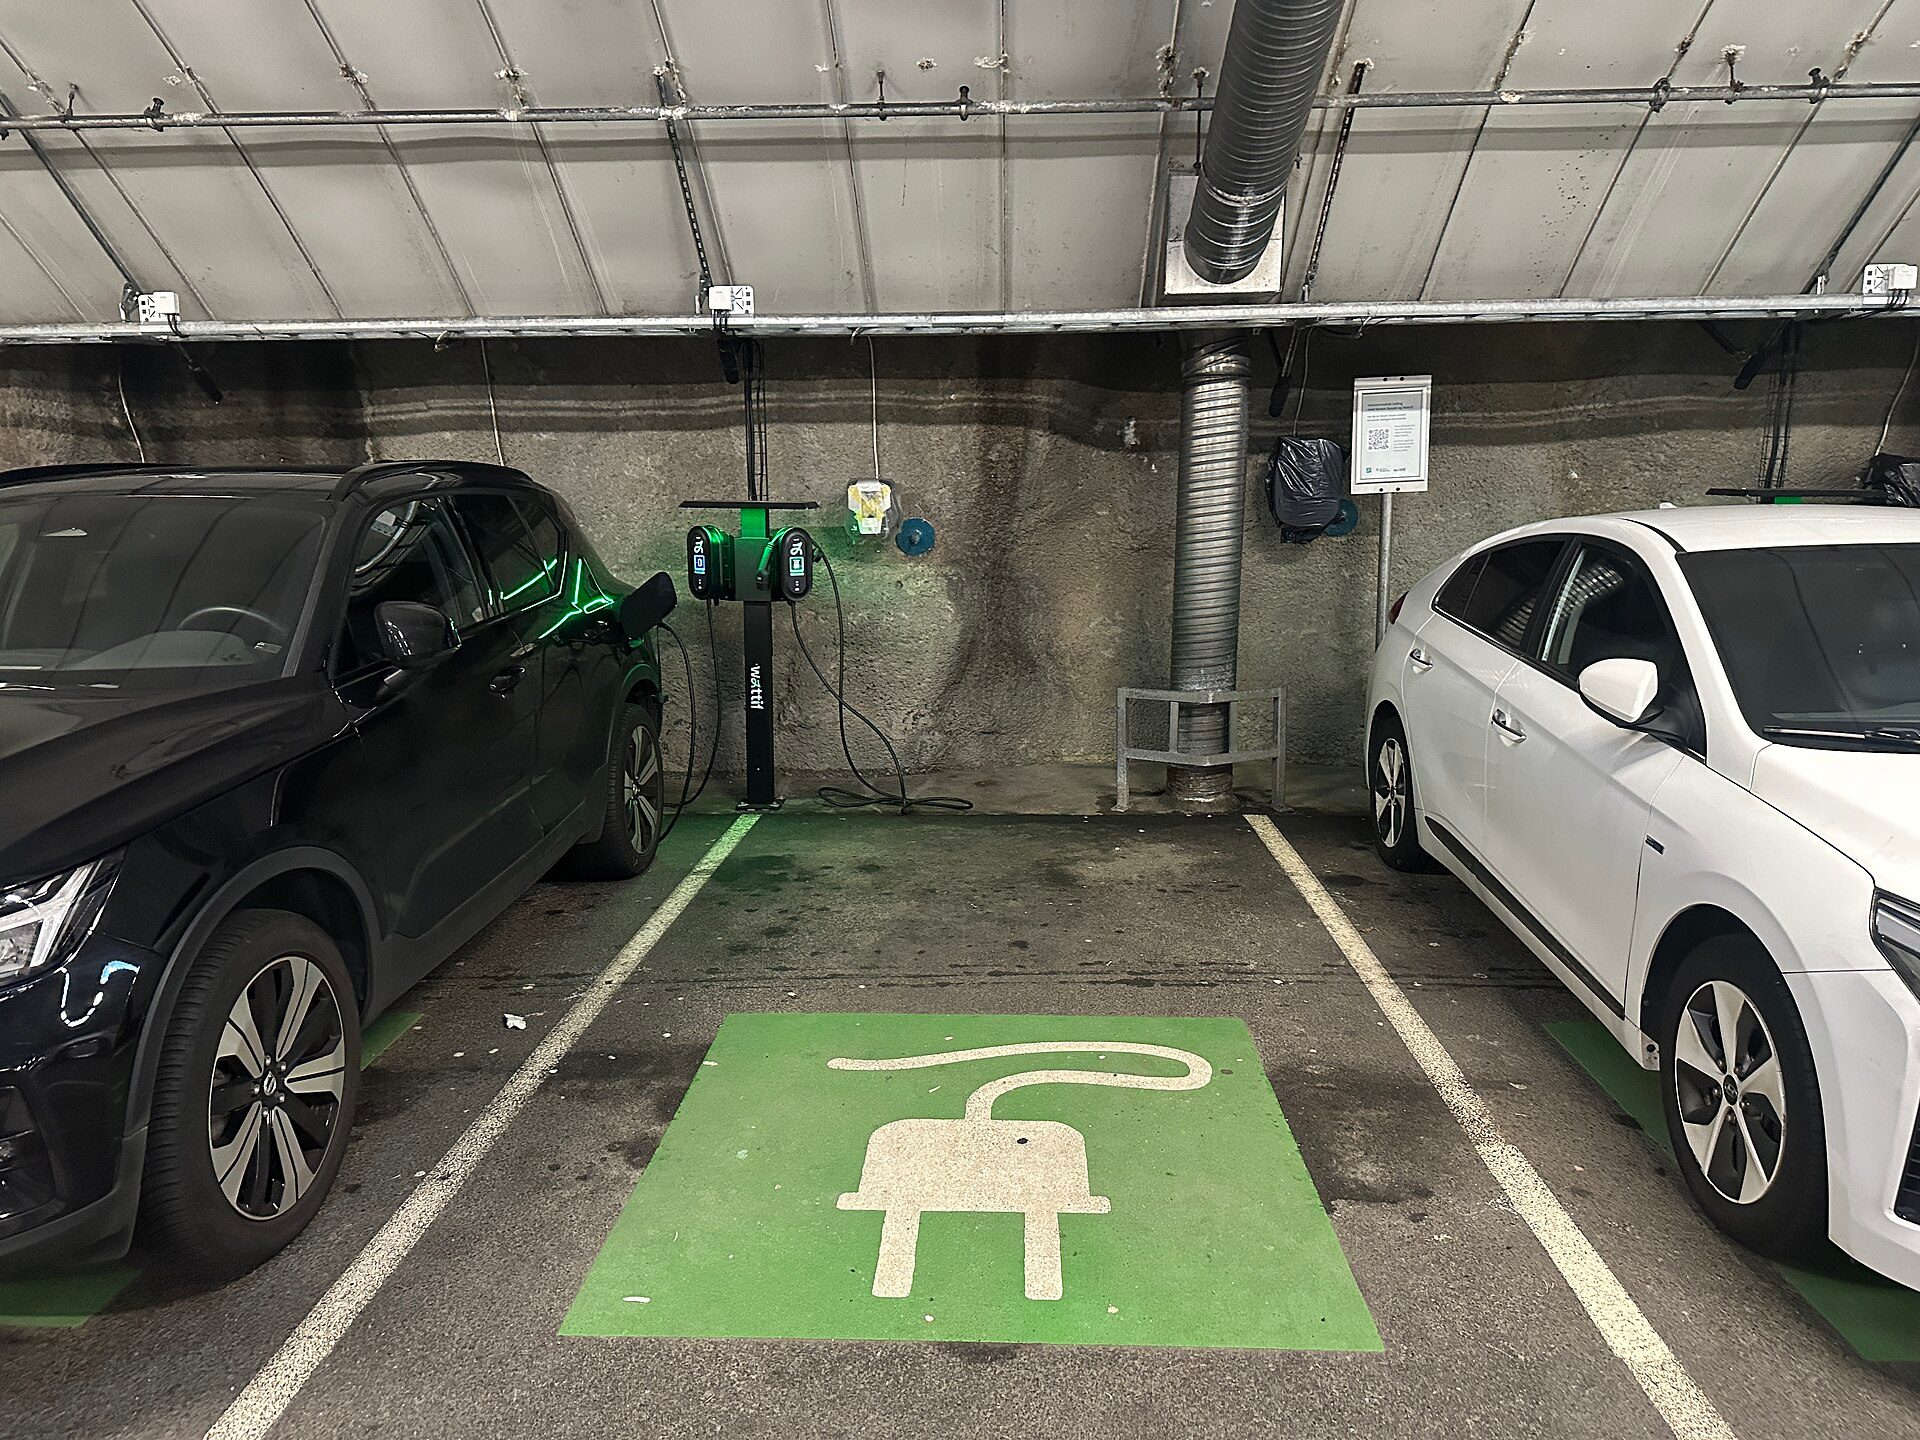
Photo: Wolfmann / Wikimedia Commons, CC BY 4.0
Townhouses
In Vietnamese townhouses the car usually parks inside on the ground floor, right behind the roller shutter. Mount the wallbox on an inside wall where the car cannot hit it; never run the charging cable onto the pavement or across a shared walkway. If the ground floor floods, mount equipment above the highest past flood level and plan how to isolate the charging circuit when it floods.
Worked example: a 3-storey townhouse with a 10(40) A meter
Ms Lan's family lives in a 3-storey townhouse with a single-phase 10(40) A meter and a 40 A main breaker. Their small electric SUV has a battery of about 60 kWh and a 7 kW on-board charger, covers 50 km a day on average and uses about 16 kWh/100 km.
Checking the load
- Evening peak load: 2 air conditioners 2.0 kW + water heater 2.5 kW + induction hob 2.0 kW + other appliances 1.0 kW = 7.5 kW, about 7,500 ÷ 220 ≈ 34 A.
- Adding 7 kW of charging at the same time: 14.5 kW ≈ 66 A — far above 40 A. Not acceptable.
- Real need: 50 km × 16 kWh/100 km = 8 kWh a day. Set the charging current to 16 A (3.5 kW): 8 ÷ 3.5 ≈ 2.3 hours, about 2.5 hours with losses.
- Schedule charging from 11 pm, when only the 2 air conditioners and small loads are on: 2.5 kW + 3.5 kW = 6 kW ≈ 27 A — below 40 A, safe.
A 7 kW wallbox with 6 mm² cable is still installed, so that if the supply is upgraded later, only the set current needs raising.
Quote
2026 reference prices in Vietnam, varying by brand, area and cable length.
| Item | Reference cost |
|---|---|
| 7 kW wallbox with 6 mA DC leakage detection | 15,000,000 VND |
| 40 A Type A 30 mA RCBO | 1,200,000 VND |
| 6 mm² copper cable: 25 m × 40,000 VND | 1,000,000 VND |
| Conduit and fittings | 500,000 VND |
| Earth rod and conductor, resistance test | 1,500,000 VND |
| Installation, testing and setup labour | 2,000,000 VND |
| Total | 21,200,000 VND |
Check the sum: 15,000 + 1,200 + 1,000 + 500 + 1,500 + 2,000 = 21,200 thousand VND (about 850 USD). Electricity: 8 kWh × 30 days = 240 kWh a month. If this falls into the higher residential price tiers of about 3,000–3,500 VND/kWh (reference only; check the current Vietnamese electricity tariff), charging costs about 720,000–840,000 VND a month.
Electrical safety when installing and using a charger
Safety warning: installing a charger means working with high-current 220 V/380 V supplies — only qualified, trained people should make the connections; always switch off, lock, tag and test for dead before touching conductors. Never charge through a multi-plug adapter, extension lead or a loose or scorched socket. Do not use a Type AC RCD on a charging circuit and never skip the earthing. Electric cars contain a high-voltage battery and orange high-voltage cables that can kill — do not open or touch the charging inlet or high-voltage cables unless you are trained and the system is isolated following the maker's procedure. If you smell burning, the plug is unusually hot or the breaker keeps tripping: stop charging, isolate the charging circuit and call an electrician. For a fire involving an EV battery, move away from the car and call the fire service (114 in Vietnam).
Safe habits for owners
- Check the cable and plug before connecting: no cracked casing, no moisture, no dirty contacts.
- Press the RCD's TEST button regularly as the maker recommends.
- Coil the cable neatly after use and never drive over it.
Common mistakes with home charging
Plugging into a shared ordinary socket
Symptom: a hot or melting socket, a tripping breaker. Cause: the socket and wiring cannot handle 10–16 A for hours, and the circuit carries other loads. Fix: run a dedicated circuit with a proper socket and residual current protection.
Setting the charging current above the meter's capacity
Symptom: the main breaker trips in the evening. Cause: existing loads were not counted. Fix: reduce the charging current, schedule night charging, or ask the power company about an upgrade.
Wrong RCD type, no proper earth
Symptom: the wallbox shows an earth fault, or the RCD does not trip on test. Cause: a Type AC RCD or a poor earth rod. Fix: use the type the maker requires, redo the earthing and test it.
Frequently asked questions
How much does it cost to install a home EV charger?
2026 reference for Vietnam: using a portable charger on an existing socket costs little more than a few million VND to run a dedicated circuit; a complete 7 kW wallbox installation is typically about 15–30 million VND depending on equipment and cable run.
Do I need to notify the power company?
If the existing supply is enough and you only add a final circuit after the meter, the contract usually does not need changing. To upgrade the supply, replace the meter or add a separate meter, contact the local power company for the current procedure.
Can I install a private charger in an apartment building?
It depends on each building's rules. Approval from the management board is mandatory; many buildings only allow shared charging points.
Does charging overnight every day harm the battery?
Slow AC charging is gentler on the battery than DC fast charging. Many makers recommend a daily charge limit of about 80–90% and charging to 100% only before a long trip — follow the car maker's guidance.
Practice exercises and self-assessment
- Survey a real house: record the meter, main breaker, evening loads and the distance from the consumer unit to the parking spot.
- Work out the maximum safe charging current and the charging time for the owner's daily mileage.
- Prepare a quote following Ms Lan's example, stating the basis for your choice of cable, breaker and RCD type.
Self-assessment criteria
- Pass: evening load plus charging current stays within the main breaker and meter; your quote adds up correctly.
- Pass: you choose the RCD type the maker requires, measure the earth, and plan isolation, lock-off and testing before connecting.
- Not yet: you suggest charging through a multi-plug adapter, use a Type AC RCD, skip the earthing, or connect to an apartment building's shared board on your own.
Once you are confident with AC home charging, you are ready for the next step of the roadmap: 12V system, thermal management & software diagnostics — why electric cars still "die" because of the 12 V battery and how to read faults with a scan tool. See the 8-step electric vehicle technician roadmap.