"Can you just add one more socket here?" It is one of the most common requests a residential electrician gets: a socket beside the bed for a phone charger, one behind the TV cabinet, one on the kitchen wall for a rice cooker and kettle, or one in a room that was wired years ago with too few outlets. It looks like a small job, and often it is. But the new socket is only as safe as the circuit it is connected to, the cable that feeds it and the connections behind the faceplate.
This guide walks through the job step by step, from checking the circuit to testing the finished socket, and explains when an extra socket is the wrong answer and a new dedicated circuit from the distribution board is needed.
Scope and safety. Written for trainee and working residential electricians, and for homeowners who want to understand what a proper job involves, on 230 V / 50 Hz single-phase supplies as used in most homes in Vietnam, with earthed (3-pin) sockets. Adding a socket means working on fixed wiring: it should be done by a competent, licensed electrician, following local regulations and the manufacturer's instructions for every product used. Cable sizes and breaker ratings marked for reference are typical examples only, not limits from a standard; the correct choice depends on the cable type, how it is installed, its length and the manufacturer's data.
Step 1: Decide what the new socket will power
Start with the load, not the wall. Ask the customer what they actually plan to plug in, now and in the near future. The answer decides almost everything else.
Small loads: chargers, lamps, fans, a router, TV or computer.
Medium loads: rice cooker, kettle, microwave, iron, hair dryer. Many of these draw 1,000 W or more while running; check the rating plate.
Large fixed loads: air conditioner, water heater, cooktop, oven, water pump or electric-vehicle charger. These run for long periods at high current and normally need their own circuit.
To estimate current at 230 V, divide the power by the voltage: current (A) ≈ power (W) ÷ 230. A 2,000 W kettle draws roughly 8.7 A. Add up what is likely to run at the same time on the circuit, not every appliance in the house.
Example: a customer wants a kitchen socket for "the rice cooker", but questioning reveals they also plan to run a kettle and microwave from it at breakfast. The circuit must carry that on top of whatever already runs on it.
Step 2: Check the existing circuit
Before deciding where to connect, find out what you are connecting to.
Which breaker feeds it?
Plug a lamp or socket tester into the nearest existing socket and switch breakers off one at a time until it goes off. Note the breaker's rating (for example 16 A or 20 A). Many older boards in Vietnamese homes are unlabelled, and one breaker may feed sockets in several rooms. Map which sockets share the circuit.
Is there RCD protection?
Look for an RCD (residual current device, often called "chống giật") or an RCBO protecting the circuit. Fitting 30 mA RCD protection to socket circuits is widely recommended and common practice, because sockets feed portable appliances that people handle directly. If there is none, tell the customer and recommend adding one before extending the circuit.
What cable is in the circuit?
At an existing socket, with the circuit isolated and proved dead (see Step 6), check the conductor size (often printed on the insulation) and condition, and whether the breaker suits the cable. A breaker too large for its cable is a fault in itself; correct it before adding load.
Is there an earth conductor?
Many older houses in Vietnam were wired with only live and neutral, and 3-pin sockets were fitted with the earth terminal left empty. If the circuit has no protective earth conductor, a new earthed socket on it will not actually be earthed. The fix is a proper earth conductor back to the main earthing terminal and earth electrode (see our guide on house earthing); never improvise an "earth" from neutral or a water pipe.
How much load is already on it?
If the breaker already trips when two heating appliances run together, the circuit is at its limit. A clamp meter on the circuit's live conductor during normal use gives a real figure instead of a guess.
Step 3: Choose where to take power from
There are three common ways to feed a new socket. The right one depends on the load from Step 1 and the circuit you found in Step 2.
From an existing socket on the same circuit
For small and medium loads, the usual method is to extend from a nearby socket on a socket circuit, or from a properly made joint in an accessible junction box, using cable of the same size as the circuit so the existing breaker still protects it. This is sound when the circuit has spare capacity.
Do not keep extending from sockets that were themselves added as extensions. In a long chain every joint carries the current of everything after it, and each connection is another place for heat to build up. If the customer wants several new sockets, a new circuit is often cleaner.
Never from a lighting circuit
Lighting circuits are often wired with smaller cable and protected by a smaller breaker, sized for lamps, not for kettles and heaters. Taking a socket from a ceiling rose, light switch or lighting junction box is a classic mistake: the socket will feed loads the lighting cable was never meant to carry. A switch box also often has no neutral, and "borrowing" one from another circuit creates dangerous cross-connections and RCD tripping. Take socket feeds from socket circuits only.
A new dedicated circuit from the board
For an air conditioner, water heater, cooktop, oven, pump or EV charger, run a new circuit from the board with its own breaker (and RCD or RCBO as required), sized from the appliance manual, and connect the appliance as its manufacturer instructs. A dedicated circuit is also the answer when the existing socket circuit is already loaded, has no RCD or has undersized cable.
Option | Suitable for | Main checks | Avoid when |
|---|---|---|---|
Extend from an existing socket | Chargers, TV, fan, lamp, computer, occasional small kitchen appliance | Circuit has spare capacity; same cable size as the circuit; earth present; RCD protection | Circuit already overloaded or trips; chain of earlier extensions; no earth |
Joint in an accessible junction box on a socket circuit | Same as above, where the nearest socket is awkward to reach | Proper rated connectors in a closed box that stays accessible; correct cable size | Box would be buried in plaster or hidden behind tiles |
Take power from a lighting circuit | Not suitable for sockets | None: do not do it | Always |
New dedicated circuit from the board | Air conditioner, water heater, cooktop, oven, pump, EV charger, or several new sockets | Board has a spare way and capacity at the main switch; new breaker and RCD/RCBO matched to the cable | The main supply itself is already near its limit: check with the customer and the power company |
Step 4: Match the cable to the breaker
The breaker's job is to protect the cable: its rating must not be larger than the current the cable can safely carry as installed. Cable in a hot roof space or bundled with others carries less than the same cable alone on a cool wall.
The table below shows combinations often seen in Vietnamese homes using copper conductors. It is for reference only: confirm against the cable manufacturer's data, the installation method, the run length and local regulations. Our separate guide on choosing wire size and breakers covers the method in more detail.
Circuit | Copper conductor size (for reference) | Breaker often used (for reference) | Notes |
|---|---|---|---|
Lighting | 1.5 mm² | 10 A | Not for sockets |
General socket circuit | 2.5 mm² | 16 A to 20 A | New socket on this circuit uses the same 2.5 mm² cable |
Water heater, small air conditioner | 2.5 mm² to 4 mm² | 16 A to 25 A | Depends on rated power and run length; dedicated circuit |
Cooktop, oven, large air conditioner | 4 mm² to 6 mm² | 25 A to 32 A | Follow the appliance manual; dedicated circuit |
Never fit a bigger breaker because "it keeps tripping", and never extend a circuit with smaller cable (for example 1.5 mm² on a 20 A socket circuit): in both cases the breaker no longer protects the cable.
Step 5: Plan the cable route
Walk the route with the customer and mark the socket position and the path back to the supply point.
Surface trunking or conduit
Surface PVC trunking or conduit is quick and needs no wall repair: the usual choice in rented rooms and finished or concrete walls. Run it straight and level, fix it securely, use proper corner fittings and surface boxes made for the system (see our guide on surface trunking).
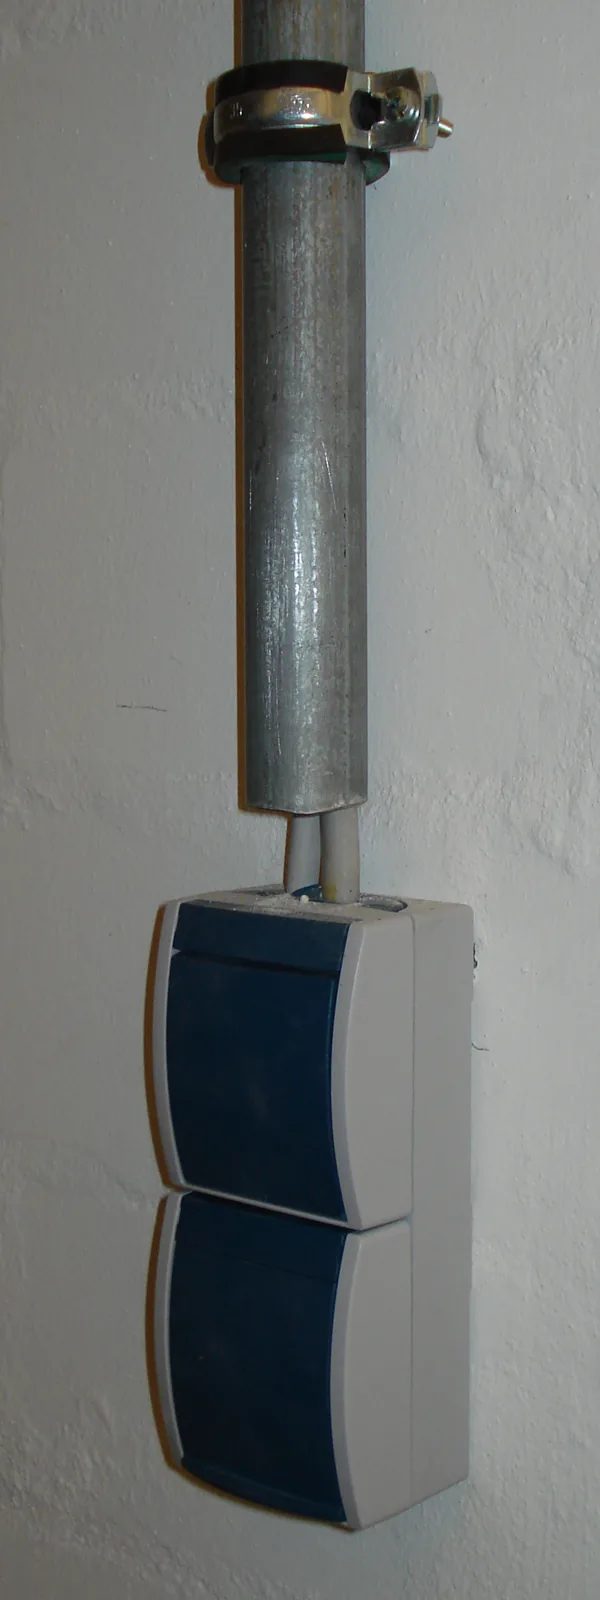
Figure 1. A surface installation: a metal conduit fixed to the wall with a clamp runs down to a surface-mounted switch and socket, both with hinged splash covers. Surface routes avoid cutting into walls, but every run still needs secure fixing and boxes designed for surface mounting. (Photo: Erik Taanman, Wikimedia Commons, CC0)
Chased (concealed) conduit
A concealed route looks neater but takes more work. Cut chases straight up/down or across from the socket, never diagonally, so anyone drilling later can predict where cables run. Lay cable in conduit so it can be replaced, avoid deep chases in columns, beams or thin walls, and check for pipes and cables before cutting (see our guide on concealed wiring). Keep cables away from water pipes and heat, and leave every junction box accessible: a joint sealed behind plaster cannot be inspected.
Where to place the socket
Place sockets where the appliance will be used, so no extension leads trail across the floor, and keep them clear of sinks, showers and splashes. Heights depend on the room and the customer; follow local rules rather than a fixed number. Bathrooms and outdoor locations need special rules and IP-rated accessories: leave them to a licensed electrician.
Step 6: Isolate safely and prove it dead
Never work on a circuit you think is off. Prove it.
Tell the household which circuit will be off and check nothing important (fridge, medical device) is affected.
Switch off the breaker for the circuit you will connect to. If you are not certain which breaker it is, switch off the main switch.
Lock and tag. Fit a breaker lock if possible and a clear "Do not switch on" tag on the board.
Prove your tester (two-pole voltage tester or suitable multimeter) on a known live source or proving unit.
Test the work point: live–neutral, live–earth and neutral–earth should all read no voltage.
Prove the tester again on the known live source.
Neon screwdriver testers are not reliable for proving a circuit dead.
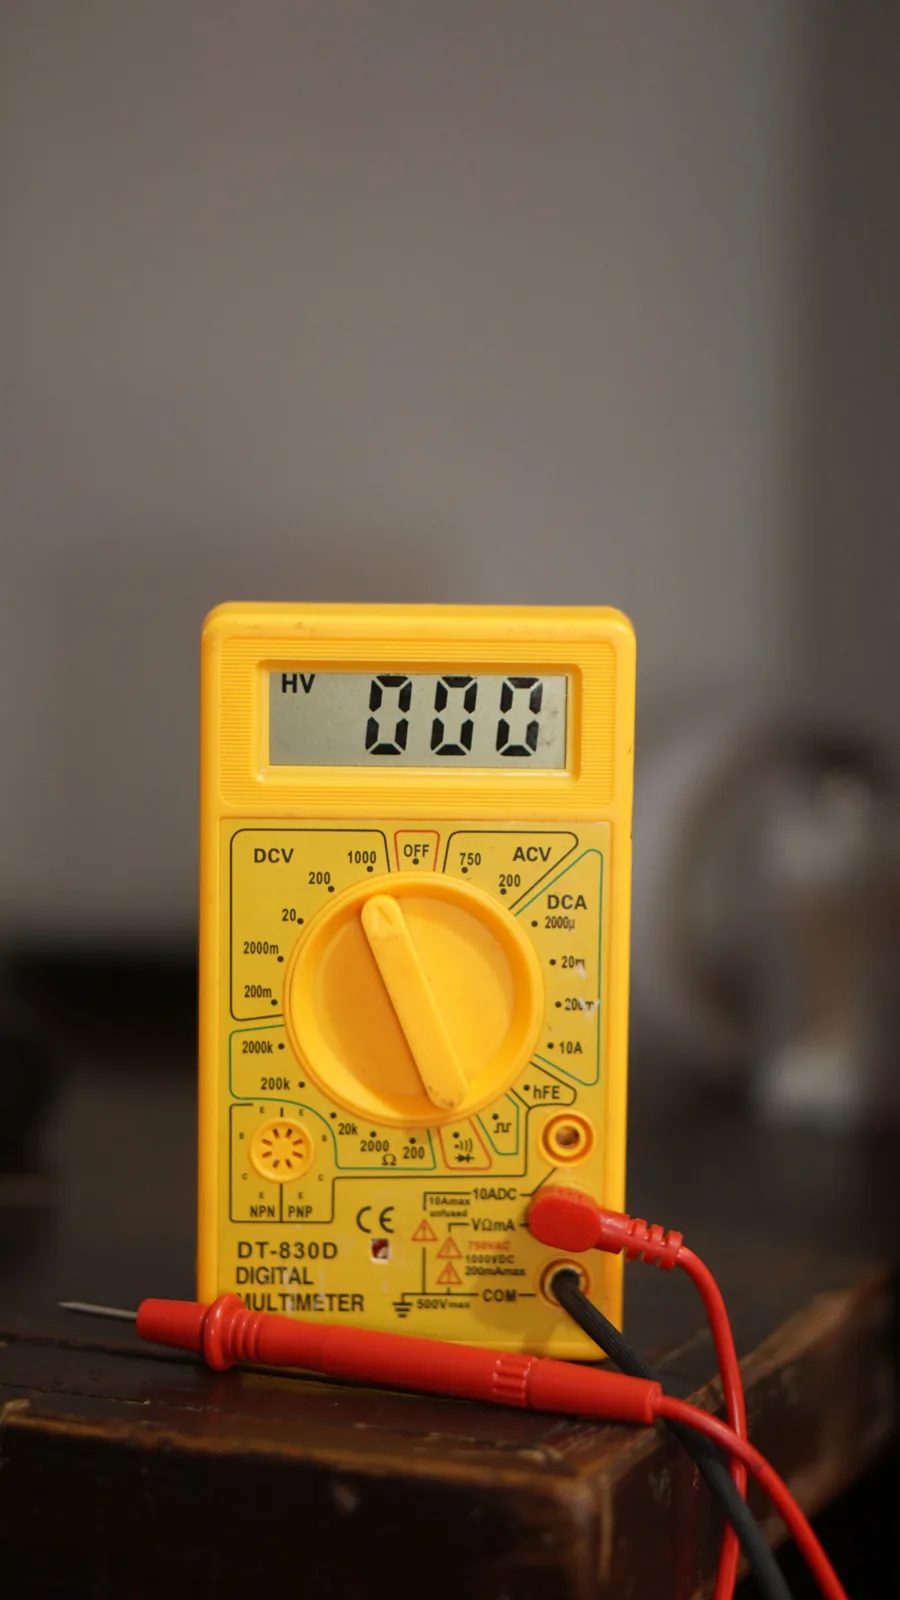
Figure 2. A basic digital multimeter with red and black test leads. Whatever meter or tester you use, check it on a known live source before and after testing the circuit, and make sure its category rating and leads are suitable for mains work. (Photo: Ahnaf Piash, Pexels)
Step 7: Mount the box
Every socket needs a proper back box, flush for concealed wiring or surface-mounted for trunking, to protect the connections and give a solid fixing.
Choose a box deep enough for the socket and the conductors, especially if two cables (in and out) will land in it.
Fix it firmly and level, flush with the finished wall surface for concealed work.
Fit grommets or use the knockouts properly so the cable sheath is not cut by sharp edges.
Bring the sheath just inside the box and leave enough conductor to connect and fold back neatly.
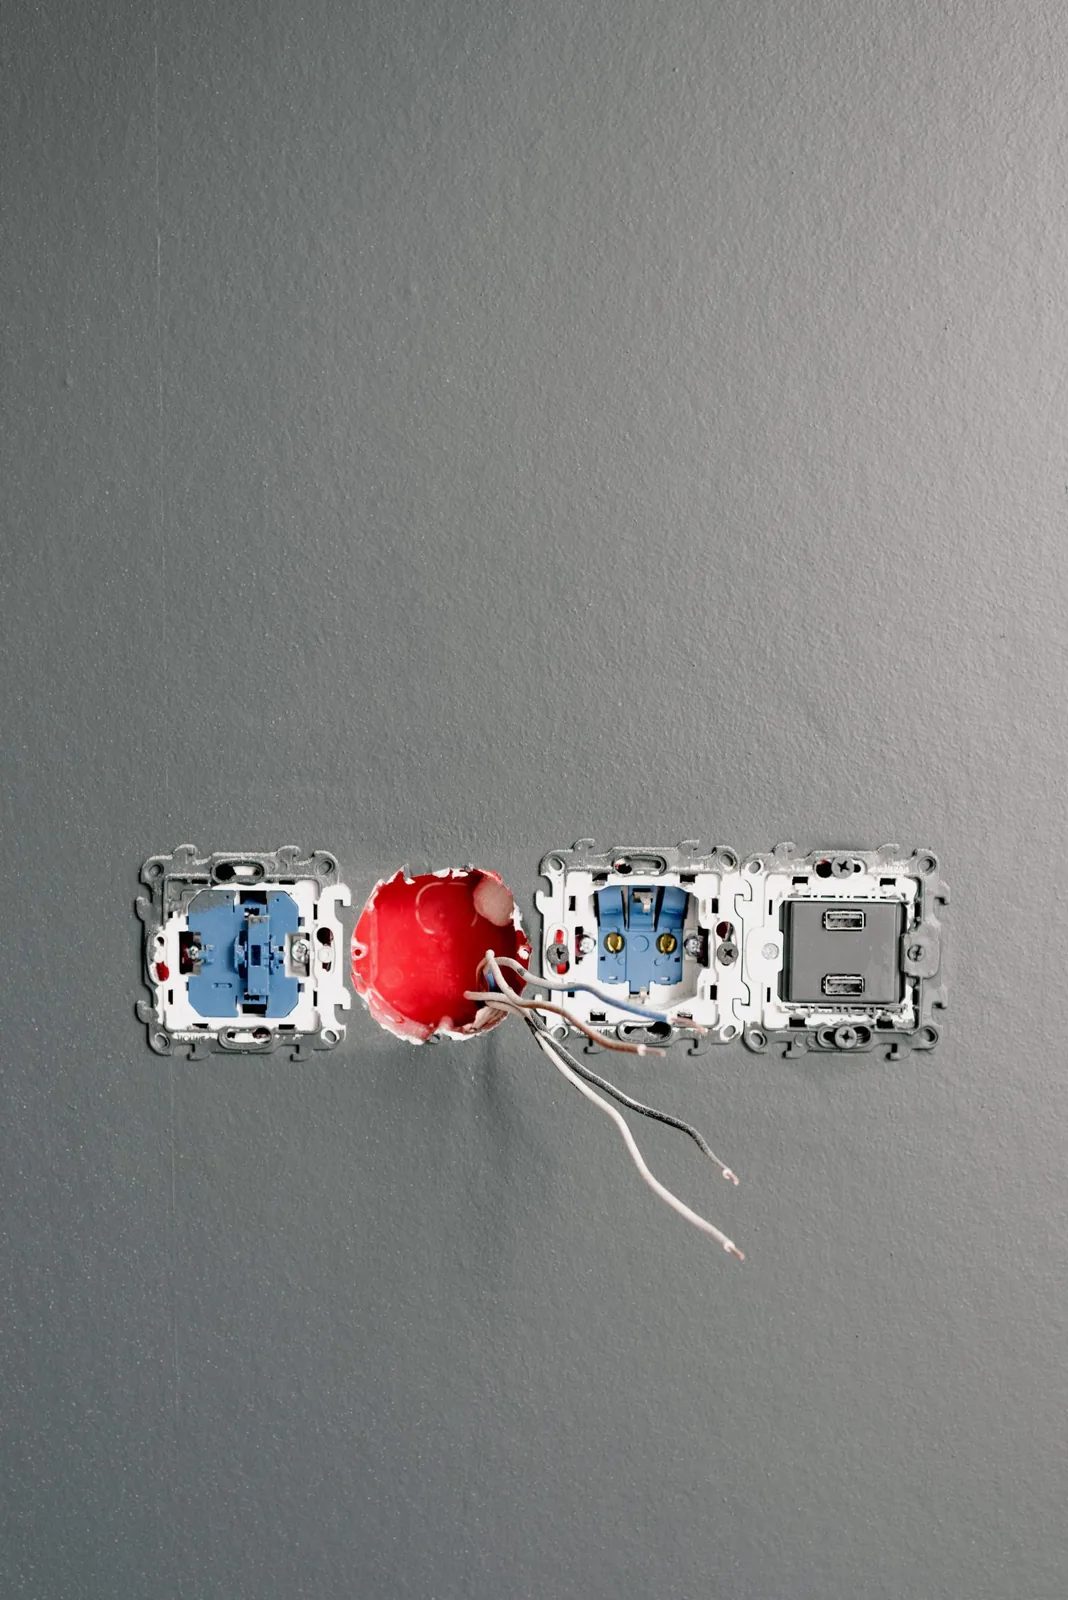
Figure 3. Flush wiring accessories during installation: a red round flush box set into the wall with conductors, their ends stripped, coming out of it, beside socket and switch inserts already fixed in their boxes. Conductors are only handled like this with the circuit switched off, locked off and proved dead. (Photo: Ksenia Chernaya, Pexels)
Step 8: Connect live, neutral and earth
With the circuit still proved dead, prepare the conductors and connect the socket.
Identify the conductors
Newer installations often use brown (or red) for live, blue (or black) for neutral and green-and-yellow for earth, but older Vietnamese houses can use almost any colours. Confirm each conductor by testing or tracing back to the board rather than trusting colour (see our guide on wire colour codes).
Make the connections
Live (L) to the terminal marked L, neutral (N) to the terminal marked N, and earth to the terminal marked with the earth symbol ⏚ or E. Keep L and N on the same sides on every socket.
Strip only enough insulation for the terminal, with no bare copper showing. Tighten firmly (to the manufacturer's torque if stated) and tug-test each conductor.
Two conductors in one terminal only if it is designed for two; otherwise use a short tail and a rated connector. Use ferrules on fine-stranded conductors.
Sleeve bare earth conductors green-and-yellow, and earth a metal back box if used.
Never connect earth to neutral at a socket, for example to make a socket tester show "correct". If the neutral ever becomes loose or broken, the metal cases of appliances plugged in can become live, and the link also upsets RCD operation. If there is no earth, install a real earth conductor.
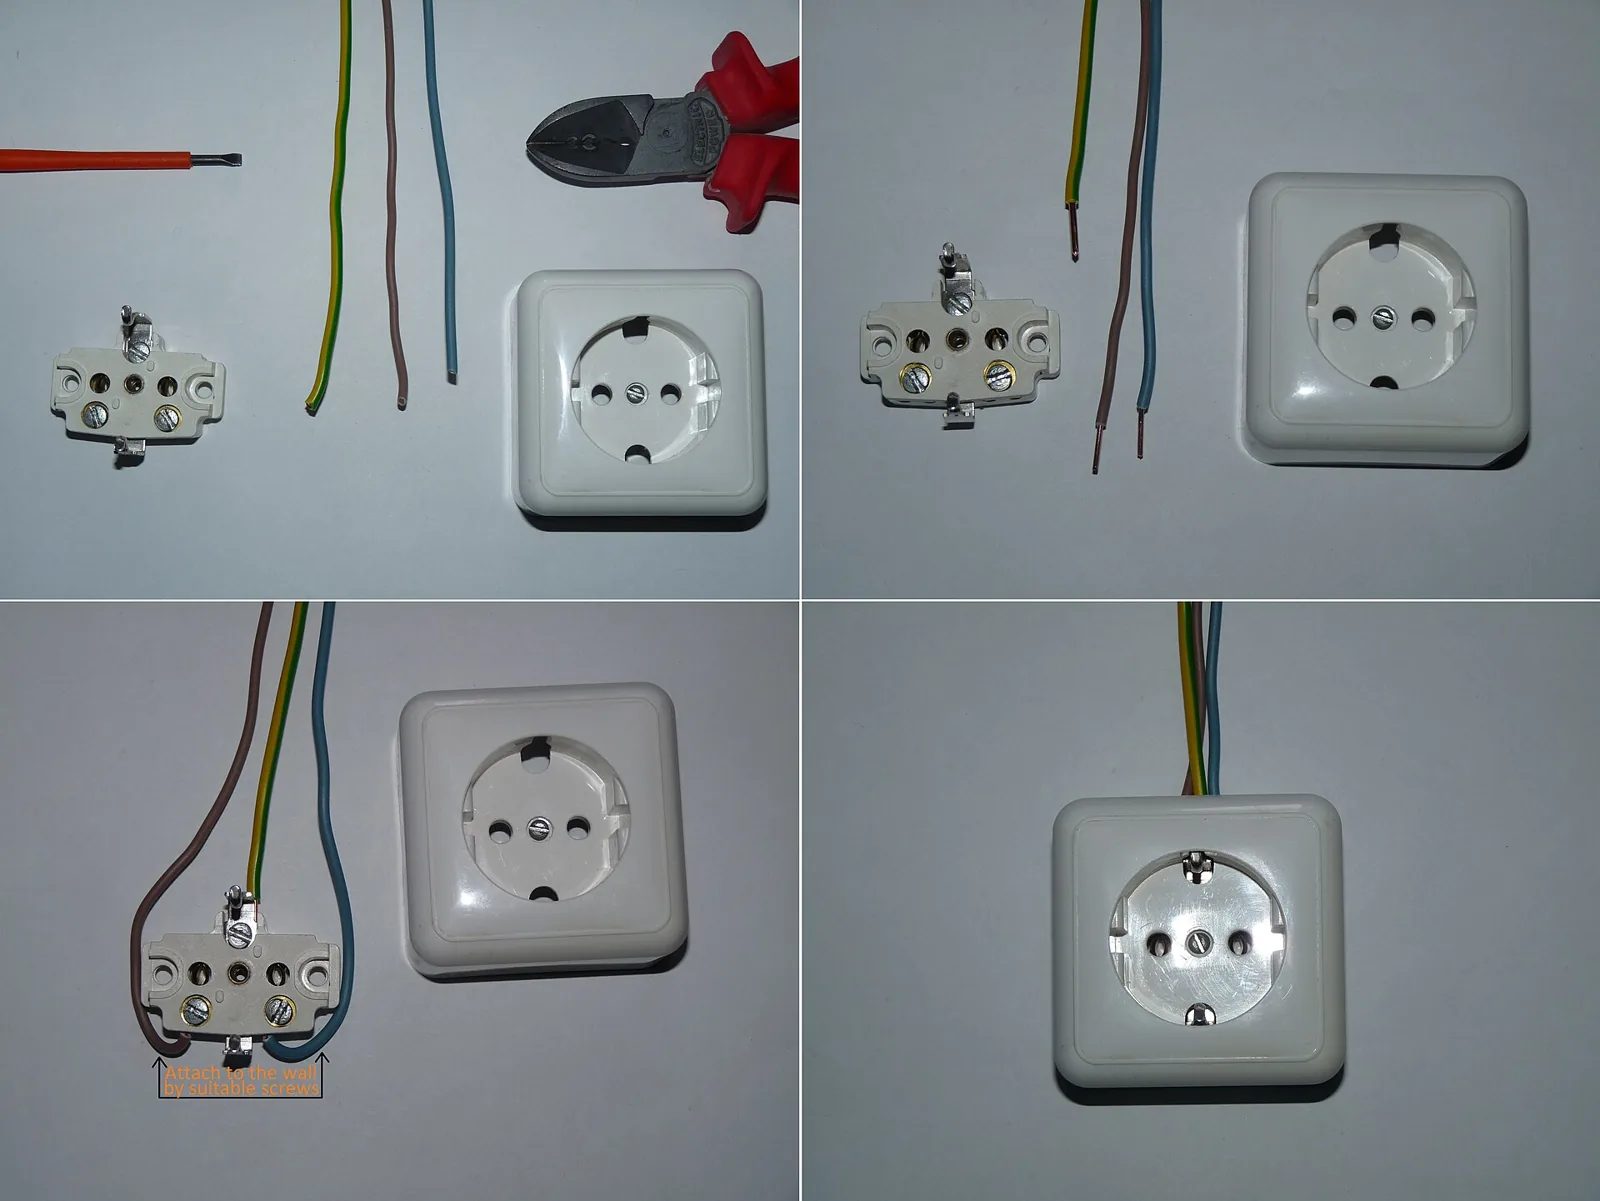
Figure 4. Wiring an earthed surface socket in four steps: stripped brown, blue and green-and-yellow conductors beside the socket base, the conductors inserted into their terminals with earth in the centre clamp, and the cover fitted. The author made this as a temporary socket and notes it should be installed only with the circuit de-energised and protected by a suitable RCBO. (Photo: Dmitry G, Wikimedia Commons, CC BY-SA 3.0)
Tidy up and fix the socket
Fold the conductors in so screws cannot pinch them, fix the socket level, and reassemble the supply-end socket or junction box, checking its existing connections too.
Step 9: Test before handing over
A socket that lights a lamp is not necessarily safe. Testing confirms earth continuity, polarity and sound insulation; trainees should do it under supervision.
With the circuit still isolated
Continuity of the earth conductor. With a low-resistance ohmmeter or the continuity function of a multimeter, check that the new socket's earth terminal connects back to the main earthing terminal. A high or unstable reading means a loose or missing earth.
Polarity. Check that the socket's L terminal connects to the breaker side of the circuit and L and N are not swapped.
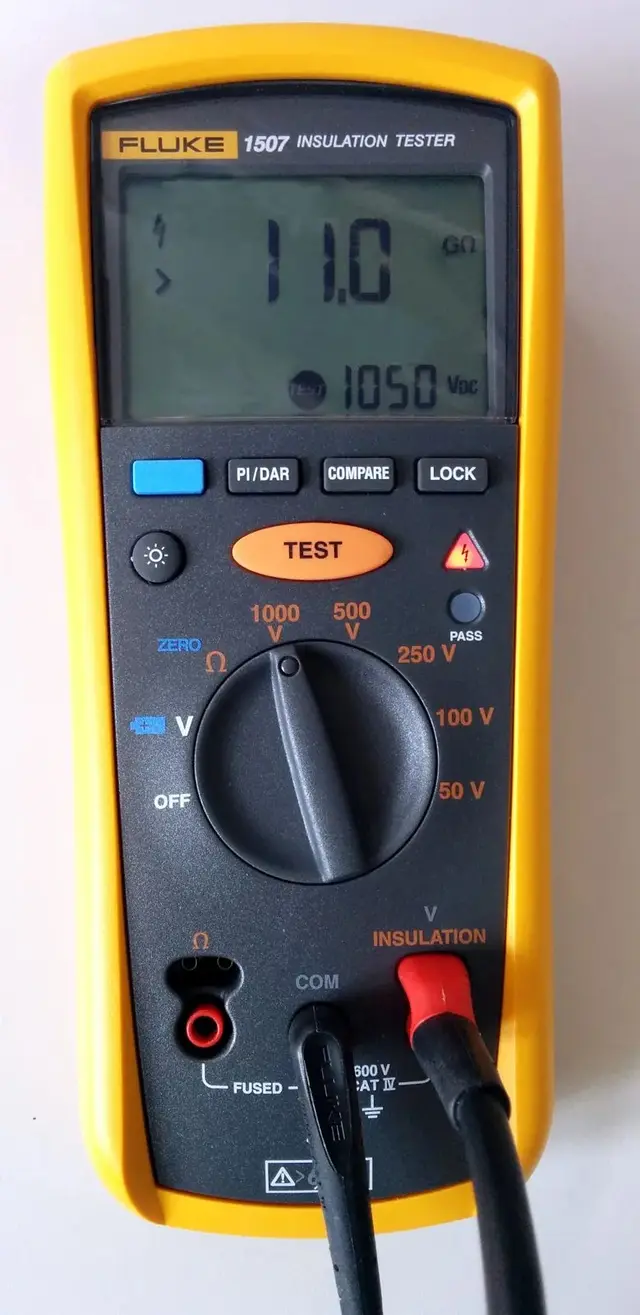
Insulation resistance, if you have an insulation tester. Unplug everything on the circuit first, then test L–N and L/N–earth at the voltage local practice specifies for 230 V circuits (commonly 500 V DC). Low readings often mean cable nicked by a screw or chasing tool.
After switching back on
Remove your lock and tag, warn the household, and switch the breaker on.
Measure the voltage at the new socket between live and neutral (around 230 V), live and earth (similar), and neutral and earth (close to zero).
A plug-in socket tester is a useful quick check, not a replacement for the tests above.
Press the test button on the RCD or RCBO: it should trip. This checks the mechanism; an RCD tester at the new socket checks it trips correctly for a fault there. Reset it and remind the customer to press the test button regularly.
Run the intended appliance for a while, then check the socket and plug are not warm.
Practical examples
Example 1: Bedside socket in an apartment
The customer wants a socket beside the bed for a phone charger and reading lamp. The nearest socket is on a socket circuit with 2.5 mm² cable, a suitable breaker and 30 mA RCBO protection. You extend from it with 2.5 mm² cable in surface trunking, fit a surface box, connect L, N and E, and test. A good, simple job.
Example 2: "One more socket" for an air conditioner
The customer bought a new air conditioner and wants a socket next to the indoor unit. The only nearby wiring is the bedroom lighting circuit, and the room's socket circuit already powers a fridge and a computer. Taking power from the lighting circuit is ruled out, and adding the air conditioner to the existing socket circuit risks overloading it. You quote a dedicated circuit from the board with its own breaker and RCD/RCBO, sized from the air conditioner's manual, and explain why.
When to call a licensed electrician
Homeowners can plan where sockets should go and estimate the load, but the wiring work itself should be done by a licensed electrician. Call one in particular when:
You are not certain which breaker feeds the circuit, or the board is unlabelled, crowded or shows heat marks.
The circuit has no earth conductor or no RCD protection.
The new socket is for an air conditioner, water heater, cooktop, oven, pump or EV charger.
The socket is in a bathroom, outdoors, near a pool or anywhere wet.
The wiring is very old or has brittle insulation.
The breaker trips, sockets get warm or you smell burning: these need fault-finding before any extension.
You do not have the testers and instruments to prove the work is safe.
Working with the customer
A small job is still a chance to build trust:
Ask and listen. What will they plug in, where will furniture go, surface or concealed route?
Check, then quote. Inspect the circuit and board before giving a firm price. Itemise materials, labour, wall repair and painting, and testing. Quote problems such as no earth or no RCD separately so the customer sees what is essential.
Explain in plain words. For example: "The light cable is thinner, so I can't take a socket from it safely. I'll connect to the socket circuit in the next room instead."
Hand over properly. Show which breaker controls the socket and how to use the RCD test button, label the board, and advise against chaining extension leads and adaptors for heaters or kettles.
Safety checklist
Estimate the load first; heavy fixed appliances get a dedicated circuit, not an extra socket.
Take socket feeds only from socket circuits, never from a lighting circuit or switch box.
Check that the breaker rating suits the cable, and use new cable of the same size as the circuit it joins.
Confirm the circuit has a protective earth conductor and recommend 30 mA RCD protection for socket circuits.
Do not keep extending from earlier extensions; avoid long chains of joints.
Switch off, lock off and tag the circuit; prove it dead with a two-pole tester or suitable meter that you check on a known live source before and after.
Use a proper back box, grommets and rated connectors; keep every junction box accessible.
Connect L, N and E to the correct terminals; never link earth to neutral.
Chase walls only straight up/down or across from the socket; check for pipes and cables first.
Test earth continuity, polarity and insulation, then test the RCD after re-energising.
Leave bathrooms, outdoor and wet locations to a licensed electrician with the correct IP-rated accessories.
If someone receives an electric shock, switch off the power before touching them and call emergency services (115 in Vietnam).
Frequently Asked Questions
Can I add a socket by taking power from a light switch?
No. Lighting circuits are usually wired with smaller cable sized for lamps, and the switch box often has no neutral. Connect to a socket circuit or run a new circuit.
How many sockets can I put on one circuit?
There is no single number that suits every house; what matters is the total load likely to run at the same time, the cable size and breaker rating, and local rules. A bedroom of chargers and lamps shares one circuit easily; a busy kitchen may need more than one. A double socket does not double the circuit's capacity.
Do I need an RCD if the house already has a main breaker?
A breaker (MCB) protects cables from overload and short circuits; it does not protect people from electric shock. An RCD detects current leaking to earth, for example through a person, and disconnects quickly. 30 mA RCD protection for socket circuits is widely recommended; ask a licensed electrician to check what your board has.
My old sockets have no earth wire. Can I just fit 3-pin sockets?
A 3-pin socket without a real earth gives a false sense of safety. Install an earth conductor to an earth electrode, ideally with RCD protection.
Practice Exercises
Load estimate. A customer wants to run a 1,800 W kettle, a 700 W rice cooker and a 1,000 W microwave from one new kitchen socket. Calculate the total current at 230 V and decide whether a 16 A socket circuit that already feeds a 150 W fridge can take it. Explain your decision.
Choose the supply point. For each request, choose: extend from a socket, new dedicated circuit, or refuse and explain: (a) a phone-charging socket beside the sofa; (b) a socket for a 4,500 W instant water heater; (c) a socket taken from the ceiling-light junction box in a bedroom; (d) four new sockets in a home office.
Isolation drill. Write the safe-isolation steps in order and practise them on a training board.
Fault spotting. List five faults you might find when opening an existing socket before extending from it and what you would do about each.
Customer explanation. In three or four sentences, explain to a homeowner why their new air conditioner needs a dedicated circuit instead of "just one more socket", without technical jargon.