"Every time I turn on the water heater, the breaker trips." "On rainy nights the RCD switches off by itself." These are the calls an electrician gets more than any other. Fitting a bigger breaker is the wrong answer, and a dangerous one. A good electrician is the one who finds the cause and fixes it in the right place.
This is the project lesson for the step "Troubleshooting common electrical faults", and it brings together everything you have learned so far: isolate – lock and tag – test dead, the multimeter and the clamp meter, load calculation, and how branch circuits and consumer units are built. In Vietnam a circuit breaker is usually called an aptomat; in this lesson we say "breaker" or "MCB". By the end of this lesson, you will be able to do four things: (1) tell from how a breaker trips whether you are dealing with an overload, a short circuit or an earth leakage; (2) narrow a fault down with a 6-step procedure instead of guessing; (3) back up your conclusion with measurements; and (4) write a one-page report that the customer can understand.
Three reasons a protective device cuts the power
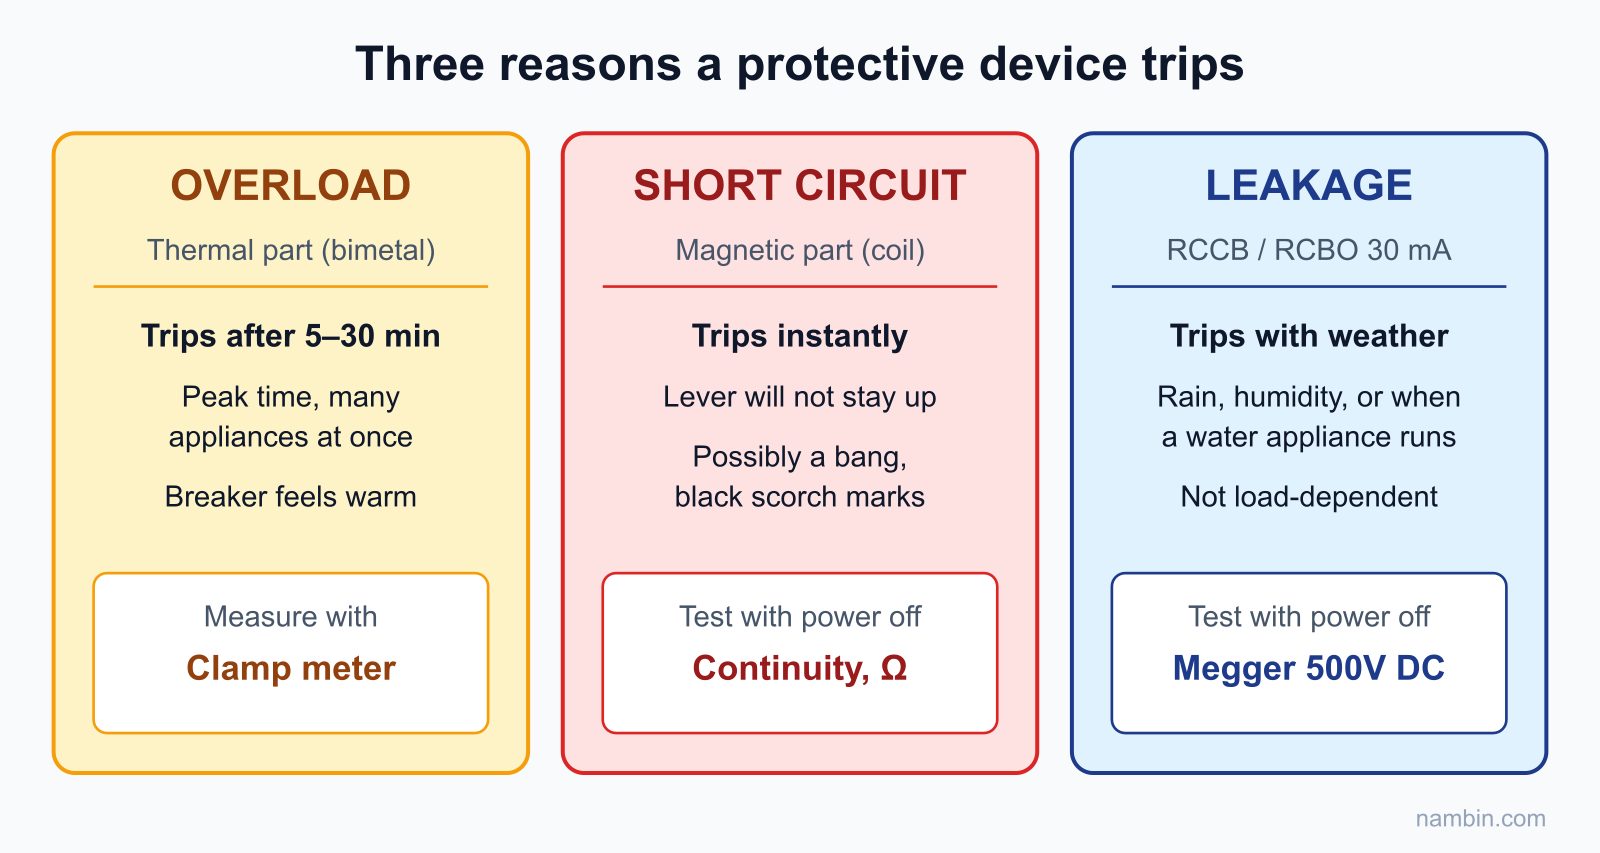
Protective devices do not "break for no reason". A device trips because it has detected one of three abnormal conditions, and each condition leaves a different set of clues.
| Cause | Device that reacts | Typical signs |
|---|---|---|
| Overload | MCB, RCBO (overcurrent part) | Trips after a few minutes when many appliances run at once; the breaker feels warm |
| Short circuit | MCB, RCBO (instantaneous trip) | Trips the moment the circuit is switched on or when one appliance is turned on; there may be a bang or scorch marks |
| Earth leakage | RCCB/RCBO/ELCB (residual current protection) | Trips when it rains, in high humidity, or when an appliance that uses water is switched on (water heater, washing machine) |
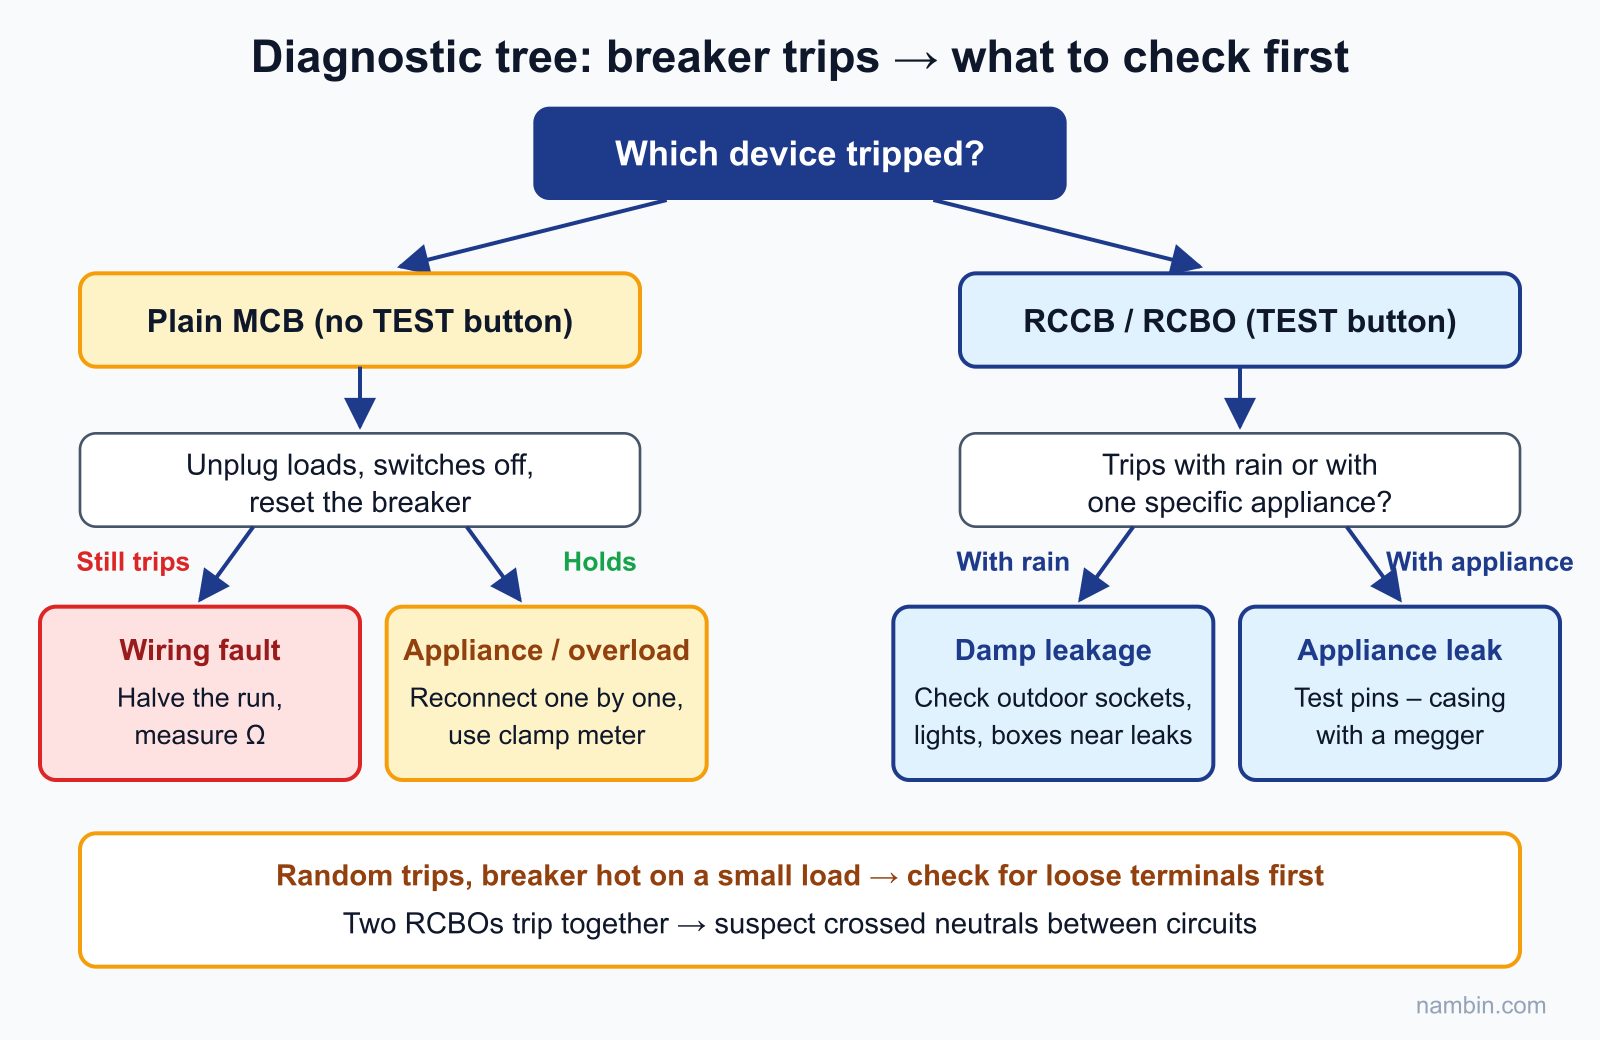
First of all, find out which device tripped: an ordinary breaker, or a residual current device (the one with a TEST button). That single piece of information already rules out half of the possibilities.
Inside a breaker: the thermal part and the magnetic part
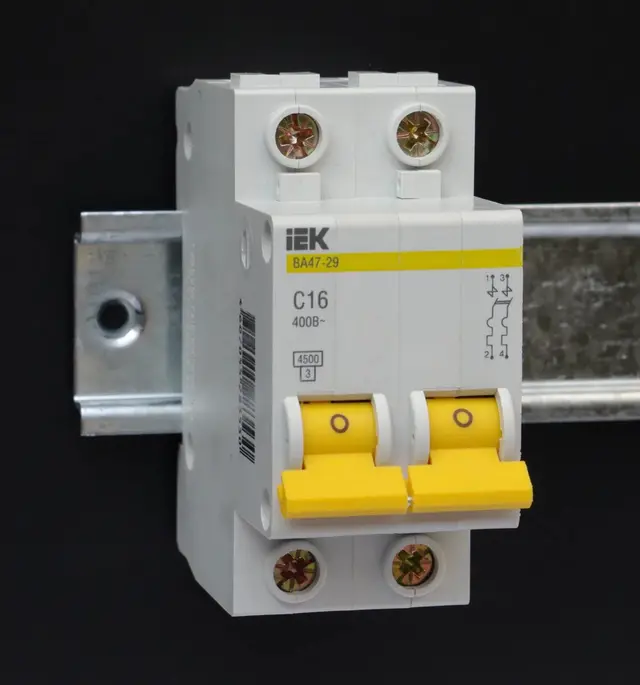
A domestic MCB contains two independent tripping mechanisms. The thermal part is a bimetallic strip: current above the rating heats it, it slowly bends and pushes the trip latch. Because it has to warm up, the thermal part is slow — the further the current is above the rating, the faster it trips. According to the usual characteristics of domestic MCBs (IEC 60898), at about 1.13 times the rated current the breaker will not trip within one hour, while at about 1.45 times it will trip within one hour. In other words, a mild overload can "smoulder" for tens of minutes before the breaker trips.
The magnetic part is an electromagnetic coil. When the current jumps to many times the rating (a short circuit), the magnetic force pulls the latch almost instantly, within a few hundredths of a second. The threshold depends on the tripping curve printed on the front of the breaker: type B trips instantly at about 3–5 times the rated current, type C at about 5–10 times and type D at about 10–20 times. Homes normally use type C. Once you understand this, the timing tells you a lot: a trip the instant you switch on points to the magnetic part; a trip after a few minutes to a few tens of minutes points to the thermal part.
What does a residual current device actually "count"?
RCCBs and RCBOs compare the current going out on the live (phase) conductor with the current coming back on the neutral. Normally the two are equal. If part of the current escapes to earth — through an appliance casing, a damp wall or a person — a difference appears. When that difference reaches the threshold (usually 30 mA for personal protection), the device trips. A residual current device does not care whether the load is large or small: a healthy 3000W induction hob will not trip it, but a socket soaked by rain that leaks only 35 mA is enough.
By common design practice, a 30 mA device may trip anywhere from about half its threshold upwards, that is 15–30 mA. So a circuit with many electronic devices, each leaking a few tenths of a milliamp up to about 1 mA through its noise filter, can add up and make the RCD trip "for no reason" even though no single appliance is actually faulty.
Reading the "signature" of a fault
- Trips instantly, the lever will not stay up: short circuit or a serious earth fault.
- Trips after 5–30 minutes, right at peak time (evening, cooking, air conditioning running): overload.
- The RCD trips with the weather or with one particular appliance: leakage caused by moisture or by that appliance.
- Trips randomly with no pattern, and the breaker is hot even with a small load: suspect a poor connection at a terminal or an ageing breaker.
Tools and preparation before you visit the customer
Diagnostic tool kit
- A voltage tester pen and a multimeter with AC voltage, resistance and continuity ranges.
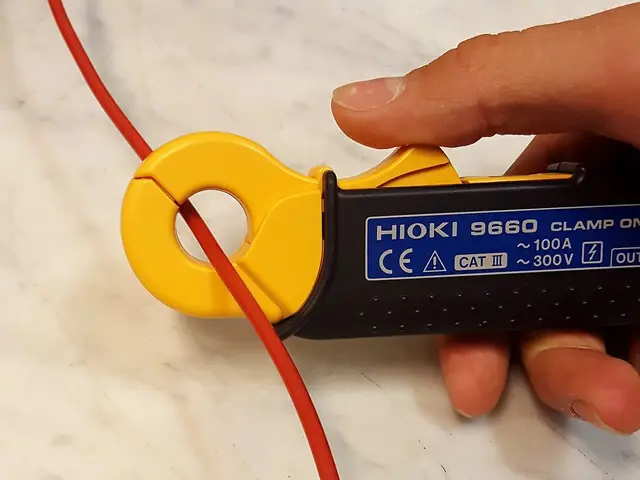
- A clamp meter to measure the real load current without cutting any wire — the most important tool when you suspect an overload.
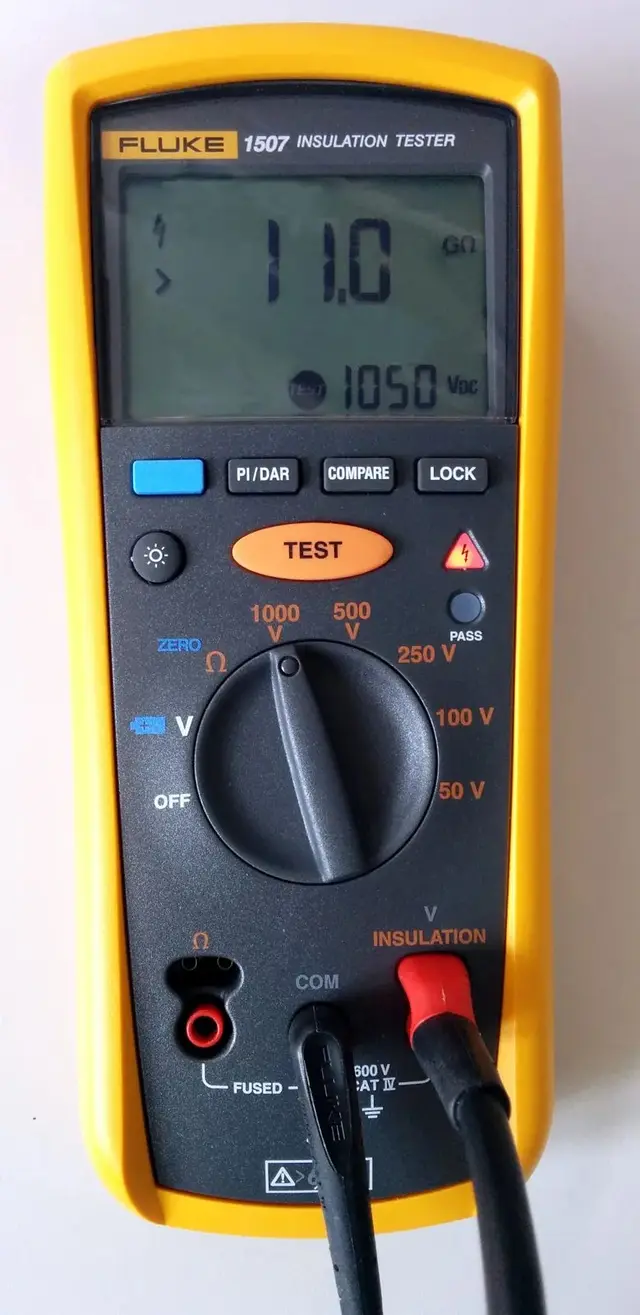
- An insulation resistance tester (megger) at a test voltage of 500V DC for 220V circuits — used when a leakage fault is hard to find.
- Insulated screwdrivers, pliers, a head torch, a ladder, a lock and a "do not switch on" sign, and a notebook or phone to record readings and take photos.
- Common spare parts: wire connectors, terminal blocks, sockets, crimp lugs, insulating tape, and a few common breakers to replace one once you are sure it is faulty.
Questions to ask on the phone
Ask in advance so you bring the right tools: which device trips (main or branch, does it have a TEST button?), since when, and whether any appliances have been added or any building work done recently. Ask the customer to send a photo of the consumer unit beforehand.
The 6-step procedure
The six steps below go from the cheapest work (asking, looking) to the most time-consuming (opening junction boxes, insulation testing). Following them in order stops you from chiselling into a wall when the fault is just an electric kettle.
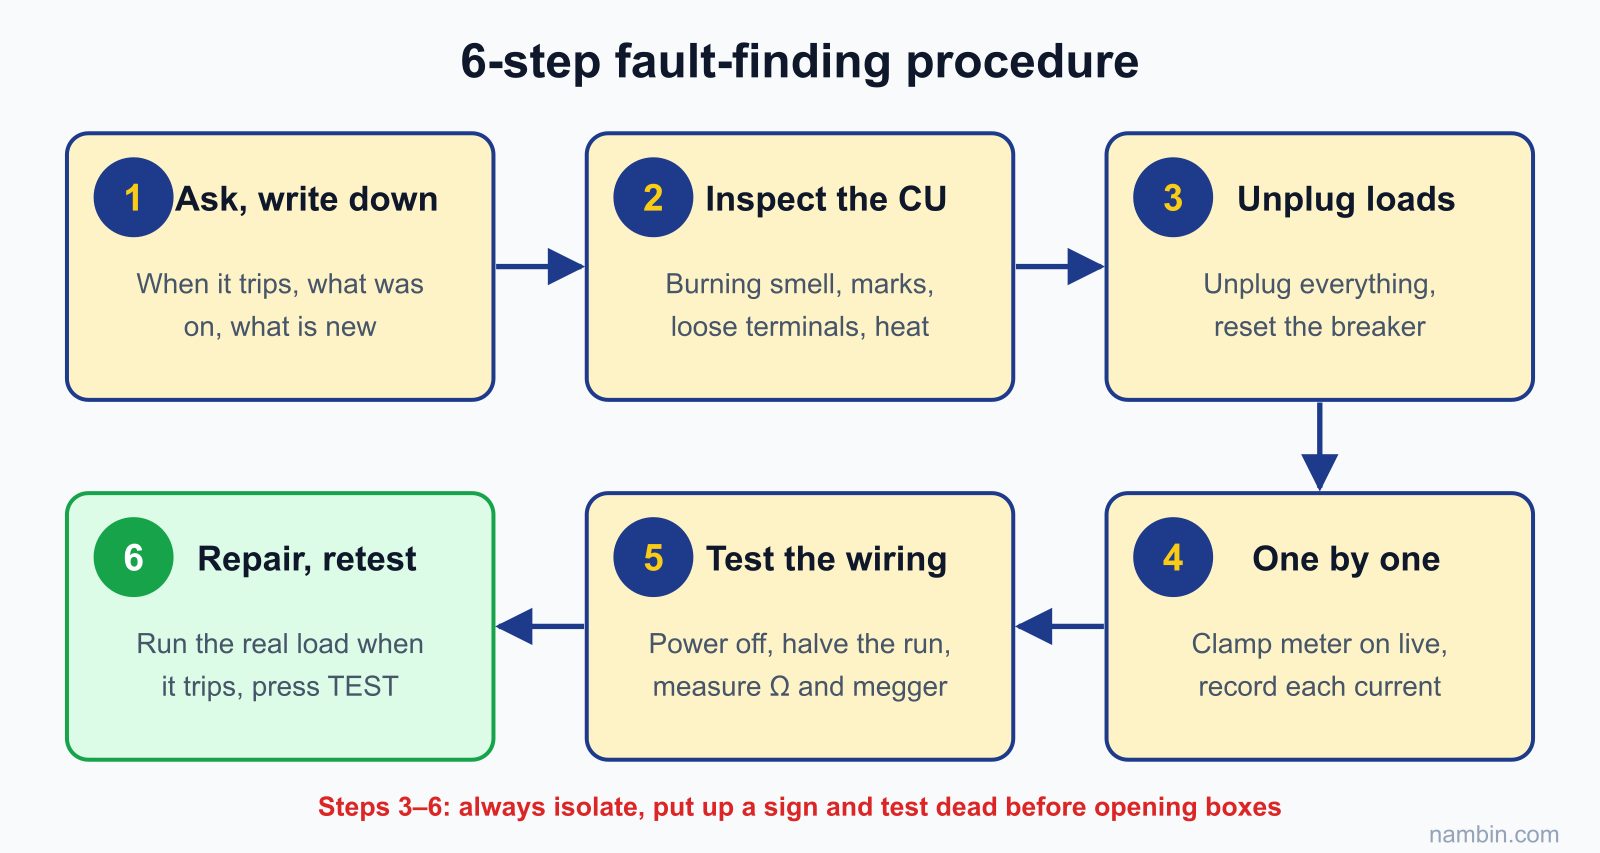
- Ask and write it down: when it started tripping, what was happening at the time, and what has changed recently (new appliances, building work, leaks or damp).
- Inspect the consumer unit: which breaker tripped, is there a burning smell, black marks, loose lugs, or a breaker that is unusually hot?
- Disconnect the loads: unplug every appliance on that circuit and turn off all the switches. Switch the breaker back on.
- Still trips immediately → the fault is in the fixed wiring (cables in the wall, junction boxes, sockets, light fittings).
- Does not trip → the fault is in an appliance, or it is an overload.
- Reconnect the appliances one at a time: plug in and switch on each appliance in turn, and wait a while before adding the next one. The appliance that causes the trip is the culprit (or, in an overload, the "last straw").
- Test when the fault is in the wiring: isolate the power, split the circuit at the junction boxes to divide the cable run in half, and use the meter to measure resistance between live, neutral and earth on each section to locate the short or the weakened insulation. For a leakage fault that is hard to find, use an insulation resistance tester.
- Repair and retest: replace the damaged cable section, joint or socket; for a faulty appliance, advise the customer to repair or replace it. Switch on, run the real load and press the TEST button on the residual current device.
Safety: Splitting circuits, opening junction boxes and measuring resistance must all be done with the power isolated and tested dead. Never bridge out or disable a residual current device just to "stop it tripping".
Tips for steps 1 and 2: do not ignore what the customer says
Customers do not know the technical terms, but they remember the circumstances clearly: "it only trips when the rain blows onto the balcony." Write it down word for word. After isolating the power, check whether terminal screws are loose and whether the plastic housing has turned brown or started to sag. A loose terminal produces heat right at the breaker and makes the thermal part trip early even though the load is below the rating — in that case the "weak breaker" is really a "bad connection".
Tips for steps 3 and 4: disconnect loads systematically
On a circuit with many appliances, do not reconnect them at random. Test the appliances that contain water and heating elements first (water heater, washing machine, electric kettle, rice cooker), then appliances with motors (water pump, fridge, air conditioner), and electronic devices last. For an overload, keep the clamp meter on the live conductor of the circuit the whole time you reconnect, so you can see the current rise with each appliance. Record the current for every appliance — this table of readings is the evidence for your report.
Tip for step 5: split in half to narrow it down
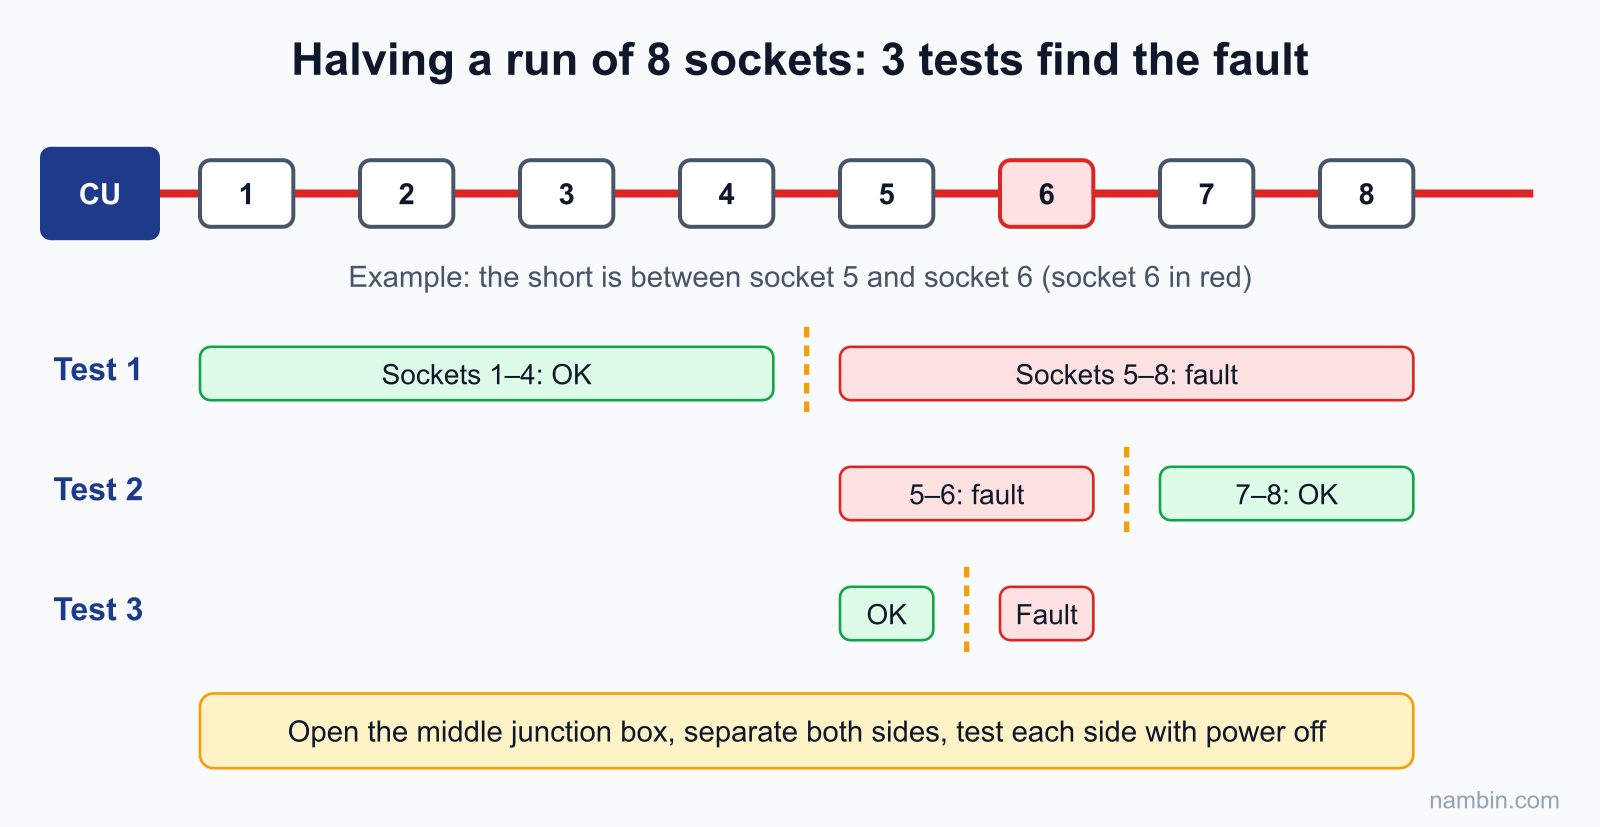
When the fault is in the fixed wiring, the most efficient technique is halving. Open a junction box around the middle of the run, separate the cables to either side and test each side. Whichever side still shows the fault, split that side in half again. On a run with 8 sockets, after just three splits you have narrowed the fault down to the section between two sockets. This is much faster than removing every socket from start to finish, and it does far less damage to the customer's walls.
Reference readings for diagnosis
A reading only means something when you know what a normal value looks like. The figures below are common reference values for 220V/50Hz circuits, measured with the power isolated (except load current).
| Measurement | Normal value (reference) | Value that indicates a fault |
|---|---|---|
| Resistance live – neutral, all loads removed | Very high, meter shows open circuit | Close to 0 Ω: short circuit; a few hundred Ω to a few kΩ: a load left connected or leakage through moisture |
| Insulation resistance live/neutral – earth, tested at 500V DC | ≥ 1 MΩ (new circuits are usually hundreds of MΩ) | Below 1 MΩ: degraded insulation, risk of leakage |
| Heating element resistance of a 2500W water heater | About 19–20 Ω (R = U²/P = 220²/2500) | 0 Ω: shorted element; open circuit: broken element |
| Resistance from supply pins to appliance casing | Very high, megger test ≥ 1 MΩ | Low: leakage to the casing, stop using the appliance |
| Circuit load current with a clamp meter | Below the breaker rating | Above the rating when everything runs together: overload |
| Voltage at the socket under load | About 200–230V | Drops sharply when a load is switched on: poor contact or undersized cable |
Note: when measuring insulation resistance with a megger, remove LED lamps, power supplies and electronic devices from the circuit, and do not touch the conductors during the test. An ordinary multimeter measures with only a few volts from its battery, so a cable that "looks fine on the multimeter" can still leak when it meets 220V in humid air — that is why hard-to-find leakage faults need a megger.
Worked example: a 3-storey tube house whose breaker trips at 7 pm
The situation
The owner of a narrow 3-storey "tube house" (the typical Vietnamese townhouse) reports that the ground-floor socket circuit (kitchen area) trips almost every evening, about 15–20 minutes after they start cooking dinner. The breaker is a C16 MCB on 2.5 mm² cable. The family recently bought an air fryer. The device that trips is an ordinary MCB, not a residual current device.
Narrowing down and calculating
A trip after 15–20 minutes shows the thermal part is acting → suspect an overload. You clamp the meter around the live conductor of the circuit, ask the owner to switch the appliances on one by one as they would for a normal dinner, and record:
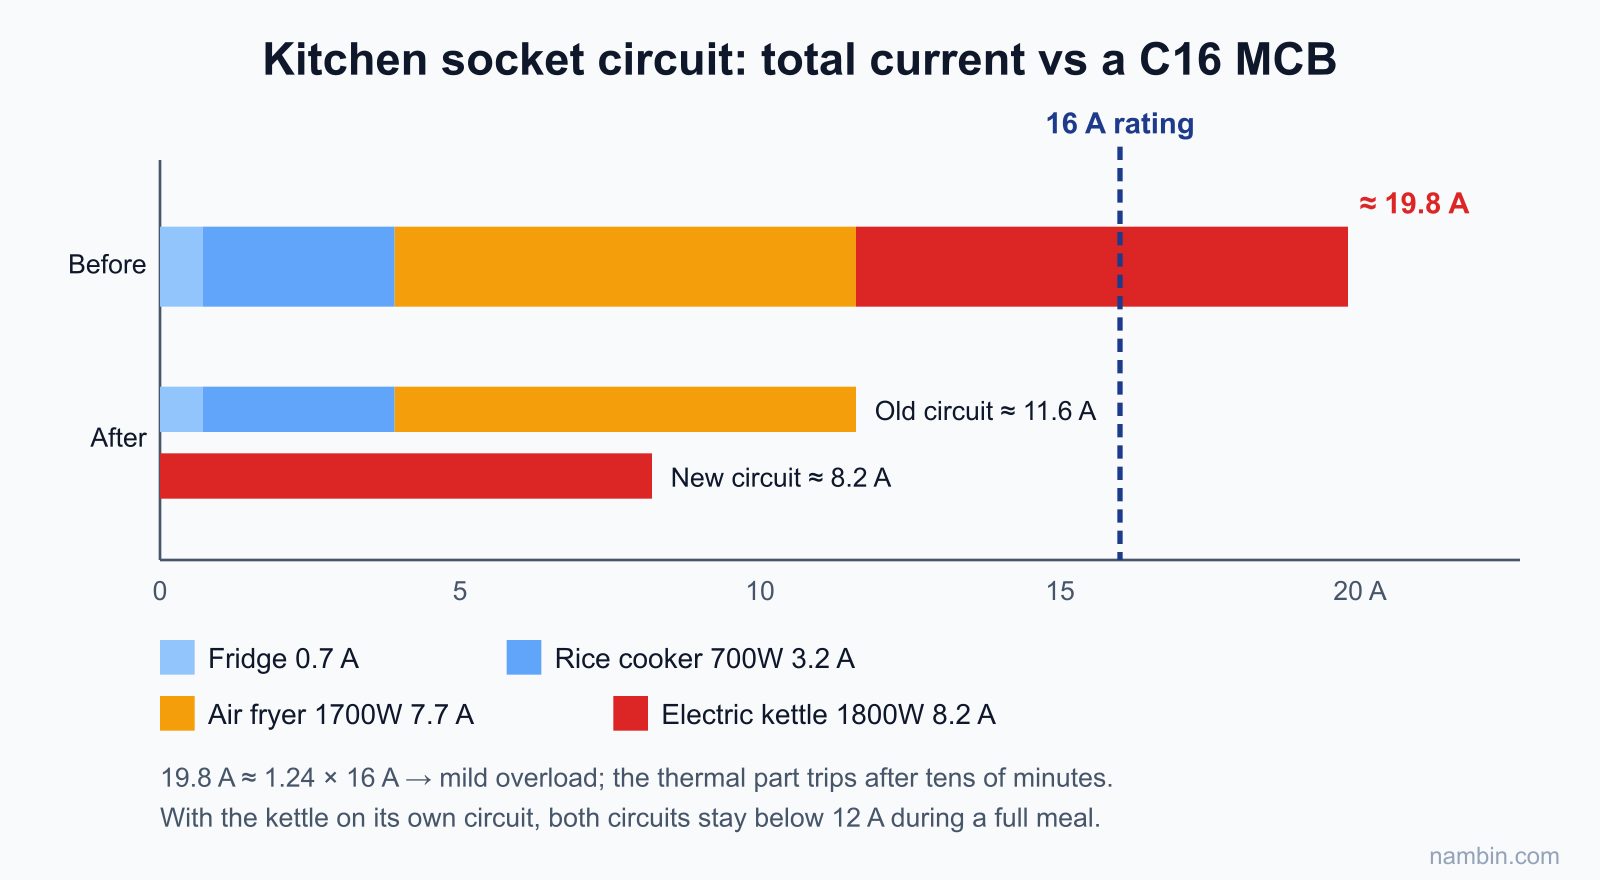
- Fridge: about 0.7 A (with the compressor running).
- 700W rice cooker: about 3.2 A.
- 1700W air fryer: about 7.7 A.
- 1800W electric kettle: about 8.2 A.
Total when everything runs together: about 0.7 + 3.2 + 7.7 + 8.2 ≈ 19.8 A. Check with the formula I = P/U: (700 + 1700 + 1800)/220 ≈ 19.1 A, and adding the fridge brings it close to the measured value. A current of 19.8 A is about 1.24 times the 16 A rating — right in the mild overload zone, where the thermal part trips after a few tens of minutes. Conclusion: the breaker is doing its job; it is not faulty.
Solution and retest
Do not upgrade to a C20 or C25 on a 2.5 mm² cable that already feeds several sockets. The correct solution is to run a new, dedicated socket circuit from the consumer unit for the kettle and any future heating appliances, with the cable and breaker sized as calculated in the step "Reading diagrams & calculating loads". If the customer does not want the work done yet, advise them not to run the kettle and the air fryer at the same time. After splitting the circuit, measure again while cooking a full meal: the old circuit carries about 0.7 + 3.2 + 7.7 = 11.6 A and the new circuit about 8.2 A — both below 12 A. Run a 30-minute test with no trips, and confirm the breaker terminals are not unusually warm. Record every reading in the report.
Common situations and how to deal with them
Trips when the water heater is switched on
If the residual current device trips: the usual causes are a leaking heating element, a damp supply cable or missing/incorrect earthing. With the power isolated, measure the resistance between the supply pins and the heater casing. If an ordinary breaker trips after a few minutes: check that the cable and breaker are large enough for the heater's power.
A 2500W heater draws about 11.4 A, so it should have its own circuit with a 30 mA RCBO. A heating element covered in years of scale can crack its sheath, letting water reach the resistance wire inside and causing leakage. If you measure a low resistance from supply pins to casing, advise the customer to have the element replaced through the warranty centre or a water heater repairer, and to stop using the heater until it is fixed.
Trips when it rains
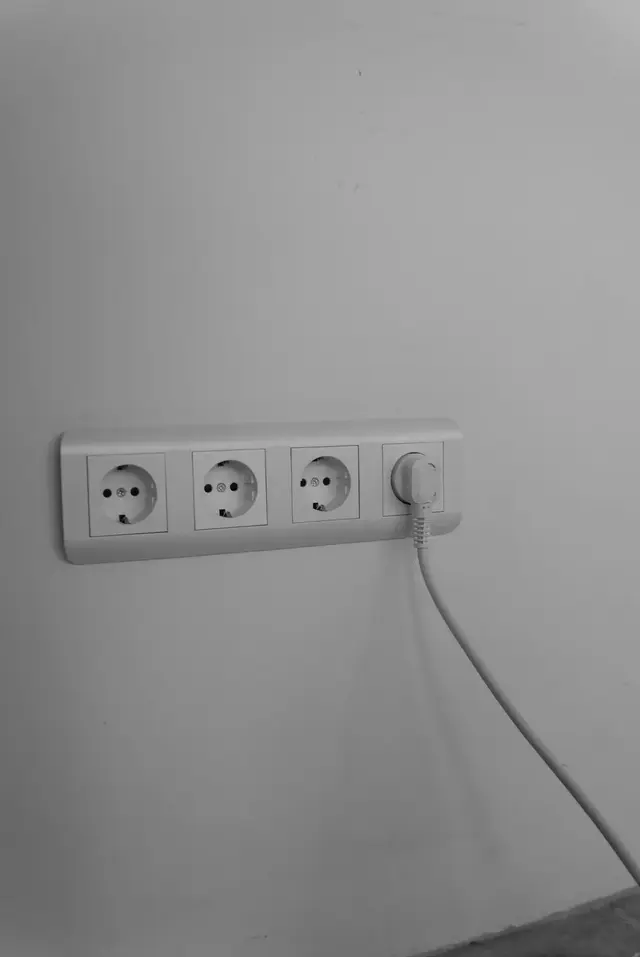
Check outdoor lights and sockets, junction boxes in the ceiling near leaks, and cables running through damp walls. Replace outdoor equipment with types that have a suitable water protection rating (IP rating), and fix the waterproofing before rewiring.
A useful tip: leakage caused by moisture often "disappears" when the weather is dry, so arrange to test just after rain, or test the insulation of each circuit and compare them — a circuit with much lower insulation resistance than the others is the one to examine first.
Hot socket with scorch marks
Usually caused by poor contact (weak socket springs, loose terminal screws) or by plugging a high-power appliance into a small socket. Replace the socket, cut back the burnt section of cable and check the cable size of the circuit.
This is a dangerous fault because the breaker does not trip: the current is still below the rating; only the contact point is overheating locally. Check the other sockets on the same run as well.
Flickering lights, appliances running weakly, tester pen lights up on both wires
These are signs of a lost neutral or a poorly connected neutral, usually in a junction box or at the N terminal in the consumer unit. When the neutral is broken, the N conductor beyond the break "picks up" voltage through the loads, so the tester pen lights in both holes of the socket. Isolate the power and check from the N bar in the consumer unit out to each junction box. If the whole house has lost its neutral, the fault may be upstream of the consumer unit — in that case, call the power company (EVN) and do not work on anything before the electricity meter yourself.
Two RCBOs trip together, or one trips when a light on another circuit is switched on
This is usually caused by crossed neutrals: the N conductor of one circuit has been connected to the RCBO of another circuit, or to a shared N bar. Current goes out through the live of one RCBO but returns by a different path, so the device "sees" an imbalance and trips. To check, isolate the power, disconnect each N conductor at the consumer unit and test continuity to identify which neutral belongs to which circuit.
Common diagnostic mistakes electricians make
- Fitting a bigger breaker: symptom — the tripping stops for a few weeks, then the cable gets hot and its insulation becomes brittle. Cause — the breaker can no longer protect the cable. Fix — choose the breaker to suit the cable size and solve the overload by splitting circuits.
- Concluding "the breaker is faulty" before measuring the current: symptom — a new breaker still trips. Cause — skipping the clamp meter measurement. Fix — only conclude the breaker is weak when the real current is clearly below the rating and the terminals have been tightened, yet it still trips.
- Insulation testing without removing electronic devices: symptom — abnormally low readings, or damaged LED lamps and power supplies. Fix — remove the loads, set the switches appropriately and record the test conditions clearly.
- Not retesting with the real load after the repair: symptom — the customer calls back the same evening. Fix — always run a test in the conditions that caused the trip (same appliances, same time of day), and press TEST on the residual current device.
- Not recording readings: next time there is nothing to compare with. Fix — record readings with the date, time and weather.
When to stop and call the responsible authority: faults at the meter, in the cable before the meter or in the shared supply of a building; abnormal voltage across the whole street; cables burning inside walls over a wide area. Report it to the power company or the building management, and do not go beyond your scope of work.
Reporting to the customer
Finish every repair with a short report (it can be sent as a text message):
- The problem the customer reported.
- The cause you found and the evidence (readings, before and after photos).
- The work done and the parts replaced.
- Recommendations: appliances to replace, circuits to upgrade, things to watch when using them.
A clear report builds the customer's trust, makes them call you again next time and brings in referrals.
For the tube house example above, a good report uses plain language: "The kitchen socket circuit has a 16 A breaker. While cooking in the evening we measured about 19.8 A, so the breaker was right to trip to protect the cable. We moved the electric kettle to a new socket circuit; each circuit now measures below 12 A and ran for 30 minutes without problems. We recommend not plugging any more heating appliances into the old circuit."
Frequently asked questions
If a breaker trips all the time, is it because the breaker is poor quality?
It can be, but less often than you might think. Measure the real current with a clamp meter and check the terminals first. Only if the current is clearly below the rating, the connections are tight and there is no leakage, yet it still trips, should you replace the breaker with one of the same type and rating.
Should I remove the residual current device because it trips too often?
No. Frequent tripping is a sign of leakage or of a poorly planned circuit layout. Find the leak, or re-divide the circuits so that no single RCD carries too many electronic devices. Removing it takes away a layer of protection for people.
Why does the multimeter say the cable is fine when it still leaks?
A multimeter measures with a low voltage, so it cannot detect damp or cracked insulation that only "breaks down" at a higher voltage. Only a megger testing at 500V DC can find this type of fault.
The water heater trips the RCD but nobody got a shock — can we keep using it?
You should not. Nobody got a shock precisely because the RCD cut the power. Stop using it, measure the resistance from supply pins to casing and recommend repairing or replacing the heating element.
Project exercise
- Build a practice board with a breaker, an RCBO, 2 sockets and 1 light; ask your instructor to create hidden faults (a loose joint, an excessive load).
- Carry out all 6 steps, record your readings and write a one-page report.
- Do one more round with a crossed neutral between two circuits, and another with a simulated leakage fault (prepared safely on the practice board by the instructor).
Self-assessment criteria — you pass when you:
- Always isolate, put up the sign and test dead before opening a junction box or measuring resistance.
- Correctly identify the type of fault (overload, short circuit, leakage, poor contact) and can show the evidence.
- Narrow down the fault area by halving, without taking everything apart.
- Have a table of readings with units and test conditions, and can explain why a reading is abnormal.
- After the repair, retest in exactly the conditions that caused the trip and press TEST on the residual current device.
- Produce a one-page report with all four parts that a non-specialist can understand.
With this lesson complete, you have finished the skills section of the learning path. The next step is the safety check and circuit installation exam: answer the compulsory set of safety questions and install a complete sample circuit within a time limit — the diagnostic procedure in this lesson will help you check your own circuit for faults before the examiner switches the power on.