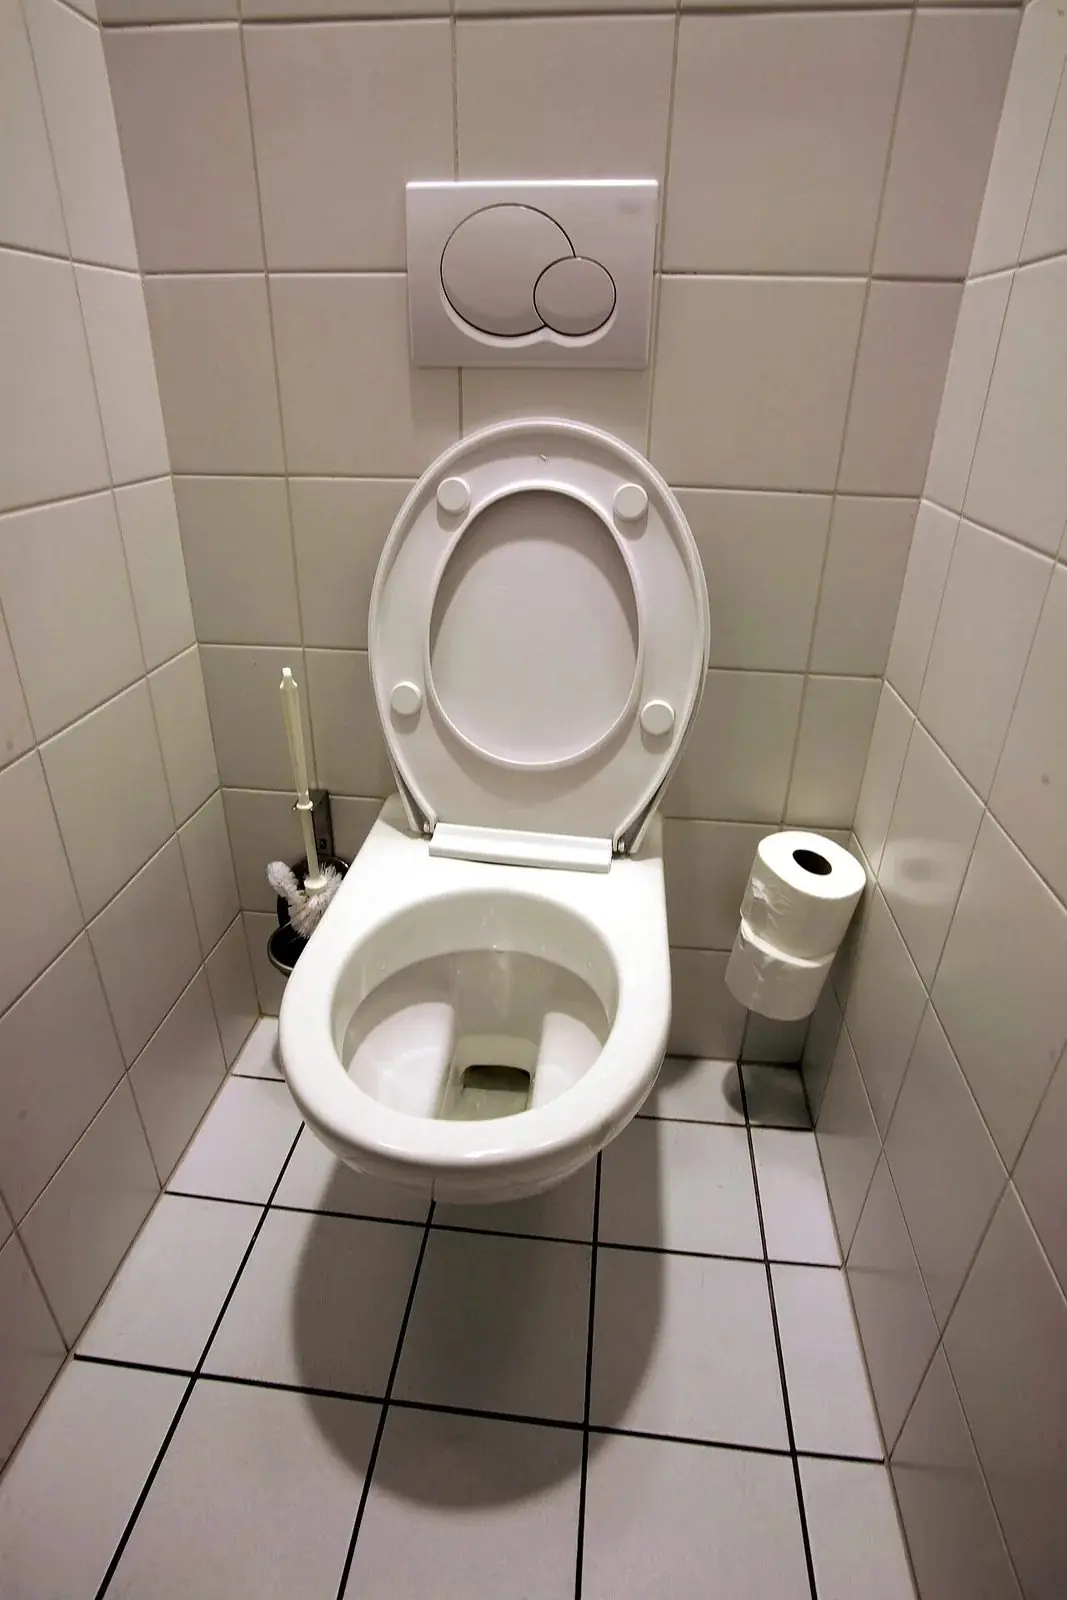
A wall-hung toilet looks simple: a ceramic pan that seems to float above the floor and a flush plate on the wall. What makes it work is hidden. Behind the finished wall a steel frame (also called a carrier or in-wall installation element) carries the weight of the pan and the person sitting on it, together with a plastic cistern, a drain bend and a supply connection. Once the wall is tiled, a mistake back there is expensive: a weeping joint, a pan set too high, a frame badly anchored or a valve nobody can reach.
This guide walks through the full job in the order a careful plumber works: choosing the right frame, setting out the heights, fixing the frame, connecting drain and supply, testing before the wall is closed, boarding and tiling around the frame, and finally hanging the pan and setting up the flush.
Scope and safety. Written for trainee and working residential plumbers in Vietnam, and for homeowners who want to understand what a good installation looks like. It covers a standard concealed-cistern frame with a ceramic wall-hung pan, in homes typically supplied from a rooftop tank by gravity or by a booster pump, with uPVC drainage. Every brand's frame, cistern and pan is different. Figures marked for reference are common examples only, not rules from a standard: always follow the manufacturer's installation instructions that come with the frame and the pan, and keep them for the client.
How a wall-hung toilet system is put together
The frame (carrier): a steel frame with adjustable feet and wall brackets. It carries the full load of pan and user, so the ceramic never hangs on the wall finish.
The concealed cistern: a plastic cistern built into the frame, containing the fill valve, the flush valve and usually an isolation valve, all reached through the opening behind the flush plate.
The drain bend: a 90° bend fixed to the frame, joining the pan outlet to the soil pipe.
The flush pipe from cistern to pan, and two threaded studs that hold the pan to the frame.
The flush plate with full and half flush buttons, linked to the flush valve by rods or another mechanism.
The pan, with its seat, connectors and sound-isolation pad.
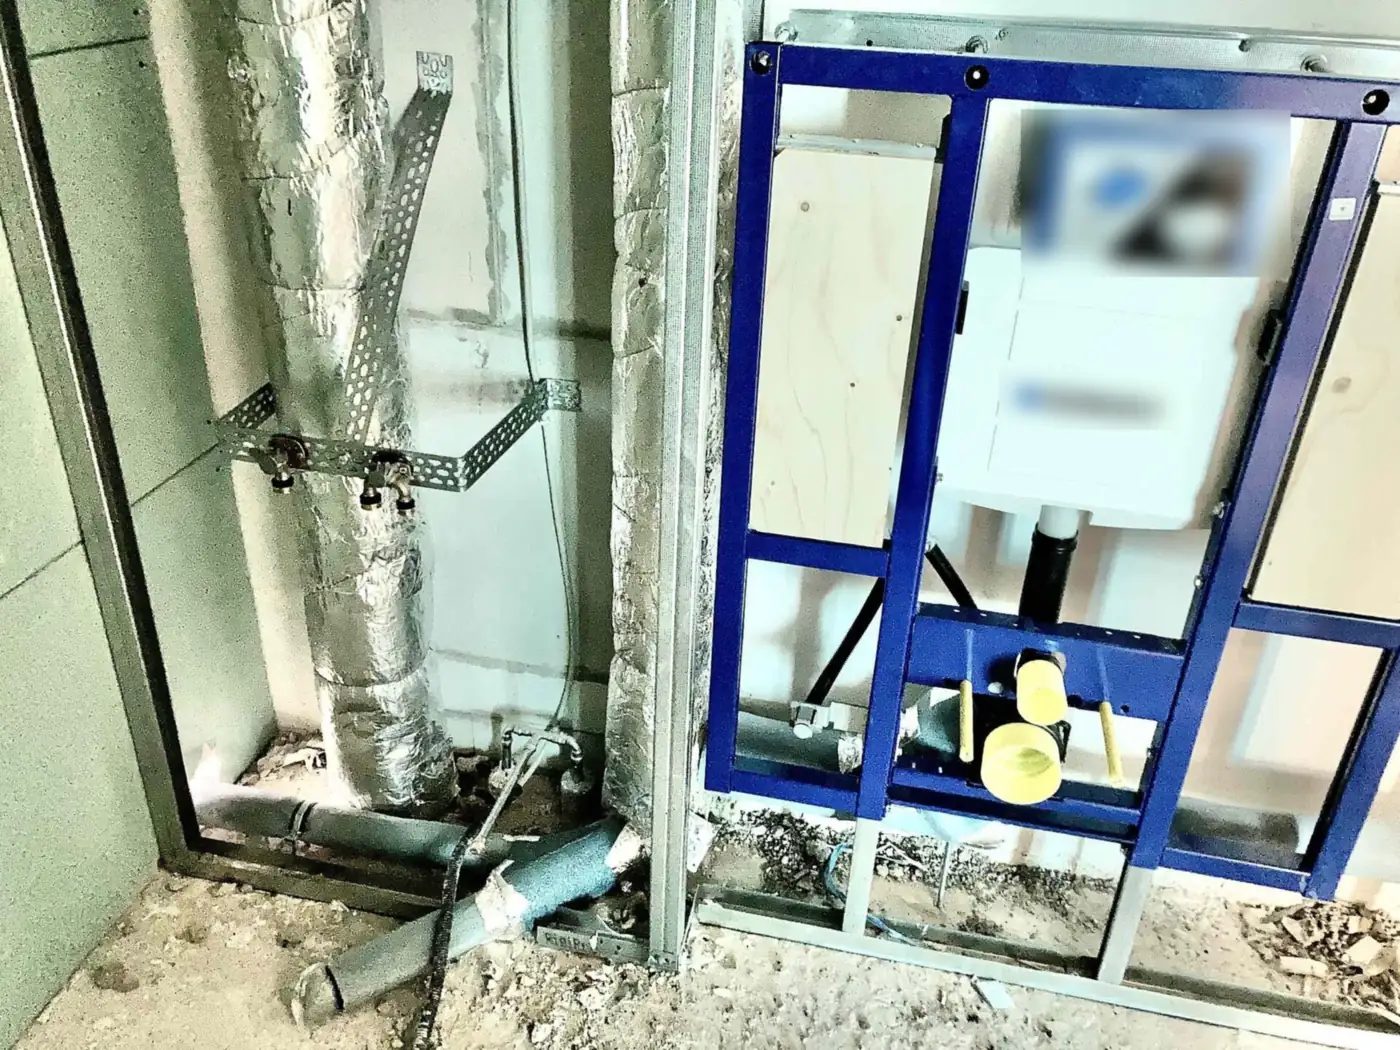
Figure 1. A floor-standing toilet frame in place before boarding: the steel frame stands on adjustable feet inside a metal stud-wall track, the plastic cistern sits at the top, and below it are the flush pipe, the drain bend under a yellow protective cap and two yellow-sleeved fixing studs for the pan. Brand labels have been blurred. (Photo: Kai Kemmann, Wikimedia Commons, CC BY-SA 4.0)
Step 1: Survey the site and choose the right frame
Wall type and frame type
Floor-standing (self-supporting) frame: the adjustable feet are bolted to the structural floor and the top is braced to the wall. Most of the load goes to the floor. It is the usual and most forgiving choice, and the right one for stud walls (metal or timber studs with boards) and for hollow brick walls, which are common in Vietnamese houses and hold anchors poorly. Never rely on plasterboard or hollow brick alone to carry a toilet.
Wall-supported frame: designed to be anchored into a solid, load-bearing masonry or concrete wall, sometimes with little or no floor support. Use it only where the wall is genuinely solid at the anchor points, and only as the maker describes.
Low-height frames suit a position under a window or a half-height duct; check the cistern still suits the pan.
Space, drain and supply
Duct depth. The frame, cistern and bend need a set depth in front of the structural wall, plus boards and tiles. Take it from the data sheet; do not guess.
Drain route. Old floor-standing toilets in Vietnam often drain straight down through the slab. A wall-hung pan drains backwards into the frame's bend, which then needs a route with a steady fall to the stack. Check there is enough height before you commit.
Pipe size. Toilet drains in homes are commonly 90 or 110 mm uPVC (for reference). The bend and adapters must match.
Supply pressure. A top-floor bathroom fed by gravity from a rooftop tank only a little higher may have low pressure; a booster pump may give more than the fill valve allows. Check both against the cistern's data.
Pan compatibility. Check that the pan's stud spacing, outlet and flush inlet suit the frame.
Step 2: Set out centre line, finished floor level and pan height
All the dimensions of a wall-hung toilet are measured from the finished floor level (FFL) and the finished wall surface, not from the bare slab or the bare wall. This is where most installation errors start.
Mark the finished floor level. Agree with the tiler on the thickness of screed, waterproofing and tiles. Mark a level line on the wall a known distance above FFL (for example a 1 m datum line) so that everyone measures from the same reference.
Mark the centre line. Mark the centre of the pan on the floor and up the wall. Check side clearances to walls, the basin, the shower screen and the door swing. Allow room to use a bidet spray if there will be one.
Decide the pan height with the client. One of the big advantages of a wall-hung toilet is that the seat height can be chosen. Many installers start from a seat height of around 40–45 cm above the finished floor (for reference) and adjust for tall or elderly users. Most frames have a height mark or a scale showing where the pan will sit relative to FFL. Write the agreed height down and get the client to confirm it.
Mark the finished wall plane. Know how far the finished tile face will be in front of the frame. Stud length, pipe connector length and the flush-plate frame depend on it.
Practical tip: Photograph your set-out lines with a tape measure in the shot. After tiling, the photo settles any dispute about heights.
Step 3: Fix the frame to the floor and wall
Set the feet. Extend the feet to bring the frame's height mark to the agreed level relative to FFL. Lock the adjustments as instructed.
Position on the centre line. Stand the frame on the centre line at the correct distance from the wall, so the front will be in the right place for the planned finished wall.
Plumb and level. Use a spirit level on the front face (vertical) and across the top (horizontal), and check that the frame is not twisted. A frame that leans makes the pan lean, and you cannot correct that after tiling.
Fix to the floor. Drill and fix through the feet into the structural slab with the anchors supplied or specified. If the floor will be waterproofed later, coordinate with the tiler so the membrane is dressed properly around the feet.
Fix to the wall or partition. Fit the wall brackets and anchor them into solid material, or into the extra framing in a stud wall, as the manufacturer shows. Do not over-drill hollow bricks.
Check again. Re-check level, plumb and height, then push firmly on the frame; it must not move or flex.
Step 4: Connect the drain bend to the soil pipe
Plan the route. From the frame's bend the drain must run to the stack with a steady fall all the way, with no dips or back-falls where waste can settle. Follow the drainage design; many installers aim for a gentle constant fall such as 1–2 % (for reference). Use two 45° bends or long-radius bends rather than a tight 90° where possible.
Fix the bend at the position the frame instructions give, so the pan outlet will line up.
Make the joints. Cut square, deburr, clean the sockets, then solvent-weld or push-fit according to the system. Keep solvent cement away from rubber seals.
Support the pipe so it cannot sag or hang its weight on the bend.
Plan access. On long or winding routes, an access fitting in a reachable place saves breaking the wall later.
Keep the bend capped until the pan is fitted, so mortar and adhesive cannot fall in.
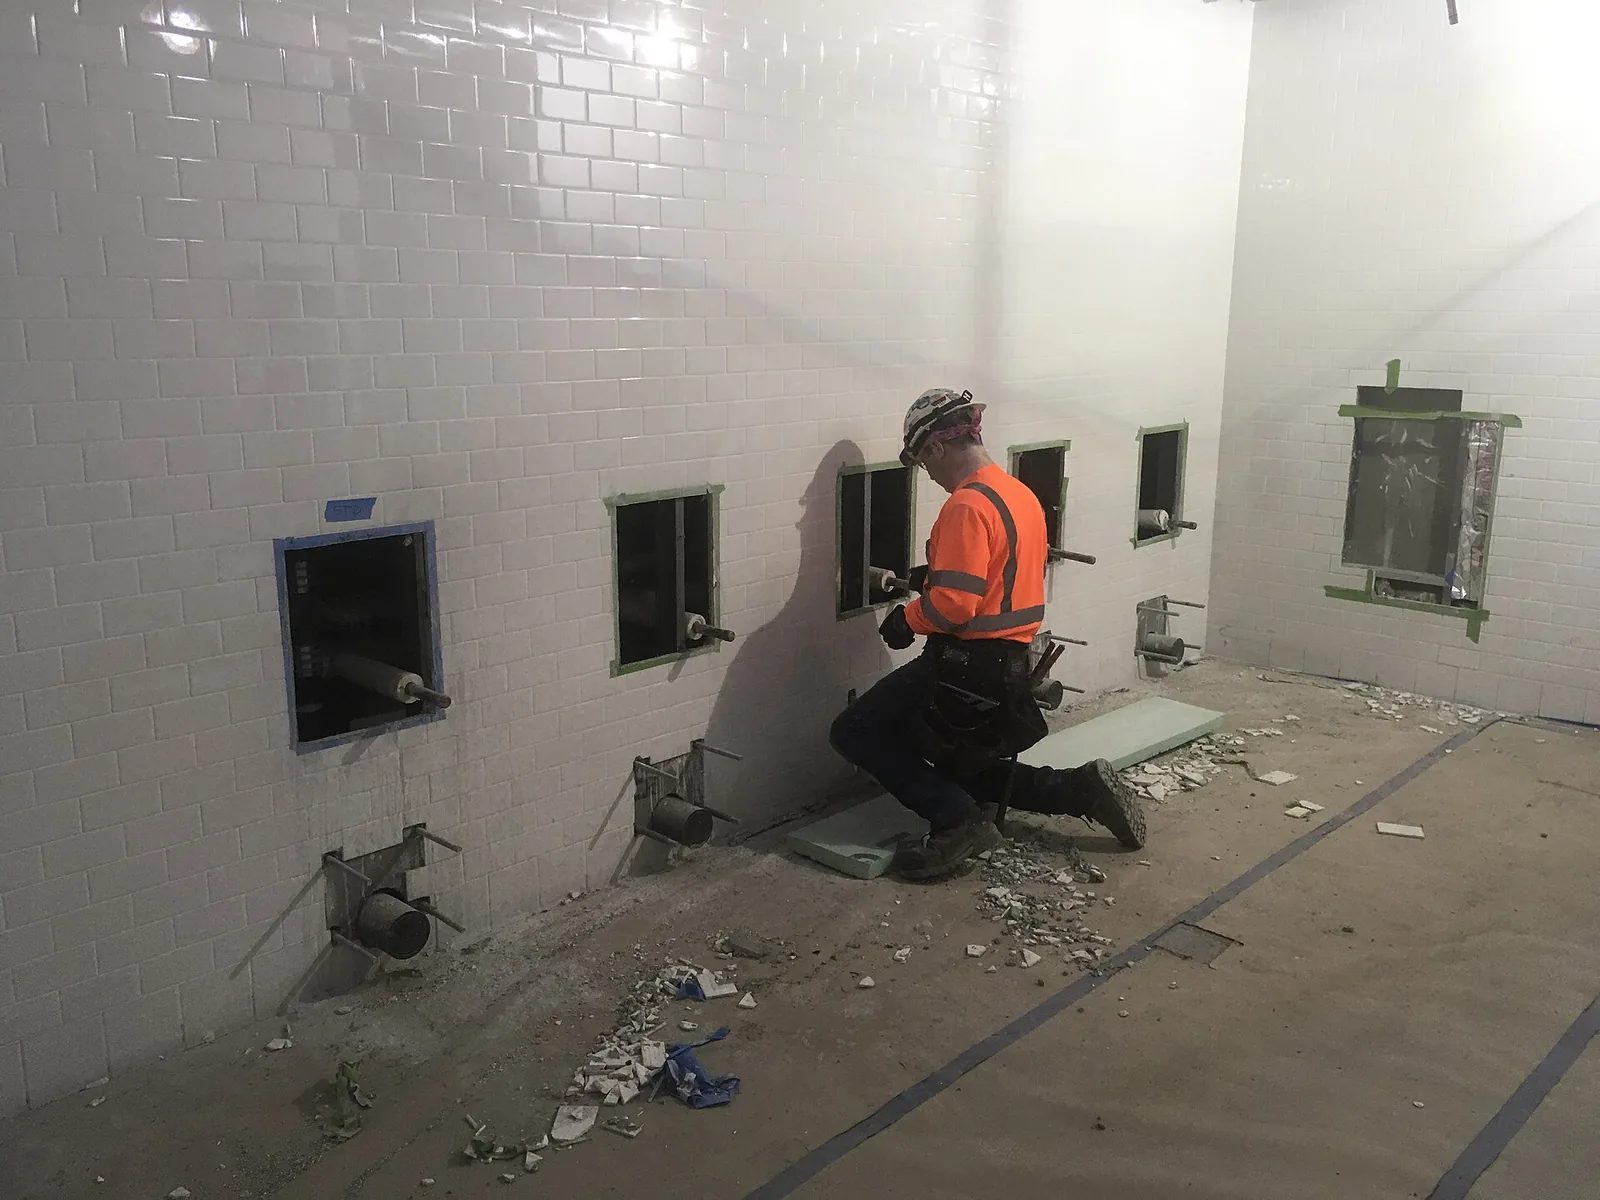
Figure 2. Toilet positions being prepared in a newly tiled wall of a public washroom: each position has a rectangular opening left in the tiles, and below it pipe stubs and threaded rods project from the hidden frames, ready for the fittings and pans. In a home the principle is the same: keep the openings and connections clear and protected until the final fit. (Photo: MTA Capital Construction Mega Projects, Wikimedia Commons, CC BY 2.0)
Step 5: Connect the supply to the cistern
Run the supply (in Vietnam usually PPR) to the cistern's inlet point shown in the frame instructions. Many cisterns take a 1/2-inch thread; check your model.
Use the built-in isolation valve. Most concealed cisterns have one, reachable through the flush-plate opening, so the fill valve can be serviced without shutting off the house. Do not bury an extra valve behind tiles.
Flush the new pipework before connecting, so swarf and debris do not jam the fill valve.
Check the pressure against the fill valve's range. If a booster pump delivers more than the cistern's maximum, a pressure-reducing valve may be needed.
Do not overtighten plastic threads. Seal as the maker states; where a rubber washer seals the joint, PTFE tape is not needed.
Step 6: Test everything before closing the wall
This is the most important step. Once boards and tiles go on, every leak stays hidden until it shows up as a damp patch, a smell or a stain in the room below.
Supply test. With the cistern isolation valve closed, test the new pipework under pressure using your normal method (see our guide to testing supply lines before plastering). Many plumbers leave it several hours or overnight (for reference), watching the gauge and checking each joint with dry tissue.
Cistern test. Open the valve, let the cistern fill and check the fill valve shuts off at the right level. Flush many times and look for drips at the inlet, flush pipe and cistern base. Water must not trickle continuously through the overflow.
Drain test. Pour plenty of water through the bend (or use the maker's test arrangement), check every drain joint, and confirm the water runs away freely with no sign of a back-fall.
Record. Photograph the frame, pipe routes and measurements before boarding, and give the photos to the client.
Step 7: Board and tile without damaging the frame
Boards. Close the duct with the boards the frame maker specifies (usually moisture-resistant), screwed to the frame and surrounding framing, in the thickness or number of layers required.
Openings. Cut neat holes for the drain bend, flush pipe and studs. Oversized holes weaken the boards and are hard to seal.
Keep the access opening. Leave the cistern's protective cover in the flush-plate opening during boarding and tiling, and trim it only when instructed. Never tile over the access opening; it is the only way to reach the valves.
Waterproofing. In wet areas use the tile system's waterproofing with proper collars around penetrations.
Thickness and flatness. The total finish (board, adhesive, tile) must fall within the range the studs, connectors and flush-plate frame allow, and the tiles behind the pan must be flat in one plane, or the pan will rock and can crack when tightened.
Step 8: Fit the pan
Cut the connectors. Measure the drain and flush connectors from the finished tile face as instructed, cut square with a fine-tooth saw and deburr.
Cut the studs so the right length projects from the finished wall: too long and the pan cannot go fully home; too short and the nuts have too few threads.
Fit the isolation pad between pan and wall if supplied. It reduces noise, spreads the load and keeps ceramic off the tiles.
Lubricate the seals lightly with the lubricant supplied or approved by the maker.
Offer up the pan over the studs and onto both connectors at once. If it will not go home, find out why; never force it.
Tighten evenly, not hard. Fit washers, sleeves and nuts in the order supplied and tighten a little at a time, alternating sides, until the pan sits firmly and evenly. Overtightening cracks ceramic, sometimes days later. Use the maker's torque value if one is given.
Check the rim with a spirit level and confirm the agreed seat height.
Seal the pan-to-wall joint only if the instructions call for it, with sanitary sealant. Many installers leave a short gap unsealed at the bottom so a hidden leak shows itself; check what the maker recommends.
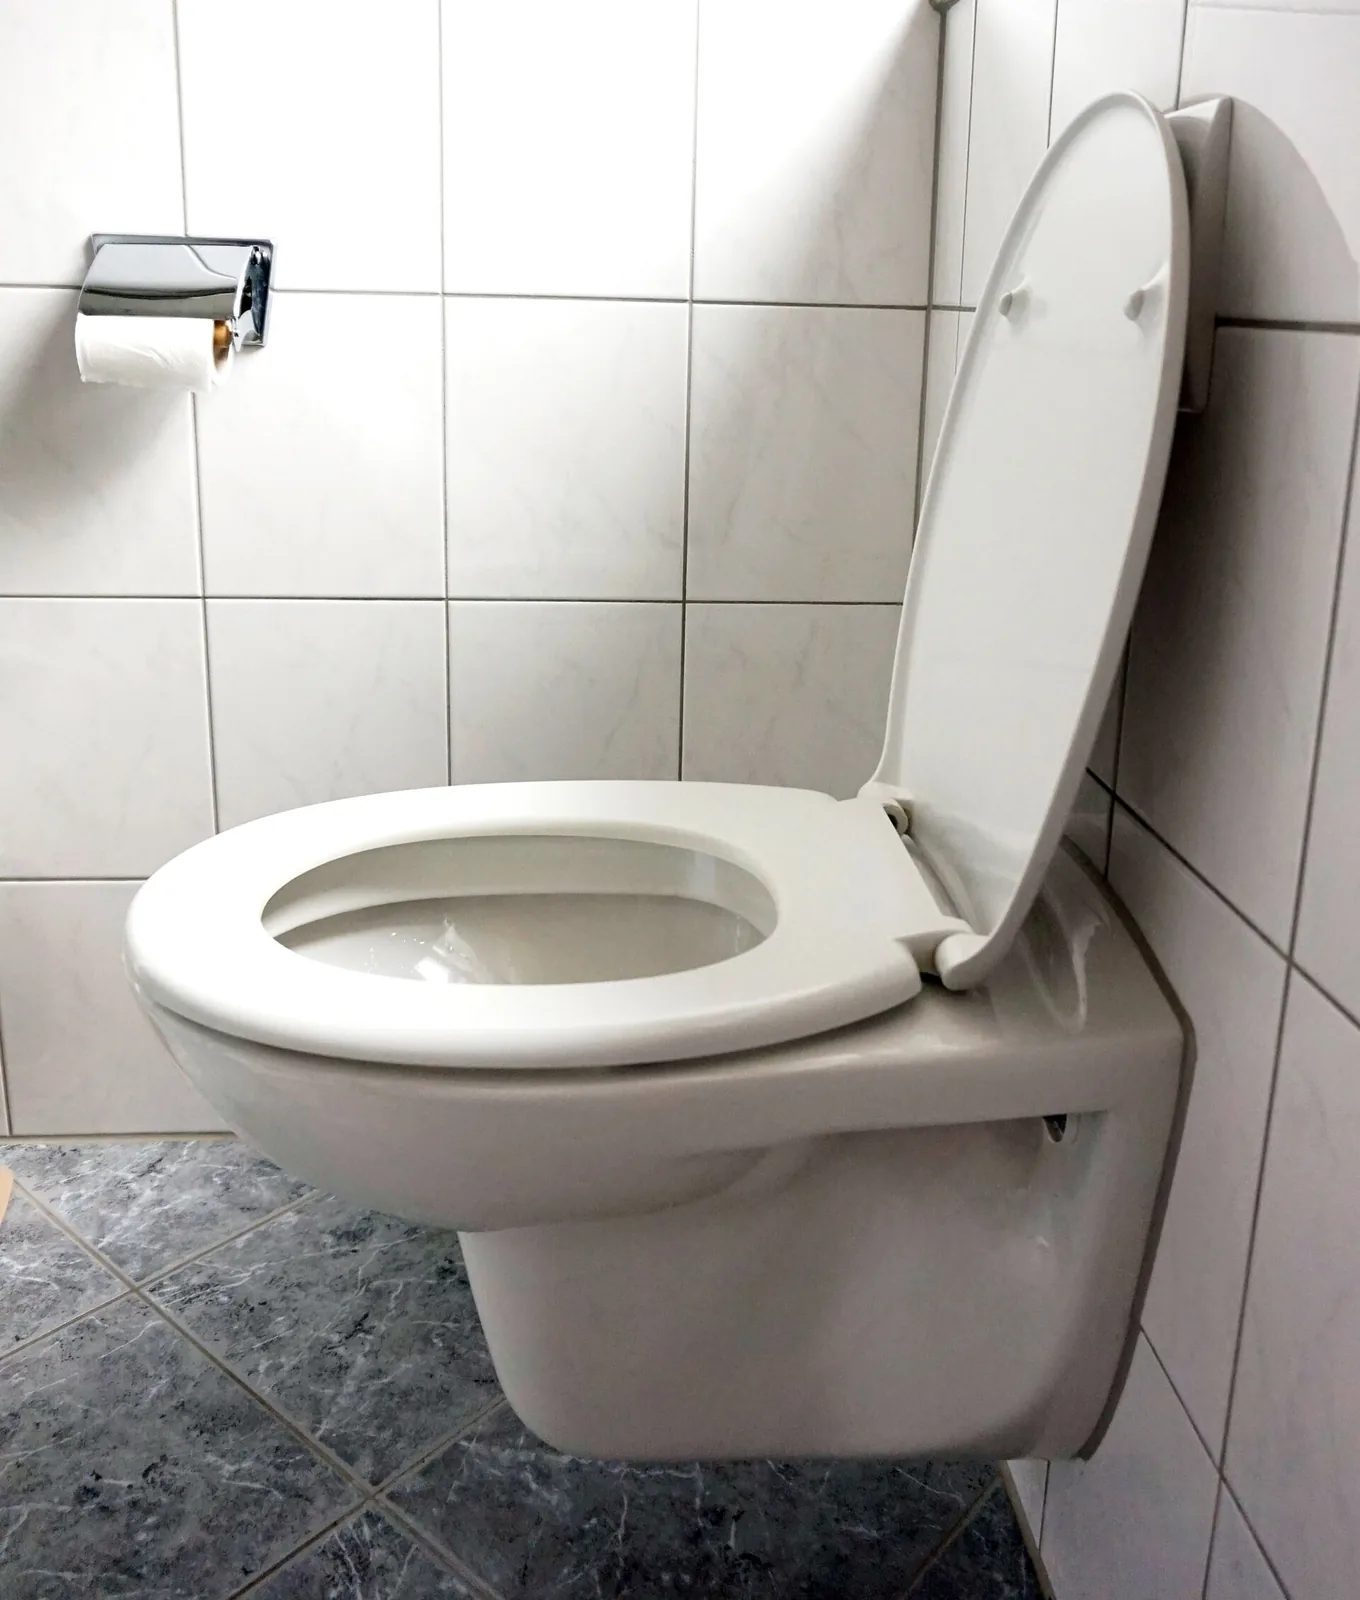
Figure 3. Side view of a fitted wall-hung pan: it sits flat against the tiles with nothing touching the floor, so the whole load goes through the studs into the hidden frame. The pan must sit evenly on a flat tiled surface; tighten its nuts evenly and never hard enough to stress the ceramic. (Photo: Tiia Monto, Wikimedia Commons, CC BY-SA 3.0)
Step 9: Fit the flush plate
Adjust the actuators. Cut or set the push rods (or other mechanism) to suit the wall thickness, exactly as instructed. Rods that are too long can hold the valve partly open and cause a constant trickle into the pan.
Fit the plate. Mount the plate frame flush with the tiles, clip the plate on and press each button. There should be a little free play before the valve lifts, and the buttons should return fully.
Step 10: Set full and half flush volumes
Most dual-flush concealed cisterns let you set the full and half flush volumes. The factory setting suits many pans, but not every pan.
Check the pan's requirement. The pan's data sheet states the flush volume it was designed for. A setting lower than the pan needs leads to poor clearing and blockages.
Adjust as instructed. Typical settings are made on the flush valve by moving a stop or a float. Common examples are around 6 litres full and 3 litres half on many models (for reference only; follow the pan and cistern data).
Test with real conditions. Flush with toilet paper in the bowl. Check that the bowl clears and that the bowl refills to a proper water seal.
Step 11: Final tests and handover
Flush several times on full and half flush, then check the pan-to-wall joint and the floor under the pan for drips.
Listen: a continuous hiss or trickle means the fill valve or flush valve is not sealing, or a rod is pressing on it.
Press down firmly on the pan: it must not move, creak or rock. Fit the seat and check the hinges.
Show the client how to remove the flush plate and where the isolation valve is, and hand over the instructions and your photographs.
Reference table: checks and measurements
Item | What to check | Typical value or method (for reference, follow the manufacturer's instructions) |
|---|---|---|
Wall type | Solid, hollow brick or stud wall | Hollow brick or stud wall: prefer a self-supporting floor frame |
Finished floor level | Agreed with the tiler | Datum line marked on the wall, e.g. 1 m above FFL |
Seat height | Agreed with the client | Often around 40–45 cm above FFL; adjust for the users |
Frame position | Plumb, level, on the centre line | Spirit level on front and top; no twist; no movement when pushed |
Drain size | Matches bend and adapters | Commonly 90 or 110 mm uPVC |
Drain fall | Steady fall to the stack, no dips | Per design; often a gentle fall such as 1–2 % |
Supply pressure | Within the fill valve's range | Check tank height or pump output; PRV if too high |
Supply test | Joints dry, gauge steady | Several hours or overnight before boarding |
Board thickness | Within the frame's allowed range | As specified in the frame instructions |
Access opening | Clear and protected | Protective cover left in until finishing |
Pan nuts | Even, firm, not overtightened | Alternate sides; use the maker's torque if given |
Flush volumes | Suit the pan | Many models around 6 / 3 litres; check the pan data |
Practical examples
Example 1: The hollow-brick wall
A client in a townhouse wants a wall-hung toilet against a hollow-brick partition. The plumber explains that anchors in hollow brick cannot be relied on to carry the full load, recommends a self-supporting frame bolted to the concrete floor slab, and uses the hollow-masonry anchors the maker approves only for the top brackets. The pan is solid and does not move.
Example 2: The tiler's extra screed
The frame was set for a planned floor build-up, but the tiler added extra screed to correct falls to the floor drain. The finished floor rose, and the pan ended up lower than agreed. Because the plumber had marked a datum line and photographed it, the problem was caught before the wall was boarded, and the frame height was corrected in time.
Example 3: The tiled-over access
A toilet has run continuously for weeks. The previous installer tiled over the flush-plate opening, so there is no way to reach the fill valve without cutting tiles. The access opening is part of the system, not an option.
Common mistakes
Measuring heights from the bare slab; anchoring a wall-supported frame into hollow brick or plasterboard; a frame out of plumb; a drain with no fall; skipping the test before boarding; tiling over the access opening; studs and connectors cut to the wrong length; overtightened pan nuts; and a flush volume set lower than the pan needs.
Safety checklist
Read the frame, cistern and pan instructions before starting.
Check for hidden pipes and cables before drilling floors and walls; use a detector.
Wear eye protection and a dust mask when drilling and cutting; use hearing protection for long drilling.
Use suitable anchors for the actual wall and floor material.
Lift ceramic pans with care; they are heavy and break easily. Get help if needed.
Keep power tools away from water, and use an RCD-protected supply on site.
If the client wants a shower-toilet or electric bidet seat, have a qualified electrician install a dedicated socket or connection with RCD protection (230 V / 50 Hz in Vietnam), positioned as the seat's manual specifies. Plumbers should not run mains wiring.
Ventilate when using solvent cement and sealants, and keep the drain capped against debris and sewer gas.
Advice for the client
Load rating. Ask for the frame's rated load in the manufacturer's data and choose a product that suits the users. A properly installed frame carries the load to the structure, not to the tiles.
Access for servicing. Explain that the fill valve and flush valve are serviced through the flush-plate opening. Keep the opening clear; never tile over it or fix furniture in front of it.
Records. Keep the model details and the photographs of the pipe routes, so parts can be found and nobody drills into a pipe later.
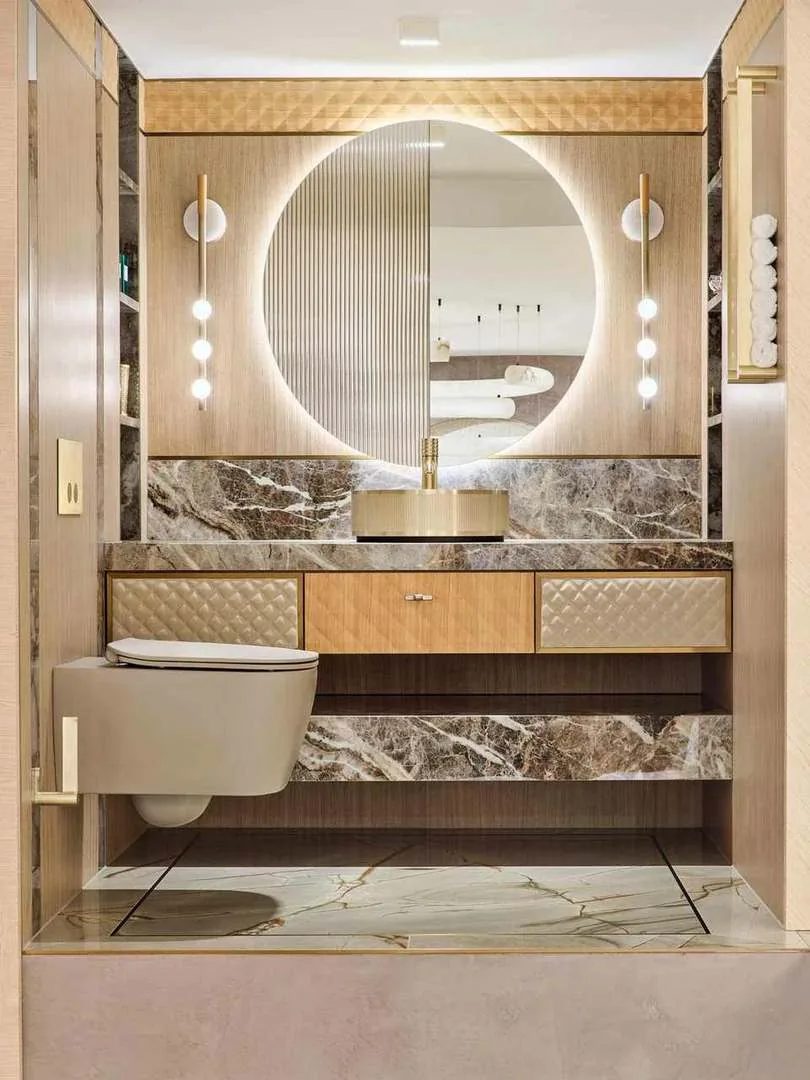
Figure 4. A finished wall-hung toilet in a showroom powder room. The small square plate with two round buttons on the wall above the pan is the dual-flush plate; behind it is the access opening to the cistern valves, which must stay clear for servicing. (Photo: Faura Ltd, Wikimedia Commons, CC BY-SA 4.0)
Frequently Asked Questions
Is a wall-hung toilet strong enough for a heavy person?
Yes, when the frame is chosen and fixed as specified. The load goes through the steel frame and its anchors into the floor and wall, not through the ceramic or tiles. Check the rated load in the frame's documentation.
Can I install one on a hollow brick or plasterboard wall?
Usually, using a floor-standing self-supporting frame with the anchors or extra framing the maker specifies. Hollow brick or plasterboard must never carry the load alone.
What if the concealed cistern leaks or runs continuously?
Remove the flush plate, close the isolation valve and service the fill or flush valve through the access opening. No wall breaking is needed if the opening was kept clear.
Can I replace a floor-standing toilet with a wall-hung one?
Often, but it is a bigger job: space for the frame and duct, a new drain route with fall from the bend to the stack, a supply to the cistern, and new boarding and tiling.
Should I seal all the way around the pan with silicone?
Follow the pan maker's instructions. Many installers leave a short unsealed gap at the bottom so any hidden leak becomes visible quickly.
Practice Exercises
Frame selection. For each wall (concrete, hollow brick, metal stud partition), decide which frame type you would choose and explain why.
Set-out. On a training wall, mark a finished floor datum, the centre line and a seat height agreed with a "client". Photograph your marks with a tape measure.
Drain planning. Sketch a drain route from a frame bend to a stack 2 m away. Mark the fall and the position of an access fitting.
Leak test. Write a short checklist for testing the supply, cistern and drain before boarding, including what to record.
Pan fitting. Practise cutting a connector and studs to length on a training frame, then fit and tighten a pan evenly without overtightening.
Client handover. In three or four sentences, explain to a client why the access opening must stay clear and how the cistern is serviced.