A bathroom floor drain is a small, cheap part, but it decides whether a bathroom stays dry and odour-free for years. Installed badly, it leaves puddles, leaks through the slab into the ceiling below, or lets sewer gas into the room. These faults are expensive to fix later, because the drain is buried under the waterproofing, screed and tiles.
This guide explains how to install a bathroom floor drain properly: choosing the drain body and trap, positioning it, connecting it to the uPVC drain pipe, setting its height, sealing it into the waterproofing layer, forming the floor falls and testing the work. It is about new installation and full bathroom renovation. If you only need to clear a blocked drain, find a smell or trace a leak in an existing bathroom, see our separate articles on blocked bathroom floor drains, bathroom odours and bathrooms leaking through the ceiling below.
Scope of this guide. It is written for trainee plumbers and for homeowners supervising a renovation in Vietnamese homes, where bathrooms are usually fully tiled, drains are uPVC and many townhouses have a recessed (sunken) bathroom slab. Concrete cutting through structural slabs and beams must be agreed with the engineer or building owner. Always follow the instructions of the drain and waterproofing manufacturers; the figures in this article are for reference only.
What a floor drain has to do
A good floor drain does four jobs at the same time:
Collect water quickly from the shower area and from the floor when it is washed, without water standing on the tiles.
Stop sewer gas and insects coming up from the drain, usually with a water seal (a trap) and sometimes with an extra anti-odour valve.
Join the waterproofing layer without a gap, so water that soaks through the tile joints and the screed is led into the drain instead of into the slab.
Stay accessible, so the grate and trap insert can be lifted out for cleaning.
Choosing the floor drain
Point drain (square or round)
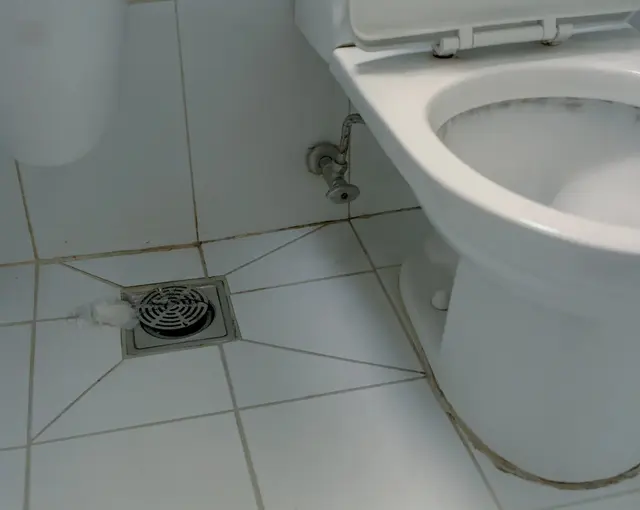
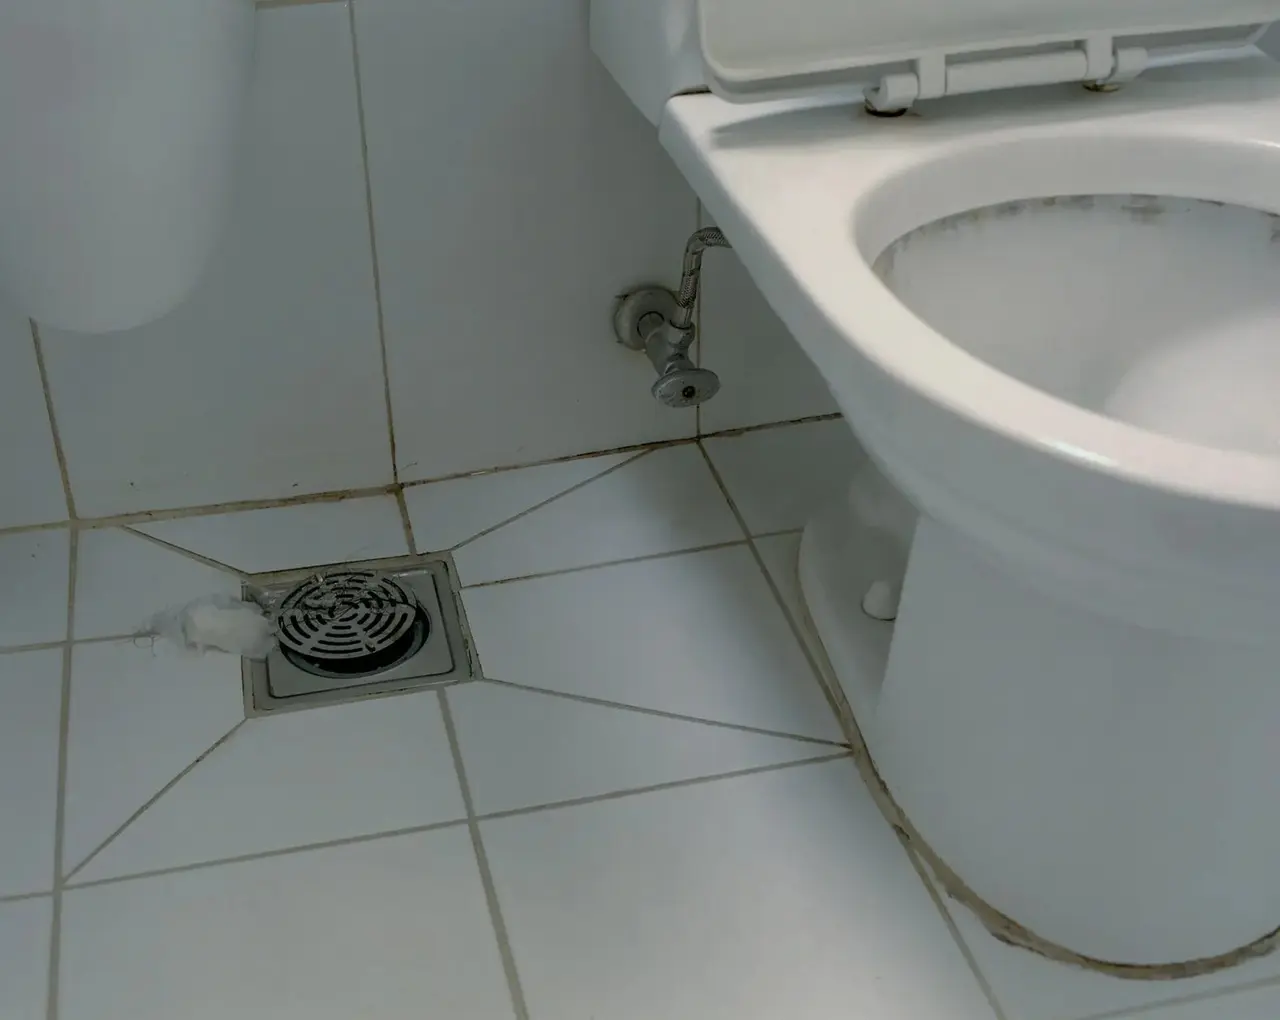
The most common type in Vietnam is a square stainless steel or brass-coloured drain about the size of one small tile, with a round or square grate. The floor slopes towards it from several directions, and the tiles around it are usually cut diagonally in an "envelope" pattern so that each part of the floor falls towards the centre.
Linear (channel) drain
A linear drain is a long narrow channel, usually placed along a wall or across the entrance of a walk-in shower. The floor only needs to slope in one direction, towards the channel, so large tiles can be laid with few or no diagonal cuts. It suits large-format tiles, but it costs more, needs more depth under the floor and more accurate setting-out.
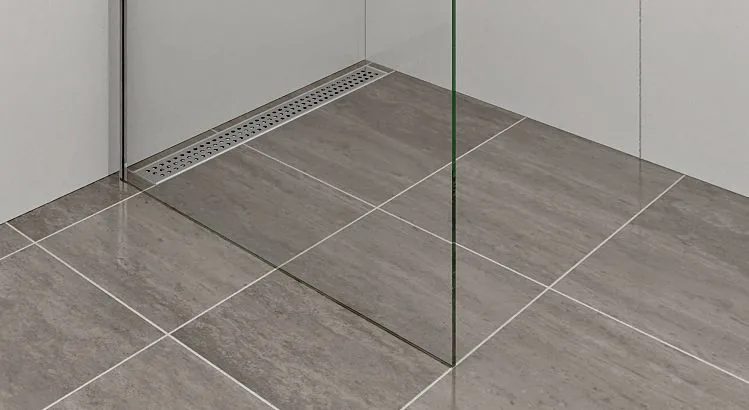
Figure 1. A linear (channel) drain with a perforated metal cover running along the wall of a walk-in shower with a glass screen. The large grey floor tiles are laid without diagonal cuts, which a floor falling in one direction towards the channel allows. (Photo: Aquadeko, Wikimedia Commons, CC BY-SA 3.0)
Outlet direction and size
Drain bodies have either a vertical (bottom) outlet, which goes straight down into a pipe below, or a horizontal (side) outlet, which connects to a pipe running sideways inside the floor build-up. Use a vertical outlet when the pipe passes through the slab into the ceiling below, and a side outlet when it runs inside a sunken slab or thick screed.
The outlet must match the pipe it connects to. For household bathroom floor drains in Vietnam, uPVC pipes of about Ø60–Ø90 mm are common, and some small shower drains use about Ø42–Ø49 mm (for reference; follow the design drawings and the drain maker's data).
Trap and anti-odour device
Every floor drain connected to a sewer or septic system needs a trap: a water seal that blocks gas from the drain. There are two ways to provide it:
A trap built into the drain body (often a removable cup or bell under the grate). It is easy to clean from above, but some cheap built-in traps hold only a shallow water seal that dries out quickly.
A separate trap in the pipe below (a P-trap under the slab or in the sunken floor). It can hold a deeper seal, but it is hard to reach for cleaning once the floor is finished.
Many drains also have an anti-odour insert (a weighted or magnetic flap, spring valve or silicone sleeve) that opens when water flows. It helps when a rarely used drain's water seal evaporates, but it collects hair and can stick. Treat it as an extra, not a replacement for a proper trap.
Do not double-trap. If the drain body already has a trap, do not add a second P-trap in the same line. Two traps in series can trap air between them, making the drain slow and gurgly. Choose one or the other.
Quality checks before you buy
The body has a wide flange or clamping ring for the waterproofing membrane to lap onto. A body with no flange is very hard to seal.
The grate can be height-adjusted or the top part can be trimmed, so it can be set flush with the tiles.
The grate and insert lift out easily, without tools, for cleaning.
The outlet spigot fits the uPVC pipe or fitting you plan to use.
Reference table: choosing a floor drain
Situation | Suggested drain type | Typical outlet (Vietnam, for reference) | Floor falls | Notes |
|---|---|---|---|---|
Small bathroom, shower area not separated | Square point drain with built-in trap or anti-odour insert | uPVC Ø60–Ø76 mm | From several directions, envelope cuts | Place the drain in the shower area, away from the door |
Shower with a step or screen | Point drain in the shower zone; optional second drain outside | uPVC Ø60–Ø90 mm | Shower zone falls to its own drain | A second drain helps when the whole floor is washed |
Walk-in shower with large tiles | Linear channel drain | Per maker (check outlet size and body depth) | One plane towards the channel | Needs accurate levels and enough depth for the body |
Laundry area or balcony with washing machine | Point drain with a deep water seal | uPVC Ø60–Ø90 mm | Towards the drain | Drain may also take the machine outlet; check it can cope with the flow |
Drain used rarely (guest bathroom, storeroom) | Drain with anti-odour valve plus trap | As above | Towards the drain | Water seals evaporate; tell the owner to pour water in regularly |
All sizes and falls are for reference. The project drawings, the drain maker's instructions and the pipe layout always take precedence.
Planning the position
Decide the drain position before any pipe is cut. A drain in the wrong place cannot be moved later without breaking the waterproofing.
Put it where the water is. The main drain belongs in the shower zone, not near the door. Water should never have to cross the bathroom to reach the drain.
Keep it clear. Not under the toilet, a basin cabinet or a washing machine, and not hidden behind a door.
Leave room for tiles. Keep the drain far enough from walls and corners to avoid tiny slivers of cut tile. Many tilers like the drain body to line up with a tile joint or the centre of a tile; agree this with the tiler before setting it.
Check what is under the slab. In multi-storey houses the drain pipe usually passes through the slab into the ceiling space of the room below. Avoid beams, and never cut reinforcement bars without the engineer's approval. In a sunken bathroom slab, check that the side outlet and pipe fit inside the depth available.
Plan the pipe route. The horizontal pipe from the drain to the stack or main drain must have a steady fall along its whole length, with no sags. See our article on drain pipe slope.
Worked example: a 1.6 m × 2.0 m townhouse bathroom
The shower is in the far corner, about 0.9 m × 0.9 m, with a toilet and basin near the door. The pipe can run down through the slab into the ceiling of the kitchen below. A sensible plan is one square point drain in the shower corner, set about 30–40 cm from both walls (for reference) so the tiler can make clean envelope cuts, with the whole floor falling gently towards it and a slightly stronger fall inside the shower zone. If the owner wants to wash the whole floor often, a second small drain near the basin is worth discussing.
Tools and materials
Floor drain body with grate and trap or anti-odour insert; uPVC pipe, fittings, primer and solvent cement.
Pipe saw, deburring tool, tape measure, spirit level and long straight edge (a laser level helps).
Core drill or rotary hammer for a new slab penetration (only after approval), with dust control; non-shrink grout for sealing round the pipe.
The specified waterproofing system: primer, membrane and reinforcing fabric or tape.
Screed mortar, tile adhesive, tiles, grout and sanitary silicone; tape or a cap to protect the drain outlet.
PPE: safety glasses, dust mask, hearing protection, gloves and knee pads.
Step-by-step installation
Step 1: Mark the drain centre and the finished floor level
Mark the drain centre on the slab. Then mark the finished floor level at the door and the level the top of the drain grate must reach. The difference between them is created by the floor falls.
Work backwards from the finished tile surface: tile + adhesive + membrane + screed. This tells you how high the drain body must sit above the slab. If there is not enough depth for the body and outlet, change the drain or the floor build-up (lowering a slab needs structural approval) before any pipe is glued.
Step 2: Prepare the pipe and the penetration
If the pipe passes through the slab, use the cast-in sleeve or an approved core-drilled hole. Clean out dust and loose concrete. Run the pipe from the drain position to the stack with a steady fall, supported so it cannot sag, and dry-fit everything first.
Seal the gap between the pipe and the concrete with non-shrink grout, packed properly from below with formwork or in stages, so the joint is fully filled. A badly filled gap around the pipe is one of the most common routes for water to leak into the ceiling below.
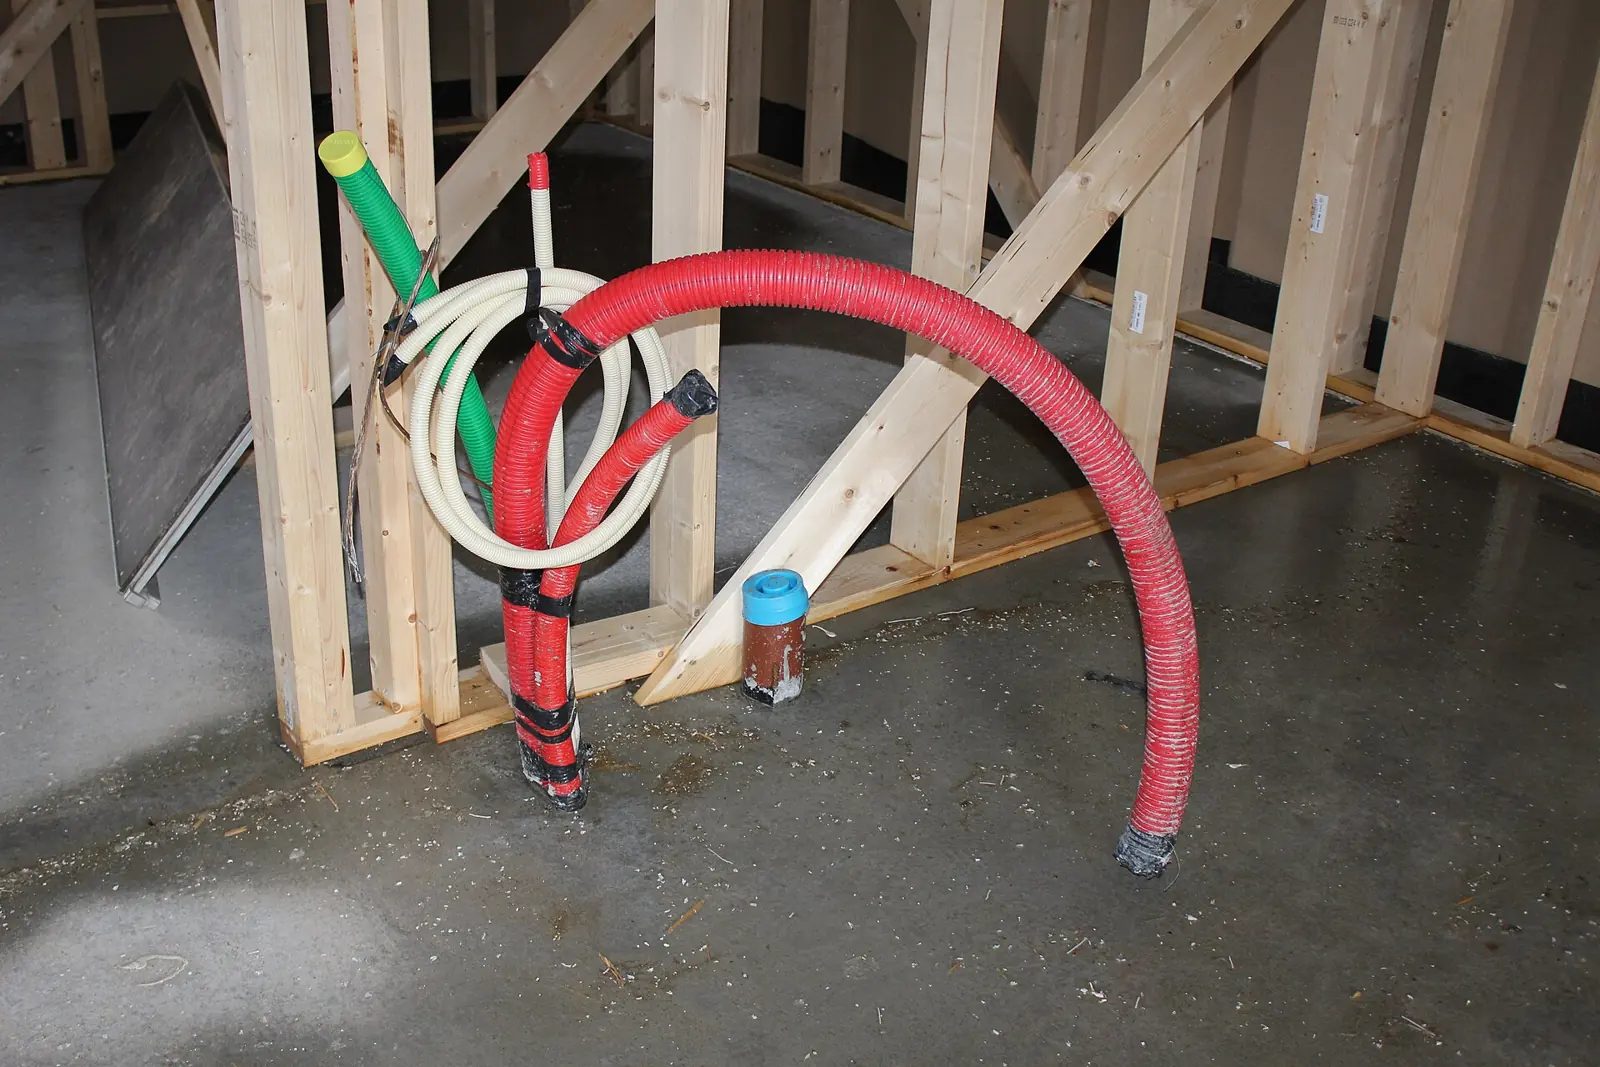
Figure 2. A drain pipe coming up through a new concrete floor, closed with a blue protective cap, next to coiled flexible conduits and the timber frame of a wall under construction. Capping every drain opening keeps out concrete, mortar and debris until the fixture is fitted. (Photo: Øyvind Holmstad, Wikimedia Commons, CC BY-SA 4.0)
Step 3: Connect the drain body to the uPVC pipe
Cut the pipe square, deburr it and check the insertion depth. Make the joint with uPVC primer and solvent cement, following the method in our article on solvent welding uPVC pipe, or use the push-fit seal supplied with the drain if it is designed for that. Hold the joint still for the time the cement maker recommends.
Before the cement sets, check that the body is level in both directions and at the correct height; a tilted body leaves a lip that catches water.
Step 4: Fix the body and protect it
Support the drain body firmly so it cannot move when the screed is laid: pack it with mortar underneath, or use the supports supplied. Cover the top opening with tape or the protective cover that comes with the drain. Mortar, tile adhesive and grout washed into a new drain are a very common cause of blockages in brand-new bathrooms.
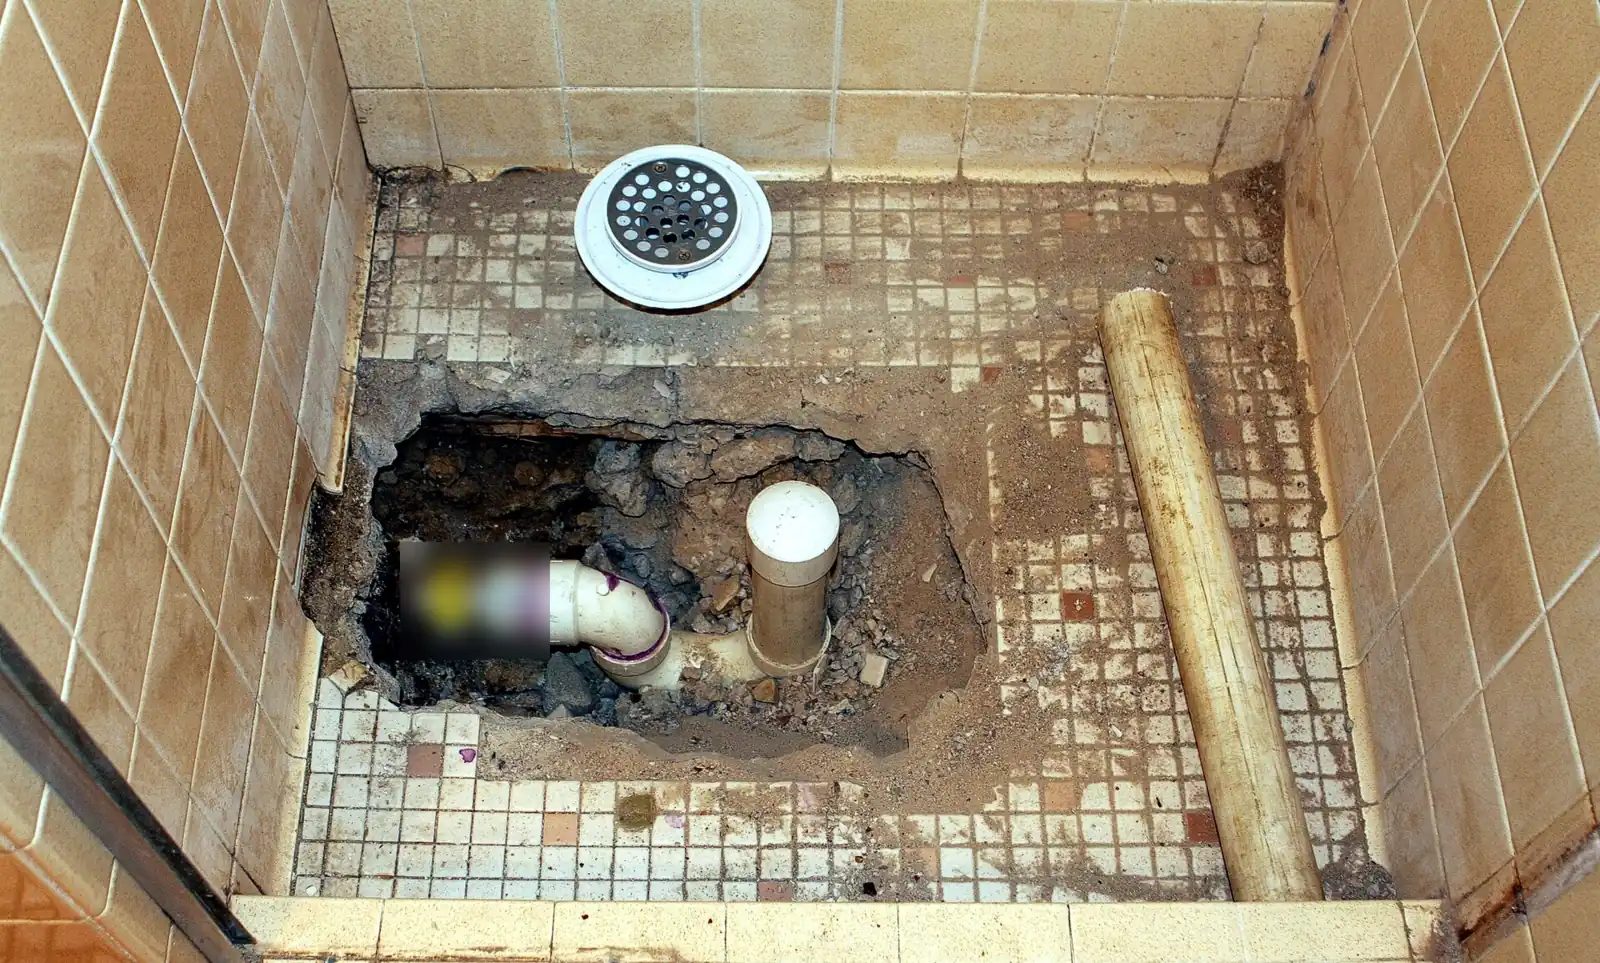
Figure 3. A shower floor broken open during a repair, showing the white plastic drain pipe and trap bend under the old mosaic tiles, with the old drain grate lying on the tiles behind. Once the floor is finished, everything below the tiles can only be reached by breaking it open again, so it must be right first time. (Photo: Hardyplants, Wikimedia Commons, CC BY-SA 3.0; product label blurred)
Step 5: Lay the screed with the correct falls
Set screed guides from the walls down to the drain with straight edges, string lines or a laser level. The floor must fall steadily towards the drain everywhere, with no flat areas or dips. A fall in the order of about 1–2% (roughly 1–2 cm per metre) is often used in bathrooms (for reference; check the tile and drain makers' guidance and the design). Too little fall leaves puddles; too much makes the floor feel uneven and can create lips at the tile edges.
A point drain needs falls from several directions (envelope cuts); a linear drain needs one plane falling towards the channel.
Step 6: Waterproof around the drain
Tiles and grout are not waterproof: water soaks through the joints and runs along the top of the membrane. The membrane must lead that water into the drain.
When the screed has cured enough for the membrane maker, clean the surface and apply the primer the membrane maker specifies.
Reinforce weak points first: the wall-floor corners, pipe penetrations and a collar around the drain body, using the reinforcing fabric or tape from the same system.
Lap the membrane onto the drain's flange or under its clamping ring, so there is no gap between membrane and drain. If the drain has a clamping ring, tighten it evenly.
Apply the main membrane in the number of coats and thickness the maker specifies, turning it up the walls. In the shower zone, the membrane is usually carried higher up the walls than in the rest of the bathroom; follow the system's instructions.
Let it cure for the time stated on the product before testing or covering it.
This guide describes the common method where the falls are formed in the screed and the membrane goes on top of it, directly under the tile adhesive. Some systems instead place the membrane on the slab under the screed; then the drain body must have a lower flange with weep holes, so water that soaks into the screed can still reach the drain. Do not mix the two methods without understanding where the water will go.
Step 7: Flood test before tiling
Plug the drain outlet temporarily, build a small dam at the door, and fill the floor with clean water a few centimetres deep. Leave it for at least 24 hours (for reference; follow the waterproofing maker or the project specification). Mark the water level at the start. Then check the ceiling below, the walls of neighbouring rooms and the outside of the walls for damp spots.
If the level drops or damp appears, repair the defect and test again. A flood test costs a day; breaking up a finished bathroom costs far more. Remove the plug carefully so it does not fall into the pipe.
Step 8: Tile and set the grate height
Adjust the drain's top part so the grate frame finishes flush with the tiles or very slightly below them, never above. A grate that stands proud of the tiles stops the last of the water reaching it and is uncomfortable underfoot.
Cut the tiles neatly around the drain frame with an even joint, and fill it with grout or sanitary silicone as the drain maker recommends. Keep adhesive out of the drain and wipe it off the stainless steel before it hardens.
Step 9: Fit the trap insert and final test
Remove the protective cover. Check that the drain body and pipe are free of mortar, adhesive and grout residue.
Fit the trap insert or anti-odour device and the grate.
Pour buckets of water from the far corners and run the shower at full flow for several minutes. Look for puddles, slow spots, and water spreading or backing up.
Check the ceiling below again after the test.
Fill the trap with water so it is sealed before you leave.
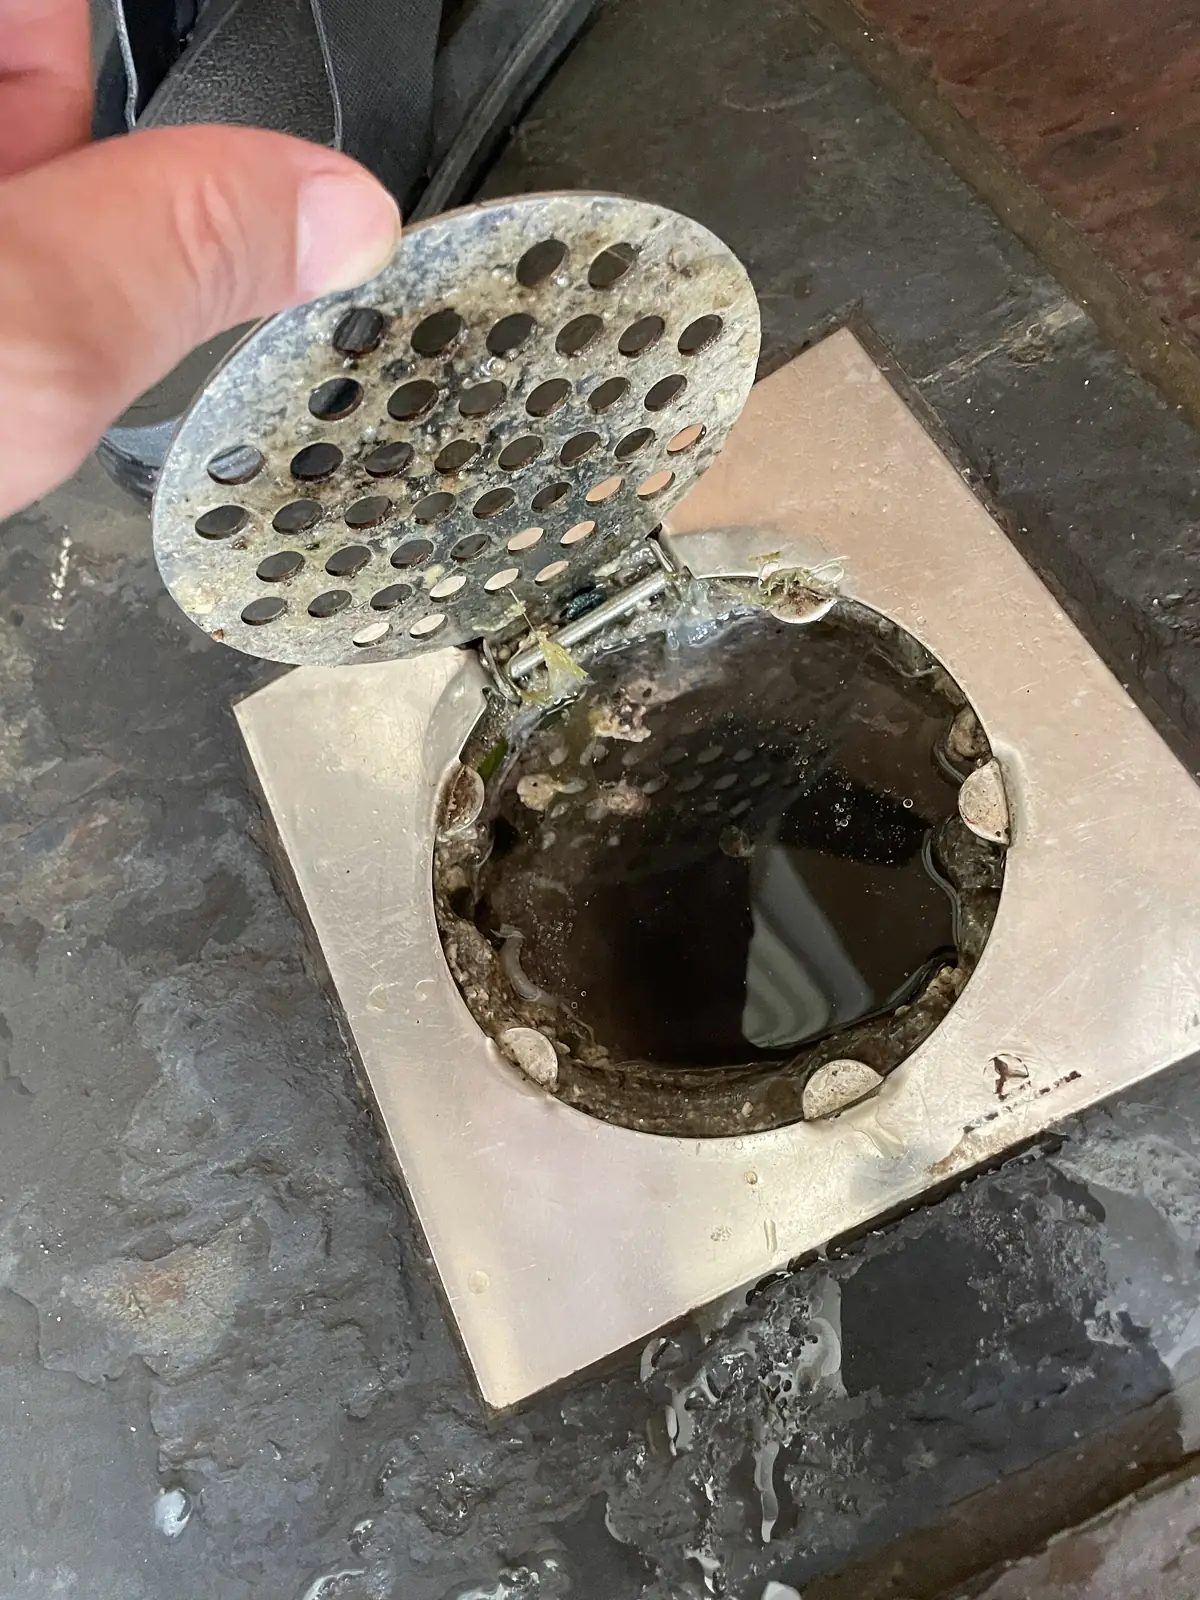
Figure 4. A square stainless steel floor drain with its round, hinged, perforated grate lifted by hand, showing dirty water standing in the body below. A grate that opens or lifts out easily lets the owner clean out hair and debris regularly, which keeps the drain working. (Photo: Sgconlaw, Wikimedia Commons, CC BY-SA 4.0)
Replacing a drain in an existing bathroom
Changing only the grate or trap insert is simple. Moving or replacing the whole drain body in a finished bathroom means breaking the tiles and screed around it, which also breaks the waterproofing at its most important point. Cut out an area wide enough to rebuild the membrane collar with a generous overlap onto the old membrane, using a compatible system, then flood test before re-tiling. If you do not know what waterproofing was used, explain the risk honestly; sometimes redoing the whole floor is the right recommendation.
Common mistakes
Drain too high: the grate stands above the tiles, so water ponds around it.
No real falls: the screed is laid flat and the tiler "tries" to make a fall with adhesive. Water stays on the floor.
No membrane collar: the membrane stops short of the drain body or is not lapped onto its flange. Water runs along the membrane and into the slab beside the drain.
Badly filled gap around the pipe through the slab, which leaks into the ceiling below.
Double trapping with a built-in trap and a P-trap below, which makes the drain slow and noisy.
No flood test, so leaks are found only after the ceiling below is stained.
Working with the customer
Agree the drain position, type and grate style with the owner before any pipe work. Show them on the floor where it will go.
Tell them how to clean the drain: lift the grate, remove the hair and debris, rinse the insert, put it back the right way.
Explain that a drain used rarely can start to smell when its water seal dries out, and that pouring a jug of water in regularly fixes this.
If the existing pipes or waterproofing are poor, say so honestly rather than promising a dry, odour-free bathroom.
Safety checklist
Any cutting or drilling through the structural slab or beams agreed with the engineer or owner; no reinforcement bars cut without approval.
Pipes and cables located before drilling; the electrical circuits in the area isolated where there is a risk of hitting them.
Power tools plugged into an RCD-protected socket; extension leads and plugs kept off wet floors (Vietnamese mains are 230 V, 50 Hz, and water plus power tools is a serious shock risk).
Safety glasses, a suitable dust mask and hearing protection worn when cutting tiles or concrete; dust controlled with extraction or water.
Good ventilation when using solvent cement, primers and liquid membranes; no smoking or open flames nearby; product safety instructions followed.
Gloves worn for cement-based materials, which can irritate or burn the skin.
Drain openings covered during work; holes in the floor marked or covered so nobody trips or steps into them.
Flood test passed and the ceiling below checked before tiling.
Trap insert fitted and water seal filled before handing over.
Frequently Asked Questions
How much slope does a bathroom floor need towards the drain?
Enough for water to run steadily to the drain without puddles, but not so much that the floor feels uneven. A fall in the order of 1–2% is often used (for reference). Follow the design and the makers' instructions, and always test with water before handing over.
Do I need a trap under a floor drain that already has an anti-odour insert?
The drain needs one proper water-seal trap. If the drain body already contains a trap, do not add a second one below it. If the drain body has only a flap or valve and no water seal, a trap in the pipe is needed. Check the product data to see which type you have.
Why does a new bathroom drain smell?
Common causes are a dry trap, a missing or wrongly fitted anti-odour insert, a drain without a proper water seal, or a gap between the drain body and the pipe. See our article on bathroom odours for a step-by-step diagnosis.
How long should the flood test last?
A test of at least 24 hours is common practice (for reference). Use the time given by the waterproofing maker or the project specification, and check the ceiling below before and after.
Practice Exercises
Set out a bathroom. On paper, draw a 1.5 m × 2.2 m bathroom with a shower at the far end. Mark the best drain position and the falls, and explain your choice in two sentences.
Height calculation. The finished tile surface at the drain must be 60 mm above the structural slab. Tiles are 8 mm, adhesive about 5 mm and the membrane about 2 mm (all values for practice). How thick is the screed at the drain? (Answer: 60 − 8 − 5 − 2 = 45 mm.)
Fall calculation. The furthest point of the floor is 1.8 m from the drain and you use a 1.5% fall. How much higher is that point than the drain? (Answer: 1.8 m × 1.5% = 0.027 m, about 27 mm.)
Customer talk. In three sentences, explain to a homeowner why you want to do a 24-hour flood test before tiling.
A floor drain is only a small part of a bathroom, but it brings together pipework, levels, waterproofing and tiling. Plan its position and height carefully, seal it into the membrane, test with water before the tiles go down, and the bathroom will stay dry and odour-free for many years.