A townhouse client wants a tap by the front gate to wash motorbikes and the yard. Another wants one on a balcony for her plants, a third on a rooftop garden beside the water tank. Each job needs the same skill: teeing off the cold supply, bringing a branch through a wall, fixing a solid wall-plate elbow, and fitting a tap that does not leak, wobble or let dirty water back into the house supply.
This guide covers choosing the tap and the spot, teeing into PPR or uPVC supply pipe, fitting the isolation valve, fixing the wall-plate elbow, sealing the threads, protecting the supply from hose backflow, testing, and fixing an outdoor tap that leaks.
Scope of this guide. For trainee and working residential plumbers, and homeowners who want to understand the job before hiring someone. Sizes, heights and distances below are for reference only: follow the instructions from the pipe, fitting and tap manufacturers, and any rules set by your water supplier or building management. Never connect anything on the supplier's side of the water meter. In apartment buildings, ask building management before cutting into any pipe or drilling an outside wall.
What an outdoor garden tap is
An outdoor tap (garden tap, wall faucet, bib tap or hose bib) is a single cold-water tap fixed to a wall, with a downward spout and usually a hose thread or ribbed nozzle. In Vietnamese homes it is used for washing yards, motorbikes and cars, watering balcony and rooftop plants, and filling buckets.
It is simple, but it lives a hard life: sun, rain, knocks, a heavy hose pulling on it, and a hose end often left in a bucket or puddle. The installation details matter more than the tap itself.
Vietnam does not have the freezing winters that make "frost-free" outdoor taps necessary in cold countries, so a standard tap is fine for most homes.
Step 1: Choose the right tap
Most household outdoor taps in Vietnam have a 1/2-inch (DN15) male thread at the back, which screws into a 1/2-inch female threaded elbow. Check the thread before you buy fittings, and buy the tap and elbow together if you can.
Valve type
Screw-down (washer) tap with a cross or T handle: several turns to open, easy flow control, gentle shut-off, and a cheap rubber washer to replace when it drips.
Quarter-turn lever tap (ball valve tap): opens with a 90° turn and shows at a glance whether it is open. Close it smoothly; snapping it shut can make the pipes knock.
Ceramic-disc quarter-turn tap: common on chrome garden taps; durable, but a dripping cartridge is replaced as a unit.
Material
Brass or chrome-plated brass: the usual outdoor choice, with strong threads that survive knocks.
Stainless steel: good corrosion resistance; check the thread quality.
Plastic: cheap, but threads crack when tightened and many plastics turn brittle in strong sun. Avoid for a permanent outdoor point.
Outlet
Choose a plain spout for filling buckets, a ribbed hose nozzle (like the cover photo) for a push-on hose with a clamp, or a threaded outlet for a click-on connector that makes it easy to remove the hose after use.
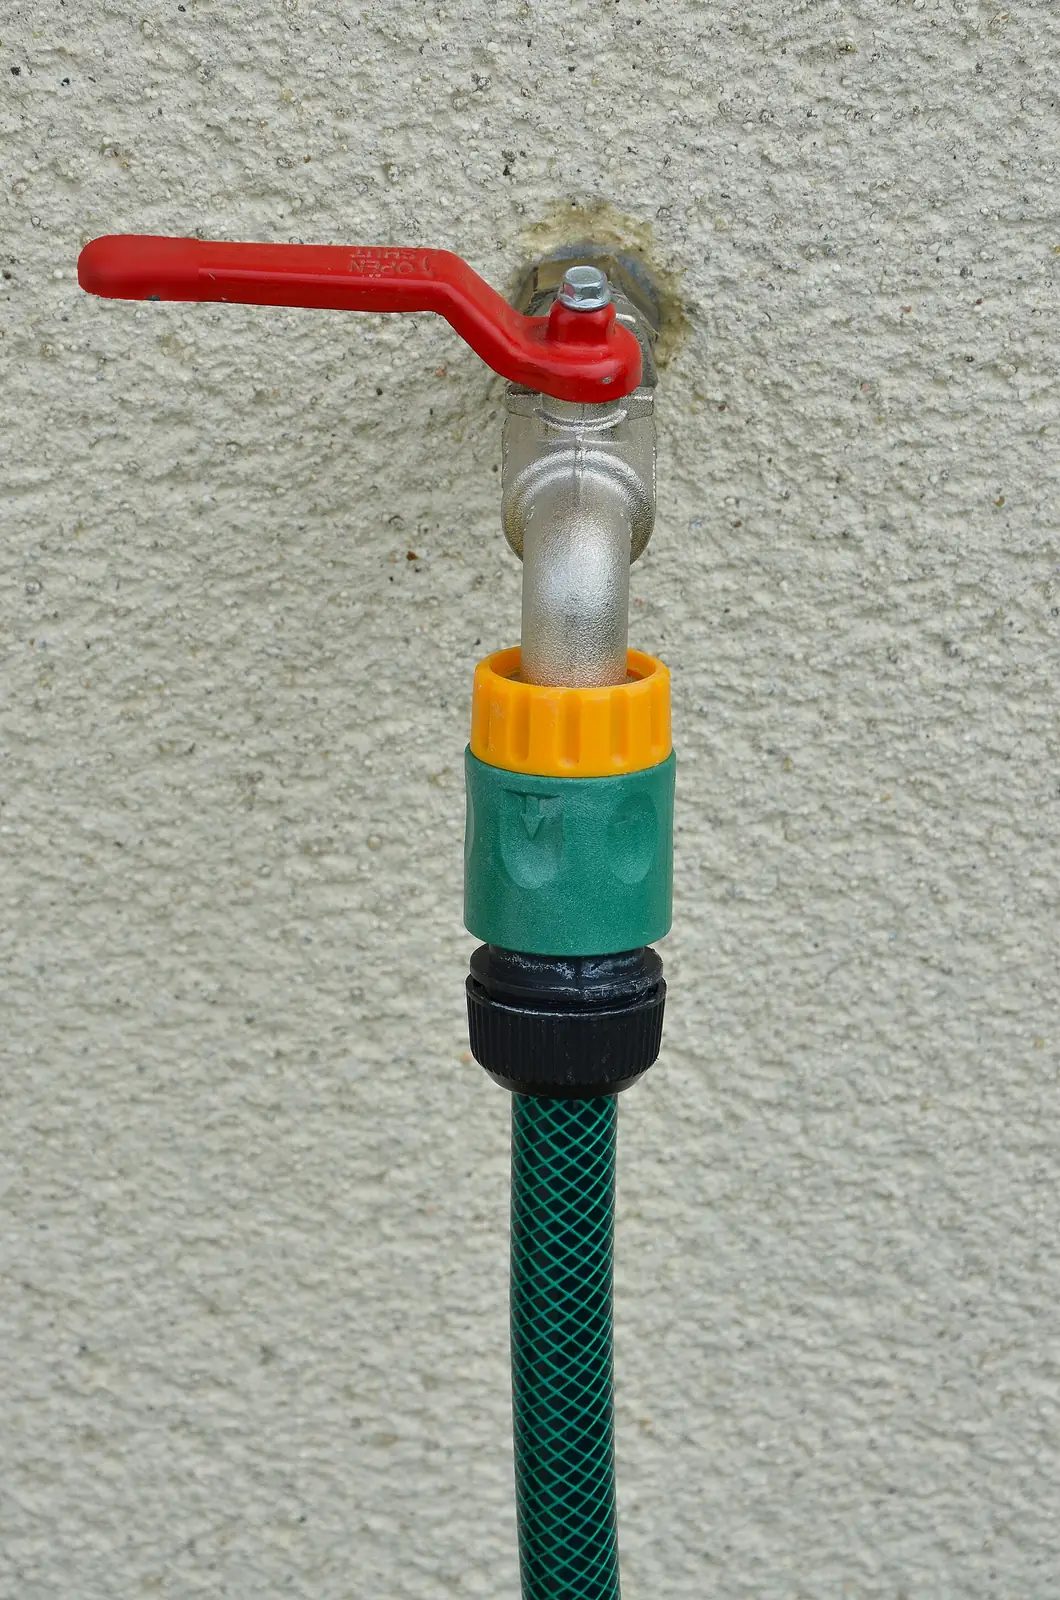
Figure 1. A quarter-turn lever tap on a rendered wall, fitted with a click-on hose connector. A connector like this lets the client remove the hose after use instead of leaving it attached and lying in a bucket or puddle. The stain around the point where the tap enters the wall is a typical sign of water running over or into an unsealed joint. (Photo: JLPC, Wikimedia Commons, CC BY-SA 3.0; small mark on the lever blurred)
Step 2: Choose the location
Walk the site with the client first. A good spot is:
Close to where the water is used, so the hose does not cross the gate or a walkway.
Water drains away safely into a floor drain, yard gully or a surface that falls away from the house. On balconies and rooftops, check the waterproofing and drain first.
Away from electrical points. Never above or beside an outdoor socket, meter box, pump control box or gate motor; hose spray finds them quickly.
A comfortable height. Many installers put a yard tap roughly 50–70 cm above the ground so a bucket fits under it (for reference only; agree it with the client).
Out of the path of motorbikes and the swing of the gate.
A short, simple pipe route from an accessible cold pipe.
Where should the water come from?
Supply option | Typical pressure at the tap | Advantages | Watch out for |
|---|---|---|---|
Ground-floor cold pipe fed from the rooftop tank by gravity | Good on the ground floor of a 3–4 storey house; weak on upper floors | No pump runs when the tap is used; water still available during mains cuts | Uses stored water; a hose left running can empty the tank |
Cold pipe fed by a booster pump | Strong and steady | Good for pressure washing | Pump starts every time the tap opens; a slow drip can make the pump cycle on and off |
A branch from the incoming mains after the meter, before the tank | Depends on street pressure and time of day | Saves stored water for the house | Low or no water at peak times in some areas; check backflow protection (see Step 8) |
Balcony or rooftop tap fed from the tank outlet | Very low if the tap is only a little below the tank | Simple, short pipe | As a rule of thumb, about 10 m of height gives about 1 bar; a tap only 1–2 m below the tank bottom gives only around 0.1–0.2 bar |
The last row catches many people out: a rooftop tap beside the tank barely trickles by gravity. For real pressure on the roof, feed it from the pumped line (if there is one); otherwise the client accepts a slow flow. Explain this before you start, not after.
Step 3: Tools and materials
The tap and a PPR female threaded elbow with a brass insert and a fixing plate or lugs (a wall-plate or drop-ear elbow) to match the tap thread. On uPVC systems, use a uPVC female adapter, preferably with a metal insert.
A tee to suit the existing pipe, branch pipe and elbows, and an isolation valve (PPR or brass ball valve).
PTFE tape or a thread sealant approved for drinking water.
A PPR welder and cutter, or uPVC cutter, primer and solvent cement.
A hammer drill, wall chaser with dust shroud, plugs and corrosion-resistant screws.
A cable and pipe detector, safety glasses, dust mask, ear protection and gloves.
A test plug and a hand pressure test pump with gauge.
Mortar, exterior sealant, a hose connector and a hose backflow device (see Step 8).
Step 4: Shut off, drain and tee into the supply pipe
Shut off the supply. Close the tank outlet valve for a gravity line; switch off and unplug the pump, then close its outlet valve, for a pumped line; close the main stop valve after the meter for a mains branch.
Drain the section by opening the lowest tap on that line. A PPR joint welded with water in the pipe will not fuse properly.
Mark the tee position on a straight run, away from existing fittings.
On PPR pipe
Cut squarely with a PPR cutter, removing a short section if needed. Clean and dry the ends and mark the insertion depth.
Heat-fuse the tee using the fitting maker's heating, joining and cooling times, pushing straight in without twisting (see our PPR welding guide).
If the old pipe cannot move enough, use a PPR union or couplers with a short new piece. Never force pipe into place; strained joints crack later.
On uPVC pipe
Cut squarely, deburr and chamfer the pipe end, and dry-fit the tee to mark alignment.
Apply primer (if used) and solvent cement, push home with a quarter turn, hold, and wipe off the excess.
Let it cure for the time on the cement can before pressurising.
Fit the isolation valve on the branch
Fit a ball valve on the branch close to the tee and where it can be reached: inside the house, in a utility area or behind an access cover. It lets the outdoor tap be repaired without shutting off the house, and lets the client turn the outdoor point off while away. A valve buried in the wall with no access cover is no better than no valve.
Step 5: Run the branch and fix the wall-plate elbow
Plan the route and drill safely
Mark the route and tap centre, then before you chase or drill:
Scan the wall with a detector for cables and pipes, and avoid the lines above, below and beside switches and sockets. Conduits in Vietnamese houses often run without a fixed pattern, so do not trust the lines alone.
Switch off the circuit breaker for that area if in any doubt. Household power is 230 V, 50 Hz; drilling into a live cable can kill.
Use power tools on an RCD-protected circuit, and keep tools and leads away from water.
Angle a hole through an outside wall slightly downwards to the outside, so water running along the pipe flows out, not in.
Concealed or exposed?
Concealed (chased in) looks neat and protects the pipe from sun and knocks. Chase deep enough for a full cover of mortar over pipe and fittings.
Exposed (surface-run) is quicker on a finished wall. Clip it firmly at the spacing the pipe maker recommends, keep it out of reach of motorbikes, and protect it from strong sun (paint or a sleeve, if the maker allows), because both PPR and uPVC can degrade under long UV exposure.
Fixing the wall-plate elbow
This is the most important part of the job: every twist, pull and knock on the tap for years goes into this one fitting.
Join the elbow to the branch with its threaded outlet pointing straight out of the wall.
Set the depth so the elbow face ends flush with the finished surface (render or tiles). Too deep, and the tap body hits the wall before the thread is engaged; too far out, and the tap levers on the fitting.
Fix the plate to solid masonry with plugs and corrosion-resistant screws, or bed the lugs firmly in mortar. An elbow held only by the pipe will turn when a stiff tap is opened, and can crack the pipe or a weld inside the wall.
Keep it level and square so the spout points straight down, and fit a test plug before plastering.
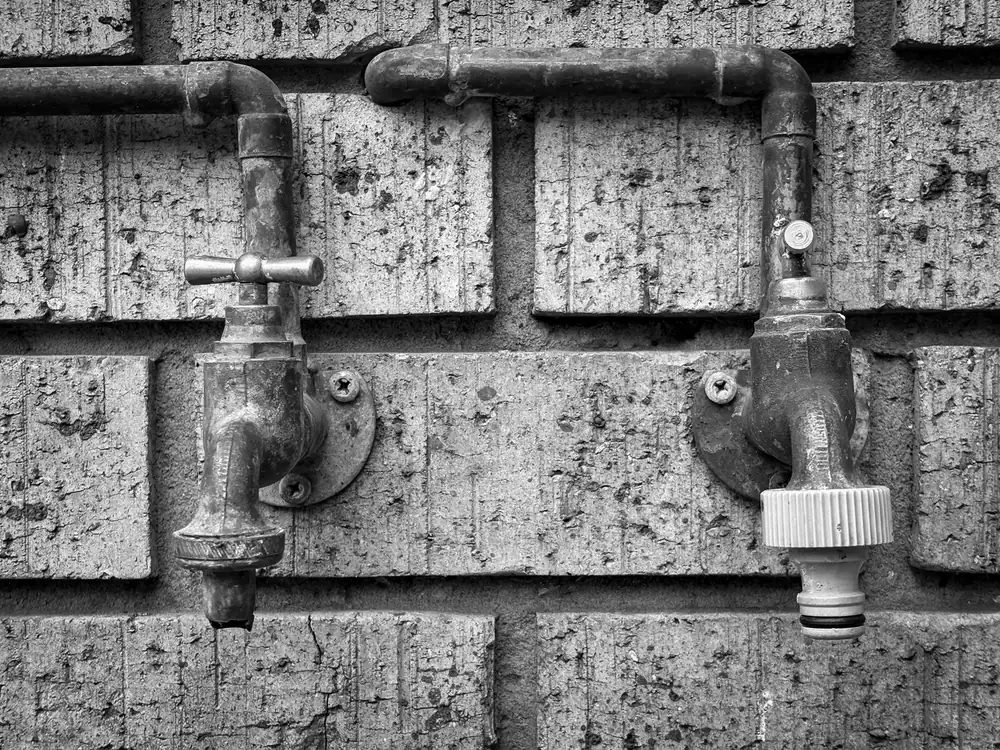
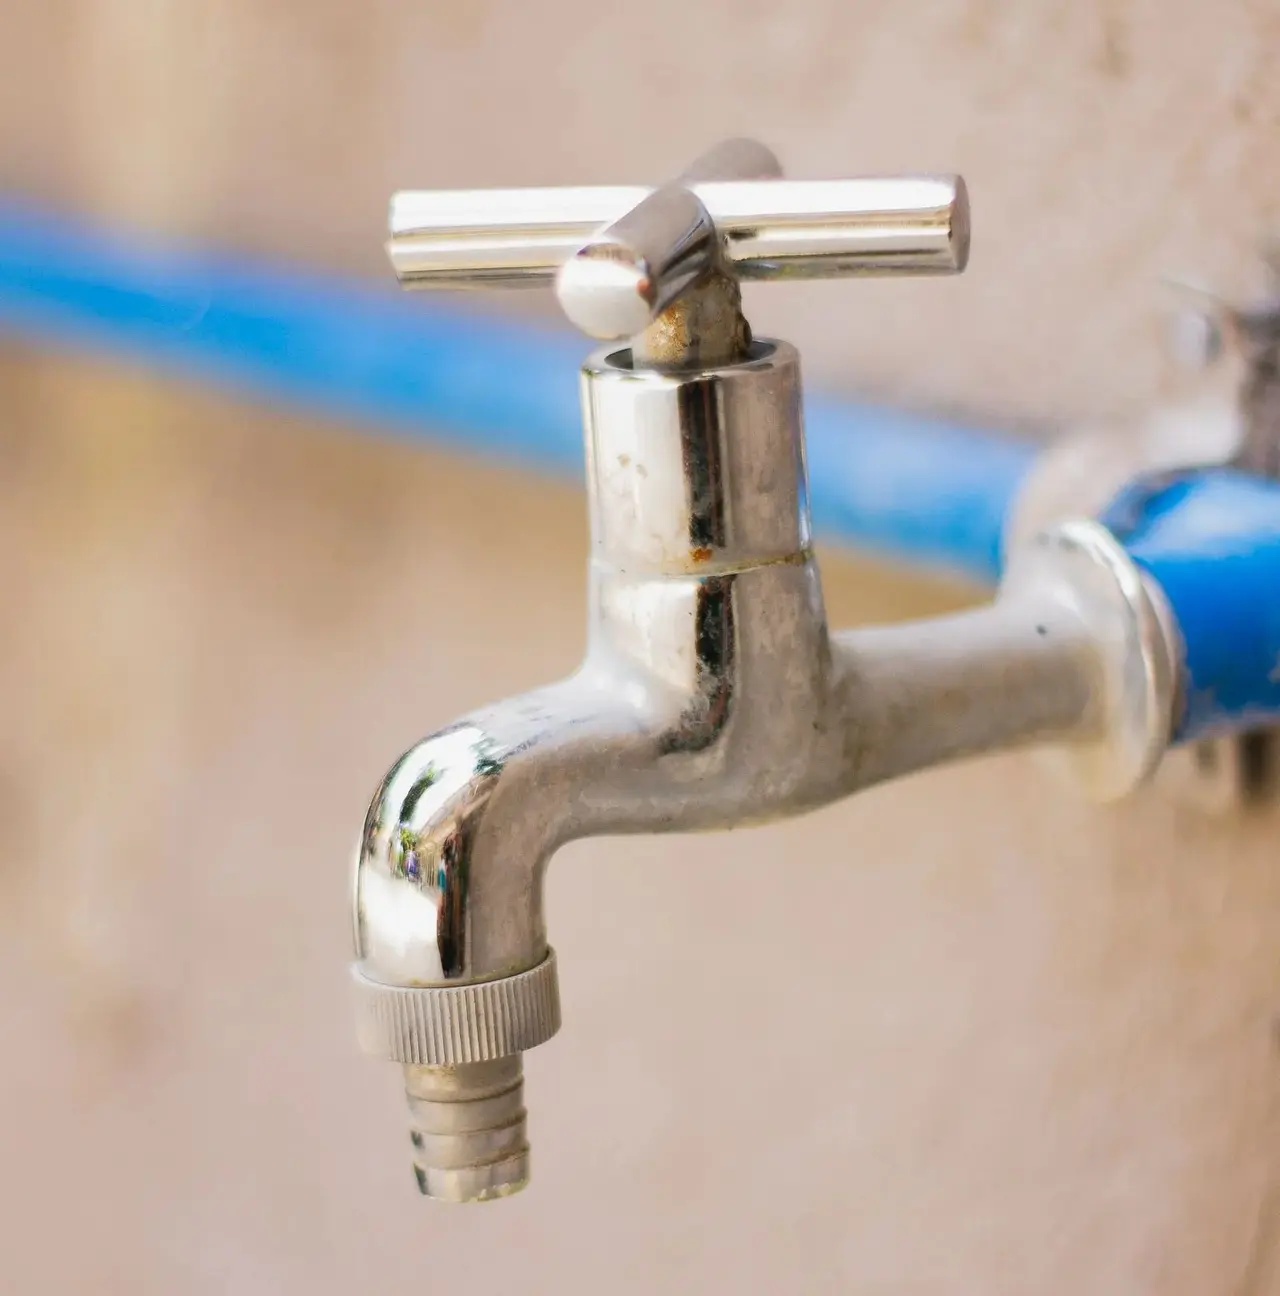
Figure 2. Two outdoor taps whose bodies are screwed to the wall through round fixing flanges, with surface-run pipes coming down from above. The flanges stop the taps from turning or pulling away when the handles are used or the hose is pulled. On a concealed PPR installation, the same job is done by the fixing plate or lugs of the wall-plate elbow. (Photo: Magda Ehlers, Pexels)
Step 6: Pressure test before you close the wall
Never plaster over a new joint before it has been tested. With the test plug in the elbow:
Open the supply and the isolation valve slowly and bleed out the air.
Check every new joint with a dry tissue.
For a concealed run, do a proper test with a hand pump and gauge, as in our guide to installing and pressure testing hot and cold supply pipes, using the test pressure and holding time from the pipe maker or project specification. Do not guess a number.
If the gauge falls, find and fix the leak, then test again.
Only then fill the chase and render. Leave the plug in until the wall is finished so mortar cannot get into the elbow.
Step 7: Fit the tap and seal the threads
Sealing the threads
Clean both threads of mortar, dust and old tape.
Wrap PTFE tape clockwise as you look at the end of the male thread, so screwing in tightens the tape rather than unwinding it. Keep it flat, slightly stretched and overlapping; the number of wraps depends on tape and thread (see our PTFE tape guide). A drinking-water-approved thread sealant also works.
Start the tap by hand, then tighten with a spanner on the tap's hex, never by the handle or spout. Make sure the elbow is firmly set before you apply torque.
Getting the spout to point down without a leak
The tap rarely points straight down at the exact moment it is tight. Always go forward to the next downward position, never back off: unscrewing even slightly breaks the seal and causes a slow leak behind the tap. If it is still loose at the downward position, or would need excessive force to reach it, take it out, change the amount of tape and try again.
Do not overtighten. The brass insert is moulded into plastic, and forcing the tap can split the fitting or loosen the insert, a much bigger repair.
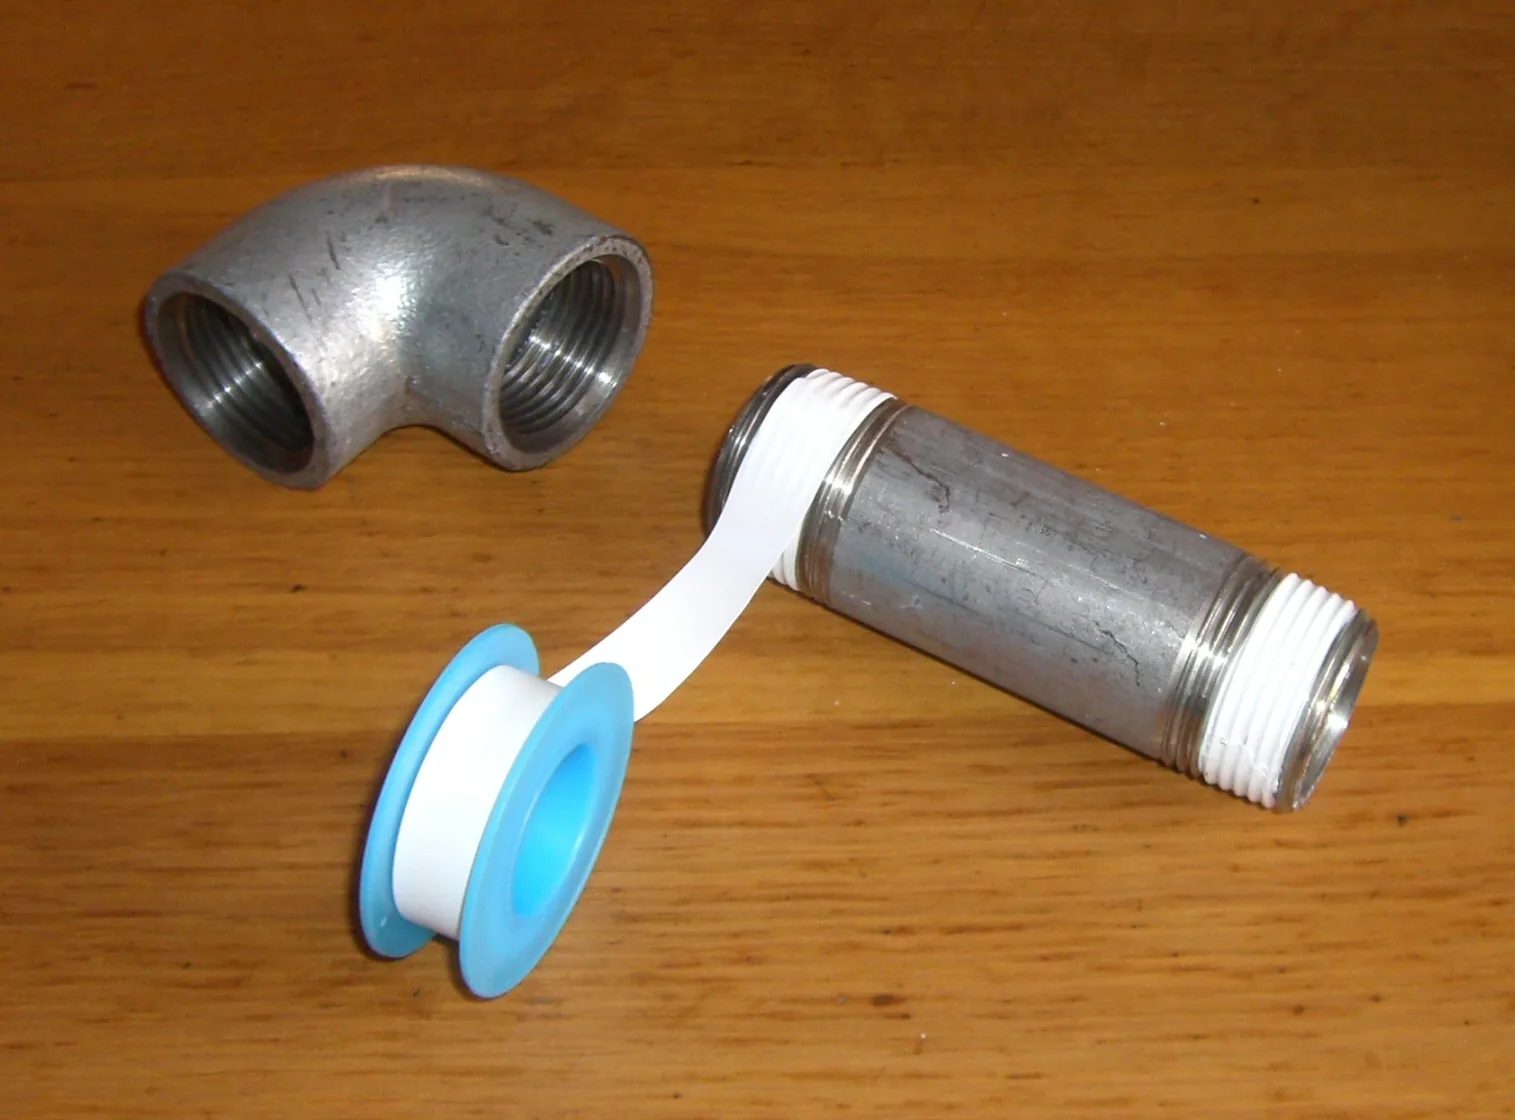
Figure 3. PTFE tape wrapped on the male threads of a steel nipple before it is screwed into an elbow. The tape lies flat in the threads and covers them evenly from the end; the same method is used on the back thread of an outdoor tap before it goes into the brass insert of the wall-plate elbow. (Photo: Miya.m, Wikimedia Commons, CC BY-SA 3.0)
Sealing the wall
Seal the gap around the fitting with exterior-grade sealant (one suitable for tiles on a tiled wall), so rain and wash water cannot run into the wall.
Step 8: Protect the supply from hose backflow
Backflow is water flowing backwards from a hose into the house supply. Outdoor taps are a common place for it, because hose ends are left in buckets of soapy water, fish ponds, puddles or drains, hoses are connected to sprayers, and taps are left open when supply pressure drops (pump off, mains cut, tank empty).
When supply pressure falls below the pressure at the hose end, dirty water can be pulled back up the hose into the pipe, and on to the next person who fills a glass in the kitchen.
To reduce the risk:
Fit a hose-connection backflow preventer, such as a hose vacuum breaker (anti-siphon device) or a non-return (check) valve, unless the tap has one built in. Choose one made for drinking-water systems that fits the tap thread, and follow the maker's instructions and any local rules.
Teach the client never to leave the hose end submerged, and to remove the hose or close the tap after use.
Never connect sprayers, fertiliser dispensers or pressure washers without the backflow protection their maker specifies.
Keep the spout above the flood level of any bucket or drain under it.
Many hose vacuum breakers release a small dribble when the tap is turned off; that is normal. A steady leak while the tap is on means the device is faulty.
Step 9: Commission and test the finished tap
Remove the test plug, fit the tap as in Step 7 and close it, then open the isolation valve slowly.
Check the joint at the wall, the gland nut under the handle and the hose connector with a dry tissue for a few minutes.
Open the tap fully until the water runs clear and air-free, then close it and watch the spout for drips.
On a pumped line, the pump should switch off and stay off with everything closed. If it keeps restarting, something is leaking.
Pull gently on the tap in all directions. It must not move or turn.
Show the client the isolation valve and the backflow device, and remind them not to leave hoses in buckets.
Practical examples from Vietnamese homes
Example 1: Front-yard tap in a 4-storey townhouse
A rooftop tank feeds all floors by gravity; a booster pump serves only the top-floor bathroom. For a tap by the gate, the plumber tees into the gravity-fed ground-floor cold PPR pipe in the kitchen, so no pump starts when the tap is used. A ball valve goes under the kitchen counter, the branch is chased along the bottom of the wall, and the wall-plate elbow is fixed about 60 cm above the yard (agreed with the client), over the yard drain and away from the gate motor's control box. The tap is a brass lever tap with a vacuum breaker and a click-on hose connector.
Example 2: Rooftop garden next to the tank
The old rooftop tap only trickles. It is fed by gravity, and the bottom of the tank sits less than a metre above it. Nothing is broken; there is just very little head. The client can accept a slow flow for watering cans and drip lines, or have the tap re-fed from the pumped line with its own isolation valve and backflow device.
Fixing a leaking outdoor tap
Before any repair, close the isolation valve and open the tap to release pressure.
Symptom | Likely cause | How to check | Fix |
|---|---|---|---|
Drips from the spout when closed (screw-down tap) | Worn or hardened rubber washer, or a damaged seat | Drip continues even when the handle is turned firmly | Replace the washer; if the seat is badly pitted, replace the tap |
Drips from the spout when closed (lever or ceramic tap) | Worn ball seals or ceramic cartridge, or grit in the valve | Lever closes fully but water still passes | Flush grit out; replace the cartridge or the tap |
Water around the handle or spindle while the tap is open | Loose gland nut or worn spindle O-ring or packing | Leak stops when the tap is closed | Tighten the gland nut a little; replace the O-ring or packing |
Water from behind the tap at the wall | Thread seal failed, tap was backed off to align it, or the elbow insert is damaged | Wet thread when the tap is removed | Remove tap, clean, re-seal and refit (go forward, never back); replace the elbow if the insert is loose or cracked |
Damp patch in the wall around or below the tap | Leak at the elbow weld or inside the wall, or rain getting in around the fitting | Damp spreads even when the tap is not used; check with the isolation valve closed and open | Find the source before opening the wall; see our guide to finding concealed leaks |
Leak at the hose connector | Missing or worn washer in the hose connector, or a cracked plastic part | Water sprays at the connection only when the hose is attached | Replace the washer or the connector |
Pump keeps restarting with all taps closed | A drip somewhere on the pumped line, often the outdoor tap | Close the outdoor isolation valve and see whether the pump stops cycling | Fix the leaking tap; see our booster pump guide if the problem continues |
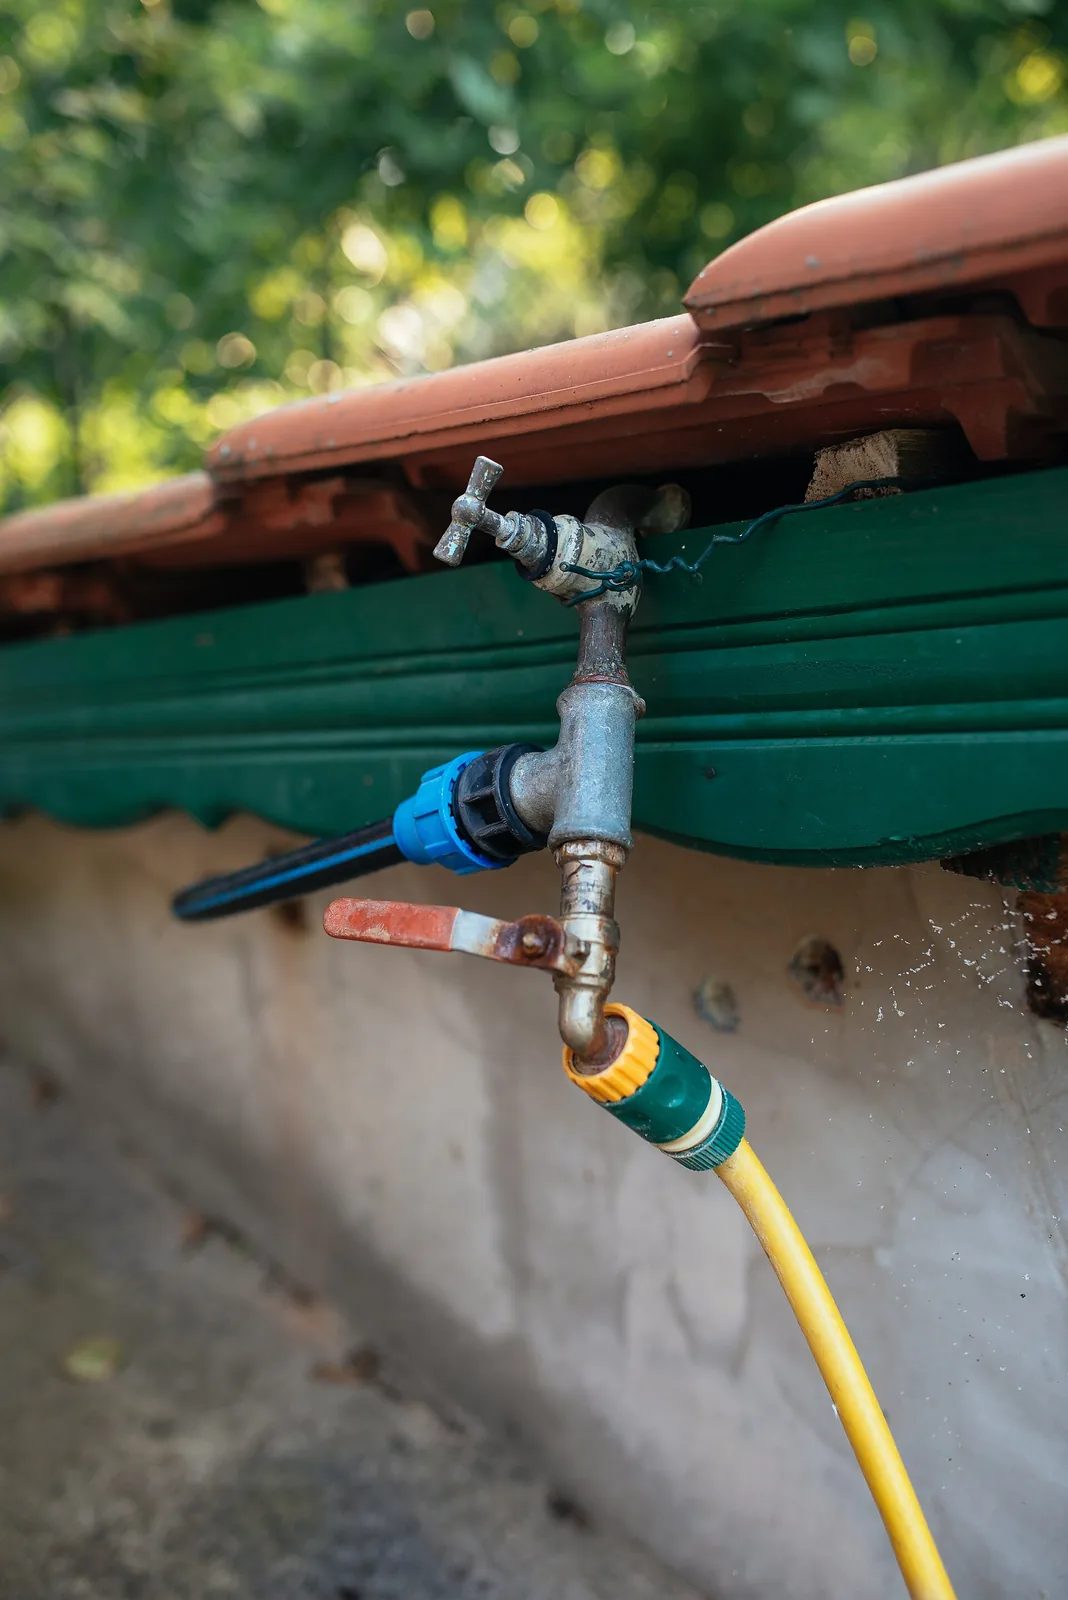
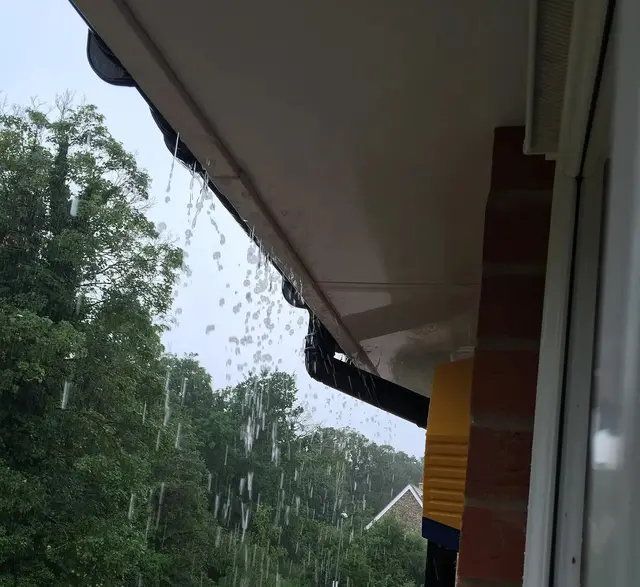
Figure 4. An improvised outdoor tap assembly tied to a wooden fascia with wire, with a spray of droplets visible on the right. Pipework that is not fixed to a solid wall moves every time the tap or hose is used, which loosens joints over time. Compare it with the screwed-down wall plates in Figure 2. If a tap moves when used, re-fix the elbow before the pipe cracks. (Photo: Shixart1985, Wikimedia Commons, CC BY 2.0)
How to replace the washer on a screw-down outdoor tap
Close the isolation valve and open the tap to release pressure.
Hold the tap body with one spanner and undo the headgear (the hex under the handle) with another, so the tap cannot turn in the wall.
Replace the washer on the bottom of the spindle with one of the same size and type.
Check the seat: if it is rough or pitted, replace the tap instead.
Refit the headgear, open the isolation valve slowly and test.
Our guide to fixing a dripping faucet covers the same repair on indoor taps.
Safety checklist
Electrical safety first. Scan for cables before drilling or chasing; switch off the circuit breaker if in doubt (Vietnam household power is 230 V, 50 Hz); use RCD-protected power tools; keep leads out of water.
Keep the tap away from electrical points. Never place it above or beside an outdoor socket, meter box, pump control box or gate motor.
Switch off and unplug the booster pump before cutting into a pumped line.
Dust, noise and heat. Wear glasses, mask and ear protection when chasing; keep the PPR welder on its stand and unplug it when done.
Working at height. On balconies and rooftops, use a stable platform and do not lean over railings or parapets to drill an outside wall.
Respect the meter and shared pipes. Never connect on the supplier's side of the meter; in apartments, get building management's agreement first.
Protect the drinking water. Fit backflow protection where hoses will be connected and teach the client how to use the tap safely.
Test before you close the wall, and open valves slowly to avoid pressure surges.
Frequently Asked Questions
How high should an outdoor tap be?
There is no single correct height. Many installers place a yard tap roughly 50–70 cm above the ground so a bucket fits underneath, but this is only a reference. Agree the height with the client based on what the tap is for, and keep it above any drain or bucket so the spout never sits in water.
Can I connect an outdoor tap directly to the mains before the rooftop tank?
You can take a branch from the incoming supply after the water meter, and some households do this to save stored water. The pressure will follow the street supply, which may be low at peak times. Never connect anything before the meter, and fit backflow protection, because any backflow from this tap would go straight into the incoming supply.
My new tap leaks at the wall. Should I just tighten it more?
Only if it is clearly loose and you can tighten it forward to the next downward position without much force. If it is already firm, or you had backed it off earlier, remove it, clean the threads, re-seal and refit it. Forcing it further can crack the elbow.
Practice Exercises
Plan the job. A client wants a tap by the gate of a 3-storey townhouse with a gravity-fed rooftop tank and a pump for the top floor only. Decide where you would tee in, where the isolation valve would go, and why.
Choose the location. Draw a sketch of a front yard with a gate motor, an outdoor socket, a yard drain and a motorbike parking area. Mark the best tap position and explain your choice.
Explain pressure. A client complains that the tap you are about to fit on the roof will be weak. Use the 10 m ≈ 1 bar rule of thumb to explain why, and give two possible solutions.
Thread sealing. Practise taping a 1/2-inch tap and screwing it into an elbow held in a vice until the spout points down when firm, without backing off. Then list three everyday situations where an outdoor tap could let dirty water into the supply, and the precaution for each.
Diagnose. "The booster pump switches on every few minutes at night, and there is a damp patch below the outdoor tap." Describe your checks, starting with the isolation valve.