A new kitchen is almost finished. The cabinets are in, the stone or laminate countertop has arrived, and the client wants to start cooking this weekend. The last plumbing job is the sink: cut (or check) the opening, set the bowl, seal it so water never gets under the edge, fit the waste and connect it to the drain without a single drip. It sounds simple, yet a badly installed sink is one of the most common call-backs a plumber gets: water swelling the cabinet board, a mouldy smell from the sealant line, or a slow leak at the trap that nobody notices for weeks.
This guide walks through installing a kitchen sink in a countertop step by step, for both top-mount (inset, drop-in) sinks and undermount sinks, then fitting the basket strainer waste, overflow and trap, and testing the whole thing.
Scope of this guide. This article is for trainee and working residential plumbers and covers a single or double stainless steel, composite or ceramic kitchen sink connected to a gravity drain. Fitting the mixer tap itself is covered in our separate guide on replacing a kitchen sink mixer tap. Cutting stone countertops produces silica dust and needs wet cutting or proper dust extraction and respiratory protection; many stone suppliers cut the sink opening in their workshop, which is usually the better option. Numbers marked for reference are typical values or worked examples; always follow the sink manufacturer's template and instructions, and local regulations.
Top-mount or undermount: know what you are installing
Before you touch a tool, confirm which type of sink the client has bought and which countertop it is going into. The two types are installed very differently.
Top-mount (inset, drop-in) sinks
A top-mount sink has a rim (flange) that sits on top of the countertop. The bowl drops through a cut-out, and the rim covers the cut edge. Most top-mount stainless steel sinks are held down from below with mounting clips that hook onto a channel under the rim and tighten against the underside of the countertop. A bead of sealant, or a foam or rubber gasket supplied with the sink, seals the rim to the top.
Top-mount sinks suit almost any countertop: laminate on particle board or plywood, solid wood, stone, quartz. Because the rim hides the cut edge, the cut-out does not need a polished finish, which is why they are the usual choice for laminate tops, where the exposed board core must never get wet.
Undermount sinks
An undermount sink is fixed under the countertop, so the polished edge of the stone forms the visible lip and crumbs can be wiped straight into the bowl. The cut-out edge is exposed, so it must be finished and waterproof. That means undermount sinks are normally used only with stone, quartz, solid surface or similar materials, not with laminate on a wooden board.
The sink is held up by clips or brackets fixed into the underside of the countertop (often with anchors set in drilled holes or bonded studs), and sealed with a continuous bead of sealant between the rim and the stone. The weight of a sink full of water and pots is significant, so the fixing method recommended by the sink or countertop manufacturer matters.
Farmhouse (apron-front) sinks
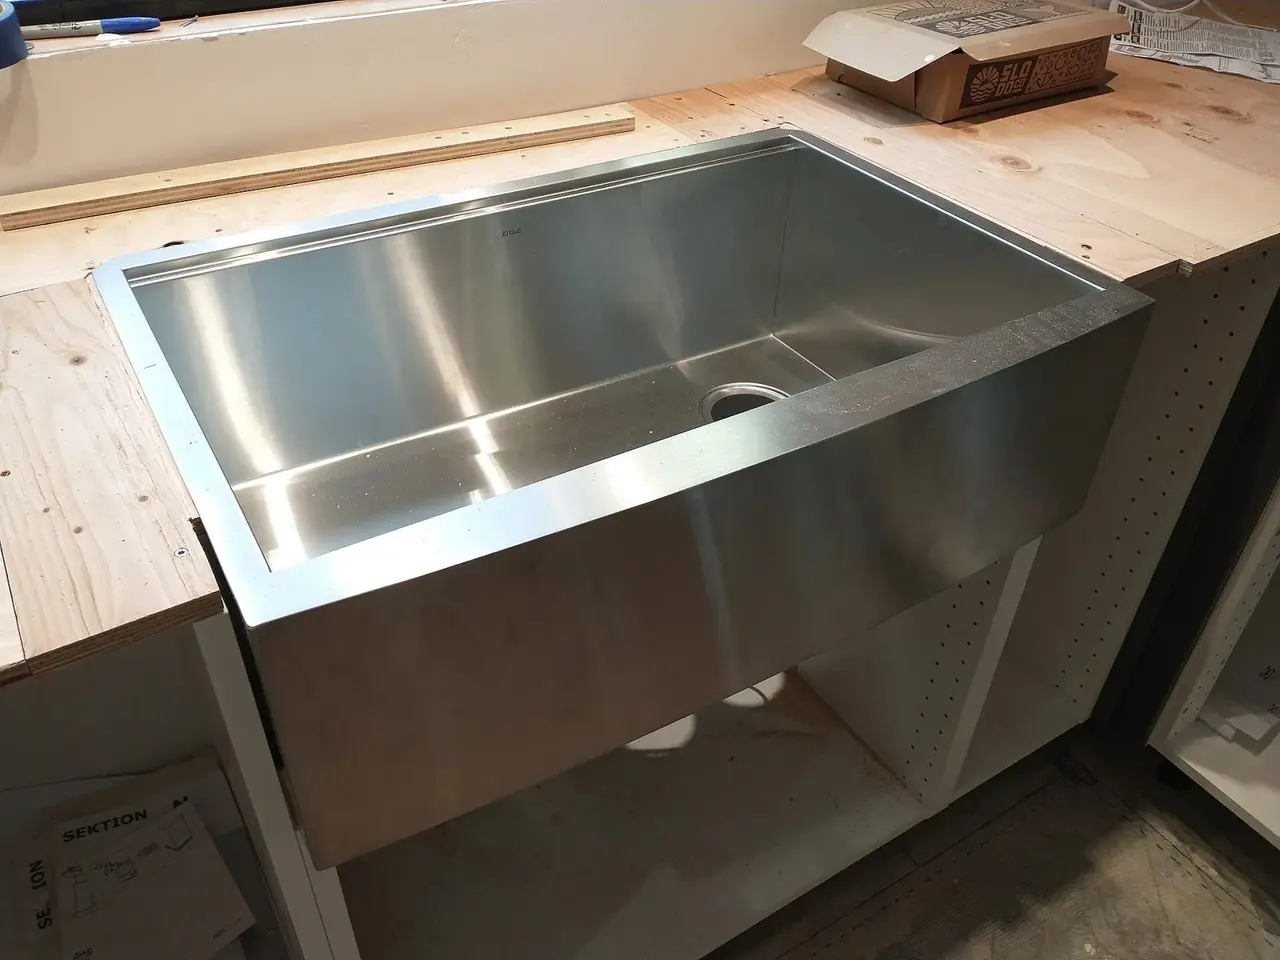
An apron-front sink, like the one on the cover of this article, has an exposed front panel and sits on a support frame or ledger inside the cabinet. The cabinet front is cut down to suit, and the countertop is fitted around the sink afterwards. These sinks are heavy and the cabinet manufacturer's or sink maker's support details must be followed exactly. The principles of the waste and trap connections below still apply.
Tools and materials
Gather everything first, so you are not leaving a half-sealed sink to go and buy a part.
Tape measure, pencil, straight edge and a small spirit level.
The sink's paper cut-out template (most sinks come with one) or the manufacturer's dimension drawing.
Jigsaw with a fine blade suitable for the countertop material, and a drill with bits to make the starting holes (for laminate or wood tops). Stone is normally cut by the stone supplier.
Masking tape, clamps and offcuts of timber for supporting the cut-out piece.
Screwdrivers, an adjustable spanner, slip-joint (water pump) pliers, and a basin wrench or long-reach tap spanner if the mixer goes in after the sink.
Neutral-cure sanitary silicone sealant (or the sealant the sink manufacturer specifies) and a cartridge gun; plumber's putty only where the waste manufacturer allows it.
Waterproofing for cut edges of laminate or wood tops: an edge sealer, varnish, or a bead of silicone over the raw board.
The sink's waste kit: basket strainer waste for each bowl, overflow fitting and hose, trap (bottle trap or P-trap), connecting pipe for a double bowl, and any dishwasher or washing machine branch spigot.
uPVC pipe and fittings to reach the wall or floor drain, solvent cement, and a rubber reducer or pipe connector if the trap outlet and the drain differ in size.
Bucket, towels, a torch and dry tissue paper for leak testing.
Safety glasses, gloves, and a dust mask or respirator suited to the material being cut.
Step 1: Check the cabinet and the services before installing
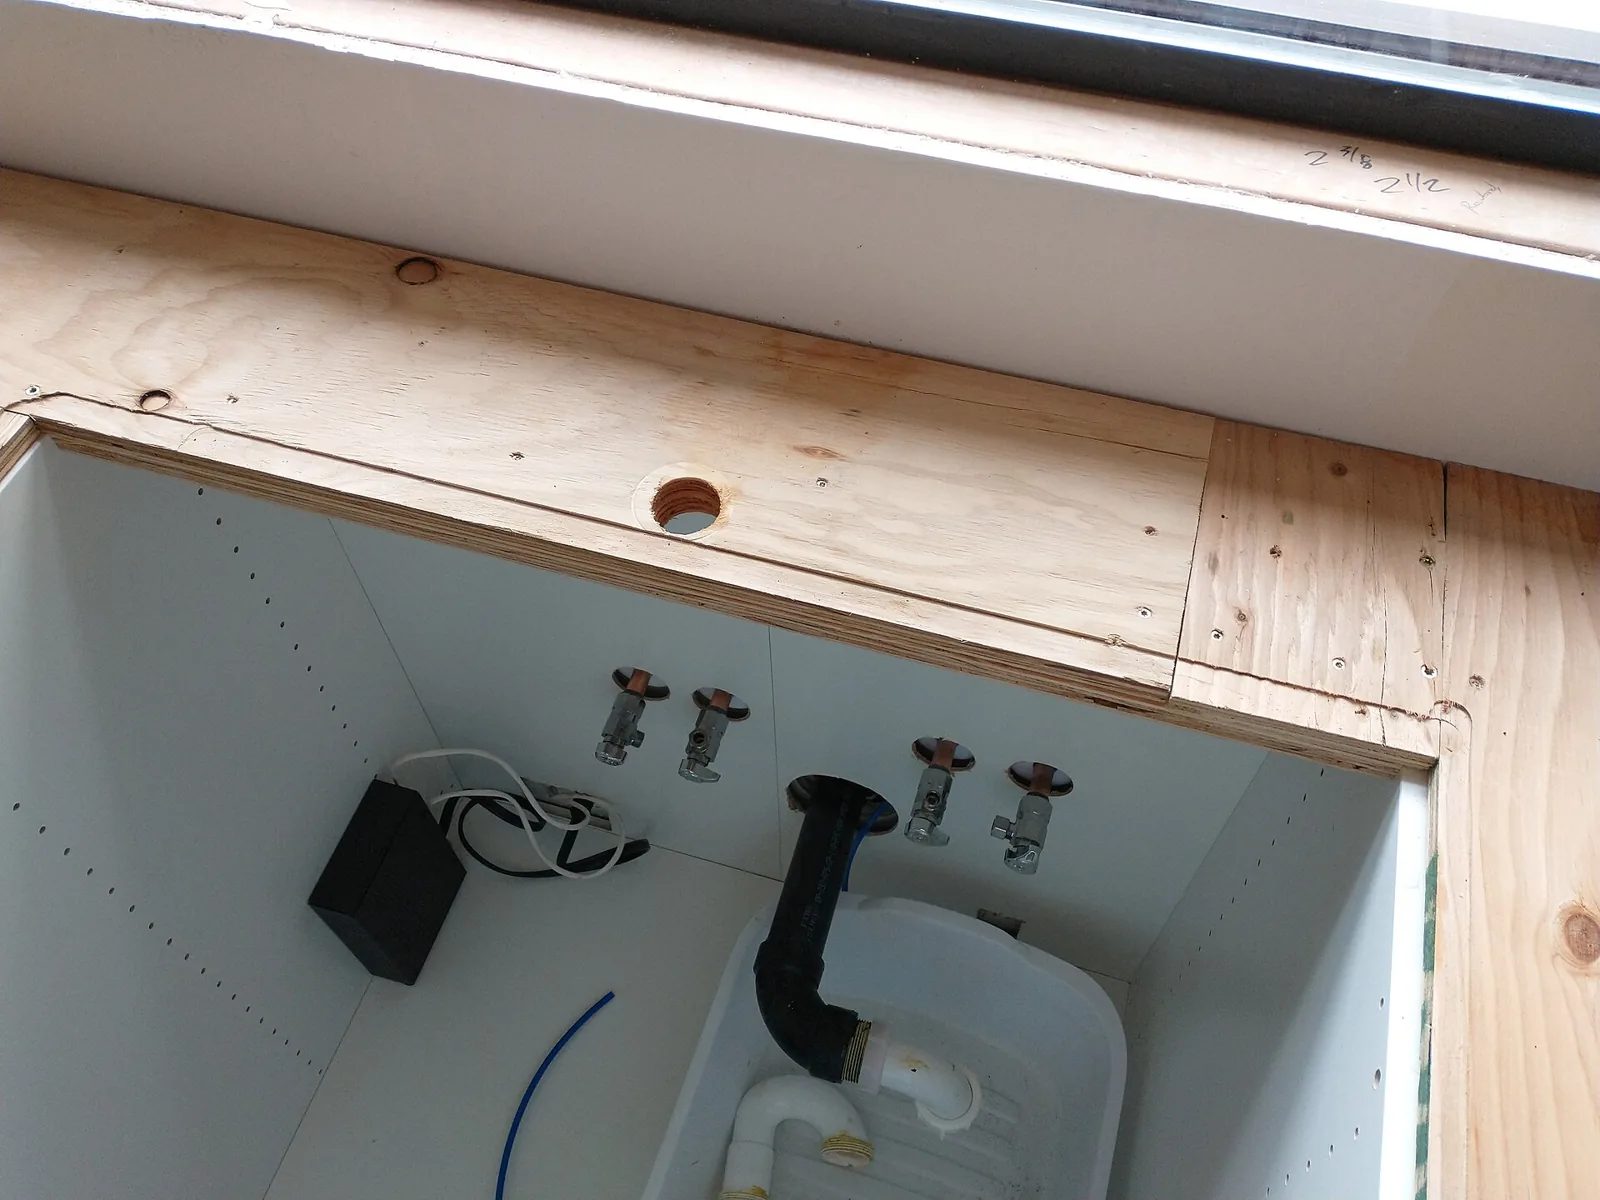
Figure 1. A sink cabinet during installation, before the sink goes in: hot and cold supply stub-outs with angle valves on the back wall, a black drain pipe coming up into the cabinet, a power cable and plug for appliances on the left, and a hole drilled in the plywood sub-top for the tap. (Photo: Stilfehler, Wikimedia Commons, CC BY-SA 4.0)
Open the sink cabinet and check what is already there. You are looking for problems that are far easier to fix now than after the sink is sealed in place.
Drain point. Where does the waste pipe come out: from the wall or the floor? At what height? The trap outlet must be able to reach it with a downward fall. If the drain comes out of the wall higher than the trap outlet will sit, water cannot flow, and the sink will drain slowly or not at all. Fix the drain height now, not after the stone is sealed.
Drain pipe size. Many Vietnamese kitchens use uPVC drain pipe of around Ø42 mm or larger for the sink branch (for reference; check what is installed). Note the size so you can buy the right connector to the trap outlet.
Supply points. Hot and cold outlets should each have their own isolation (angle) valve, at a height that leaves room for the waste and trap below. Test that each valve turns off fully.
Electrical points. If there is a socket for a water purifier, food waste disposer or dishwasher inside the cabinet, it must be well away from where water could drip, and the circuit should be protected by an RCD. Electrical work is a job for an electrician; just make sure your plumbing will not sit above or against the socket.
Cabinet level and strength. Place a level across the cabinet top. A sink installed on an out-of-level top will hold water in one corner and drain poorly. The cabinet frame must support the countertop and the full weight of the sink in use.
Practical example. On a renovation job, the old wall drain came out 45 cm above the floor, while the new deep single bowl and its trap needed the drain at no more than about 35 cm. The plumber lowered the wall drain before the countertop was fitted. Had the sink been installed first, the only options would have been a pump or breaking out tiles behind a finished kitchen.
Step 2: Mark and cut (or check) the opening
The cut-out is the step that cannot be undone. Measure twice, then measure again.
Positioning the sink
Centre the sink on the cabinet below it, or on the window, depending on what the client prefers. Confirm with the client before marking.
Check the front-to-back position. The bowl must clear the cabinet front rail and side panels underneath, and there must be enough room behind the sink for a deck-mounted tap if the tap goes on the countertop rather than the sink deck. The manufacturer's template usually shows the recommended setback from the front edge.
Check that the bowl will not hit the cabinet sides, drawer runners or the supply valves when it is dropped in.
Cutting a laminate or wood countertop for a top-mount sink
Place the template (or the upturned sink, if the manufacturer says to trace it) on the top, mark the cut line, and double-check that the cut line is inside the rim line by the amount the manufacturer specifies, so the rim fully covers the cut edge with room for the clips.
Put masking tape along the cut line to reduce chipping of the laminate, and redraw the line on the tape.
Drill a starting hole inside the line in each corner, large enough for the jigsaw blade.
Cut along the line with the jigsaw, supporting the cut-out piece from below (or screw a batten across it) so it does not drop and tear the last section of laminate.
Dry-fit the sink. It should drop in easily without forcing, with the rim lying flat all round.
Seal the raw edge. The exposed particle board or plywood on the cut edge will swell if water ever reaches it. Coat it with an edge sealer or a thin layer of silicone and let it dry. This one step prevents most of the swollen, crumbling countertops seen on old kitchens.
Stone and quartz countertops
For granite, marble, quartz and other stone, the opening is normally cut and polished by the countertop supplier using the sink's template, and the tap hole is drilled at the same time. Your job is to check that the opening matches the sink before the top is fixed down: hold the sink in position underneath (for undermount) or drop it in (for top-mount) and check the overhang or reveal is even all round. If you do have to cut stone on site, use a wet-cutting saw or a tool with proper dust extraction and wear suitable respiratory protection, because stone dust can contain crystalline silica, which is harmful to the lungs.
Step 3: Fit the tap and waste to the sink before setting it
Working under a sink inside a cabinet is awkward. Where the design allows, fit as much as possible while the sink is upside down on a padded surface:
If the tap mounts on the sink deck, install the mixer tap and its flexible hoses now (see our kitchen mixer tap guide).
Fit the basket strainer wastes and the overflow fitting (details in Step 5).
Attach the mounting clips loosely into the channel under the rim of a top-mount sink, turned so they will not block the bowl from dropping in.
Check the manufacturer's instructions first: some undermount sinks are easier to fix with the waste fitted afterwards, because the strainer flange has to sit on the sink, not between the sink and the stone.
Step 4: Set and seal the sink
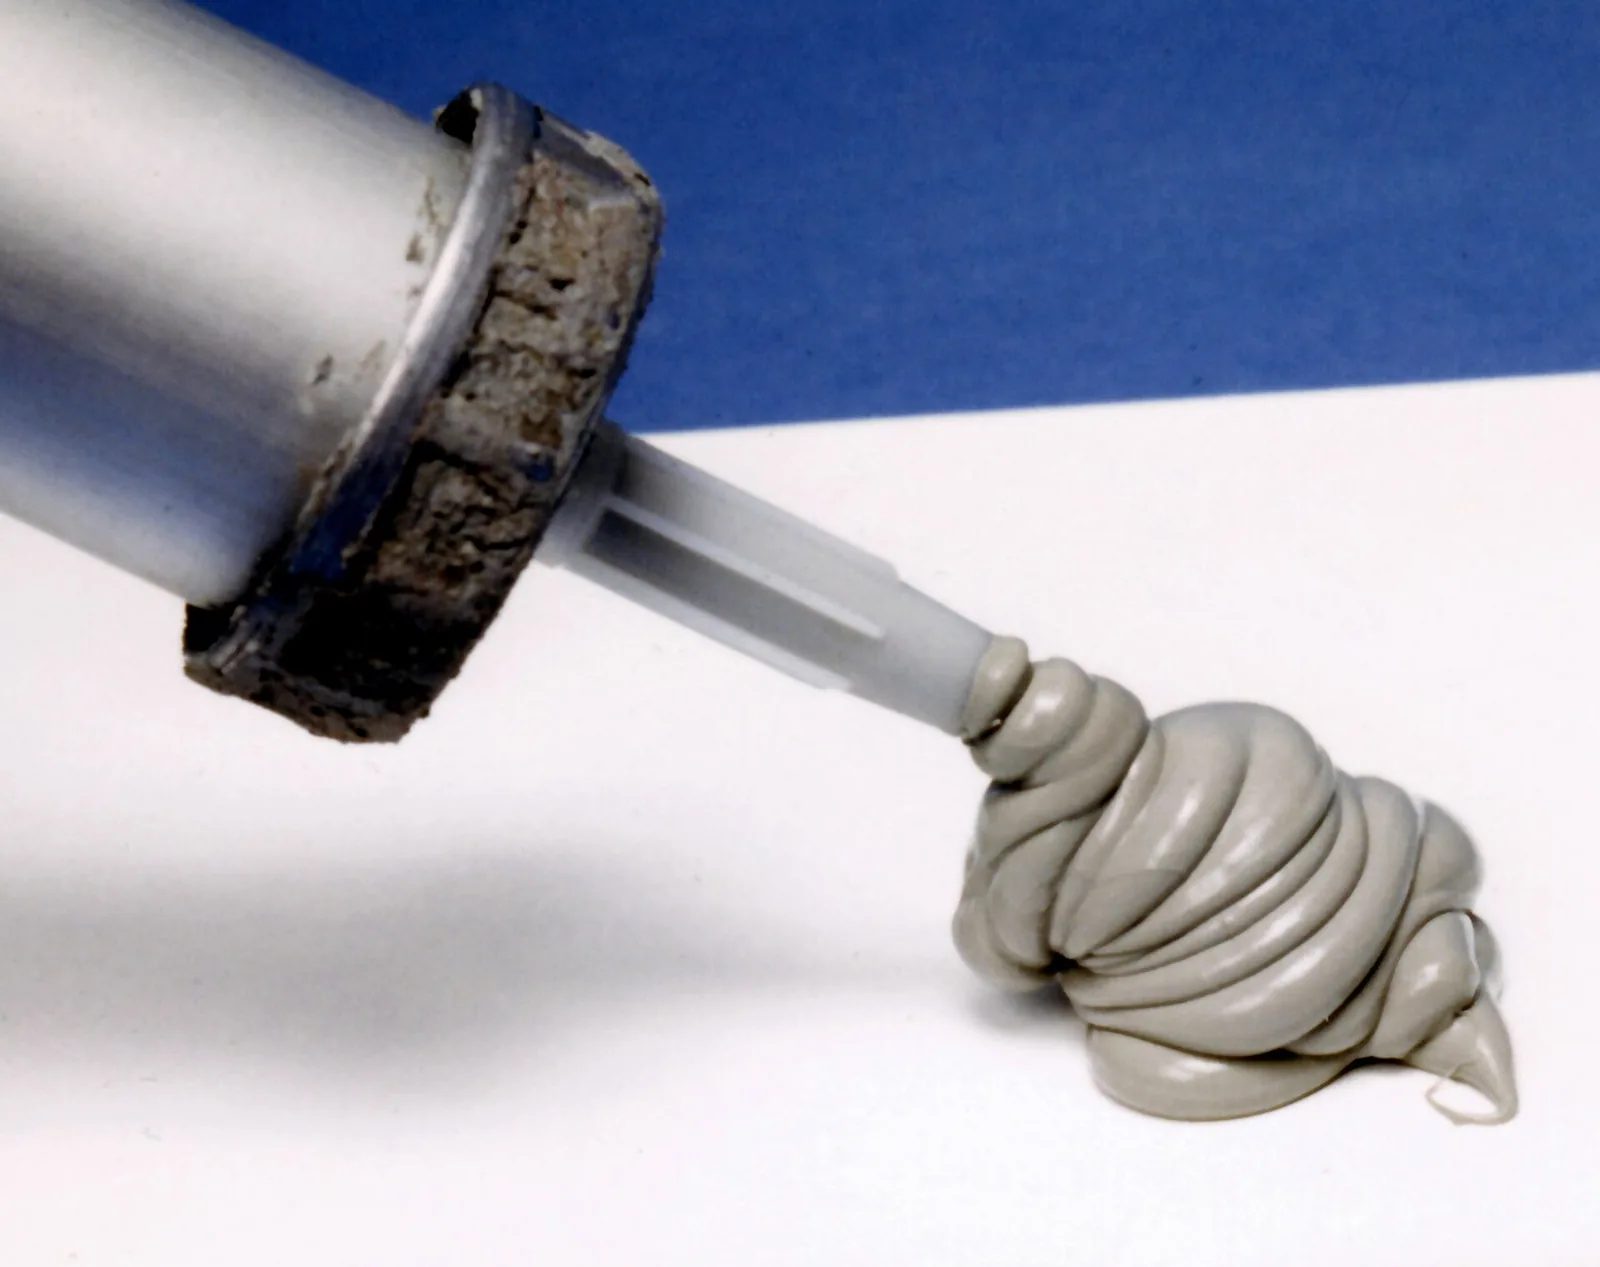
Figure 2. Silicone sealant being extruded from the nozzle of a cartridge gun. A continuous, even bead with no gaps is what keeps water from getting under a sink rim. (Photo: Achim Hering, Wikimedia Commons, CC BY 3.0)
The seal between the sink and the countertop is what stops water running under the rim and into the cabinet. A gap of even a few millimetres in the bead is enough to cause a hidden leak.
Top-mount sink
Clean the countertop around the cut-out and the underside of the sink rim. Dust, grease and old sealant stop the new sealant from bonding. Wipe with a cleaner the sealant manufacturer recommends and let it dry.
If the sink came with a foam or rubber gasket, apply it to the underside of the rim as instructed. Otherwise run a continuous bead of sanitary silicone around the cut-out, a little way back from the edge so it sits under the rim, not in the opening.
Lower the sink straight down into the opening. Do not slide it, as that smears the sealant and leaves gaps.
From below, rotate each mounting clip so it bears on the underside of the countertop, then tighten them evenly a little at a time, working around the sink in a cross pattern, like tightening the nuts on a wheel. Over-tightening one clip can bend a thin stainless rim and lift the opposite side.
Check the rim sits flat and the sink is level. Wipe away squeezed-out sealant on top with a cloth and smooth a neat, thin fillet along the rim edge if the sealant manufacturer recommends it.
Leave the sealant to cure for the time on the cartridge before filling the sink or putting weight on it.
Undermount sink
With the countertop in place (or upside down on a padded surface, if the supplier mounts the sink before the top is fitted), clean the underside of the stone around the opening and the top of the sink rim.
Run a continuous bead of the specified sealant on the sink rim.
Lift the sink into position under the opening, centre it so the reveal is even all round, and support it from below with a prop, clamp or a timber across the cabinet while you fix the clips or brackets. Do not rely on sealant alone to hold the weight.
Fix the clips or brackets with the anchors the manufacturer specifies. Tighten evenly.
From above, wipe away the excess sealant at the joint between the polished edge and the bowl so the line is clean.
Leave the support in place until the sealant and any adhesive have cured fully, as instructed.
Practical example. A client complained that the base board of a two-year-old kitchen sink cabinet had swollen and smelt musty. The trap and hoses were dry. The cause was a 5 cm gap in the silicone at the back of a top-mount sink: water splashing behind the tap was running under the rim and dripping down the inside of the cabinet. The fix was to remove the clips, lift the sink, clean off all the old sealant, dry the board, seal the cut edge and reseal with a continuous bead.
Step 5: Fit the basket strainer waste and overflow
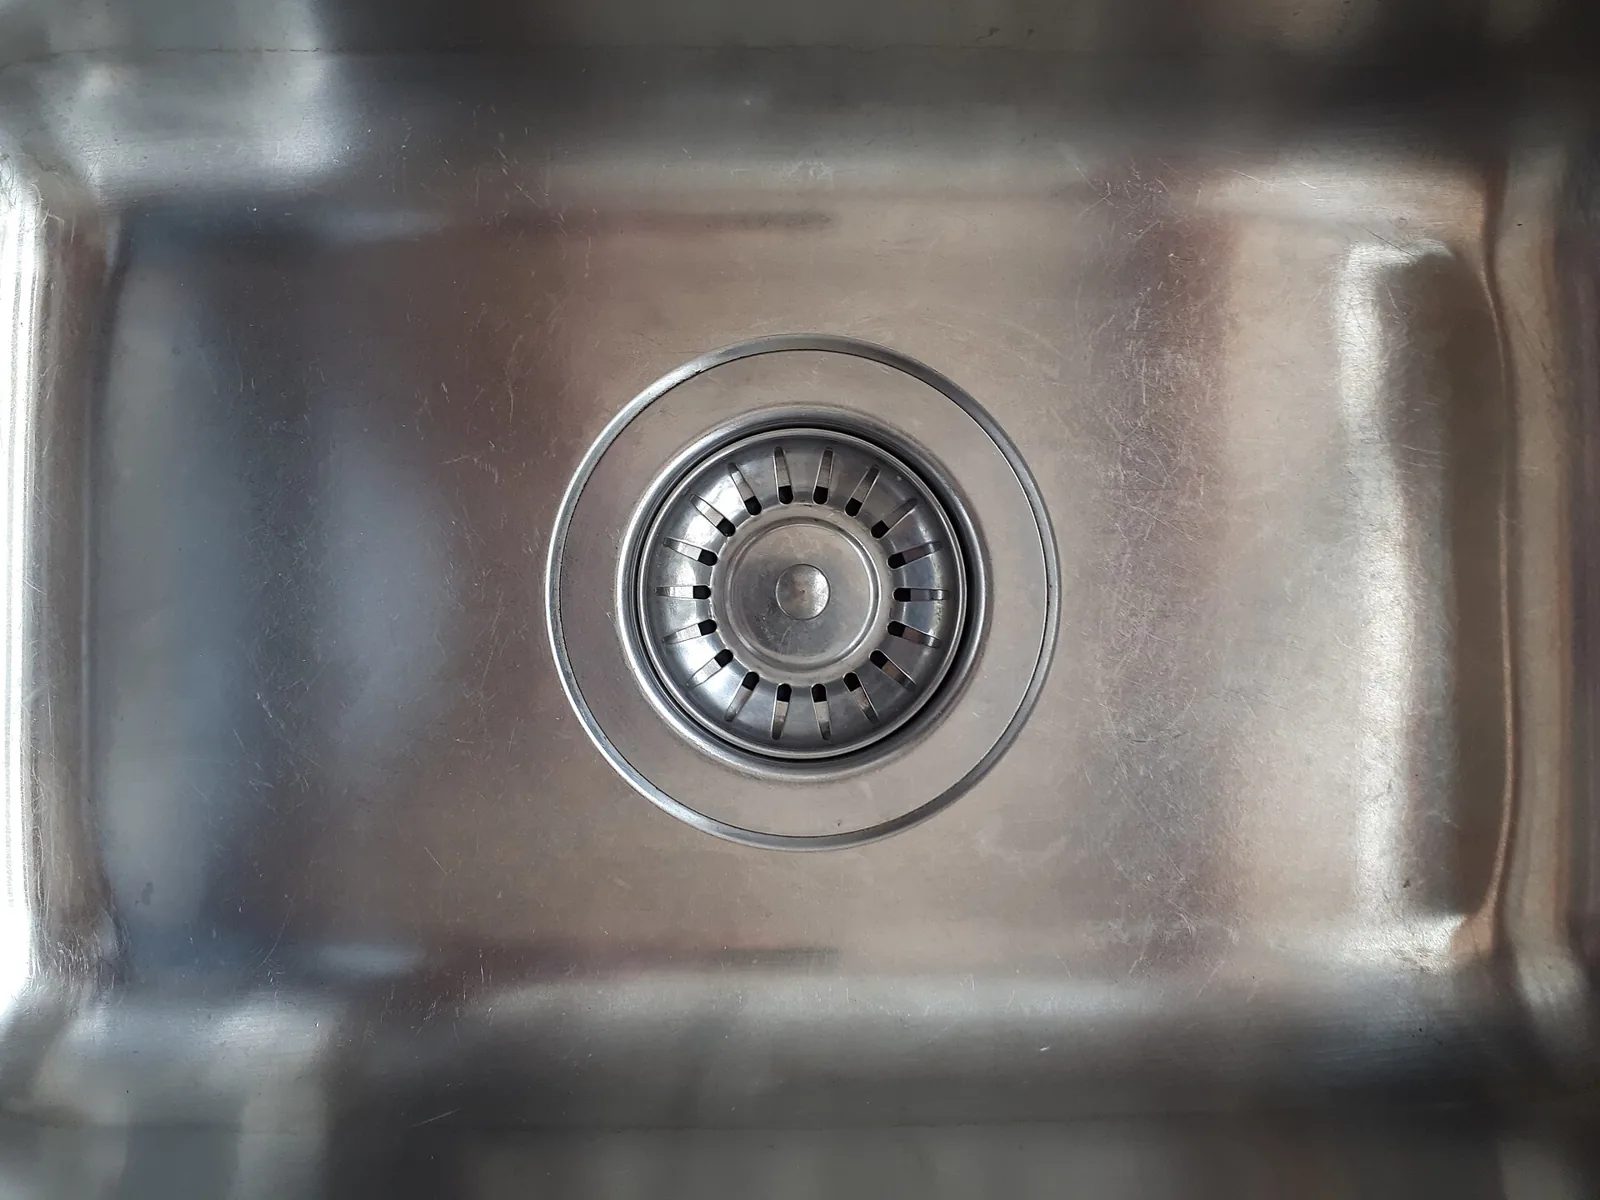
Figure 3. A stainless steel basket strainer sitting in the drain opening of a kitchen sink. The removable basket catches food scraps; the flange of the waste body underneath must be sealed to the sink so water cannot leak around it. (Photo: Fructibus, Wikimedia Commons, CC0)
The basket strainer waste is the drain fitting in the bottom of a kitchen sink bowl. It has a flange that sits inside the bowl, a threaded body that passes through the drain hole, a rubber washer and a fibre or plastic friction washer underneath, and a large lock nut that clamps it all together. The tailpiece below connects to the trap.
Clean the drain hole. Any burr or dirt under the flange will cause a leak.
Seal the flange to the bowl using the method the waste manufacturer specifies: a supplied rubber or foam seal under the flange, a thin bead of silicone, or plumber's putty. Do not mix methods unless the instructions say so, and note that some plastic waste bodies and some composite sinks must not be used with putty.
Push the waste through the hole. From below, fit the rubber washer, then the friction washer, then the lock nut, in the order shown on the instructions. The friction washer lets the nut turn without twisting the rubber washer out of place.
Hold the strainer from above so it cannot turn, and tighten the lock nut firmly by hand, then a little more with pliers or a spanner. Do not overtighten a plastic nut; it can crack.
If the sink has an overflow opening, fit the overflow outlet to the bowl with its seal, then connect the overflow hose to the spigot on the waste body or trap. A loose overflow hose is a classic hidden leak, because it only leaks when the sink is filled to the top.
Step 6: Connect the trap and the drain
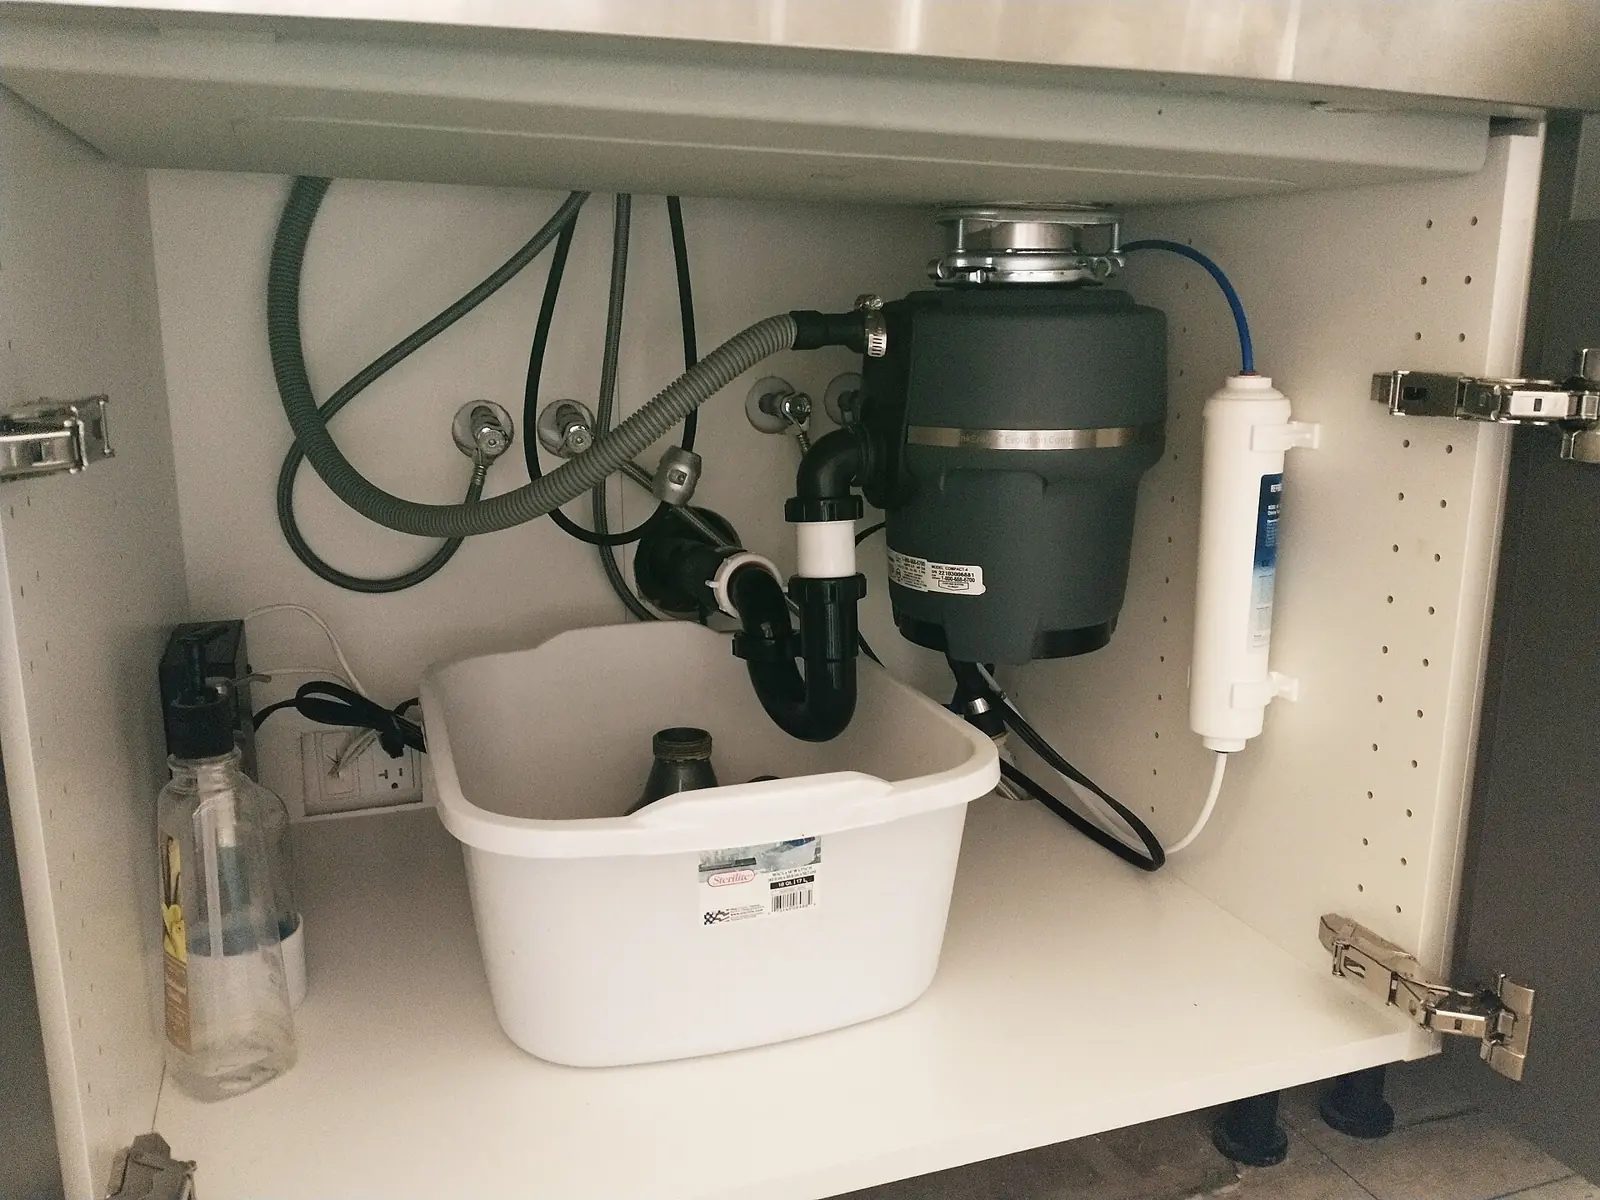
Figure 4. A finished sink cabinet: the waste from the bowl runs down through a black trap to the drain, the hot and cold angle valves on the back wall feed the flexible tap hoses, a water filter is mounted on the right, and a food waste disposer is fitted under the sink. A plastic tub sits under the trap to catch any drips while the work is checked. (Photo: Stilfehler, Wikimedia Commons, CC BY-SA 4.0)
The trap holds a small amount of water (the water seal) that stops sewer smells coming back up the drain into the kitchen. Every kitchen sink needs one, usually a P-trap or bottle trap supplied with the waste kit.
Plan the route. Hold the trap up to the waste tailpiece and see where its outlet lands relative to the drain. The pipe from the trap to the drain must fall towards the drain all the way, with no dips where water and grease can sit. A reference value often quoted for small drain branches is a fall of around 1–2 cm per metre (for reference; the slope required by local rules or the design takes priority).
Double bowls. A double sink usually connects both wastes to a single trap with a tee or a connecting pipe supplied in the kit. Follow the kit layout so each bowl drains freely and the trap stays accessible.
Cut pipes square. If the plastic tailpiece or outlet pipe is too long, cut it square with a fine saw or pipe cutter and remove the burr, so the washers seat evenly.
Assemble the slip joints. Slide the nut, then the tapered washer (with the taper facing into the joint), onto each pipe. Push the pipe into the fitting and tighten the nut by hand. Hand tight plus a quarter turn with pliers is usually enough for plastic slip nuts; overtightening distorts the washer and can crack the nut.
Connect to the drain. Use the correct rubber connector or reducer between the trap outlet and the drain pipe, or a solvent-welded uPVC fitting if the outlet is designed for it. Do not just push a small pipe into a larger one and wrap it in tape: it will leak, smell and let insects in.
Appliances. If the client has a dishwasher or washing machine, connect its drain hose to the branch spigot on the trap or waste, using the high loop or air gap method its manufacturer requires so dirty water cannot siphon back into the machine.
Connect the tap hoses to the angle valves, if not already done, without twisting or kinking them.
Step 7: Test for leaks
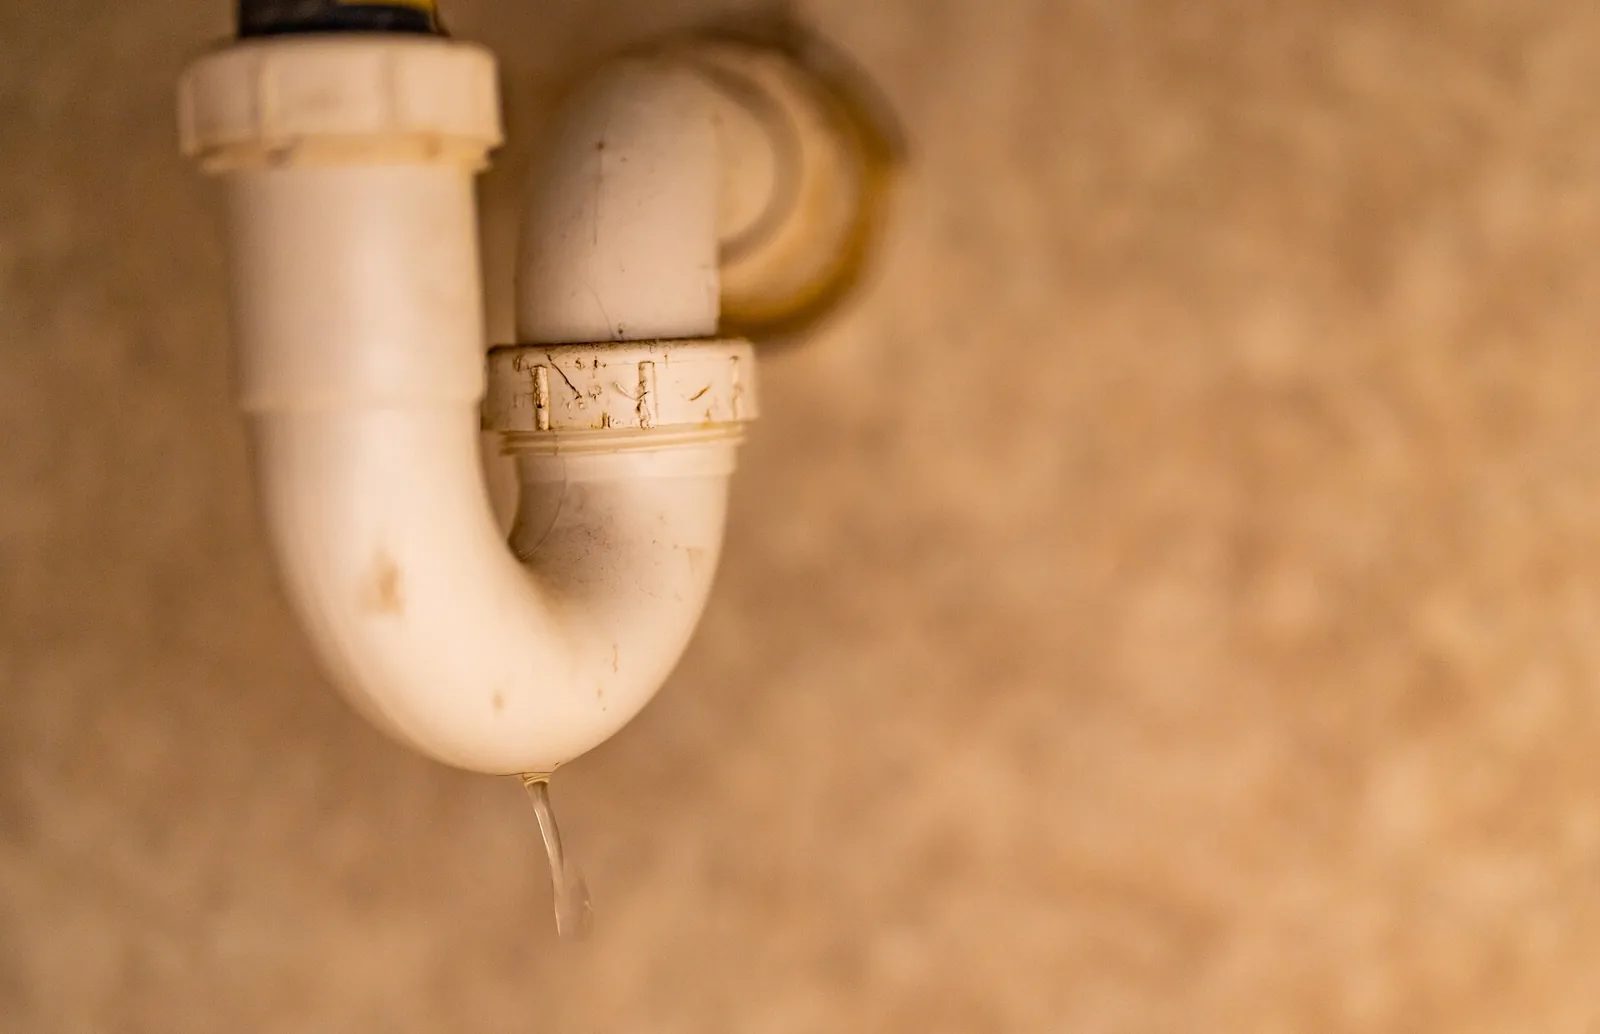
Figure 5. A drip forming under a leaking plastic P-trap below a sink, at a slip joint where the pipe enters the trap. Leaks like this are easiest to spot during a proper fill-and-drain test with dry tissue paper wiped around each joint. (Photo: Tony Webster, Wikimedia Commons, CC BY 2.0)
Never hand over a sink after just running the tap for a few seconds. Small leaks often appear only when the sink drains a full bowl of water, or when the overflow is used.
Wait until the sealant has cured as the manufacturer says.
Dry every joint under the sink with a towel. Put a dry bucket or tub under the trap.
Open the angle valves slowly and check the tap hose connections for drips.
Put the plug in, fill each bowl right up to the overflow, and check the strainer flange and the overflow hose while full.
Pull the plug and let the full bowl drain. Watch and feel each slip joint, the trap and the drain connection while the water rushes through.
Wipe each joint with dry tissue paper. Tissue shows a tiny dampness that you cannot see with a torch.
Run hot water for a minute and repeat the check. Plastic joints can behave differently when warm.
Check the top of the countertop around the rim: pour water near the back edge and behind the tap, then look inside the cabinet for any drip along the underside of the top.
Check again after 15–30 minutes, or ask the client to check the next day, because slow leaks take time to show.
Reference table: common sink installation checks
Item | What to check | Typical value or rule (for reference) |
|---|---|---|
Cut-out size | Matches the manufacturer's template; rim covers cut edge (top-mount) | Always use the template supplied with the sink |
Countertop level | Spirit level front to back and side to side | Level, so water does not sit in a corner of the bowl |
Cut edge of laminate or wood top | Raw board fully sealed before setting the sink | No exposed particle board or plywood |
Rim sealant | Continuous bead or gasket, no gaps, cured before use | Curing time as printed on the cartridge |
Mounting clips or brackets | Tightened evenly in a cross pattern; undermount supported until cured | Number and spacing as per sink manufacturer |
Basket strainer | Correct washer order; flange sealed by the specified method | Hand tight plus a little more with a tool |
Overflow hose | Pushed fully onto both spigots, not kinked | Tested with the bowl filled to the overflow |
Trap | Water seal present, accessible for cleaning | P-trap or bottle trap from the waste kit |
Trap to drain pipe | Continuous fall, no dips, proper connector | About 1–2 cm per metre for small branches, or as designed |
Drain pipe size | Trap outlet fits the drain with the right reducer | Often around Ø42 mm uPVC or larger in Vietnamese kitchens; check on site |
Supply connections | Each line has a working angle valve; hoses not twisted | Flexible hoses of suitable length, no kinks |
Leak test | Full bowl drain, hot water, overflow, rim splash test | All joints dry to tissue paper, rechecked later |
Common mistakes and how to avoid them
Leaving the cut edge of a laminate top unsealed
This is the most common cause of a swollen, crumbling countertop around a sink. Seal the raw board every time, even if the rim seems to cover it.
Using the wrong sealant
Acetic-cure silicone (the type that smells of vinegar) can mark some natural stones and may not be recommended by some sink or stone manufacturers. Use the sealant the sink and countertop makers specify, typically a neutral-cure sanitary silicone with mould resistance for kitchens.
Overtightening plastic nuts
Slip nuts and plastic strainer nuts crack if you lean on them with large pliers. The crack may not leak on day one but will after a few weeks of hot water. Tighten firmly, not brutally, and stop once the joint is sealed.
Trap outlet lower than the drain
If the trap outlet is below the drain connection, water will sit in the pipe and grease will build up quickly. Solve the height problem at the drain before installing, or choose a sink and trap combination that fits.
Forgetting access
The trap needs to be removed for cleaning and the angle valves need to be reached in an emergency. Do not box them in behind a fixed panel or a tight drawer.
Not testing with a full bowl
Running the tap for a moment does not test the strainer seal, the overflow or the slip joints under full flow. Always do the full fill-and-drain test.
Working with the client
Before the job: confirm the sink type, the countertop material, who cuts the opening (you or the stone supplier), where the tap goes, and whether a water purifier, dishwasher or food waste disposer will share the cabinet. Each of these changes the layout under the sink.
Explain curing time: tell the client clearly how long they must wait before using the sink or putting heavy pots in it, and write it down if needed.
Hand-over: show the client where the angle valves are and how to turn them off, how to remove and clean the basket strainer, and how to unscrew the trap if something valuable goes down the drain.
Care advice: do not pour cooking oil or fat down the sink; let it cool and bin it. Use the strainer basket. Wipe water off the back of the rim rather than letting it stand against the sealant.
Quote honestly: if the drain height, a weak cabinet or a damaged countertop must be fixed first, explain why and price it separately, before you start.
Safety checklist
Wear safety glasses when drilling, cutting and working under the sink.
Cutting stone produces dust that may contain crystalline silica. Use wet cutting or proper dust extraction and suitable respiratory protection, or have the supplier cut it.
Use a jigsaw with the correct blade, clamp the work, support the cut-out piece and keep hands clear of the blade line.
Get help lifting heavy sinks, especially composite, ceramic and apron-front models. Lift with your legs, not your back.
Keep water away from any socket or appliance inside the cabinet. Switch off and unplug appliances before working near them; electrical changes are for an electrician.
Use silicone and solvent cement in a ventilated room, keep them away from flames, and follow the label.
Shut off the hot and cold angle valves before connecting tap hoses, and open them slowly afterwards.
Take care with hot water during testing to avoid scalds.
Do not stand or kneel on a freshly installed sink or countertop.
Clean up offcuts and sealant, and leave the cabinet dry.
Frequently Asked Questions
Should I use silicone or plumber's putty under the sink rim?
For the sink rim on the countertop, sanitary silicone (or the gasket supplied with the sink) is normally used, because it bonds and stays flexible. Plumber's putty is a traditional sealant for some strainer flanges, but it does not bond and is not suitable for every material: some plastics and natural stones can be damaged or stained by it. Always follow the sink and waste manufacturer's instructions.
Can I install an undermount sink in a laminate countertop?
In general, no. With an undermount sink the cut edge of the countertop is exposed to water all the time. A laminate top has a wooden board core that swells when wet, so even with sealing it will eventually fail. Some manufacturers make special laminate systems for undermount sinks; unless the client has one of those, choose a top-mount sink.
How long should I wait before using the sink?
Wait for the full curing time printed on the sealant cartridge and in the sink's instructions. Some sealants are touch-dry in minutes but need much longer to cure fully. Undermount sinks in particular must stay supported until the sealant or adhesive has cured.
The sink drains slowly right after installation. What is wrong?
Check the trap-to-drain pipe for a dip or a section that runs uphill, check that the trap outlet is not lower than the drain connection, and make sure no offcut, sealant or packaging fell into the waste. A dishwasher hose pushed too far into the branch can also restrict flow. If the house drain itself is blocked, see our guide on clearing a blocked kitchen sink.
Why does my new sink smell of drains?
The trap may be missing its water seal (for example if it was installed dry and not yet used), a slip joint may be loose, or the trap outlet may be pushed into a larger drain pipe without a sealed connector, letting sewer air escape. Run water to refill the trap, then check every connection and fit a proper reducer or connector at the drain.
Water appears inside the cabinet, but the trap and hoses are dry. Where is it coming from?
Look at the rim seal and the tap hole. Water splashed behind the tap or along the back of the sink can run under a gap in the sealant and drip down inside the cabinet. Pour water around the rim and watch from below to find the spot, then reseal.
Can I connect the dishwasher drain to the sink trap?
Yes, most kitchen waste kits include a spigot on the trap or waste for this. Remove any blanking cap or knock-out plug first, secure the hose with a clip, and route it with the high loop or air gap the dishwasher manufacturer specifies so waste water from the sink cannot flow back into the machine.
Practice Exercises
Read the template. Take the cut-out template from any kitchen sink. Identify the cut line, the rim line and the recommended setback from the front edge. Explain why the cut line sits inside the rim line on a top-mount sink.
Practice cut on an offcut. On a piece of laminate-faced board, mark a small rectangular cut-out with rounded corners, tape the line, drill the starting holes and cut it with a jigsaw. Then seal the raw edge. Check how cleanly the laminate cut and what you would change.
Assemble a waste kit on the bench. Assemble a basket strainer, overflow hose and P-trap without a sink, then name each washer and nut and the order they go in. Take it apart and assemble it again without looking at the instructions.
Plan the drain height. For a sink whose trap outlet will sit 38 cm above the floor (example data), decide the highest acceptable height for a wall drain connection 60 cm away, allowing a continuous fall. Write down your reasoning.
Full leak test. On an installed sink (at your workshop or under supervision on site), carry out the full test sequence from Step 7, including the overflow and rim splash test, and record any joint that showed dampness and how you fixed it.
Client hand-over. Role-play the hand-over with a classmate: explain curing time, show the angle valves, the strainer basket and the trap, and give two pieces of care advice in plain words.
A kitchen sink installed carefully, with a sealed cut edge, a continuous rim seal, correctly assembled waste and a proper fall to the drain, will work quietly for years. The extra half hour spent checking levels and testing with a full bowl is what separates a professional job from a call-back.