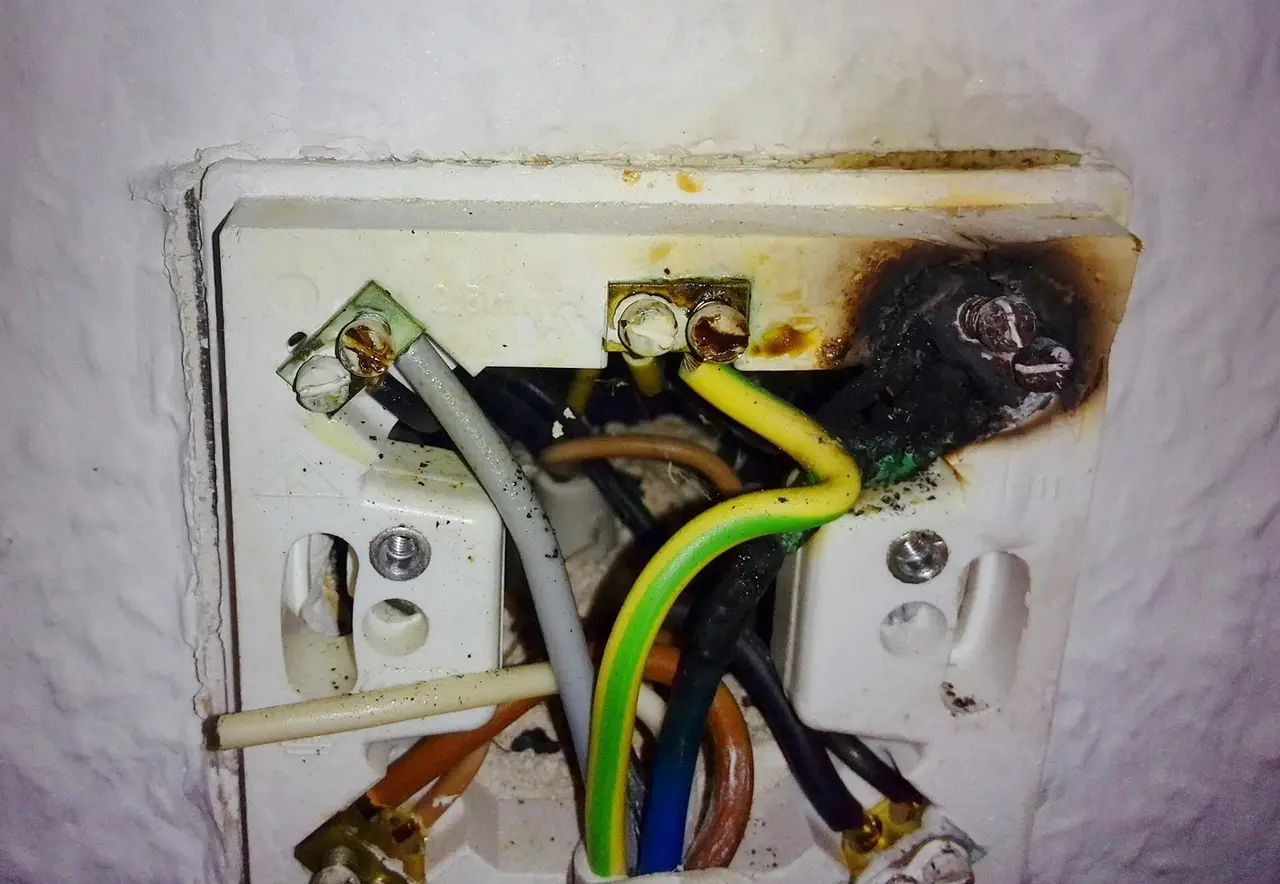
A client calls because the socket behind the rice cooker "gets really hot", or because a plug came out of the wall with a brown mark on one pin. The breaker never tripped and the house seems fine. A trained electrician treats this as an early warning of an electrical fire, because heat at a socket or plug usually means a fault that breakers are not designed to catch.
This guide explains to trainee electricians why sockets and plugs overheat, how to find out whether the problem is the socket, the plug, the load or the wiring, and how to replace a heat-damaged wall socket safely. It is written for Vietnamese homes on a single-phase supply of nominally 220–230 V, 50 Hz.
Scope and safety. This article covers diagnosing a hot or scorched socket outlet and replacing a single wall socket on an existing circuit. It does not cover new circuits, work inside the distribution board or rewiring damaged cable runs. Mains voltage can kill. Learners should do this work only under the supervision of a qualified electrician. If you find charred cable, damage that extends into the wall, or wiring you do not understand, stop and have a qualified electrician inspect the circuit. Numbers in this article are for reference only; the socket and appliance manufacturers' instructions always come first, together with the rules that apply where you work.
First response: what to do when a socket is hot or smells of burning
Switch off at the distribution board first: the MCB for that circuit, or the main switch if you do not know which one. Do not grab a hot or melted plug while it is live; the softened body may expose pins or conductors.
Then unplug by the plug body, not the cable, wearing suitable gloves if it is still hot.
Check for fire. Smoke from the wall, soot around the plate or a smell that continues after isolation means heat may have spread into the box or cable. If there is any sign of fire, get everyone out and call the fire service (114 in Vietnam). Never use water on electrical equipment.
Leave it off, including any strip or extension lead on that socket, until the cause is found.
Why sockets and plugs get hot
Every connection has a small electrical resistance. When current flows through resistance, it produces heat; the heating power is roughly the current squared times the resistance (P = I²R). A good, tight contact has so little resistance that the heat is negligible. A poor contact can have many times more resistance, and because all the load current must pass through that tiny spot, the heat is concentrated there.
That creates a vicious circle. Heat oxidises the metal and softens the spring contacts, which raises the resistance, which creates more heat. Over weeks or months the plastic darkens, then chars, and eventually it can ignite. This is often called a high-resistance joint or a "glowing contact".
Why the breaker did not trip
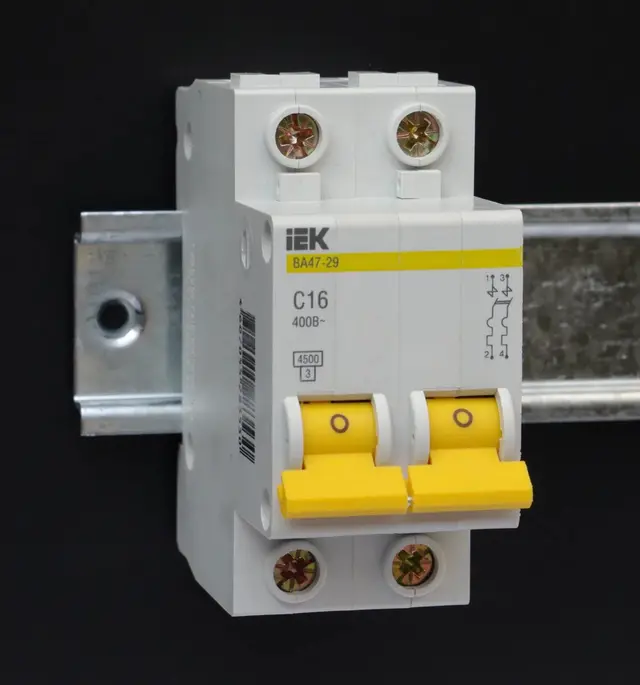
This is the most important point to explain to clients. An MCB responds to current: it trips on overload (too much current for too long) and on short circuit (a very large current instantly). An RCD, RCCB, RCBO or "aptomat chống giật" responds to leakage: current that returns through earth or a person instead of the neutral. A loose terminal carrying a normal 8 A kettle load is neither an overload nor a leakage. The current is normal; only the heat at one spot is abnormal. So none of these devices will trip, even while the socket is burning.
Arc fault detection devices (AFDDs) exist in some countries but are uncommon in Vietnamese homes. In practice, inspection and good workmanship are the protection against this fault.
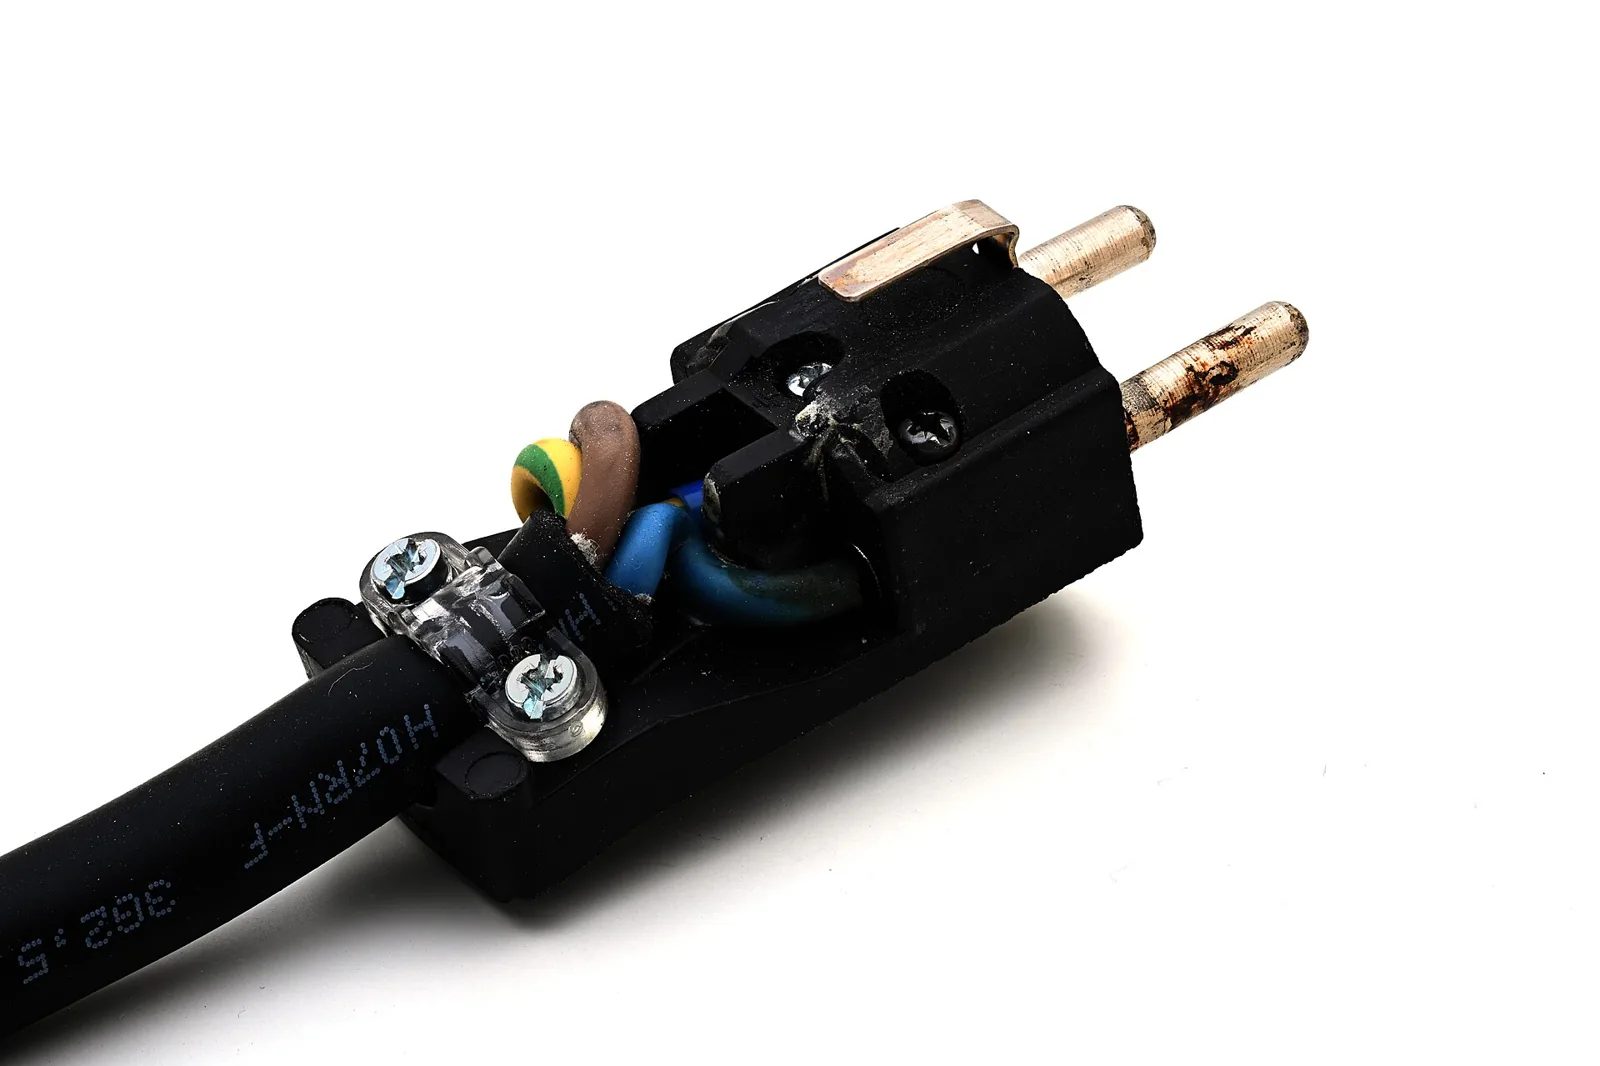
Figure 1. A failed plug with burn marks and pitting on its pins, worst on one pin. Through the opened back you can see a discoloured blue conductor partly melted into the plug body. The heat came from poor contact, a fault that an overcurrent breaker does not detect. (Photo: Phiarc, Wikimedia Commons, CC BY-SA 4.0)
The common causes
1. Worn or weak socket contacts
Spring contacts inside the socket grip the plug pins. With age, after one overheating episode, or in a cheap socket with thin metal, they lose tension. The plug wobbles or falls out, contact resistance rises and the socket heats under heavy load. Worn contacts cannot be reliably repaired; replace the socket.
2. Loose terminal screws behind the socket
A screw that was never tightened properly, or has loosened through heating and cooling cycles, makes the joint heat at the back of the socket. Typical signs are discolouring around one terminal, or a hot plate even though the plug feels firm. Where sockets are looped from one to the next, one loose terminal can affect every socket further along the loop.
3. Too much load on one socket or power strip
Sockets, power strips and extension leads each have a maximum rating, often 10 A or 16 A for household types (check the product marking). Several heating appliances on one strip can easily exceed it, and they draw high current for long periods.
4. Poor or mismatched plugs, thin cords and dirt
Thin or undersized pins, stacked adapters and plugs that do not match the socket all make poor contact. Universal (multi-standard) sockets accept many plug shapes but may not grip every plug firmly; a plug that only works when pushed sideways is a warning. A thin extension cord or a fixed circuit with cable too small for the load runs warm along its length, not just at the socket. In kitchens, bathrooms, balconies and coastal areas, grease, moisture and corrosion raise contact resistance and can cause tracking, which leaves dark lines between the contacts.
5. A fault inside the appliance's plug or cord
Sometimes the heat starts in the plug: a loose internal joint, a poor crimp in a moulded plug, or a damaged cord near the plug. A damaged plug will damage any socket it is pushed into.
Diagnosis: six steps to find the real cause
Step 1: Ask and look, without touching anything yet
Ask which appliance was plugged in, for how long, whether the problem is new, whether the plug feels loose and whether lights flicker when it runs. Look for discolouration, melted plastic, soot or a crooked plug on the socket, the plug and any power strip, and photograph everything before you change anything.
Step 2: Add up the load
Read the rating plates of everything plugged into that socket, including every outlet on any strip connected to it. Add the wattages and divide by the supply voltage to estimate the current: I ≈ P ÷ V. Using 230 V is a convenient reference value. Compare the total with the rating of the socket, the strip and the plug. If the total is close to or above the rating, overload is at least part of the problem.
The wattages below are typical figures for reference only. Always read the actual appliance rating plate.
Appliance (reference) | Typical power range | Approx. current at 230 V | Advice |
|---|---|---|---|
Electric kettle | 1500–2200 W | 6.5–9.6 A | Plug directly into a wall socket; do not share a strip with other heating loads |
Clothes iron | 1000–2400 W | 4.3–10.4 A | Wall socket preferred |
Air fryer / small oven | 1200–2000 W | 5.2–8.7 A | Wall socket; keep away from other heating loads on the same strip |
Rice cooker | 500–1000 W | 2.2–4.3 A | Usually fine, but it adds up with a kettle on the same strip |
Induction hob | About 2000 W or more | 8.7 A or more | Often needs its own socket or dedicated circuit; follow the installation manual |
Storage or instant water heater, split air conditioner | Varies widely | Read rating plate | Normally on a dedicated circuit with its own breaker; never on an extension lead |
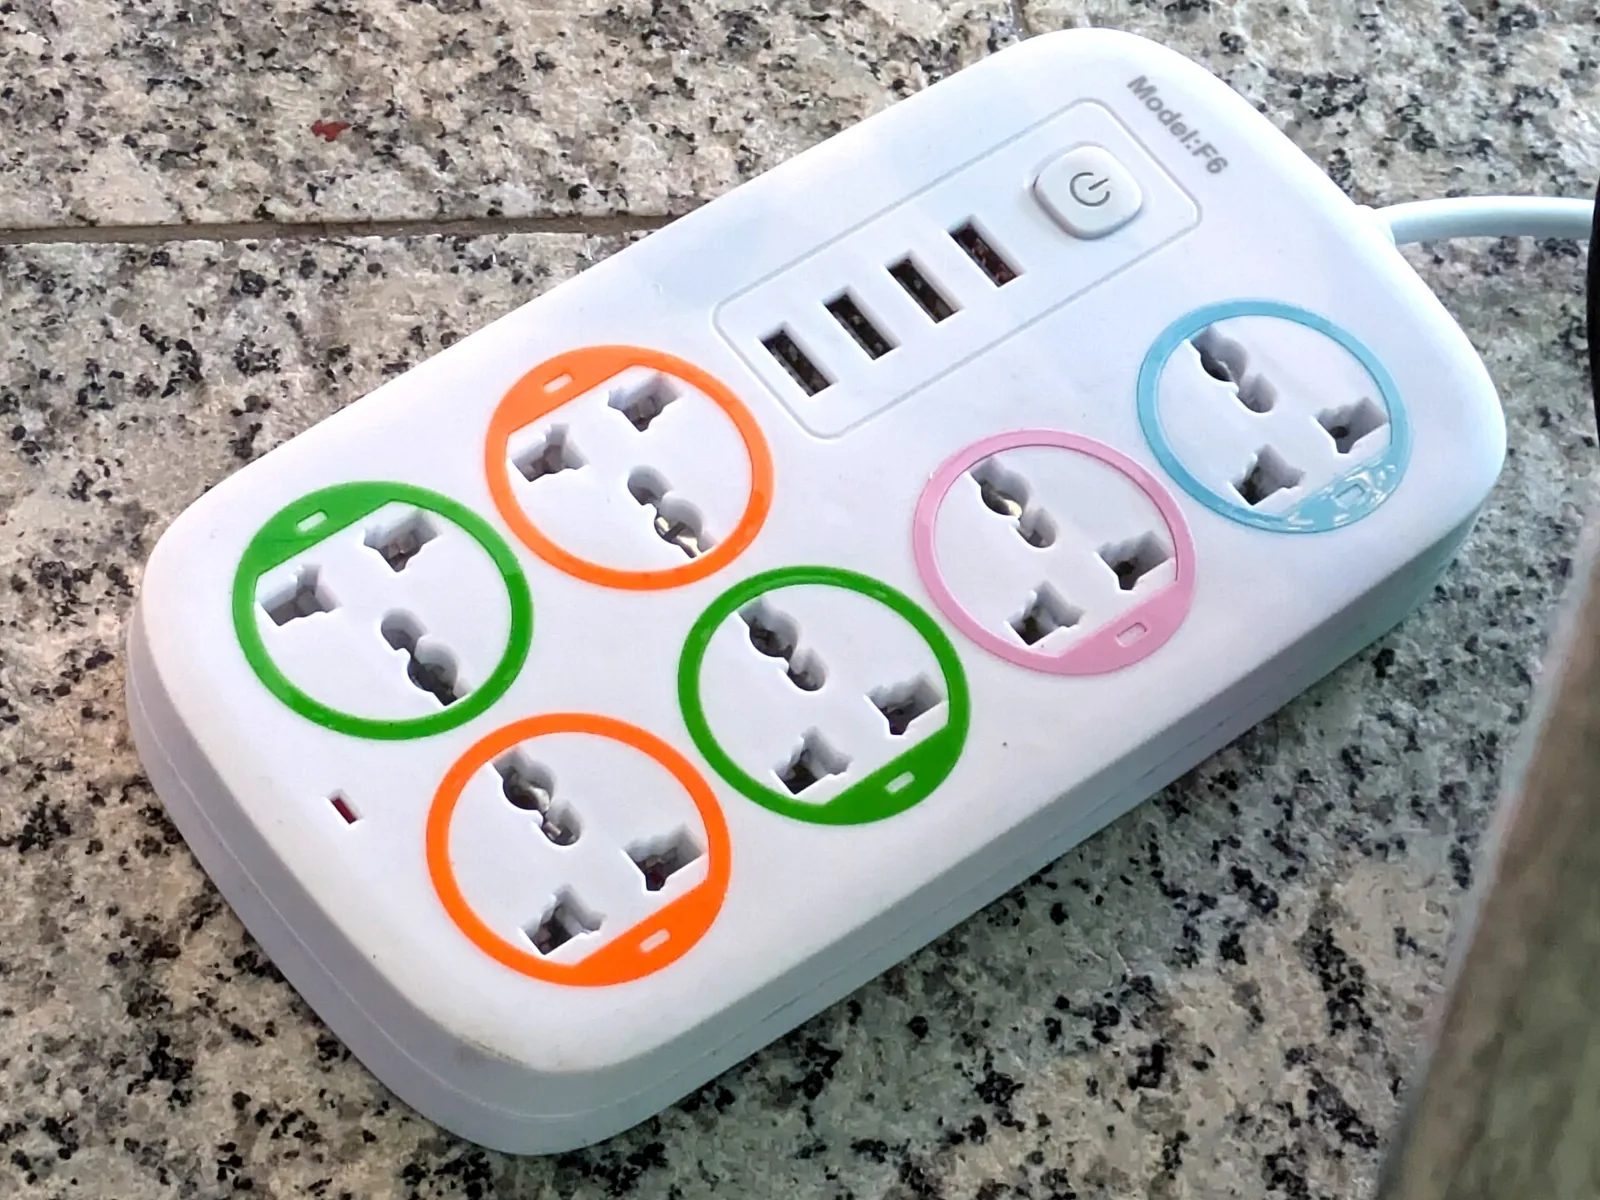
Figure 2. A six-outlet power strip with universal (multi-standard) socket openings, four USB ports and a power button. The number of outlets says nothing about how much it can carry: the strip's marked current or power rating is the limit for everything plugged into it together. (Photo: Bärbel Miemietz, Wikimedia Commons, CC BY-SA 4.0)
Step 3: Compare temperatures carefully
Mild warmth on a plug that has run a kettle for several minutes can be normal. A plug or plate too hot to keep your hand on, or one side much hotter than the other, is not. An infrared thermometer is useful for comparing the suspect socket with a similar socket under similar load: a clear difference points to the hot spot. Do not hold a damaged or deformed plug in a live socket to "test" it. If the damage is visible, isolate and go straight to Step 5.
Step 4: Decide whether the problem is the plug or the socket
Remove the plug (with the circuit isolated if it was hot) and inspect it:
Pins discoloured, pitted or rough: the plug has overheated. Assume the socket contacts are damaged too. Replace both the plug (or the appliance cord, or the appliance if the plug is moulded and not replaceable) and the socket.
Plug clean, but loose in this socket and firm in others: the socket contacts are worn. Replace the socket.
Plug and pins clean and firm, but the plate is hot or discoloured around one side: suspect a loose terminal behind the socket. Go to Step 5.
Plug body or cord hot a few centimetres away from the pins: suspect a fault inside the plug or the cord. Take the appliance out of service until it is repaired by someone competent.
Never move a scorched plug to another socket "to see if it still heats"; it will just damage that socket too.
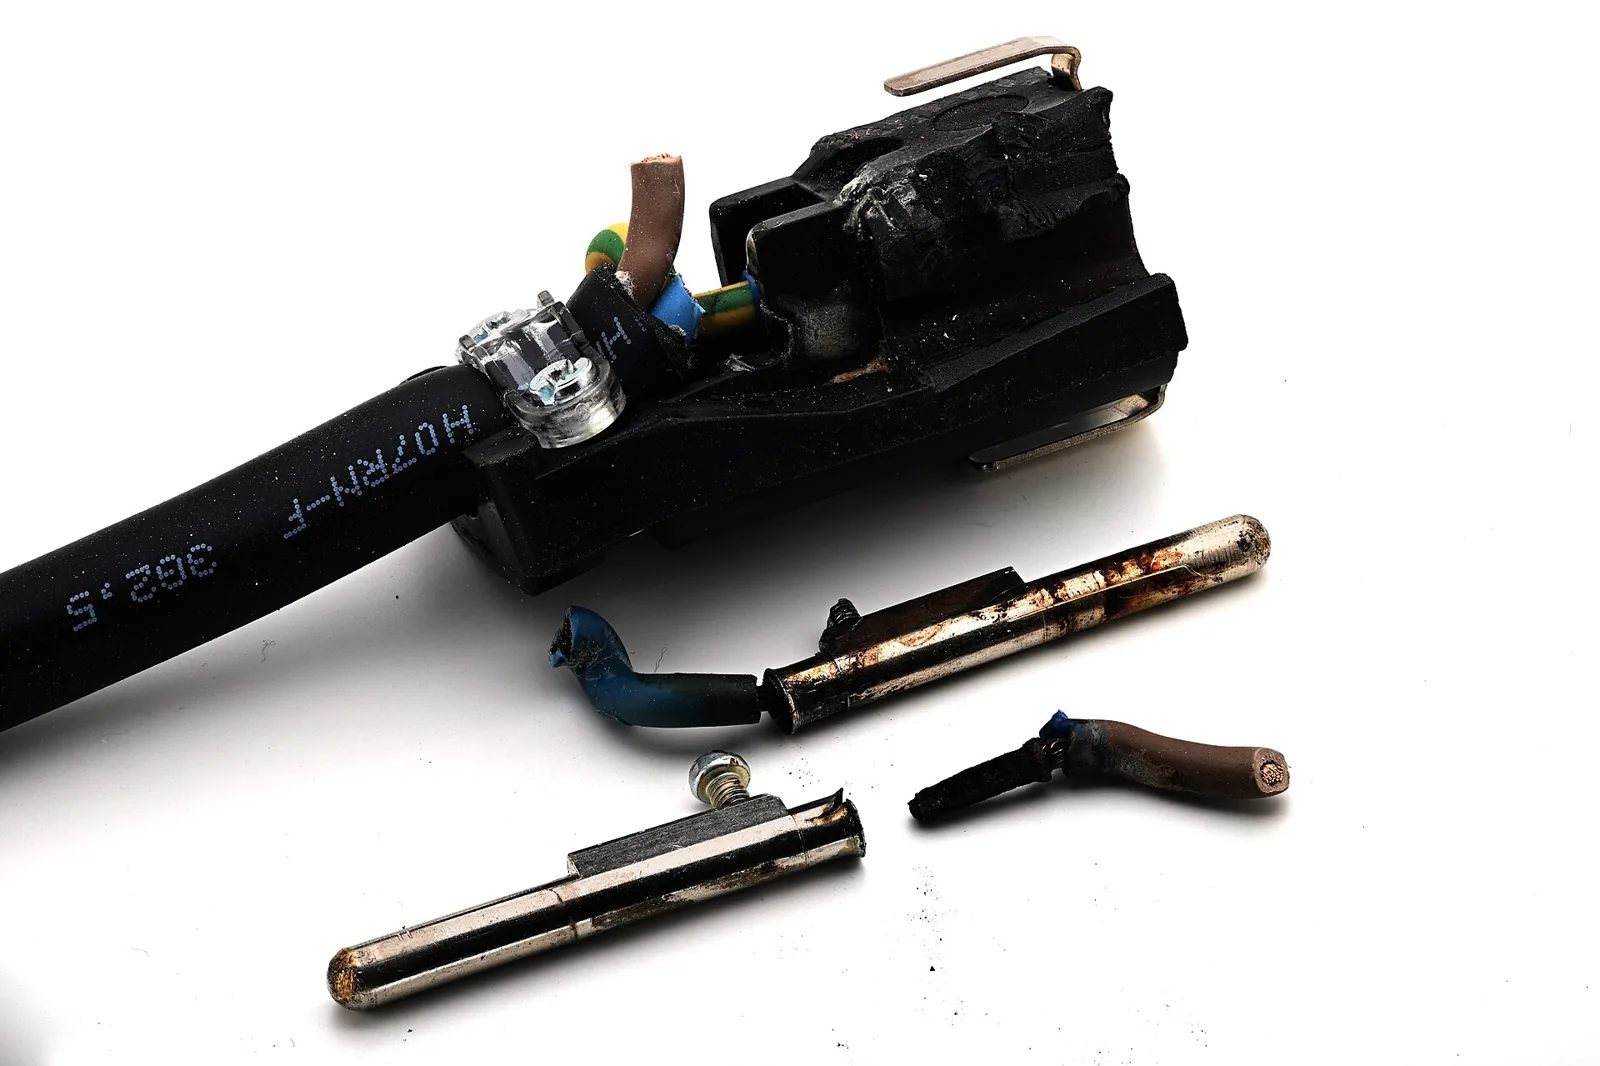
Figure 3. The same failed plug cut open: spark erosion on the screw terminals, scorched conductor ends and melted, deformed plastic around the contacts. Damage of this kind cannot be cleaned off; the plug and the socket it was used in should both be replaced. (Photo: Phiarc, Wikimedia Commons, CC BY-SA 4.0)
Step 5: Isolate, prove dead and open the socket
Switch off the MCB for the circuit. Lock it off if the board allows it, or tape it and attach a "Do not switch on – work in progress" tag. Then prove the socket is dead:
Check your voltage tester on a known live source (for example, another socket on a different circuit).
Test between line and neutral, and also line to earth and neutral to earth where the socket has an earth conductor (many older two-pin sockets in Vietnam do not).
Check the tester again on the known live source to confirm it still works.
A non-contact voltage pen is only a first check, never proof of dead; use a two-pole tester or a correctly set multimeter.
Remove the plate and pull the socket forward. Look for loose terminal screws or conductors that pull out; discoloured copper and brittle or melted insulation, and how far back the damage goes; soot in the back box; and a second cable (a loop to other sockets), noting which terminal was hot. Check that the terminals suit the number and size of conductors in them.
Step 6: Decide what to repair
Damage limited to the socket and the last centimetre or two of conductor: replace the socket and cut the conductors back to clean copper (procedure below).
Insulation brittle or discoloured further back, or too little length left: do not tape it. A qualified electrician must repair the section by an approved method or replace the cable.
Several sockets on the loop warm or damaged: inspect the whole circuit, and check that the breaker suits the cable size. A breaker larger than the cable rating lets the cable overheat without tripping.
Overload was the cause: a new socket alone will not fix it. Move heating appliances to separate wall sockets and consider extra sockets or a dedicated circuit, designed by a qualified electrician.
Quick reference: symptom, likely cause and test
Symptom | Likely cause | Test or check | Typical action |
|---|---|---|---|
Plug falls out or wobbles; socket warm under heavy load | Worn socket contacts | Compare plug grip with another socket; inspect pins | Replace socket |
Plate discoloured on one side; plug firm and clean | Loose terminal behind socket | Isolate, prove dead, open and check terminals | Cut back to clean copper, replace socket |
One plug pin brown, pitted or rough | Poor contact between plug and socket | Visual inspection of pins and socket openings | Replace plug or cord and socket |
Power strip hot, several heating loads plugged in | Overload of strip or socket | Add up rating plates; compare with strip rating | Spread loads across wall sockets; replace damaged strip |
Lights flicker when the appliance runs; crackling at socket | Arcing at a loose connection | Isolate immediately; open and inspect socket and loop | Repair connection; inspect the rest of the loop |
Several sockets on one circuit warm | Loose joint upstream, undersized cable or breaker too large for the cable | Inspect each socket on the loop; check cable size against breaker rating | Qualified electrician to inspect the whole circuit |
Dark tracks between contacts, socket damp or corroded | Moisture, dirt or corrosion causing tracking | Visual inspection; check location and water sources | Replace socket; use a suitable protected socket away from water; check RCD protection |
How to replace a heat-damaged wall socket
Choose the replacement
Buy a socket from a reputable manufacturer with its rating clearly marked (for example 16 A 250 V), matching the plugs used in the home, with an earth contact where the circuit has an earth conductor, and with terminals suited to the size and number of conductors. In damp areas, use a socket with a suitable cover or IP rating on an RCD-protected circuit.
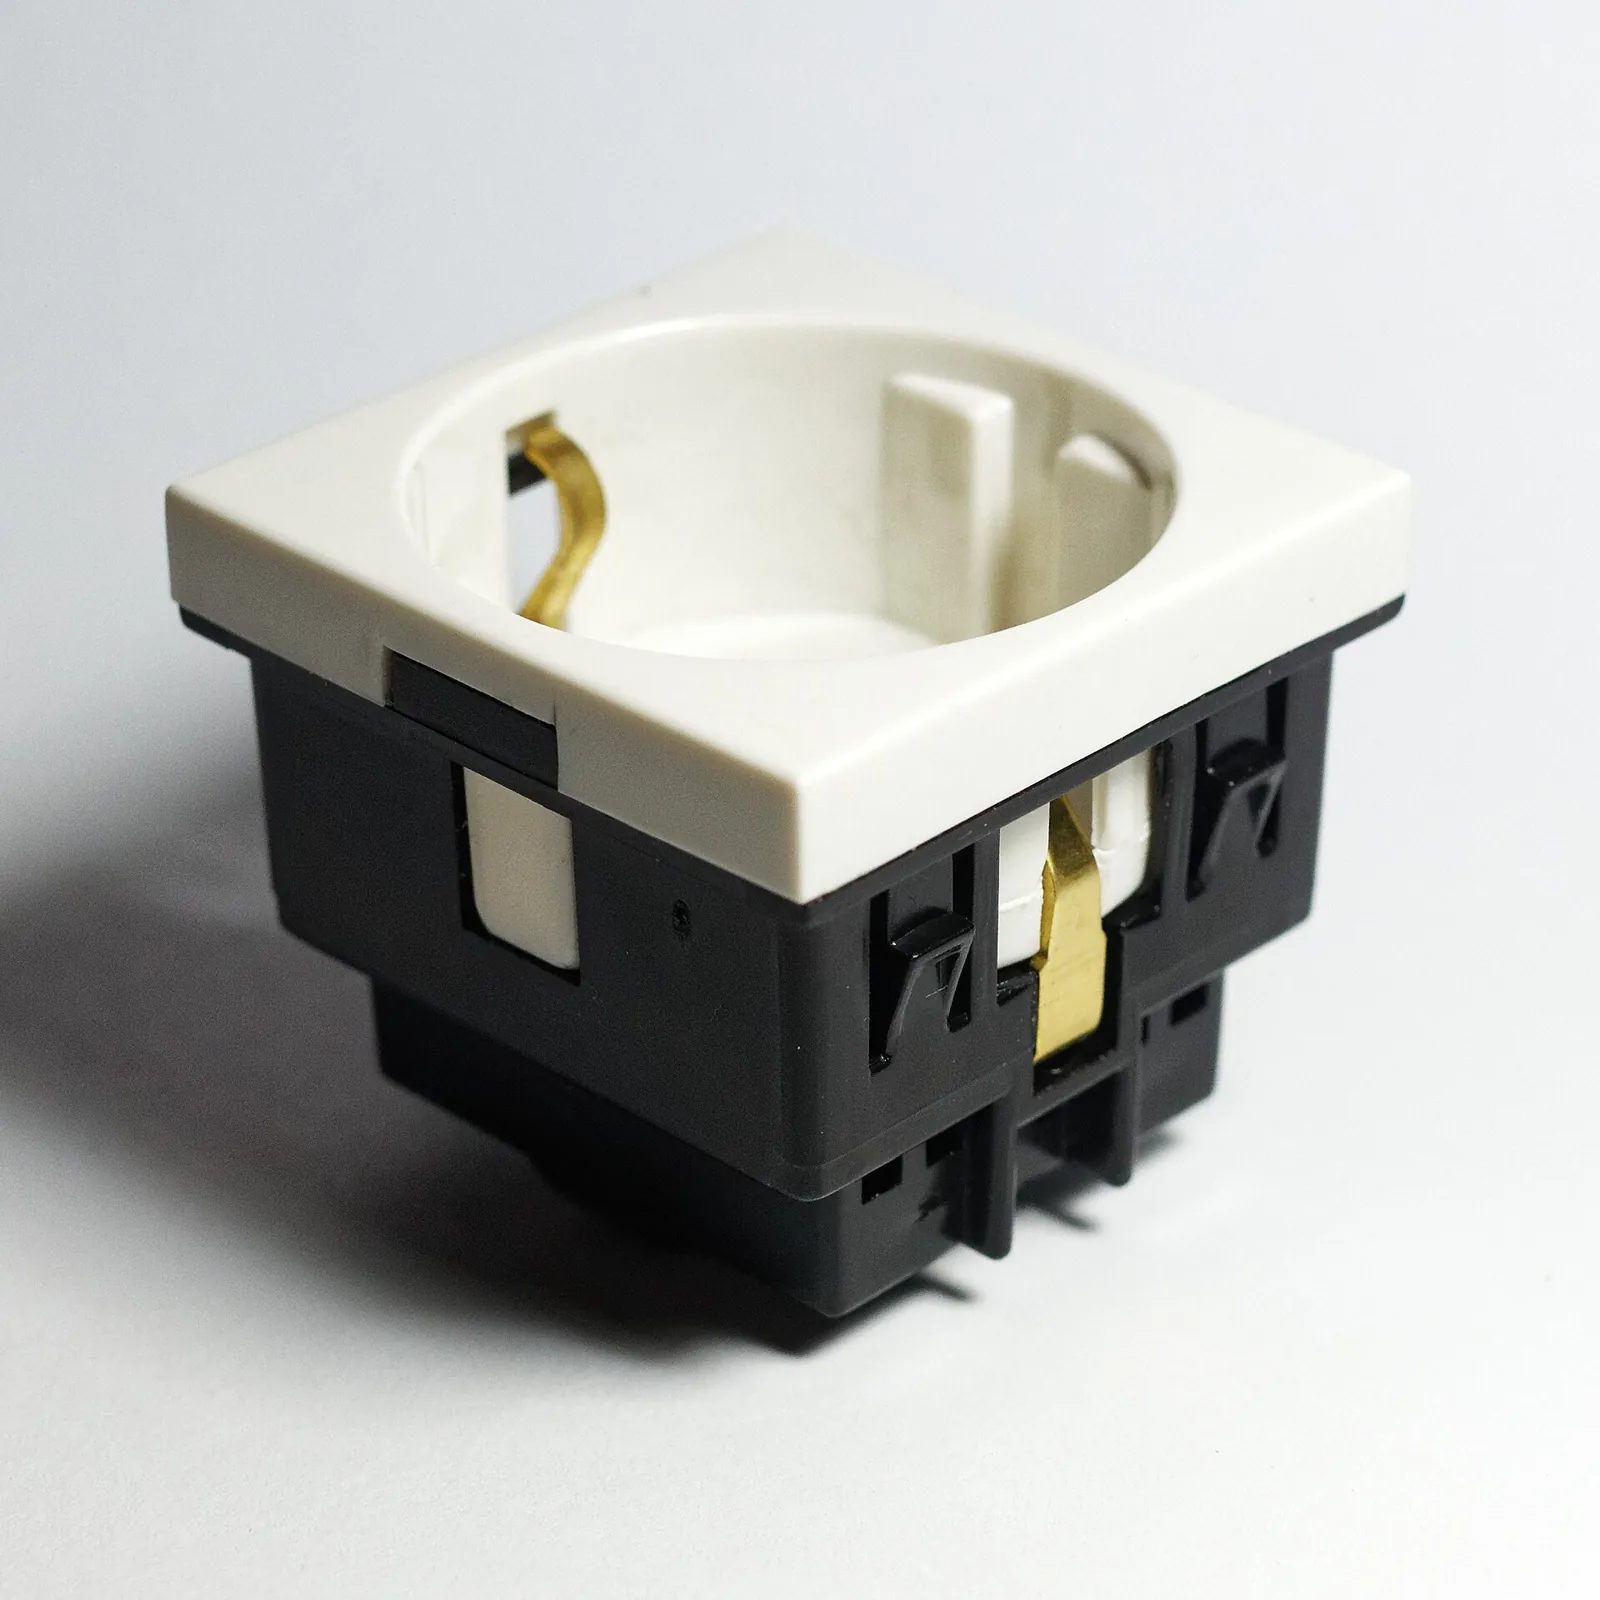
Figure 4. A modular wall socket (European Schuko type) seen from the side, with its brass contact parts visible inside the socket cup and through the black base. All the current flows through small metal contacts like these, so a well-made socket with firm, springy contacts is worth paying for. (Photo: Retired electrician, Wikimedia Commons, CC0)
Tools: a two-pole voltage tester or multimeter, a lock-off device or tape and warning tag, insulated screwdrivers, side cutters, a wire stripper, ferrules and a crimp tool if the terminals need them, and a socket tester if you have one.
Step 1: Isolate and prove dead
Use the sequence from Diagnosis Step 5: switch off, lock or tag, then prove-test-prove. If the box holds cables from more than one circuit, prove every conductor dead.
Step 2: Photograph and mark the conductors
Photograph the connections, then mark each conductor (L, N, E). In older Vietnamese houses colours often do not follow any standard; if you are unsure which is which, stop and identify them properly before going further.
Step 3: Cut back and prepare the conductors
Cut off any copper that is discoloured, oxidised or hardened, and any insulation that is brittle or melted. Strip the insulation to the length shown on the new socket or its instructions, taking care not to nick the copper. Twist the strands of a stranded conductor neatly, or fit a ferrule if the terminal maker requires or recommends one. Do not tin stranded conductors with solder for screw terminals: solder slowly deforms under the screw pressure, the joint loosens and the overheating can start again.
Step 4: Connect the new socket
Connect the earth conductor to the earth terminal, then line and neutral to their terminals, following the socket's markings. Push each conductor fully into its terminal so that no bare copper shows outside it and no insulation is trapped under the screw. Tighten firmly; if the manufacturer gives a tightening torque, use it. Pull each conductor gently to confirm it is held.
If two cables share a terminal because the socket is on a loop, check that the terminal is designed for two conductors of that size. If not, join the conductors with a suitable rated connector and run a single short conductor ("tail") to the socket terminal.
Step 5: Fit the socket back into the box
Fold the conductors in without sharp bends or trapping them under the fixing screws. Fix the socket firm and level; a socket that moves when a plug goes in will loosen its own connections.
Step 6: Restore power and test
Remove your lock and tag, and switch the MCB back on.
Measure line to neutral (supply voltage) and, where an earth is present, line to earth (also supply voltage) and neutral to earth (normally close to zero).
Check polarity with a socket tester if you have one.
If the circuit is RCD- or RCBO-protected, press the device's test button and confirm it trips, then reset it.
Plug in a normal load such as a kettle, run it for a few minutes, then switch off and check the plug and plate. They should be at most slightly warm.
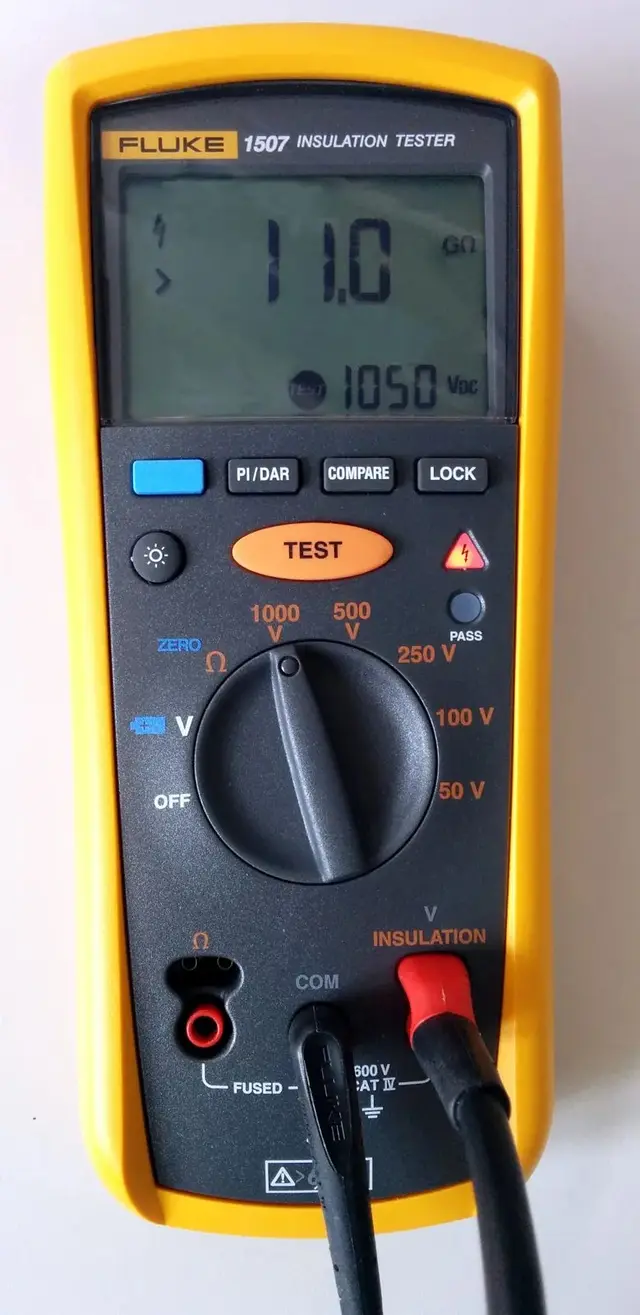
Insulation resistance testing of the circuit should be done only by trained people, with the circuit isolated and all electronic equipment disconnected, using a suitable insulation tester.
Worked examples
Example 1: The kitchen power strip
A family complains that the power strip on the kitchen counter is hot and the plastic has yellowed. Plugged into it: a kettle rated 1800 W, a rice cooker rated 700 W and an air fryer rated 1500 W. The strip is marked 10 A 250 V.
Total power: 1800 + 700 + 1500 = 4000 W.
Estimated current: 4000 ÷ 230 ≈ 17.4 A.
That is far more than the strip's 10 A rating whenever all three run together, which is exactly what happens at dinner time.
After isolating and opening the wall socket feeding the strip, you find its line terminal discoloured too. Replace the socket, discard the strip, and advise plugging the kettle and air fryer into separate wall sockets. With only one kitchen socket, recommend additional sockets designed by a qualified electrician. A new 16 A strip on the same socket would not solve anything, because the wall socket and its circuit would still carry the whole load.
Example 2: The bedroom socket that "only warms up sometimes"
A bedroom socket gets warm only when a hair dryer is used, and the client has noticed the light flicker slightly at the same time. The hair dryer's plug pins are clean and grip firmly. Load: about 2000 W (≈ 8.7 A), within the socket's 16 A marking.
Load is not the issue, so you isolate, prove dead and open the socket. The neutral screw turns half a turn before tightening and the copper under it is dark: a high-resistance joint, and the flicker suggests it was arcing. Cut back to clean copper, fit a new socket and check the previous socket on the loop that feeds this one. Explain that the breaker could not have detected this.
Safety checklist
Circuit switched off at the board before touching a hot or damaged plug or socket.
Lock or tape and warning tag on the breaker; tester checked on a known live source before and after testing.
Dead proven between L–N (and L–E, N–E where earthed); every circuit in the box tested.
Damaged copper and insulation cut back to clean material; no taping over heat damage.
No solder-tinned conductors in screw terminals; ferrules only where suitable.
Terminals tight, pull-tested, and rated for the number and size of conductors.
Earth conductor connected where present.
Breaker rating checked against the cable rating; never fit a larger breaker to "stop problems" without checking the cable.
RCD/RCBO test button tested where fitted.
Heavy heating loads moved off power strips and extension leads; water heaters and air conditioners on dedicated circuits.
Frequently Asked Questions
Why didn't the circuit breaker trip?
A circuit breaker trips on excessive current, and an RCD trips on leakage to earth. A loose or worn contact carrying normal current causes local heating without either, so neither device reacts. That is why inspection and good workmanship matter.
Can I just tighten the screws and keep the old socket?
Only if there is no sign of heat damage at all. If the plastic is discoloured, the copper is dark or the contacts feel loose, the socket's materials have already been weakened. Replace it, and cut the conductors back to clean copper.
Should I choose a 10 A or a 16 A socket?
Choose a socket rated at least for the expected load and suitable for the circuit, and follow local practice and the manufacturer's data. A higher-rated socket does not make the circuit able to carry more: the cable and breaker set the circuit's limit.
Is a power strip or extension lead safe for a water heater or air conditioner?
No. These appliances draw high current for long periods and are normally connected to their own dedicated circuit with a suitably sized cable and breaker, following the manufacturer's installation instructions.
Can I fit a larger breaker if the socket circuit keeps having problems?
Never upsize a breaker without checking the cable rating. The breaker protects the cable. A breaker larger than the cable can safely carry allows the cable to overheat without tripping, which is a fire risk.
Practice Exercises
Exercise 1: Load calculation. A power strip marked 10 A 250 V has a 2000 W iron, a 600 W rice cooker and a 100 W TV plugged into it. Calculate the total current at 230 V. Is the strip overloaded? What would you advise the client?
Exercise 2: Plug or socket? Your trainer gives you three plugs: one with discoloured pins, one clean but loose in a test socket, and one clean and firm. For each, say what you would replace and why.
Exercise 3: Safe isolation. On a training rig under supervision, isolate a socket circuit, lock and tag it, prove dead using the three-step tester check, and explain why a non-contact pen alone is not enough.
Exercise 4: Socket replacement. On a training rig, replace a socket that has a conductor with damaged insulation at its end. Cut back, strip to the correct length, connect, pull-test and have your trainer check your work before power is restored.
Exercise 5: Client explanation. A client says, "My breaker never trips, so the wiring must be fine." Write a short explanation, in plain words, of why a socket can overheat without the breaker tripping, and what you recommend.