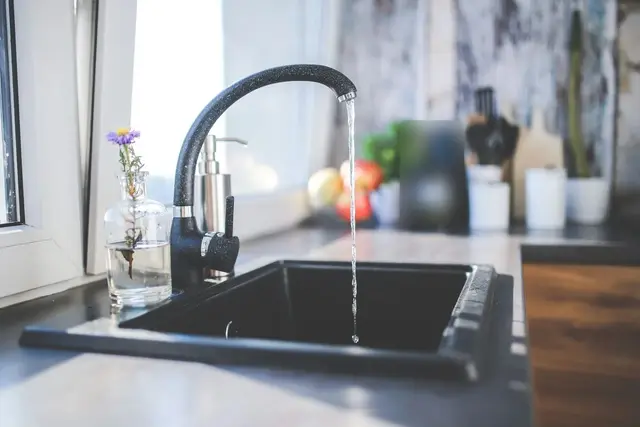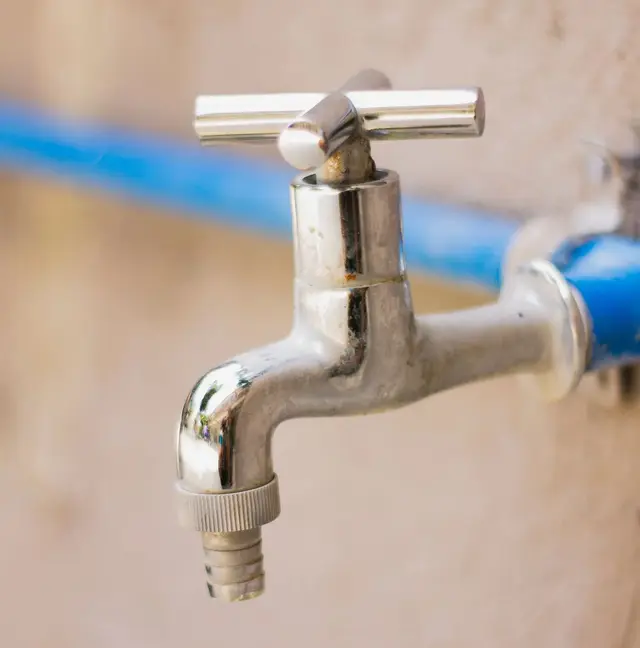
A dripping faucet and a slow-draining bathroom sink are the smallest jobs in plumbing, yet they are the ones you will be called for most often. Doing them quickly, cleanly and with a clear explanation is the best way to make customers keep your phone number for bigger jobs later.
By the end of this lesson, you will be able to: pinpoint the leak in 3–5 minutes before taking anything apart; replace the washer of a compression faucet in about 15 minutes and the cartridge of a single-lever mixer in 30 minutes or less without scratching the chrome; clear a blocked sink from light to heavy clogs without breaking tiles or walls; know when to stop and call the building management; and write a job report with before-and-after measurements so the customer trusts you and you are protected.
Why faucets drip and sinks clog: understand the principle before picking up tools
Experienced plumbers spend the first 3–5 minutes asking, looking and listening, because most failed repairs come from fixing the wrong part: replacing the cartridge when the real leak is the supply hose, or cleaning the trap when the blockage sits in the shared branch pipe.
How the two common faucet types are built
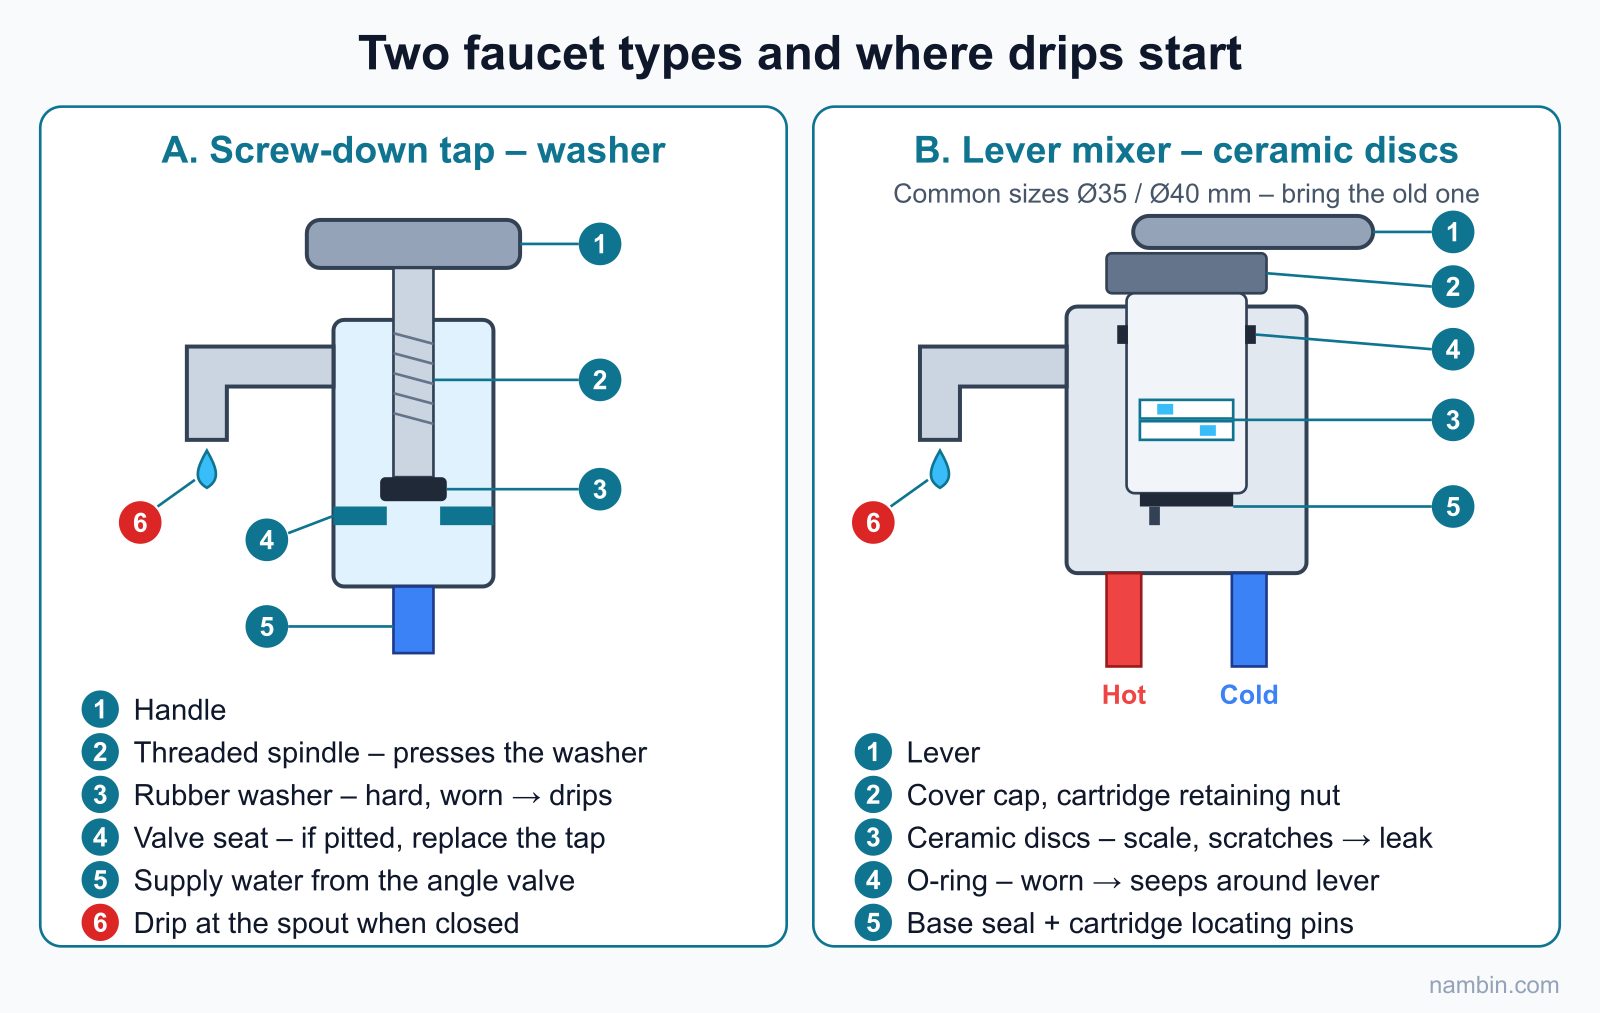
Household faucets usually use one of two mechanisms:
- Compression faucet (old-style screw-down tap): it shuts off water by pressing a rubber washer onto a valve seat. Dripping is usually caused by a worn, hardened washer. When you turn the handle, a threaded spindle pushes the washer down onto the seat; the harder the washer gets, the more force is needed to seal it, and that extra force destroys the washer even faster. A typical sign: the customer says "I have to turn it really tight to stop it".
- Single-lever mixer (hot and cold with one lever): it uses a ceramic disc cartridge. Dripping usually comes from a worn cartridge, mineral deposits, or a damaged cartridge seal. Inside the cartridge, two flat ceramic discs slide over each other; water flows when the holes in the two discs line up. A single grain of sand or flake of limescale caught between the discs scratches the ceramic surface, and water seeps through the scratch even when the lever is fully closed.
Mixer cartridges come in several diameters (around 35 mm and 40 mm are the most common), and the spindle height and number of spline teeth differ between models. That is why you should always take the old cartridge to the shop to match it, never buy one "from memory".
How much water a drip wastes: numbers to explain to the customer
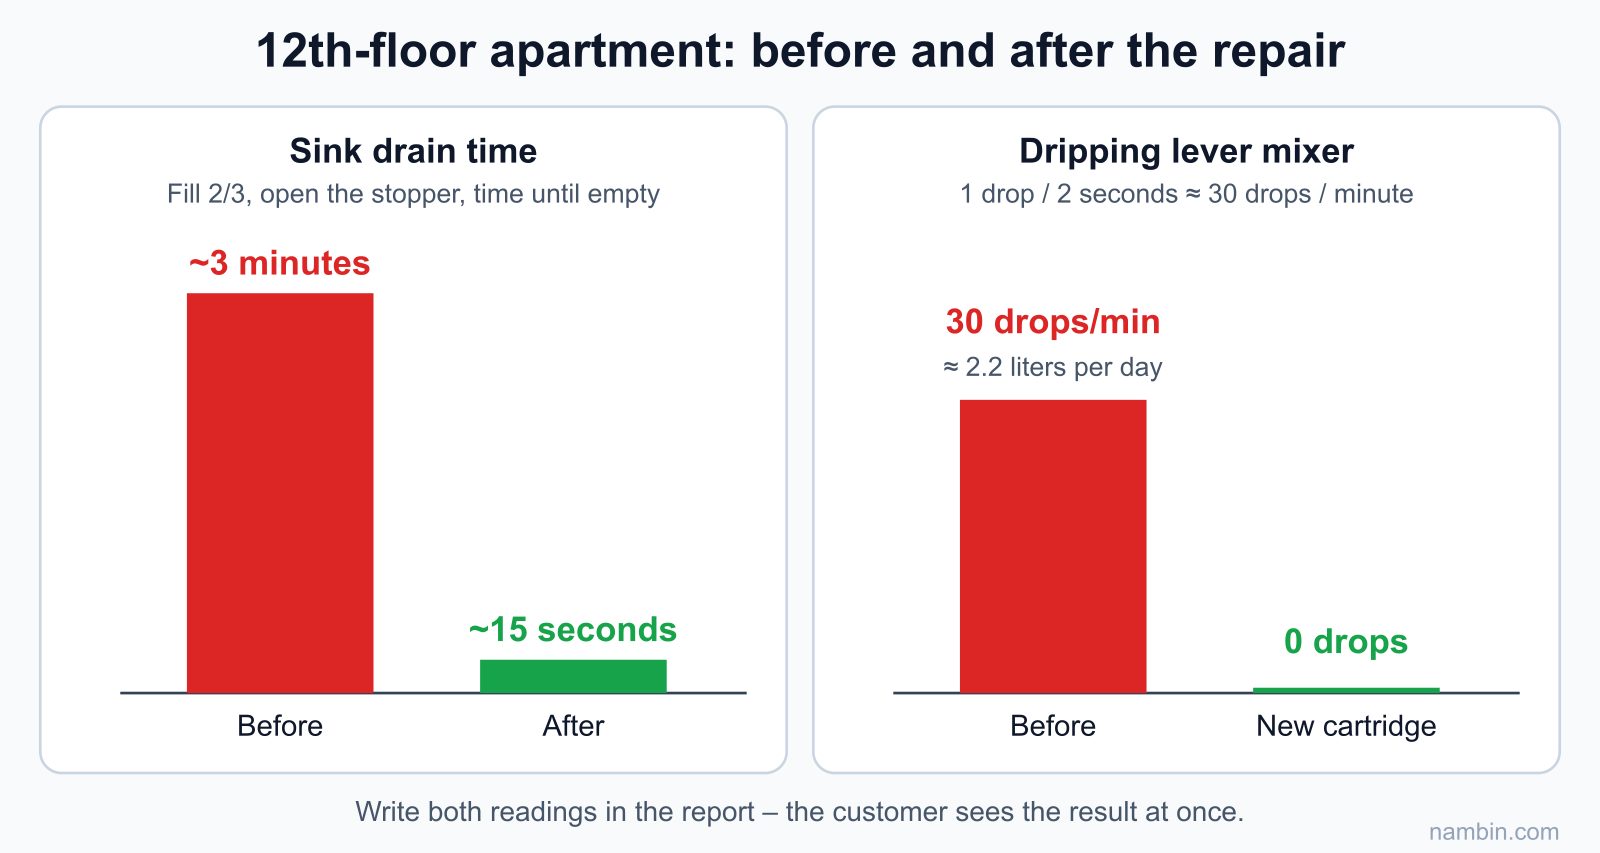
Many homeowners think a few drops are not worth fixing. You can show them with a quick calculation: one drop of water is about 0.05 ml. If the faucet drips once per second:
- One day has 86,400 seconds → 86,400 × 0.05 ml ≈ 4,300 ml, or about 4.3 liters.
- One 30-day month → about 130 liters (enough to fill a 200-liter drum in about a month and a half).
- One year → about 1.5 m³ of water.
With a hot water faucet, the customer also pays for the electricity used to heat that water. Concrete numbers show the customer you are not "inventing work".
Why sinks clog: hair, soap and slope
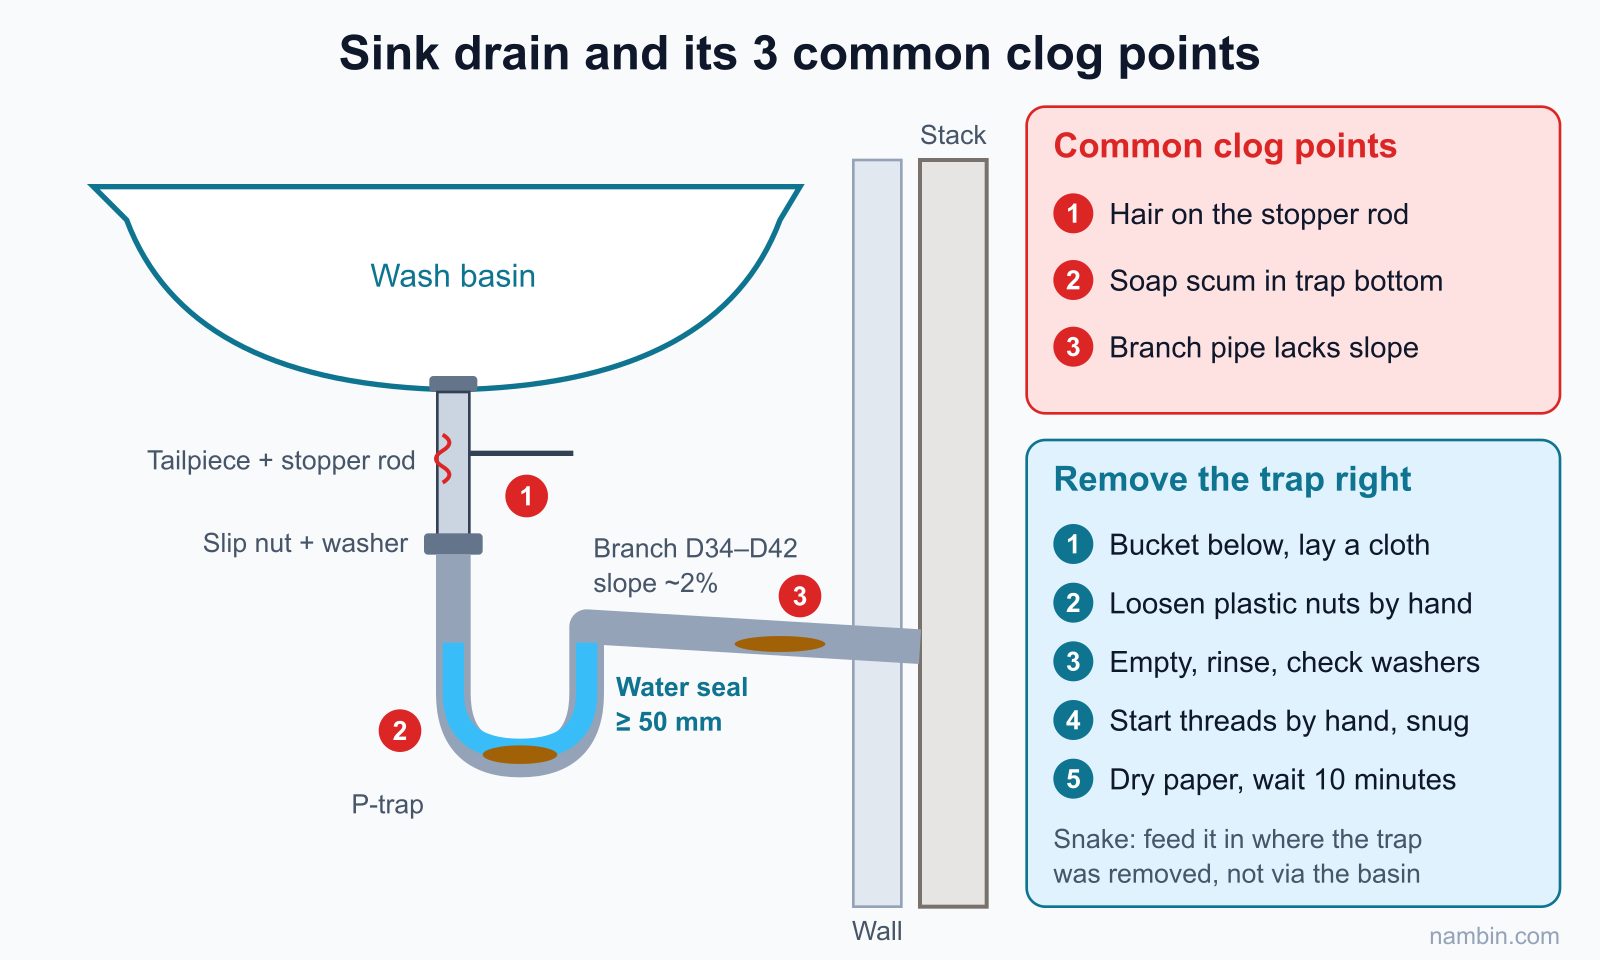
A typical bathroom sink drain consists of: the drain stopper (a push-button pop-up or a lift-out plug), the straight tailpiece, the trap (P-trap or bottle trap) that holds a small amount of water as a seal against sewer smells, and then a small branch pipe (usually D34–D42, i.e. 34–42 mm outside diameter, the common uPVC sizes in Vietnam) running into the wall or floor to join a larger drain. Clogs almost always form the same way: hair catches on the stopper rod or at a bend, soap scum and toothpaste stick to the hair, and over time it becomes a tough, felt-like plug. Where a horizontal pipe has too little slope (you learned this in the drainage step), deposits settle many times faster.
A sink that gurgles and drains slowly may also lack proper venting — no amount of unclogging will cure that, so you need to recognize it early.
Part 1: Diagnosing exactly where a faucet leaks
Ask the customer and observe for 3 minutes
- Ask: since when has it leaked, where does the water come out, has the faucet ever been knocked, does the house use a booster pump, has anyone tried to fix it before.
- Dry everything — the faucet, its base, the supply hoses and the angle valves under the basin — with a dry cloth.
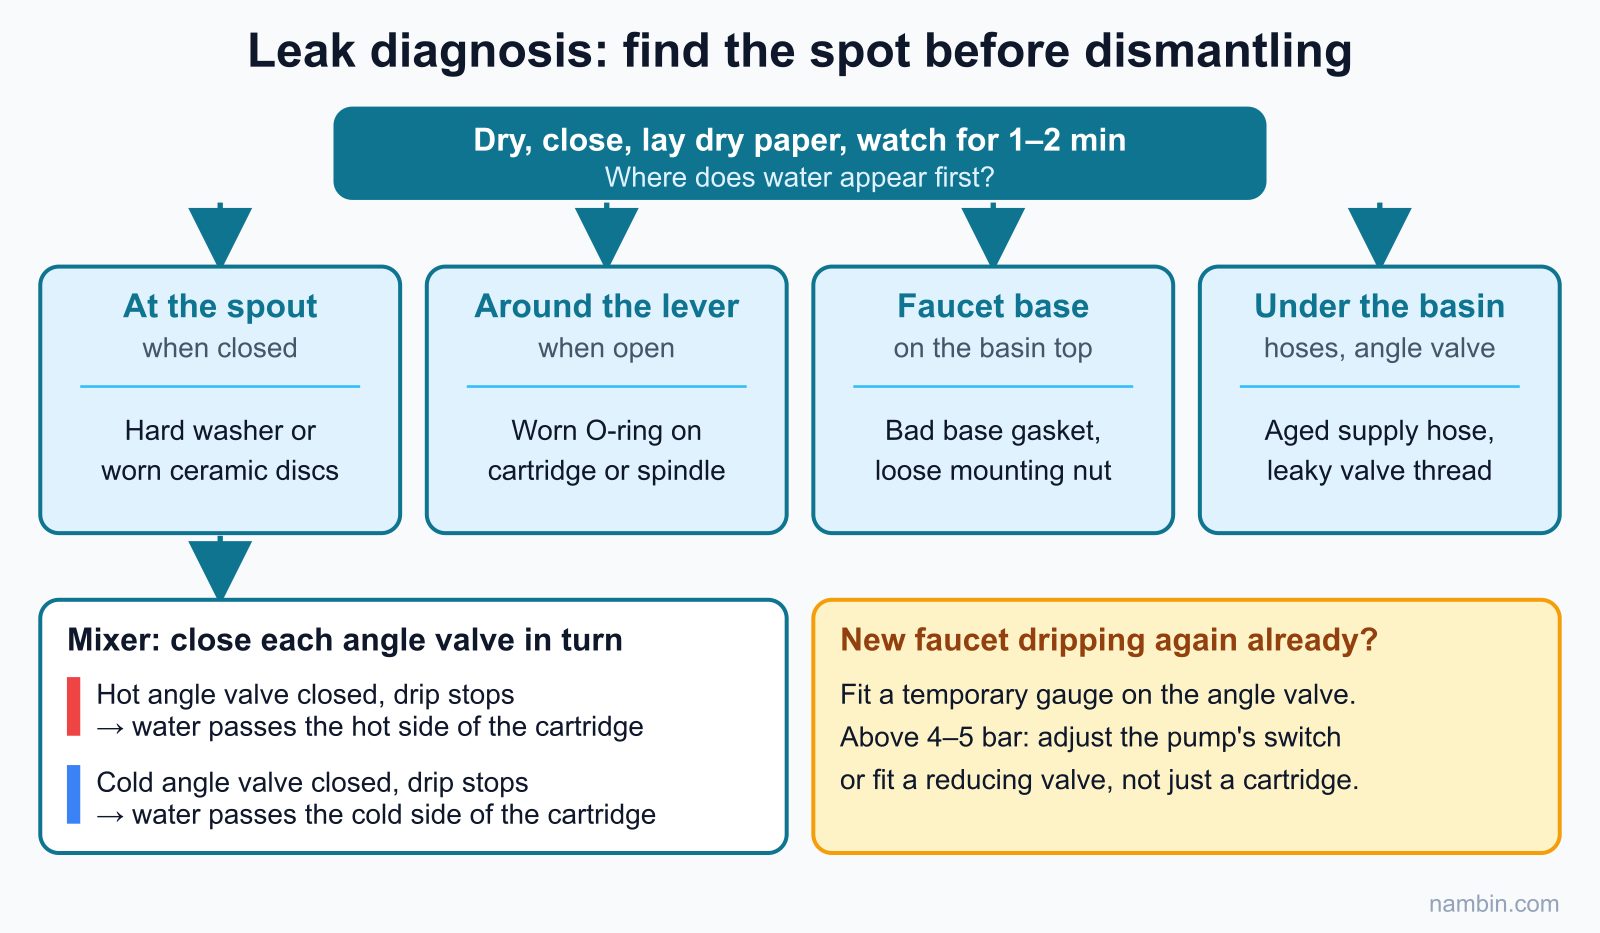
- Close the faucet and watch for 1–2 minutes: where does water appear first? Put a piece of dry paper under the supply hoses and angle valves to make damp spots easy to see.
- Open the faucet and keep watching: is there seepage around the lever, around the base, or at the hose connections?
- Test hot and cold separately on a mixer: close the hot angle valve and see whether it still drips; then do the opposite. This tells you which side of the cartridge is letting water through.
Symptom – cause – fix lookup table
| Symptom | Common cause | Fix |
|---|---|---|
| Drips from the spout when closed | Hardened washer (compression faucet) or scratched, scaled ceramic cartridge (mixer) | Replace the washer, or clean/replace the cartridge |
| Seepage around the lever or spindle when the faucet is open | Worn O-ring on the cartridge or spindle | Replace the O-ring or the cartridge |
| Water pooling around the faucet base on the basin | Damaged base gasket, loose mounting nut, or a leak from the body running down | Retighten the nut, replace the base gasket; check the faucet body |
| Drops under the basin, on the supply hose | Aged flexible hose, damaged hose washer, leaking angle valve thread | Replace the hose, rewrap the angle valve thread with PTFE tape |
| Hot water creeps in when only cold is open | Faulty mixing cartridge or a large pressure difference between hot and cold | Replace the cartridge; check the pressure on both lines |
Measure the pressure when a faucet keeps failing
If a faucet replaced only a year ago is dripping again, think about pressure: a booster pump (previous step) set too high can push the pressure at the faucet above 4–5 bar, wearing out washers and cartridges quickly. Attach a temporary pressure gauge to the angle valve to measure it; if it is high, suggest adjusting the pump's pressure switch or fitting a pressure-reducing valve rather than just replacing the cartridge.
Repairing the faucet: step-by-step for both mechanisms
Tools and materials to prepare
- Allen keys, screwdrivers, and an adjustable wrench wrapped in a cloth so it does not scratch the chrome.
- Washers, O-rings and replacement cartridges with the right part number; vinegar or descaling solution and a small brush.
- A drop cloth, a tray for screws, a headlamp; seal grease that is safe for drinking water.
- A phone to photograph each disassembly step, so you can reassemble in the right order.
Steps to replace the washer of an old compression faucet
- Close the stop valve, open the faucet to drain the remaining water, and cover the sink drain.
- Pry off the cap, remove the screw and pull off the handle; use the cloth-wrapped wrench on the hex to unscrew the spindle assembly.
- Replace the washer at the bottom of the spindle with one of the same diameter and thickness; if the O-ring around the spindle is flattened or cracked, replace it too.
- Inspect the valve seat with a light. If the seat is pitted, a new washer will only seal for a few weeks — advise replacing the faucet.
- Apply a thin layer of seal grease, reassemble, tighten by hand plus about a quarter turn; turn the water on and open and close several times to check.
Steps to replace a mixer cartridge
- Close the stop valve under the basin (or the main valve). Open the faucet to drain the remaining water.
- Cover the sink drain with a cloth so no screws fall in.
- Remove the hot/cold indicator cap, the lever screw and the lever.
- Remove the cover and the retaining nut that holds the cartridge, then pull the cartridge out. Photograph the order of the parts.
- Clean the scale inside the faucet body and check the base seal.
- Fit the new cartridge the right way round (aligned with the locating pins), tighten the nut by hand — do not overtighten, or the cartridge may crack.
- Refit the lever, open the stop valve slowly, and check hot, cold and that nothing drips.
Tip: if the ceramic faces are not scratched, soaking the old cartridge in vinegar for 20–30 minutes and brushing it clean can make it seal again. Tell the customer clearly that this is a temporary fix and write it in the report.
Repair or replace the whole faucet: how to advise the customer
Recommend replacing the whole faucet when: you cannot find a cartridge with the right part number (a cartridge that "almost fits" usually leaks again within a few months), the plating is peeling and the body is pitted (pits trap scale and can leak through the body), or the repair costs nearly as much as a new faucet, which also comes with a warranty. Always quote both options and let the customer choose.
Part 2: Diagnosing a slow or blocked sink
Locate the blockage with a quick diagnosis table
If you follow the water path from the basin outlet to the stack, you will see that clogs form almost exclusively in three places: the stopper rod, the bottom of the trap, and the horizontal branch pipe.
| Symptom | Usual blockage location |
|---|---|
| Only the sink drains slowly | The stopper (pop-up) or the trap under the basin |
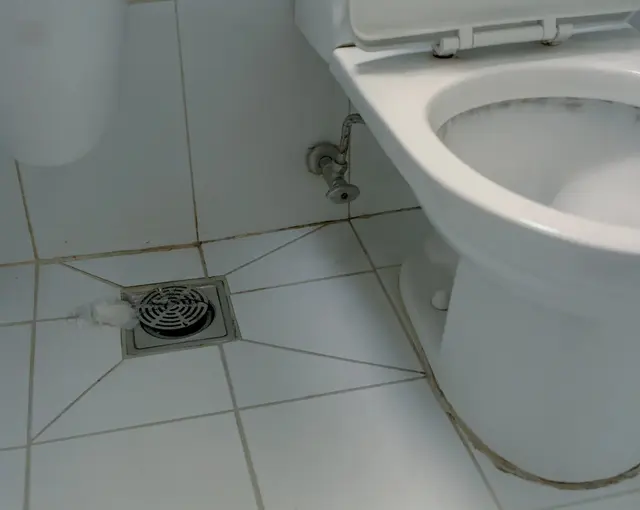
| Sink and floor drain both slow | The shared branch pipe behind them |
| Several fixtures in the home slow, water backing up | Main drain or stack — needs specialist equipment / report to building management |
The timed drain test and listening
Close the stopper, fill the basin to about two-thirds, open the stopper and time how long it takes to empty. A clear sink usually empties in about 10–30 seconds depending on its volume; several minutes means a definite clog. Write this number in the report so you can compare after clearing.
While the water drains, listen:
- Loud gurgling, with the water level in a nearby floor drain moving: suspect missing venting or a partly blocked shared branch.
- A bad smell rising when the water is gone: the trap has been siphoned dry, or the sink has no trap at all.
- Steady but slow draining, no noise: usually a nearby clog, in the stopper or the trap.
Ask about usage habits
Ask whether the household pours oil, soup or coffee grounds into the sink. If there is grease, deposits usually extend into the pipe inside the wall; if it is only hair and soap, most of it sits within the first 50 cm.
Unclogging a sink step by step, from light to heavy
Tools to bring
- A bucket or bowl, cloths, long-cuff rubber gloves, safety glasses.
- A barbed plastic hair-removal strip (flat, cheap, but very effective with pop-up stoppers).
- A small rubber plunger for sinks.
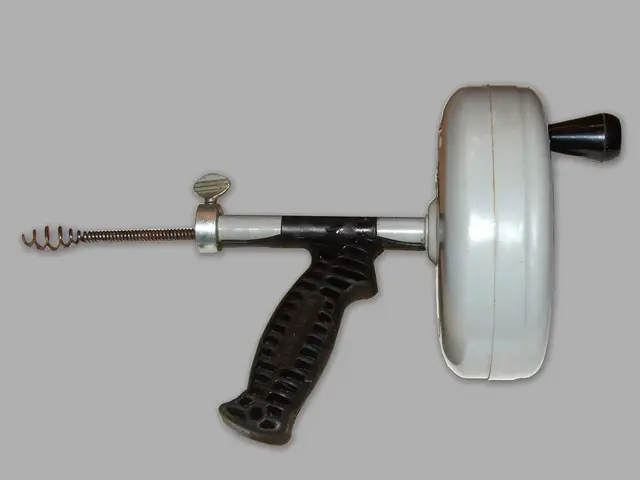
- A small hand-held drain snake (spring auger), about 3–5 m long.
- Spare trap washers in the common sizes, PTFE tape.
- A kettle or jug of hot water at about 50–60 °C.
Clearing steps
- Clean the stopper: pull the pop-up out and remove the hair and soap scum around it. If the stopper does not lift out, undo the pivot nut at the back of the tailpiece under the basin to withdraw the rod, and remove the hair wrapped around it.
- Use the plunger: if the basin has an overflow hole, seal it tightly with a wet cloth (otherwise the suction escapes through the overflow and does nothing). Leave about 2–3 cm of water so the cup seals, then push and pull firmly 10–15 times.
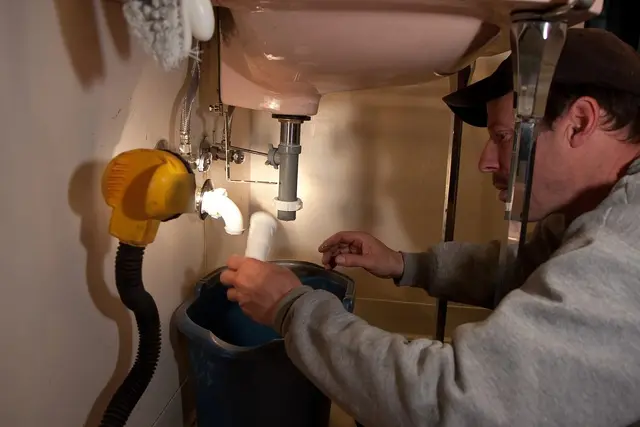
- Remove the trap: put a bucket underneath, loosen the plastic slip nuts by hand, empty the debris, rinse, check the washers and refit.
- Use the small drain snake for the pipe running from the wall inward, turning it steadily, then pull it out and clean the tip. Feed the snake in where you removed the trap, not through the basin outlet, because the spring easily scratches the glaze and jams in the trap neck.
- Flush with hot water (not boiling water with plastic pipes) to wash away remaining grease.
- Repeat the timed drain test exactly as during diagnosis and compare.
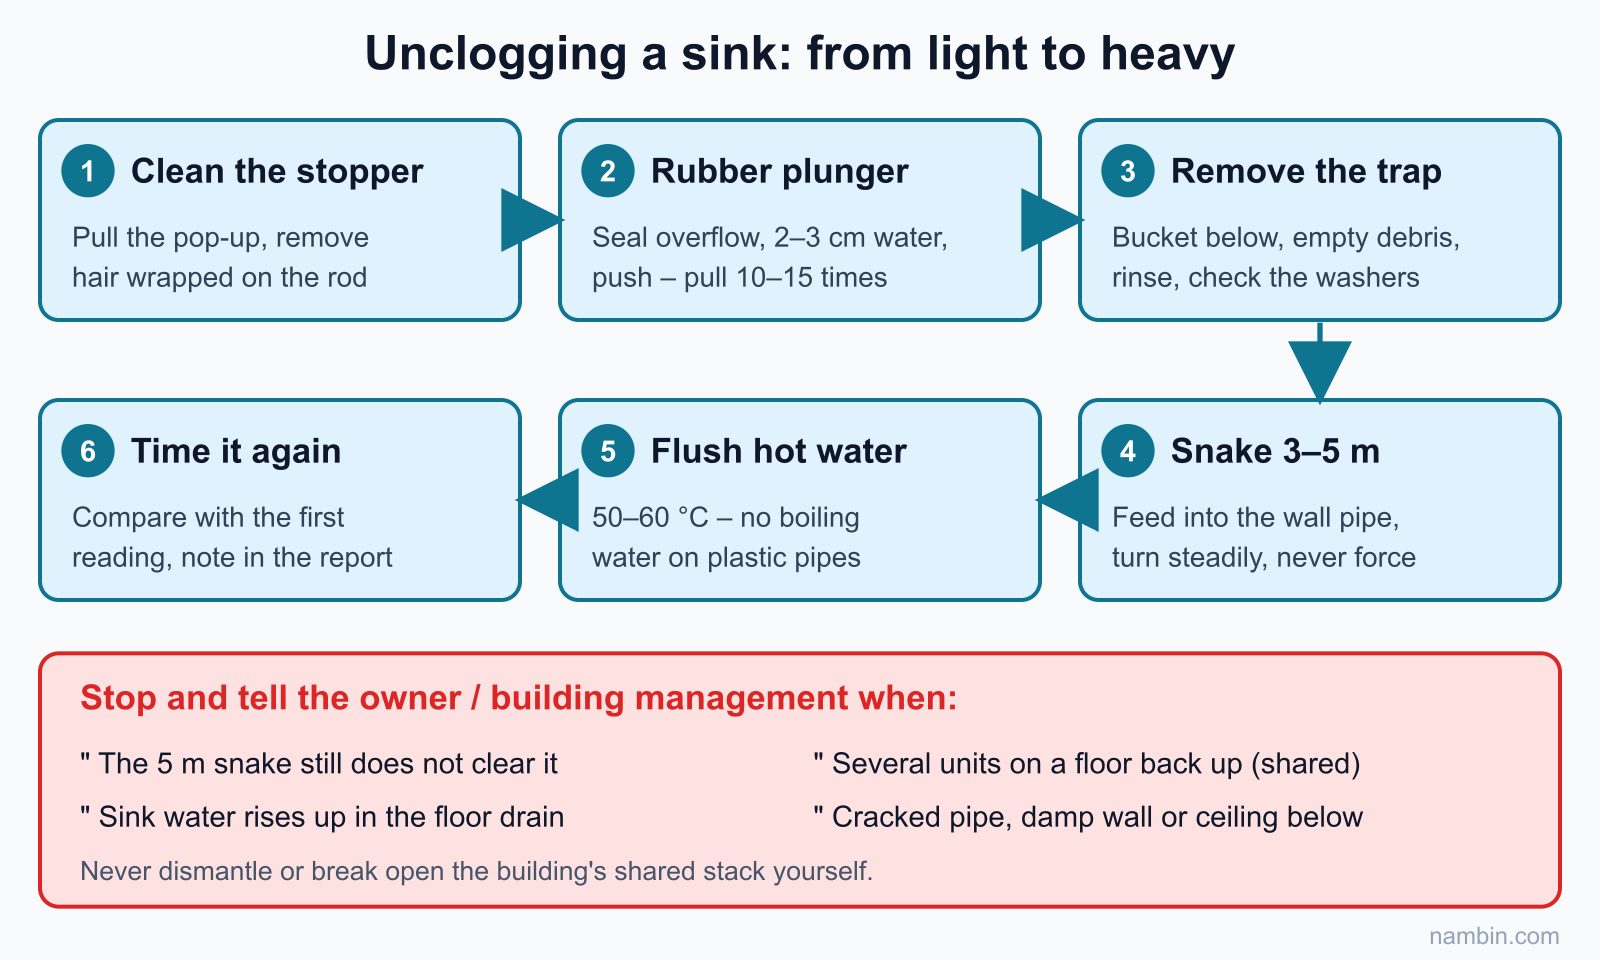
Feel through your hand as you feed the snake: soft resistance is a plug of hair and scum; hard resistance after a short distance is usually a tight bend — do not force it, or you may break a solvent-welded uPVC joint inside the wall.
When you must stop
- The 5 m snake still does not clear it, or water rises in the floor drain when the sink drains: the blockage is in the shared branch or the stack.
- In an apartment block where several units on the same floor are backing up: this is the building's shared pipe — report to building management, and never dismantle or break open shared pipes yourself.
- You find a cracked pipe or a joint inside the wall leaking when water runs: switch to the concealed-leak procedure and quote it separately.
Caution: Avoid strong chemical drain cleaners. They can damage pipes and seals and cause burns if they splash out when you later remove the trap. If the customer has already poured in a chemical, ask exactly what it was and wear gloves and glasses while you work. Never add a different chemical in the same place — mixing drain cleaners with each other or with bleach-type cleaners can generate heat and toxic gas. When repairing a hot and cold mixer, also close the hot angle valve and wait for the water in the pipe to cool before removing the cartridge, so hot water does not spray onto your hands.
Worked example: a 2-bedroom apartment with a dripping mixer and a slow sink
The situation
A customer calls you to a 12th-floor apartment. In the main bathroom, the single-lever hot and cold basin mixer drips about once every 2 seconds, and the sink drains very slowly and smells. The family has lived there about 6 years and never replaced the faucet.
Diagnosis
- Dry and observe: water drips from the spout, the base is dry, the hoses are dry.
- Close the cold angle valve: it still drips. Reopen it, close the hot angle valve: the drip stops after about 1 minute. Conclusion: water passes through the hot side of the cartridge.
- Timed sink test: about 3 minutes to empty, no gurgling, the nearby floor drain is normal. Conclusion: a nearby clog, in the stopper or the trap.
- Usage habits: two family members with long hair, no grease poured in.
Repair and quote
You offer two options for the faucet: replace the cartridge with the matching part (the plating is still good and the body is not pitted) or replace the whole faucet. The customer chooses the cartridge. Pulling out the pop-up reveals a long tangle of hair around the rod; removing the trap yields more soap scum, and the trap washers are still good. After reassembly, the timed test takes only about 15 seconds.
| Task | Actual time | Reference cost (2026) |
|---|---|---|
| Diagnosis, inspection | 10 minutes | Usually included in the labor charge |
| Replace mixer cartridge | 25–30 minutes | Labor about 150,000–300,000 VND; cartridge about 100,000–400,000 VND depending on type |
| Clean stopper and trap | 20 minutes | Labor about 150,000–300,000 VND |
| Final check, clean-up, report | 15 minutes | — |
Prices are for reference only (VND = Vietnamese dong; 150,000–300,000 VND is roughly 6–12 USD) and vary by area and time of day. The rule: quote before you start, separate labor from materials, and never add extra charges without asking the customer.
Handover
Show the customer the old cartridge scratched on the hot side, the hair plug and the two before-and-after measurements; suggest a hair catcher. The whole job takes about 70 minutes.
Common mistakes and how to avoid them
- The faucet still drips after the cartridge is replaced. Sign: drops appear right after assembly. Cause: wrong cartridge, scale not cleaned from the seat in the faucet body, base seal out of place. Fix: take it apart again, brush the seat clean, check that the locating pins sit in the right holes.
- The lever's hot and cold are reversed. Cause: the cartridge was fitted rotated, or the hoses were swapped. Fix: keep the convention hot on the left, cold on the right.
- The trap leaks after clearing. Sign: dry paper under the trap is damp after 10 minutes. Cause: washer out of place, cross-threaded nut, nut cracked by tightening with pliers. Fix: take it off, reseat the washer, start the thread by hand so it runs true, then tighten moderately.
- The snake damages the pipe. Sign: the wall or the ceiling of the floor below is damp after clearing. Cause: forcing it through a tight bend. Fix: work gently; if you suspect damage, tell the customer immediately.
Final check and job report
Final check steps
- Run water continuously for 2–3 minutes: no pooling, no seepage at any nut you removed.
- Dry the area and check again after 10 minutes with dry paper under the trap.
- Open and close the faucet at least 10 times on both hot and cold, and watch the spout for another 2 minutes after closing.
- Take before-and-after photos, record the replaced materials and the warranty period.
- Advise the customer: use a hair catcher, do not pour grease or coffee grounds into the sink.
What the repair report should include
- Date and time, address, customer name and phone number.
- The problem the customer reported and your diagnosis (location, cause).
- Before-and-after figures: drops per minute, basin drain time.
- Work done, materials replaced (name, quantity, unit price), warranty period for each item.
- Problems found but not fixed (for example: the angle valve is rusty and should be replaced soon) and the customer's signature or confirmation message.
The "found but not fixed" section is very important: if the angle valve leaks a month later, the customer will remember that you warned them, rather than thinking you broke it.
Frequently asked questions
Can I use PTFE tape as a temporary fix for a dripping faucet?
No. PTFE tape only seals threaded joints; it cannot fix the washer or cartridge that shuts off the water inside. Wrapping tape around the cartridge can also make it seize, so it becomes very hard to remove next time.
Can I pour boiling water down the drain to unclog it?
Not with uPVC plastic pipes and rubber seals, because high temperatures soften the pipe and deform the joints. Hot water at about 50–60 °C is enough to soften soap and grease deposits.
Why does the sink clog again a few weeks after clearing?
Usually because the hair plug inside the wall pipe was not fully removed, the branch pipe lacks slope, or the household's habits have not changed. If it keeps clogging, propose checking the pipe slope and advise the customer to fit a hair catcher.
Which pipes in an apartment building may a plumber repair?
Usually the pipework inside the apartment up to the connection with the stack belongs to the owner; the stack belongs to the building — if you suspect the blockage is there, report it to the building management.
Project exercise
- Fully dismantle and reassemble a single-lever mixer and a trap on the practice bench, and time yourself.
- Dismantle an old compression faucet, replace the washer and the spindle O-ring, and test with at least 10 open–close cycles.
- Write a sample repair report for a "dripping faucet + slow sink" job, with a quote.
Self-assessment criteria
- Replace a mixer cartridge in 30 minutes or less, no scratched chrome, no leak after 10 minutes of observation.
- Remove and refit a trap in 15 minutes or less; dry paper underneath is not damp after 10 minutes.
- Correctly name the leak location for any 5 situations in the lookup table without looking at notes.
- The report contains every item listed in the final check section, with before-and-after figures.
- The quote separates labor and materials and states when you must stop and report to building management.
Next step in the roadmap
This is the last project step before the assessment. The next step is Technical test, quoting and taking on jobs: you will answer a set of questions on materials, slope and pressure, take a timed practical test assembling a basin set and pressure-testing it, then prepare a quote for a sample bathroom. The report and quote you write in the exercise above make a good first draft to bring into that test.