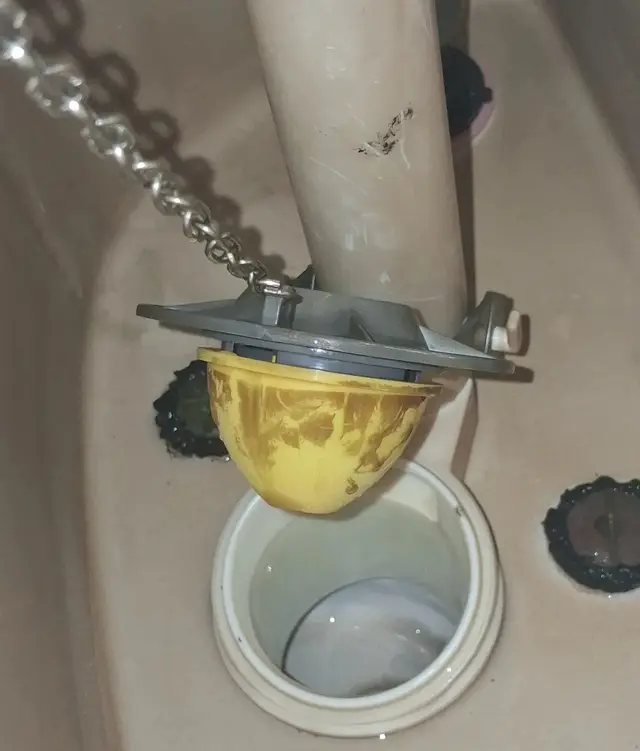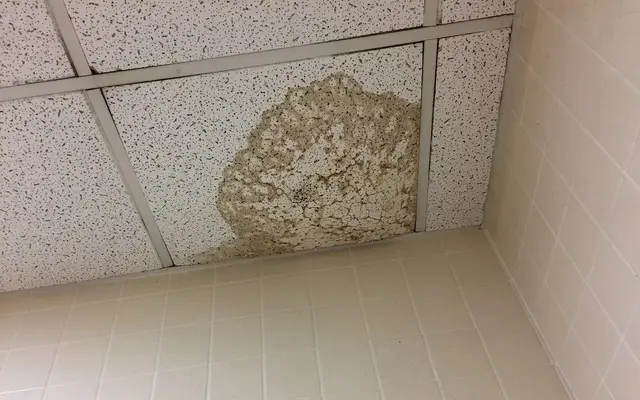
A toilet leaking at the base has three main sources: the supply line and stop valve, the cistern (the bolts joining the tank to the bowl), and the ring seal between the bowl outlet and the drain pipe in the floor. The first two can be fixed in 15–60 minutes without lifting the toilet; only once they have been ruled out do you remove the toilet to replace the seal — and you almost never need to break up the floor.
This is a repair a plumber meets every week: the customer sees a puddle around the base, yellow-stained grout, a smell, or a damp patch spreading on the ceiling of the flat below. Guess the source wrong and you either lift the toilet for nothing, or you replace the supply line and the customer calls you back anyway.
By the end of this lesson, you will be able to:
- Tell water leaking from the supply line, the tank or the ring seal apart using three tests in about 30 minutes.
- Remove a toilet, clean the flange, choose a wax or rubber seal and reinstall the toilet dead centre.
- Apply silicone around the base correctly: sealed at the front and sides, with a 3–5 cm gap at the back so leaks show.
- Test for leaks after the repair (10 flushes, dry paper for 24 hours) and price the job by real time and materials.
Learn the trade, not just one repair: this lesson belongs to step 5 — Installing sanitary fittings — of the 8-step Residential Plumber roadmap on NAMBIN. Work through all 8 steps and you can confidently take on complete bathroom installation and repair jobs.
Why does a toilet leak at the base?
A toilet both receives clean water under pressure (from the supply line into the tank) and discharges waste water without pressure (from the bowl into the drain). These two flows pass through at least five joints. Whichever joint opens up, the water runs to the lowest point — the floor around the base. So "leaking at the base" only tells you where the water collects, not necessarily where it escapes.
Joints that can leak
- Stop valve and supply line: the nuts at both ends of the flexible hose, the washers inside them, and the valve thread in the wall. Clean water under pressure; it leaks even when nobody uses the toilet.
- Fill valve (float valve) at the bottom of the tank: the plastic nut under the tank works loose or its washer hardens.
- Tank-to-bowl bolts and gasket: on a two-piece (close-coupled) toilet, the tank sits on the bowl on 2–3 bolts and a large foam gasket. Hardened gaskets and rusty bolts are a very common source of leaks.
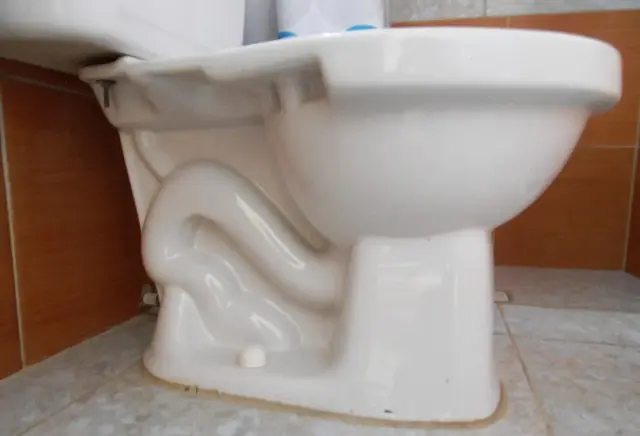
- Toilet ring seal: a wax or rubber ring squeezed between the outlet under the china (the "horn") and the mouth of the drain pipe (the flange). This is the only joint that carries waste water.
- Cracked china: rare but real, usually caused by overtightened screws or an impact. A hairline crack in the bowl or tank leaks continuously.
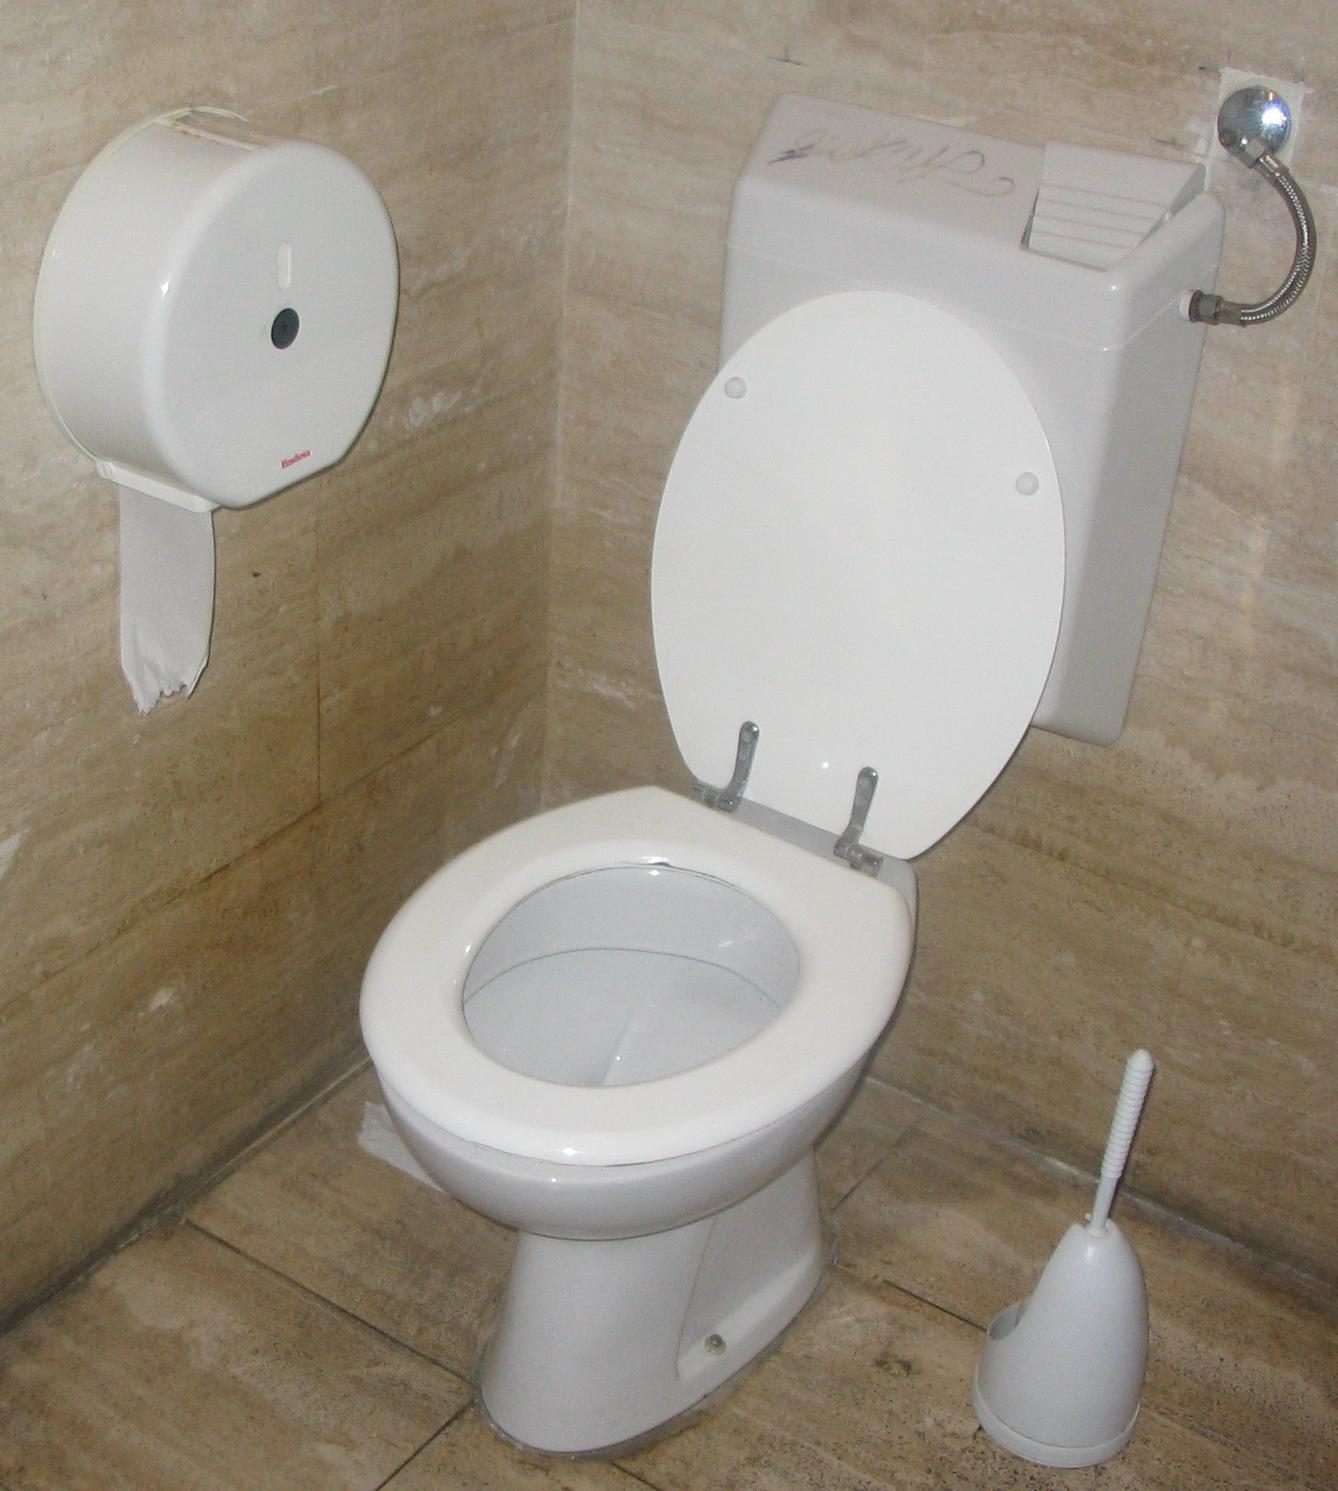
Photo: Jarlhelm / Wikimedia Commons, CC BY-SA 3.0
Clean water or dirty water: the first clue
Look at and smell the puddle before you wipe it up. Clear, odourless water is almost certainly supply water (line, valve, tank). Slightly cloudy water that smells of urine, with grout around the base turning yellow-brown, points to the ring seal — waste water has been seeping out flush after flush. The second clue is timing: a leak that continues all night is on the supply side; a floor that only gets wet after flushing points to the tank or the ring seal.
Why do ring seals fail?
A wax seal is not elastic: once the toilet has been lifted or rocked hard, the flattened wax does not spring back to fill the gap. Common causes: loose floor screws, so the bowl rocks every time someone sits down; an uneven floor that makes the toilet wobble; a flange that ended up lower than the new tile surface after re-tiling; or a previous installer reused the old seal. Rubber seals last longer but also harden after years, especially when exposed to strong drain-cleaning chemicals.
Diagnosis: test first, lift the toilet last
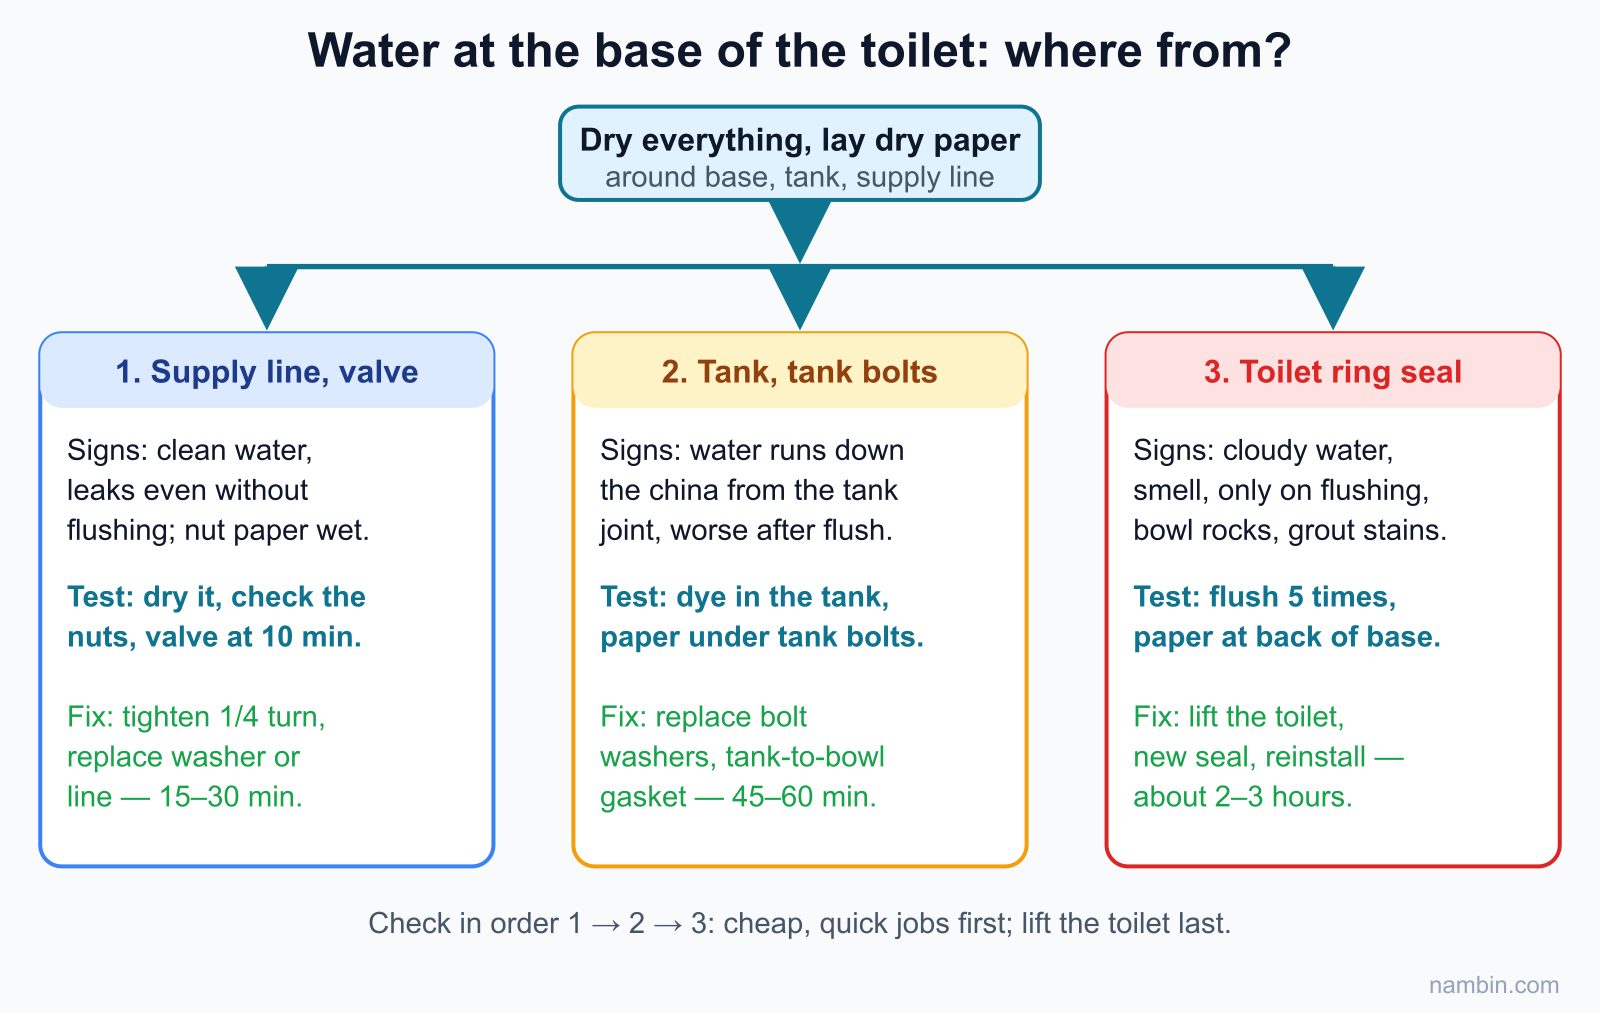
The master plumber's rule: do the cheap, quick jobs first. Lifting a toilet costs 2–3 hours and a new seal; nipping up a supply-line nut takes five minutes. The chart in Figure 2 sums up the order in which to check the three main sources.
Test 1: dry paper for the supply line and stop valve
- Dry the whole floor around the base, the tank, the supply line and the stop valve with a dry cloth.
- Wrap a strip of dry toilet paper around both supply-line nuts and the valve body; lay a few sheets under the tank.
- Do not flush; wait 10 minutes. If the paper at the nuts gets wet first, the leak is on the supply side.
The fix: close the stop valve and tighten the nut about a quarter turn more (plastic nuts are hand-tight plus a little — never lean on them with a big wrench). If it still leaks, fit a new supply line; an old line with rusty ends or a bulging braided cover should be replaced straight away, even if it is not leaking yet.
Test 2: dye in the tank, paper under the bolts
Put a few drops of food colouring in the tank and place white paper directly under the heads of the tank bolts (on the underside of the bowl, at the back). Wait 15–20 minutes without flushing. Coloured paper means water is escaping from the tank through the bolts or the tank gasket. If the colour appears in the bowl instead, the flush valve inside the tank is passing water into the bowl — a different fault (a running toilet), which does not wet the floor.
Test 3: repeated flushing for the ring seal
When both tests above stay dry, wipe everything again and place paper tight against the base at the back and on both sides (where the silicone has gaps). Flush five times in a row, about one minute apart. Paper that gets wet with slightly cloudy, smelly water just after flushing means the ring seal has failed. One more sign: sit on the toilet and lean left and right — if the bowl moves, the seal has almost certainly been crushed.
| Leak source | Signs | Test | Reference repair time |
|---|---|---|---|
| Supply line, stop valve | Clean water, leaks even without flushing | Paper round the nuts, wait 10 minutes | 15–30 minutes |
| Fill valve at tank bottom | Wet directly under the tank corner on the supply side | Paper under the fill-valve nut | 30–45 minutes |
| Tank bolts, tank gasket | Water runs down the china, more after flushing | Dye in the tank, paper under the bolts | 45–60 minutes |
| Ring seal | Cloudy water, smell, bowl rocks, stained grout | Flush 5 times, paper at the back of the base | 2–3 hours |
| Cracked china | Hairline crack, steady leak unrelated to flushing | Dry it, shine a torch along the body | Replace the toilet |
The ring seal and flange: how they work
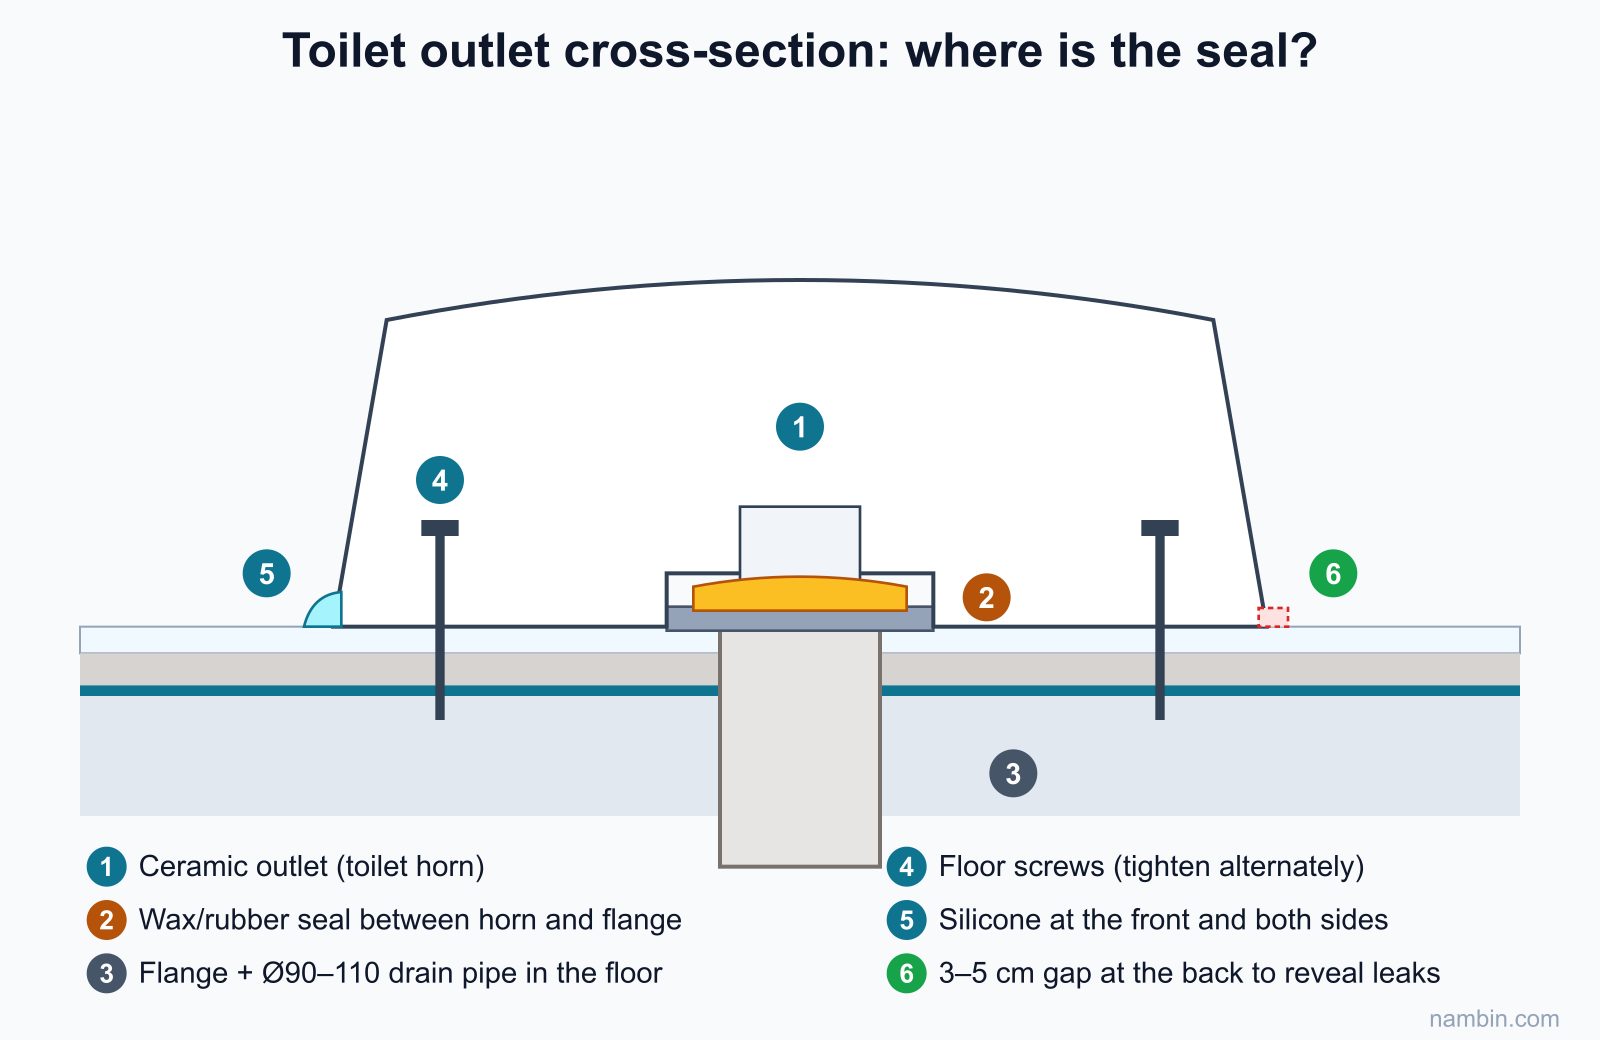
Before lifting the toilet, you need to picture what is going on underneath. The outlet under the china (the horn) does not plug into the drain pipe; it sits on top of the pipe mouth. The gap between them is closed by the seal, as in the cross-section in Figure 3.
What is a flange?
A toilet flange is a plastic or metal collar fixed on the mouth of the Ø90–110 mm drain pipe in the floor, with slots for bolts and a flat face for the seal to bed against. On many Vietnamese sites, installers do not fit a separate flange; they leave the uPVC pipe mouth level with or slightly below the tile surface, and the seal beds directly on the pipe. What matters is that the bedding face is clean, round, uncracked and at the right height for the seal.
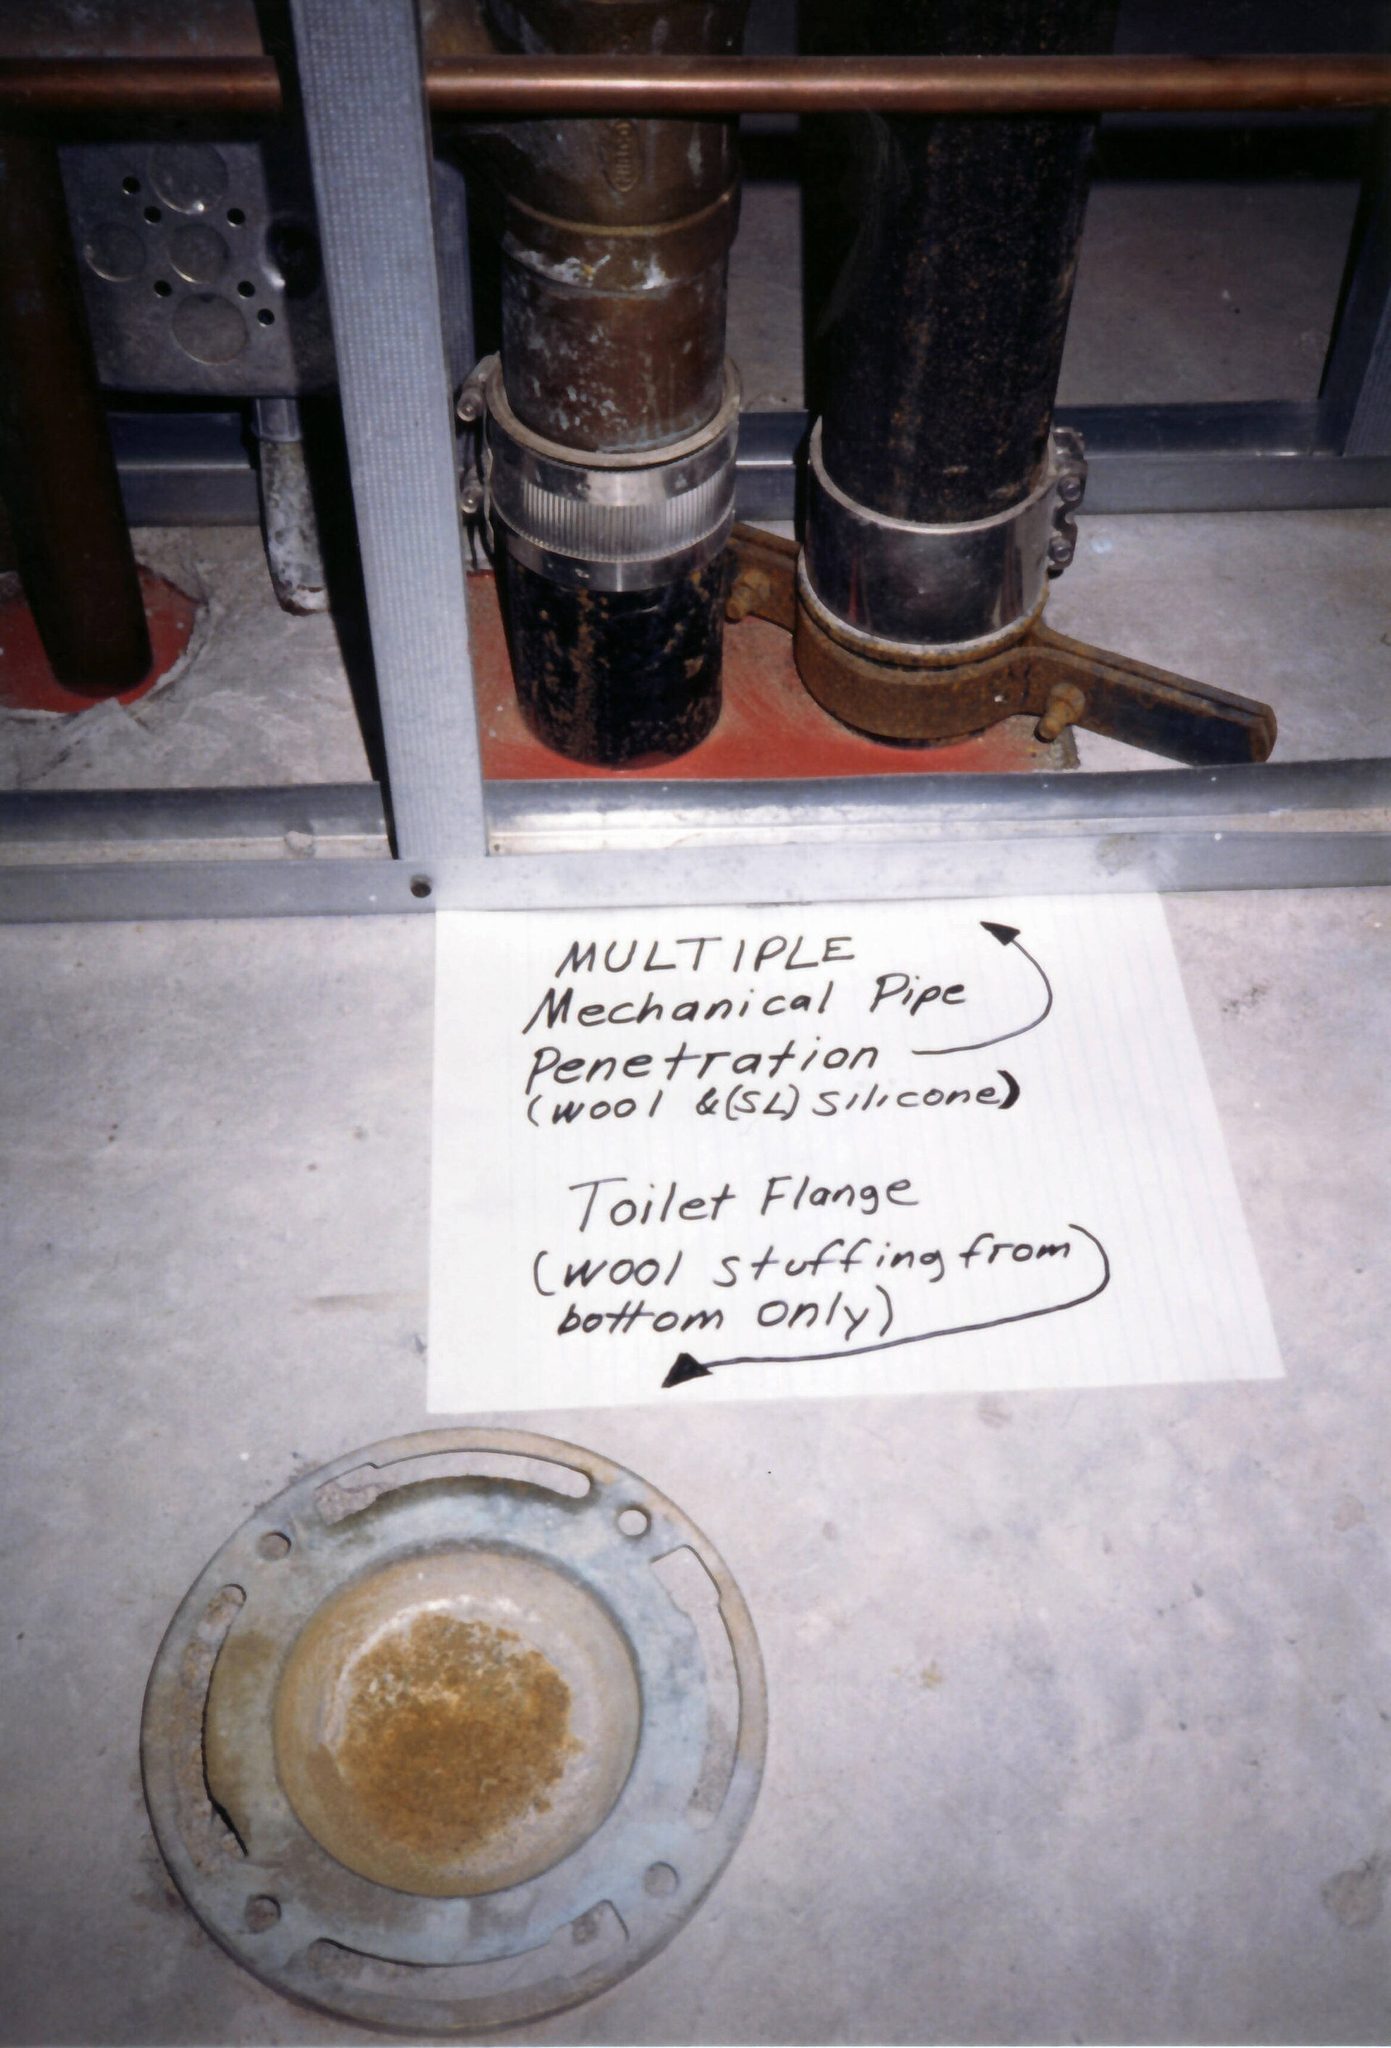
Photo: Achim Hering / Wikimedia Commons, Public domain
Wax seal or rubber seal?
| Criterion | Wax seal | Rubber / foam seal |
|---|---|---|
| How it seals | Squashed flat, fills the gap | Elastic, grips the horn and the pipe mouth |
| Reuse after lifting the toilet | No, always replace | Possible if still soft and untorn |
| Suits | Flange level with or slightly below the floor | Short-horn toilets, pipe at floor level; as the maker specifies |
| Sensitivity to rocking | Very sensitive — rocking means leaking | Less sensitive |
| Reference price 2026 | 40,000–80,000 VND | 60,000–150,000 VND |
Prices are in Vietnamese dong (VND); 100,000 VND is roughly 4 US dollars. Always prefer the seal type the toilet maker specifies (see the catalogue or the fittings bag supplied). When the flange sits more than 5–10 mm below the tile, a standard seal often will not compress properly — use a thick wax seal with a sleeve (horn) or a flange extension ring, rather than stacking two wax seals.
Why you don't need to break up the floor
Leaks at the base almost always come from the bedding face above the floor, not from inside the pipe. You only need to break the floor when the drain pipe is cracked under the tiles, the flange is too far off-centre from the toilet, or the pipe has been cut so low that no extension ring can make up the difference. These cases are rare; if you meet one, give the owner the plan and the cost first, because breaking the floor affects the waterproofing layer.
Removing the toilet, replacing the seal and reinstalling
This section covers floor-outlet toilets fixed with floor screws. On a two-piece toilet, take the tank off first to lighten the load; a one-piece toilet needs two people to carry.
Tools and materials
- Tools: adjustable wrench, screwdrivers, utility knife, silicone scraper, plastic putty knife, bucket, sponge, cloths, rubber gloves and cut-resistant gloves, spirit level, torch.
- Materials: a new ring seal (the right type), a new set of floor anchor screws, a tube of anti-mould silicone, a stainless-steel braided supply line if the old one is poor, plastic shims if the floor is uneven, and a rag to plug the pipe temporarily.
Removing the toilet
- Close the stop valve, flush the tank empty, and sponge out the remaining water in the tank and bowl.
- Disconnect the supply line at the valve. Cut the silicone bead around the base with a utility knife.
- Remove the bolt caps and floor screws. If a rusted screw will not turn, cut it with a small hacksaw — don't hammer it.
- With two people holding the bowl, rock it gently side to side to break the wax, lift it straight up and lay it on a sheet of cardboard.
- Immediately stuff a rag into the drain to block sewer gas and stop anything falling into the pipe.
Cleaning and checking the flange
- Scrape all the old wax off the flange and the horn with a plastic putty knife; wipe with a dry rag. Leftover wax stops the new seal from bedding flat.
- Shine a torch on the pipe mouth: look for cracks, chips and mortar ridges, and check whether the pipe was cut at an angle.
- Measure from the tile surface to the flange face, and lay a spirit level across the floor to check it is flat around the base.
- Check the old screw holes: are the wall plugs still firm, is the tile cracked around them?
Reinstalling the toilet dead centre
- Dry-fit the bowl without a seal and see whether it wobbles; shim any gaps with plastic shims.
- Pull the rag out of the pipe. Put the new seal on the horn (bowl upside down) or on the flange, as the packaging instructs.
- Lower the bowl straight down, sighting through the screw holes to centre it, then press down evenly with both hands and your body weight. Do not lift and reseat it — a wax seal compressed once must be replaced.
- Fit new floor screws, tightening left and right alternately a little at a time until the bowl no longer moves. Overtightening cracks the china.
- Refit the tank (if removed) with a new tank gasket and bolts, tightening both sides evenly so the tank does not lean.
- Reconnect the supply line, open the stop valve, and check that the tank water level stops about 2–3 cm below the top of the overflow tube.
Safety and hygiene: a ceramic toilet weighs 25–45 kg and broken edges are as sharp as knives — always carry it with two people and wear cut-resistant gloves. The wax and the water in the outlet are sewage: wear rubber gloves, don't touch your face with bare hands, and wash thoroughly afterwards. Open a window or door for ventilation, because sewer gas rises while the pipe is open. If the customer has just poured drain-cleaning chemicals, do not put your hand into the pipe, and flush plenty of water through first. For electric "smart" toilets, isolate the power and have an electrician disconnect the electrical part.
Applying silicone around the base correctly
Silicone around the base has two jobs: stopping floor-cleaning water from running under the toilet, and helping keep the bowl from shifting. It is not a leak barrier for the ring seal. Sealing the entire base is the most common mistake: when the seal fails, the waste water is trapped under the toilet and soaks through the grout into the floor slab and the ceiling below, without anyone seeing it.
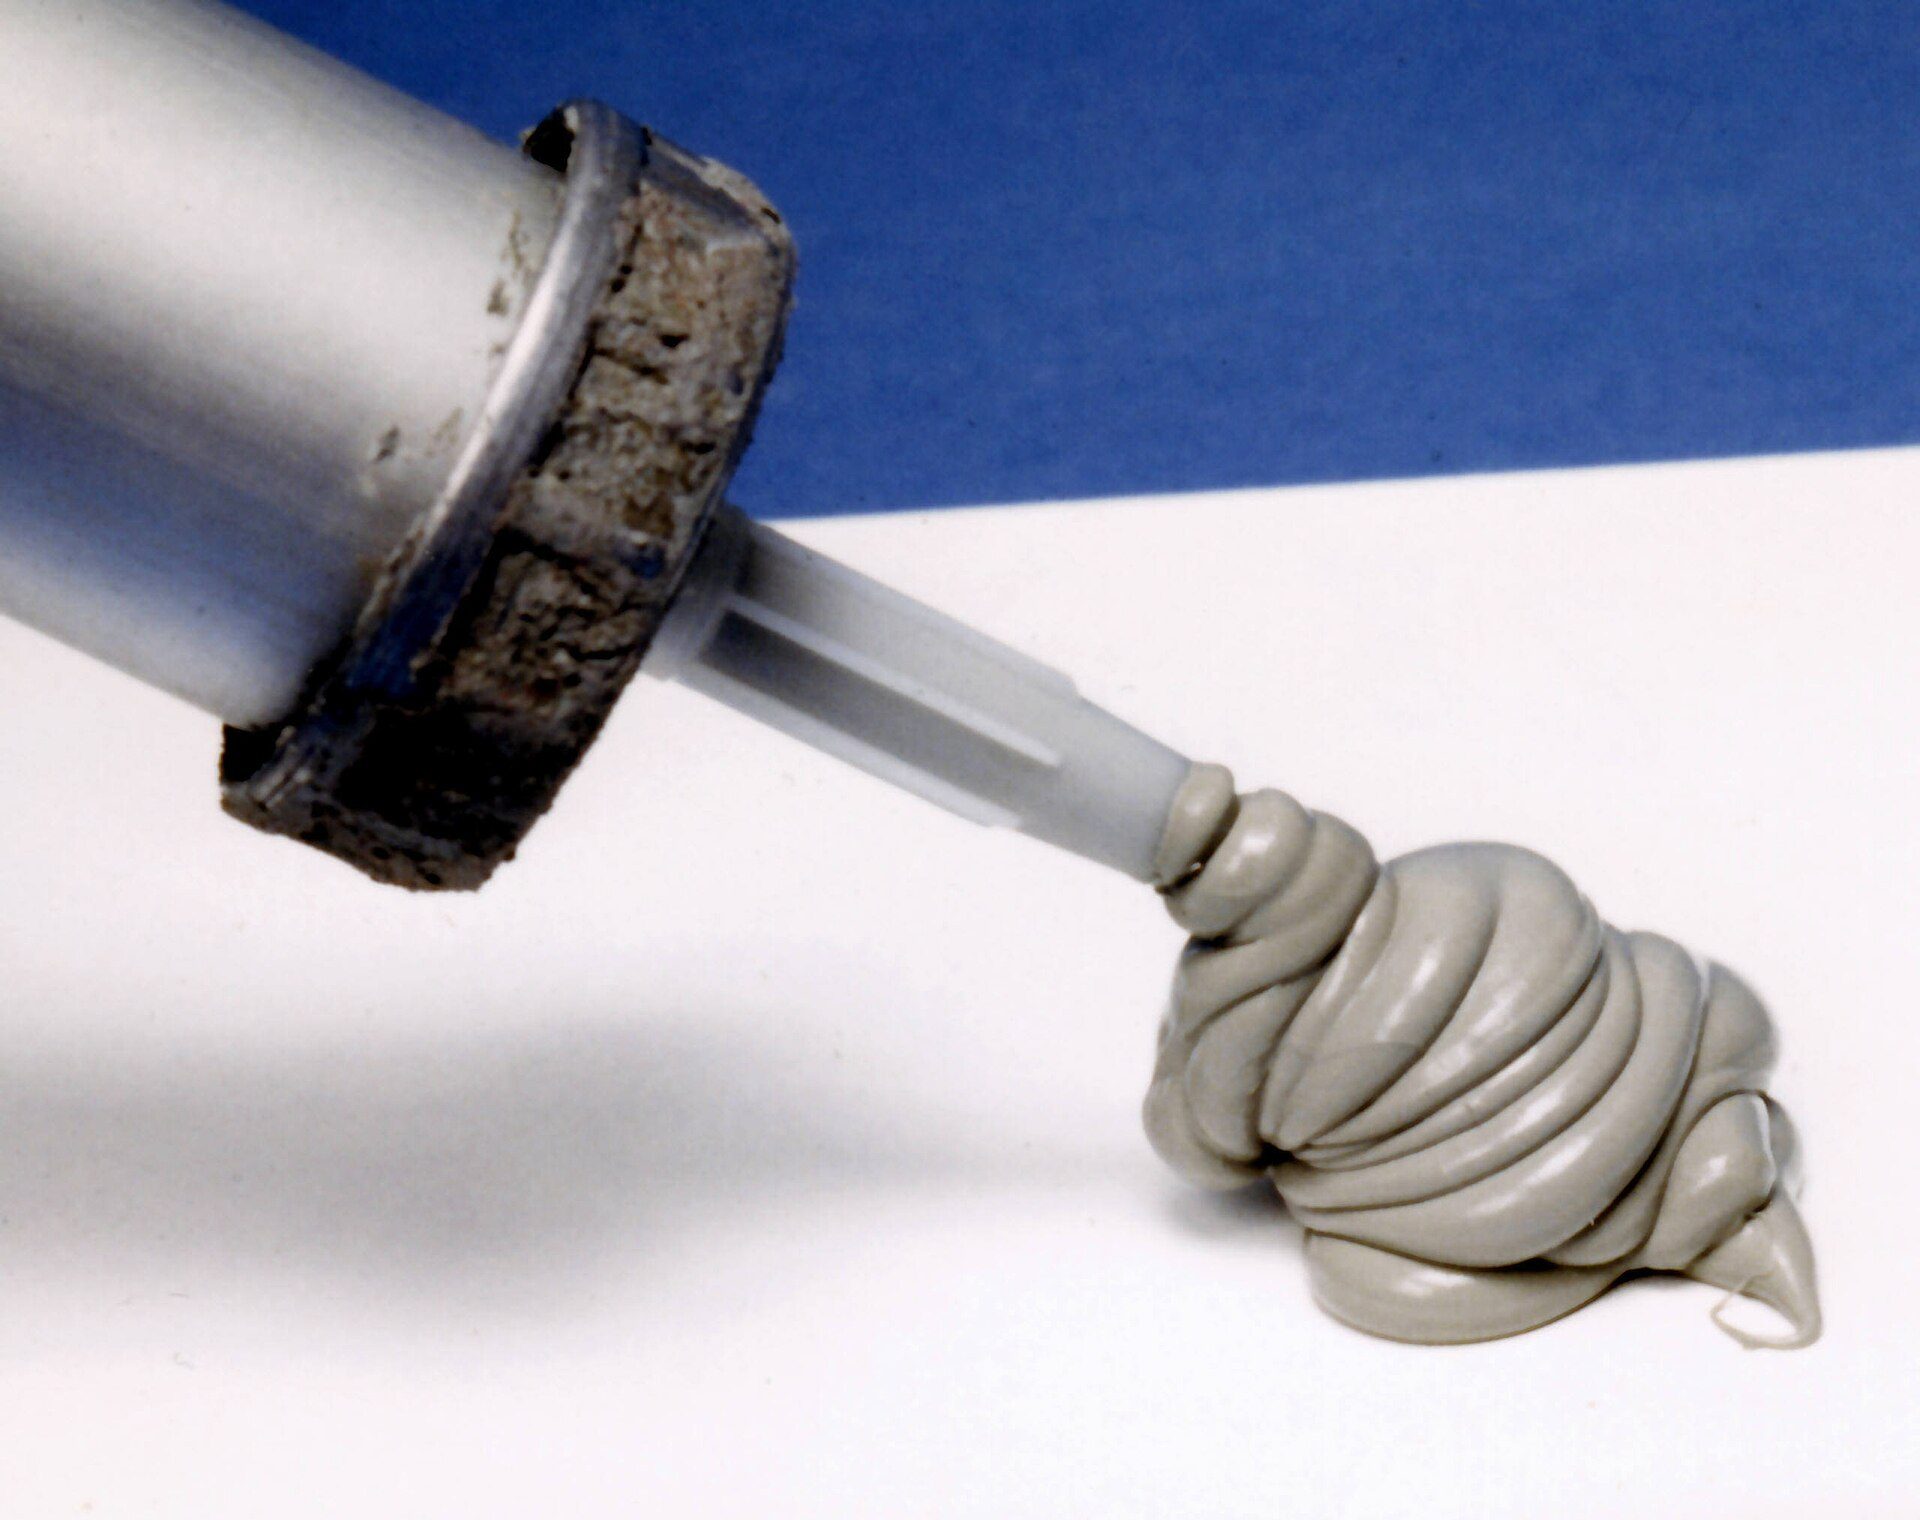
Photo: Achim Hering / Wikimedia Commons, CC BY 3.0
Preparing the surface
- Scrape off all old silicone and wipe away dust; the tile must be completely dry — silicone will not stick to damp tile.
- Use anti-mould silicone for wet areas, in white or clear to match the grout.
- Run masking tape on both sides of the joint if you want a neat line.
Applying and tooling the bead
- Cut the nozzle at an angle, with an opening of about 5–6 mm.
- Run one continuous bead across the front and both sides of the base. Leave about 3–5 cm unsealed at the back (against the wall), as in Figure 3.
- Smooth it with a gloved finger dipped in weak soapy water, or a tooling spatula, to make a smooth concave line; peel off the tape while the silicone is still wet.
- Keep water off it for the curing time printed on the tube (usually a few hours to skin over).
Why leave a gap at the back?
The back gap is an "alarm door": if the seal fails again, the waste water shows up exactly where it is easy to see, the owner calls a plumber early, and the floor and the ceiling below are not damaged. Because it is at the back, it does not spoil the look, and mopping water at the front cannot get in. Explain this to the owner so they don't seal it up themselves later.
Worked example: a 6th-floor flat staining the 5th-floor ceiling
The situation and diagnosis
The owner of a 6th-floor flat hears from the neighbour below: the bathroom ceiling on the 5th floor has a yellow stain right under the toilet. The toilet is a two-piece model about 6 years old, with silicone all the way round the base. You come to check:
- Test 1 (paper round the supply line, 10 minutes): dry. The supply-line thread ends are a little rusty.
- Test 2 (dye in the tank, paper under the bolts, 20 minutes): dry.
- Test 3: the floor around the base is dry because the silicone is continuous, but the grout next to the base is dark and smells; when you sit and lean, the bowl moves. Conclusion: the ring seal is leaking, and the silicone is trapping the water so it soaks downwards.
The work and the result
With the toilet removed, the flange is in good condition but 6 mm below the tile surface (the floor had been re-tiled over the old tiles); the old wax seal is flat, with a channel where water has been running. You use a thick wax seal, shim one corner of the base that was 2 mm off the floor, reinstall the toilet and leave the silicone gap at the back. Reference time and cost:
| Item | Time | Cost (VND) |
|---|---|---|
| Diagnosis with 3 tests | 30 minutes | — (included in labour) |
| Remove tank, remove toilet | 30 minutes | — |
| Clean and check the flange | 20 minutes | — |
| Reinstall toilet, tank, supply line | 40 minutes | — |
| Silicone, 10 test flushes | 30 minutes | — |
| Thick wax seal | 70,000 | |
| Floor anchor screw set + shim | 40,000 | |
| Anti-mould silicone (1 tube) | 90,000 | |
| New stainless supply line | 60,000 | |
| Labour | 450,000 | |
| Total | 150 minutes (2.5 hours) | 710,000 |
Check: 30 + 30 + 20 + 40 + 30 = 150 minutes; materials 70,000 + 40,000 + 90,000 + 60,000 = 260,000, plus 450,000 labour = 710,000 VND (about 28 US dollars). The next day, the paper at the back gap is still dry. You tell the owner: the ceiling stain on the 5th floor needs 1–2 weeks to dry out completely before repainting; if it keeps spreading after that, the floor waterproofing needs checking — a job for a waterproofing team, not a seal problem.
Lessons from this job
The full ring of silicone hid the fault for months. If you had just replaced the supply line on a hunch (because its threads were rusty), the customer would have called you back a week later. Make a before-and-after record with photos of the flange and the old seal so the owner can send it to the neighbour downstairs.
Common mistakes and how to avoid them
Stacking two wax seals to make up for a low flange
Sign: still leaks a few weeks after installation. Cause: the two wax rings slide on each other, leaving a gap between the layers. Fix: use one thick seal with a sleeve, or a flange extension ring of the right height.
Reusing the old wax seal
Sign: leaks on the very first flush. Cause: the wax is already flattened and no longer fills the gap. Fix: always carry a new seal on any job where the toilet may need lifting.
The toilet still rocks after tightening the screws
Sign: it moves when you sit and lean. Cause: uneven floor, loose wall plugs. Fix: shim the gaps with plastic, replace the plugs or drill new holes away from the old ones, and inject sealant into the holes before tapping in the plugs so water cannot track down the drill holes. Do not bed the base in cement mortar.
Confusing a base leak with a running toilet
A running toilet (water trickling into the bowl, the tank refilling endlessly) raises the water bill but does not wet the floor. The dye test makes the difference clear: colour in the bowl means the flush valve; colour on the paper under the bolts means the tank is leaking outwards. For adjusting the float and the tank water level, see the lesson on installing toilets, basins and showers at the right heights (in Vietnamese).
Frequently asked questions
Can I fix water seeping under the toilet myself?
Tightening supply-line nuts or replacing the supply line is something a homeowner can do. Replacing the ring seal means lifting a heavy toilet, cleaning the flange and centring it properly — better to call a plumber, especially for a one-piece toilet or when the ceiling below is already stained.
How often should the toilet seal be replaced?
The seal does not need replacing on a schedule as long as the toilet is firmly fixed. Replace it only when there are signs of leaking, the bowl rocks, there is a sewer smell around the base, or whenever the toilet is lifted (to clear a blockage, or re-tile the floor).
Do I need to break up the floor to reinstall a toilet?
Hardly ever. Only when the drain pipe is broken under the floor, badly off-centre, or cut too low to compensate. In that case, explain the plan, the cost and the need to redo the waterproofing to the owner first.
Should I seal all the way round the base to be safe?
No. Leave a 3–5 cm gap at the back so a leak shows up early. Sealing it completely traps water under the toilet, which then soaks into the ceiling below.
Why does a toilet leaking at the base smell?
Usually because the ring seal is open: sewer gas escapes through the gap and waste water soaks into the grout. If the seal is fine but it still smells, check whether a floor drain has lost the water in its trap — see the lesson on drain pipe falls and preventing bad smells (in Vietnamese).
Practice exercises and self-assessment
Exercises
- On a toilet at home or in a training workshop, carry out all 3 tests (paper on the supply line, dye in the tank, 5 flushes) and record each result with its waiting time.
- Under a master plumber's supervision, remove a two-piece toilet on a practice floor, scrape the flange clean, measure the distance from the flange to the tile surface, and reinstall it with a new seal.
- Apply silicone around the base with the gap at the back; take before-and-after photos.
- Draw up a time-and-cost table for replacing the seal on a one-piece toilet, and check the total yourself.
Pass / not yet criteria
- Pass: you identify the right source before lifting the toilet, and can write down why you ruled out the other two. Not yet: you lifted the toilet before doing tests 1 and 2.
- Pass: the bowl does not move when you lean to either side; the china is not cracked. Not yet: it still rocks, or has been shimmed with wood or paper.
- Pass: after 10 flushes in a row and paper left for 24 hours, the paper at the back gap and around the supply line is still dry. Not yet: any damp mark at all.
- Pass: the silicone bead is continuous and smooth, with a 3–5 cm gap at the back. Not yet: sealed all the way round, or the bead is broken.
- Pass: the cost table adds up and separates materials from labour. Not yet: the total does not match.
Next step on the roadmap
Once you can fix a leak at the toilet base, you have the sanitary-fittings part of step 5 under control. The next step is step 6 — Pumps, water tanks and water heaters: choosing a booster pump, fitting a float switch on a roof tank and connecting a water heater with a safety valve; see the lesson on installing pumps, roof tanks and water heaters. Other leak jobs such as dripping taps and blocked basins come up again in step 7; you can read ahead in the lesson on fixing dripping taps and clearing blocked basins.
Keep learning the plumbing trade: work through the 8 steps of the Residential Plumber roadmap on NAMBIN — from pipe materials, PPR welding and pressure testing to leak repair, quoting and finding work.