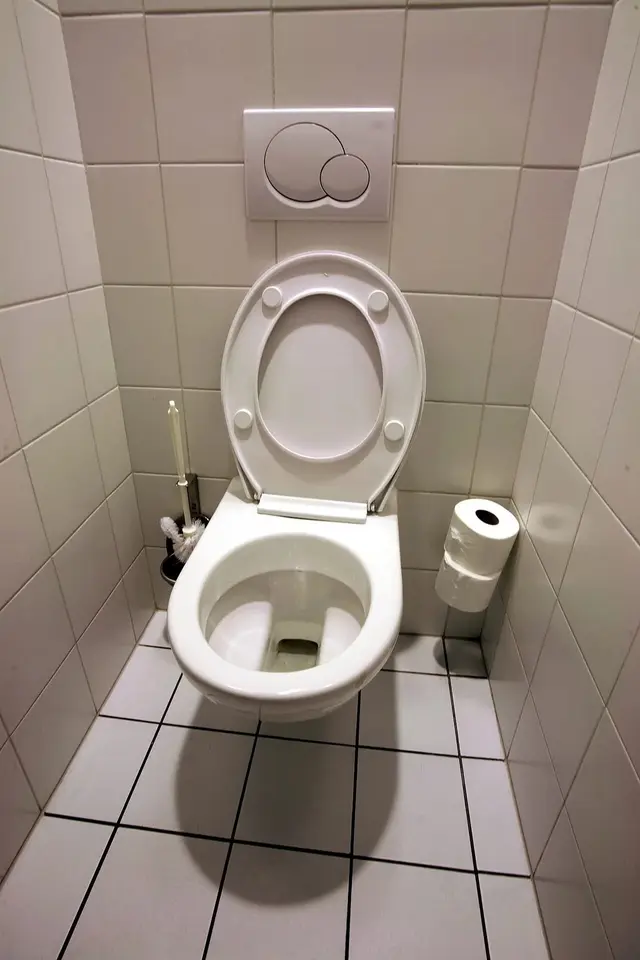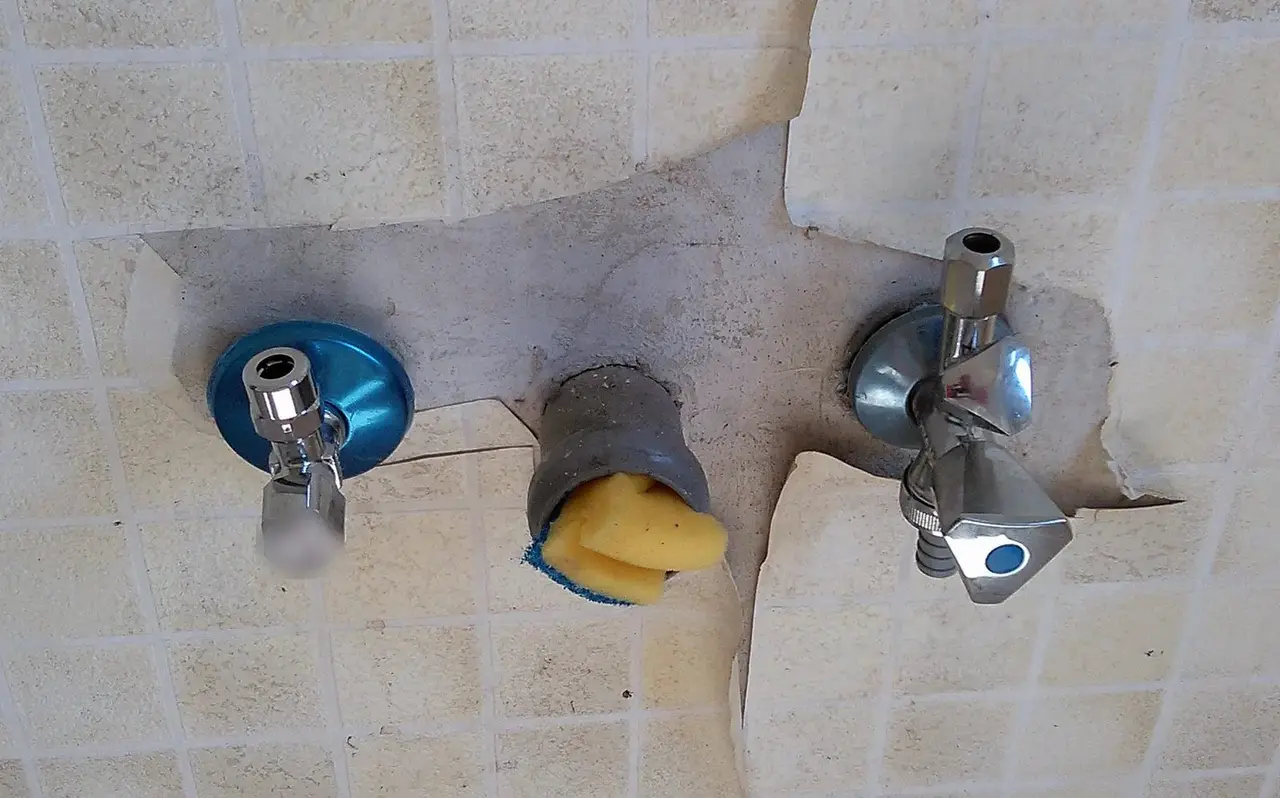
A small chrome valve sits on the wall under almost every washbasin and kitchen sink and behind almost every toilet in a Vietnamese home. Plumbers call it an angle stop valve or angle valve; in Vietnam you will hear van góc or van khóa góc. It lets you shut off water to one fixture without closing the whole house, so a tap or toilet fill valve can be repaired while the rest of the home keeps running.
The valve is cheap, but most callbacks on this job come from the threaded fitting in the wall behind it: a cracked plastic adapter, a twisted PPR insert, too much or too little tape. This guide shows trainee plumbers how to replace the valve while protecting the wall fitting, seal the thread, reconnect the hose and prove there is no leak.
Scope and safety. This article covers replacing a threaded angle stop valve on a cold or hot water supply to a basin, sink or toilet, where the valve screws into a female threaded fitting at the wall. It does not cover opening walls or fusion welding PPR. Numbers in this article are for reference only; the valve and hose makers' instructions and the rules that apply where you work always come first.
What an angle stop valve does
An angle stop valve has an inlet that screws into the wall fitting and an outlet at 90 degrees to it, usually pointing up, that feeds a flexible hose to the tap or toilet cistern. A handle on the front opens and closes it. A chrome cover plate (escutcheon) slides over the inlet and hides the hole in the tiles.
It is a service valve: fully open in normal use, closed only for repairs or emergencies.
When an angle valve needs replacing
Replace the valve when you see any of these:
Seized handle. It will not move by hand. Forcing it with pliers can snap the spindle and leave water you cannot shut off.
Drip from the spindle or handle. Water weeps from around the handle when the valve is open. On multi-turn valves the gland can sometimes be nipped up slightly, but on cheap sealed valves the usual fix is replacement.
Valve will not shut fully. Water still trickles from the outlet with the handle closed, usually because scale or debris has damaged the washer, seat or ball.
Leak at the wall thread. Water around the inlet thread or a wet cover plate means the thread joint has failed, or the wall fitting behind it is cracked.
Corrosion. Flaking chrome, green or white crust, pitting or a body that looks eaten away.
Before a fixture replacement. An old, doubtful valve is cheapest to change while everything is already open.
If only the hose is dripping, you may not need a new valve at all. Check the hose and its washer first (see Step 8).
Choosing the right replacement valve
Take the old valve, or clear photos, to the supplier and check the threads, the operating type and the material.
Threads and sizes
In Vietnamese homes the wall outlet for a basin, sink or toilet is normally a 1/2-inch threaded point (locally often called size phi 21, after the 21 mm outside diameter of the matching PVC pipe). Most angle valves sold in Vietnam have a 1/2-inch male inlet to suit it, and a 1/2-inch male outlet for the flexible hose nut. Some valves, mainly on imported fixtures, have a 3/8-inch outlet, so match the outlet to the hose you will use.
Two details catch learners out:
Tapered or parallel? Pipe threads to the BSP family come in tapered (marked R) and parallel (marked G) forms. Tape-sealed valve inlets are designed to seal on the thread. A parallel-threaded inlet sealed with an O-ring or face washer should be fitted dry or as the maker says. Read the packaging and do not mix systems without checking.
Female-inlet valves. A few valves have a female inlet to go onto a male nipple that sticks out of the wall. Look at what is actually in the wall before you buy.
Quarter-turn or multi-turn
Quarter-turn (ball) valves close with a 90-degree turn of a lever or small handle. They show clearly whether they are open or shut, and they are less likely to seize. Many plumbers prefer them for new work.
Multi-turn (spindle or compression) valves close by screwing a washer down onto a seat over several turns. They allow finer flow adjustment, but the washer and gland wear, and a valve left untouched for years can stick.
Either type works if it is good quality.
Material and quality
Most angle valves are chrome-plated brass. Very light, cheap valves made from thin castings or zinc alloy are more likely to corrode and crack, especially on hard water. Judge quality by weight, clean threads and a maker's guarantee, not by shine. On a hot supply, check that the valve is rated for hot water.
Tools and materials
Two adjustable wrenches (with cloth to protect the chrome), a torch, bucket and towels, a small brass or stainless brush and a pick, PTFE tape or a drinking-water-approved thread sealant, the new valve with its cover plate, a new flexible hose or new hose washers, and dry tissue for the leak test.
Step-by-step: replacing the valve
Step 1: Find and close the right supply
In a typical Vietnamese townhouse, cold water to the bathrooms often comes by gravity from a stainless roof tank, sometimes with a booster pump, while the ground floor may be fed from the mains or a pump. There may be a main valve near the meter, a valve on the tank outlet and valves on each floor branch.
Close the valve that isolates this point. If you are not sure which one, close the tank outlet valve or the main.
Switch off any booster pump at its switch or breaker.
For a hot supply, switch off the water heater at its isolator and let the water cool. Never leave a heater switched on while its supply is shut off and drained.
If the old angle valve still closes, close it too.
Our Vietnamese article on the main shut-off valve (van khóa tổng) covers what to do when the main valve itself is stuck or leaking.
Step 2: Drain the line
Open the tap at this fixture and the lowest tap on the same branch until the flow stops completely. On a toilet, flush and hold the lever to empty the cistern. A trickle that never stops means the supply is not fully shut; find out why before going on. Put the bucket and towels under the valve, because even a drained line releases some water.
Step 3: Disconnect the flexible hose
Hold the valve body still with one wrench and undo the hose nut with the other. If you turn only the hose nut, the force goes through the valve into the wall fitting. Then undo the other end of the hose if it is being replaced.
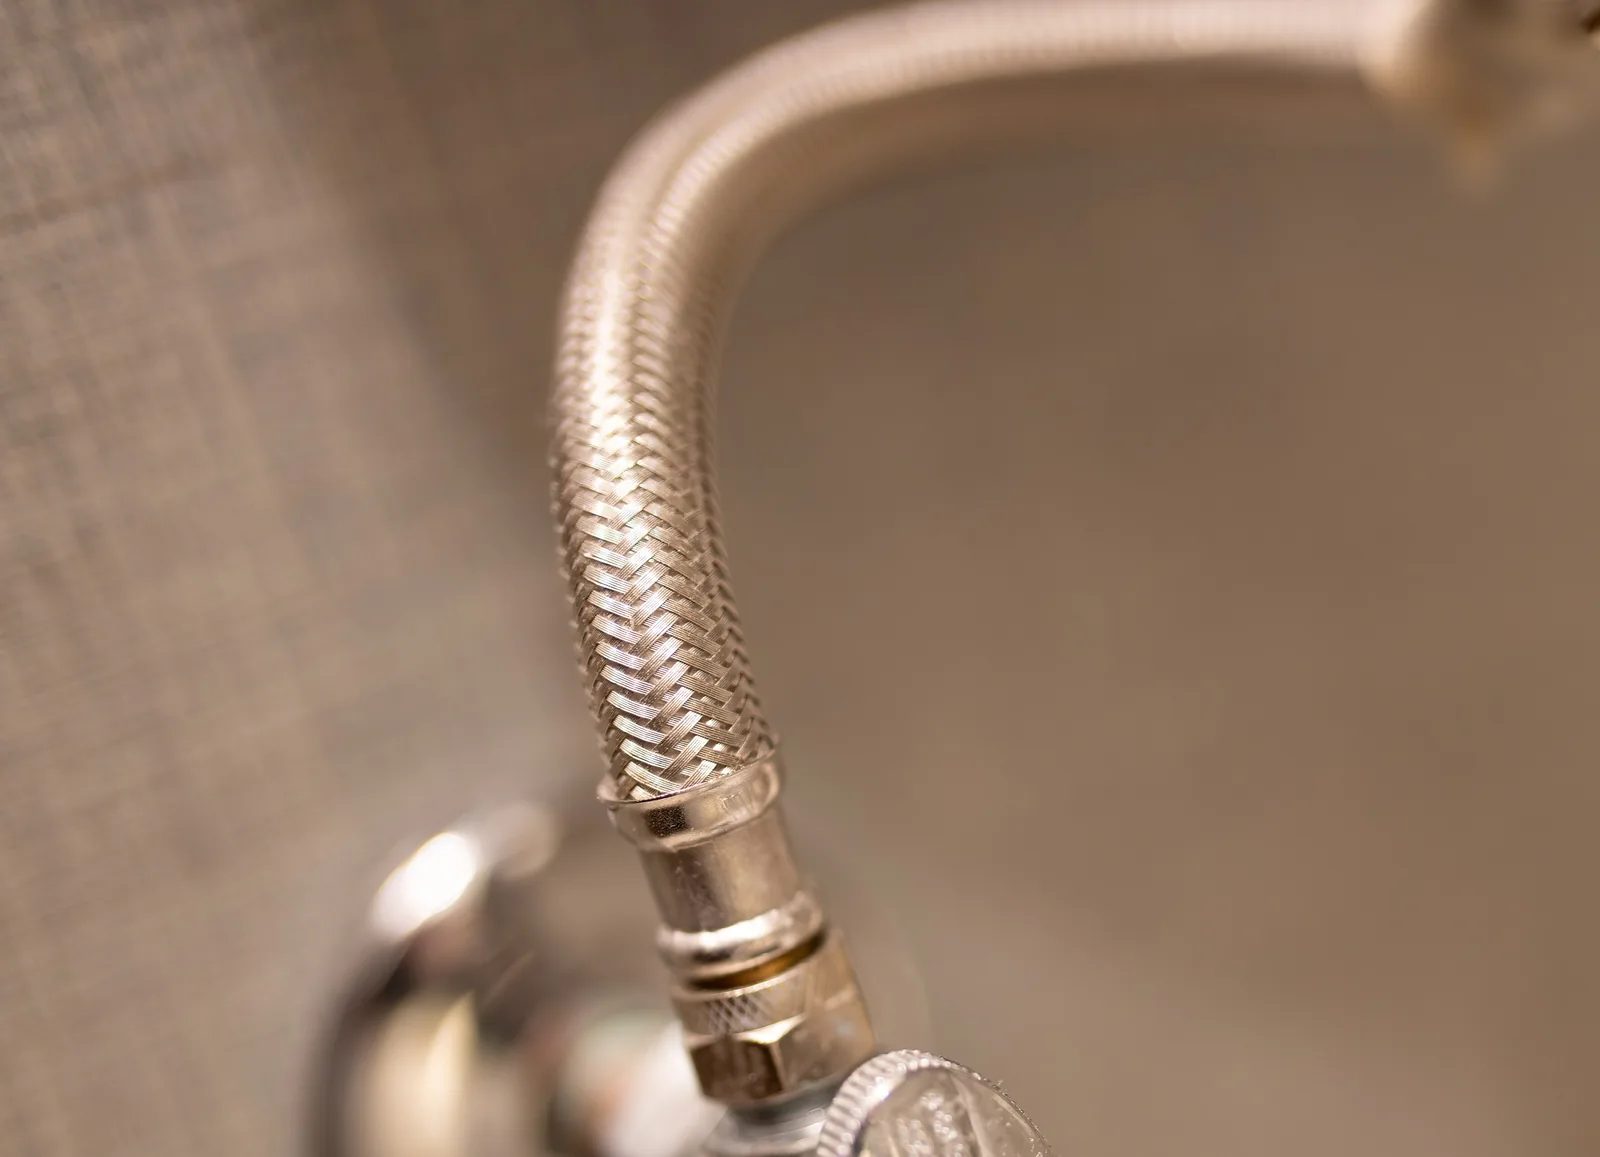
Figure 1. A braided flexible hose connected to the outlet of a chrome stop valve behind a toilet. When undoing or tightening this hose nut, hold the valve body with a second wrench so the force does not reach the wall fitting. (Photo: Tony Webster, Wikimedia Commons, CC BY 2.0; cropped, label blurred)
Step 4: Remove the old valve without damaging the wall fitting
Slide the cover plate away and look at what the valve is screwed into. In most modern Vietnamese homes it is a PPR female threaded adapter: a PPR fitting with a brass threaded insert moulded inside, fusion-welded to the pipe and buried in the wall. Older homes may have a PVC female adapter or galvanised steel fittings.
Unscrew the valve anticlockwise, with the wrench on the flats of the valve inlet, not on the handle or outlet.
Use steady, controlled force, not sudden jerks or a long lever bar. A sharp twist is what cracks PVC adapters and breaks a brass insert loose inside a PPR fitting.
Watch the wall fitting. If the fitting or insert starts to turn with the valve, or a tile cracks, stop immediately.
If it is stuck, work it gently back and forth. Do not heat plastic fittings.
If part of the fitting is exposed, such as a brass extension nipple, hold it with the second wrench.
If the insert has spun or the adapter has cracked, the wall fitting must be replaced (see Troubleshooting).
Step 5: Inspect and clean the threads
With a torch, check the female thread for cracks (often a white line or a wet mark), damage and heavy corrosion, and check by hand that the brass insert is firm. Pick out all old tape, sealant and thread-sealing cord; old tape left in the thread stops the new joint from seating. Brush, wipe and dry the thread.
Step 6: Seal the new valve's inlet thread
For a tape-sealed male inlet, wrap PTFE tape in the same direction as the thread tightens. For a normal right-hand thread, looking at the thread end-on with the end pointing towards you, that is clockwise. Wrapped the other way, the tape unwinds and bunches as you screw the valve in.
Start one or two threads back from the end, so no tape gets into the waterway.
Keep the tape flat and slightly stretched, overlapping each turn by about half its width.
As a reference only, around 5 to 8 wraps of standard thin tape on a 1/2-inch thread is a common starting point. A loose-feeling thread needs a little more; a tight one needs less; thicker tape needs fewer wraps.
Press the tape into the thread so the thread form shows through.
Too much tape is a real risk with plastic wall fittings. A tapered male thread with a thick wad of tape acts like a wedge and can split a PVC adapter or stress the plastic around a PPR insert, sometimes days later. If you use liquid thread sealant instead, choose one suitable for drinking water and the materials, and respect its curing time.
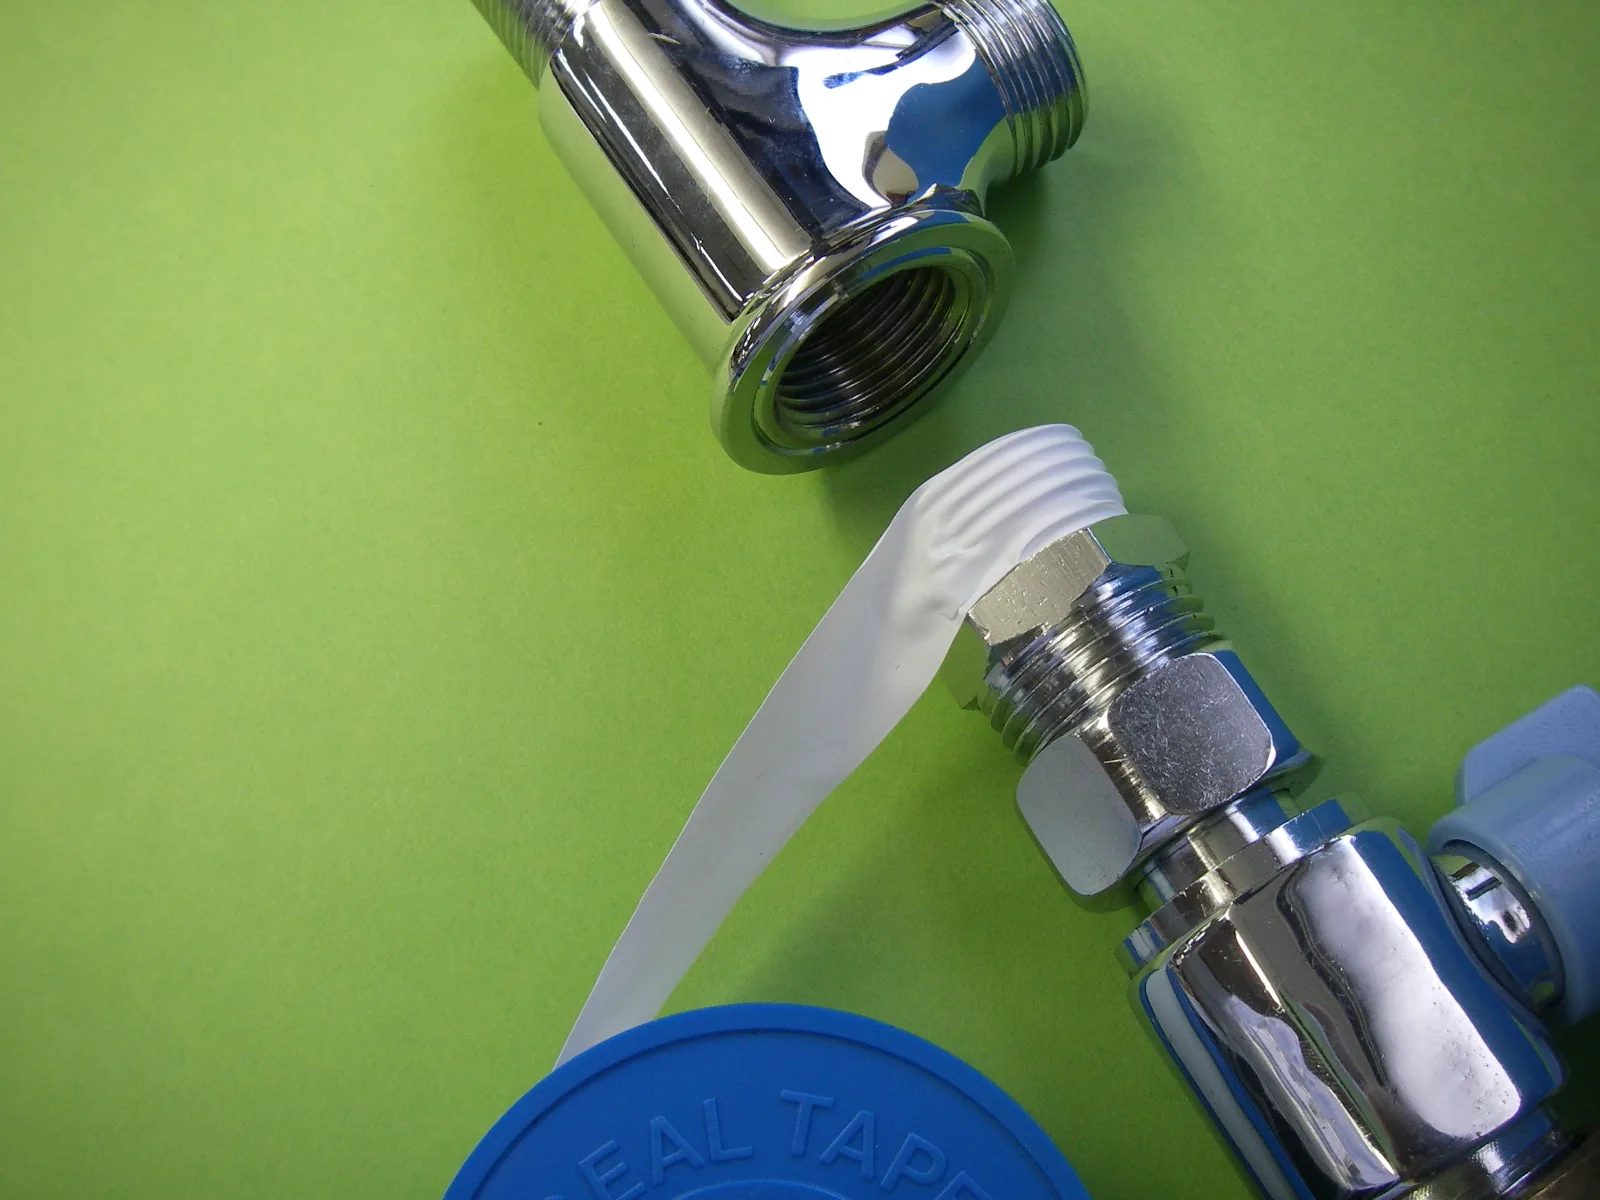
Figure 2. PTFE tape being wound onto the male thread of a chrome valve connector, next to a female-threaded chrome fitting. The tape lies flat and the thread form shows through it. (Photo: Nagao, Wikimedia Commons, public domain)
Step 7: Fit the valve at the correct orientation
Slide the cover plate onto the valve first. Start the valve into the wall fitting by hand for two or three turns to make sure it is not cross-threaded. Then tighten with a wrench on the inlet flats until the joint is firm and the outlet points where the hose needs to go, usually straight up, with the handle facing out where it can be reached. Stop when it is firm; do not lean on the wrench.
Do not back the valve off to line it up. Turning a tape-sealed joint backwards loosens the seal and is a common cause of leaks. If you go past the right position, take the valve out, clean off the tape and start again. The cover plate is decorative only and does not seal anything.
Step 8: Reconnect the flexible hose
Replace the hose if the braid is rusty, frayed or bulging, if it has been kinked, or if nobody knows how old it is. A failed hose can flood a room quickly, and a new one costs little compared with the damage.
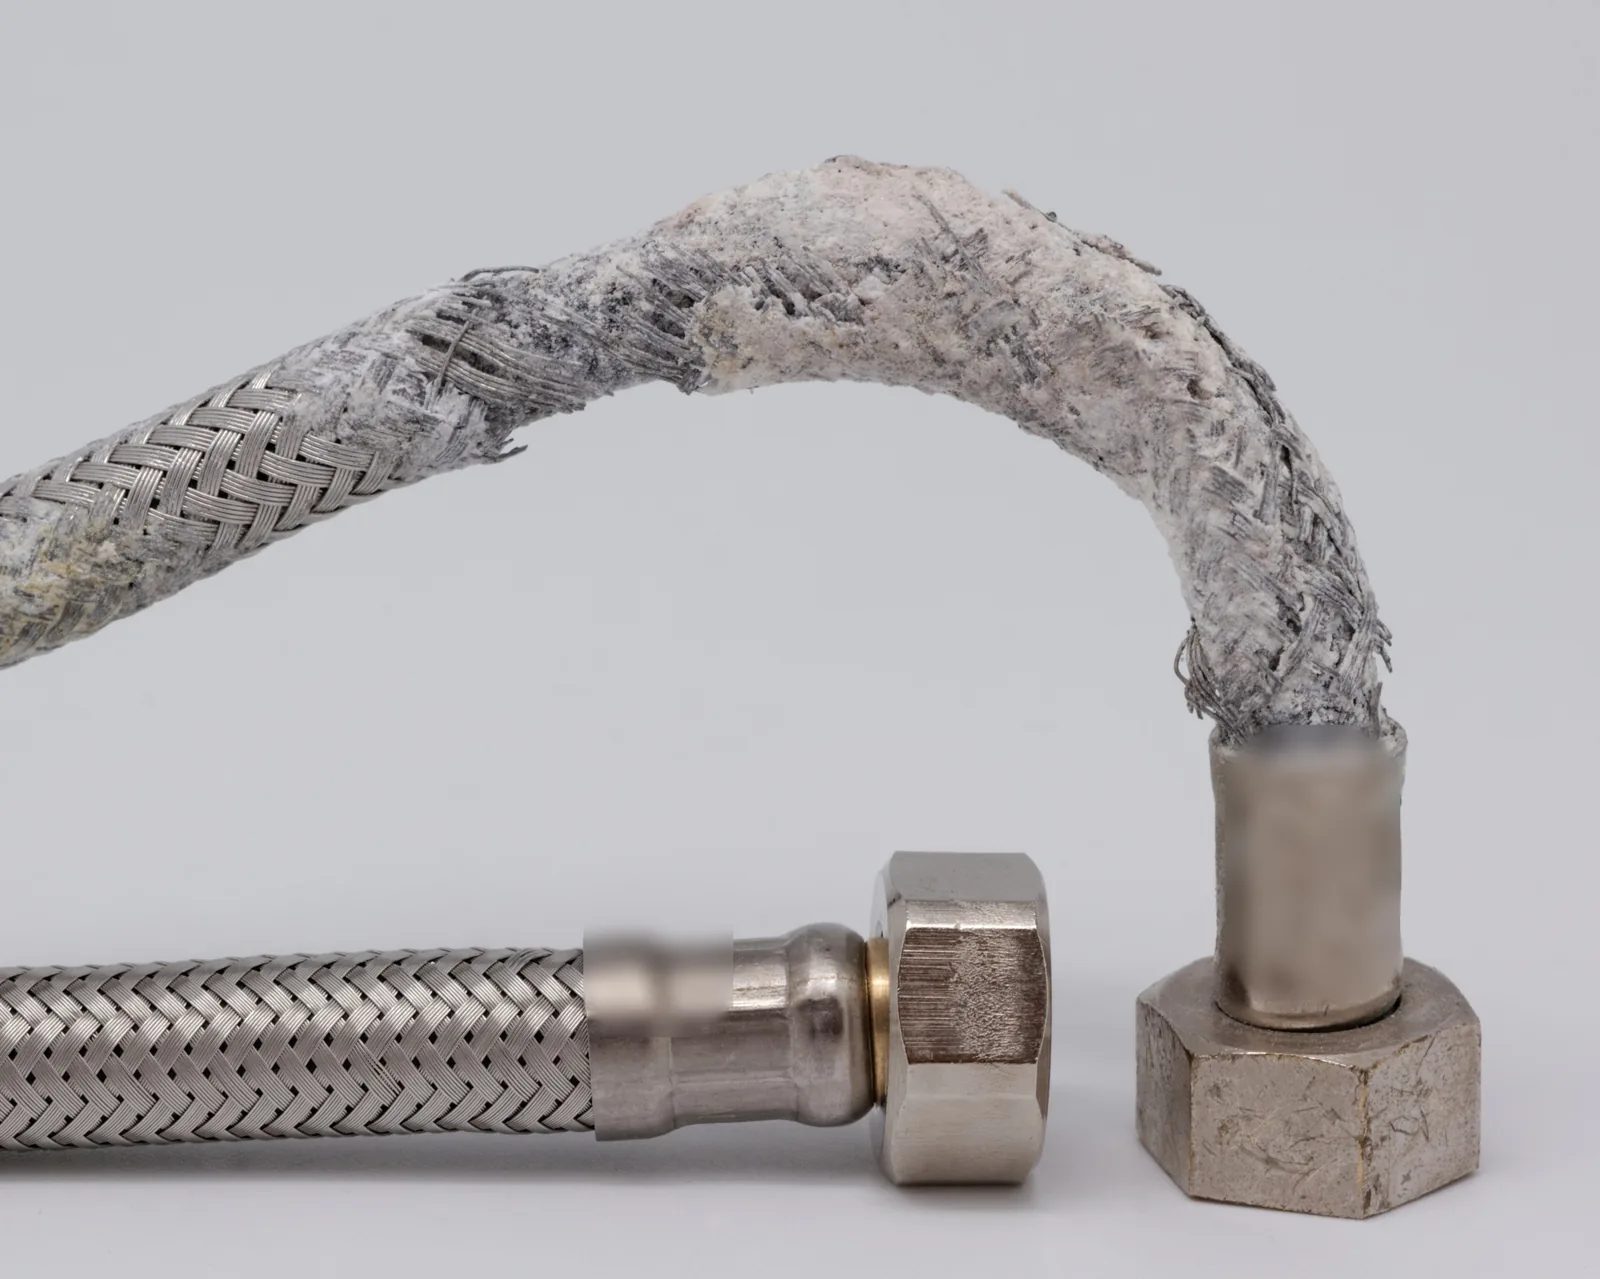
Figure 3. A new braided flexible hose (front) next to one that has failed: its stainless braid is corroded, crusted and broken through. A hose in this state must be replaced, not reused. (Photo: Coyau, Wikimedia Commons, CC BY-SA 3.0; resized, markings blurred)
Most hose nuts seal on a flat rubber washer inside the nut, not on the thread:
Check that the washer is present, flat and not cracked or squashed. Fit a new one if in doubt.
Do not put PTFE tape on a washer-sealed nut. It does not help the seal and can stop the washer seating evenly.
Screw the nut on by hand until snug, then hold the valve with one wrench and give the nut a small extra turn. As a reference only, about a quarter to half a turn past hand-tight is typical; follow the hose maker's instructions.
Over-tightening squashes the washer, can crack the nut and causes slow leaks.
The hose should run in a smooth curve, without kinks, twists or tension.
Step 9: Restore the water slowly
Close the new angle valve. Open the supply valve slowly, a little at a time, to avoid a pressure surge and to let air out gently, then switch any booster pump back on. Check the inlet joint, then open the angle valve slowly and run the tap or fill the cistern to clear air and debris. If the tap flow looks weak, check its aerator for grit.
On a hot supply, make sure water flows from the hot tap before switching the water heater back on.
Step 10: Leak test
Visual checks miss slow leaks, so use dry tissue:
Dry every joint: the wall thread, the valve body and spindle, and both hose ends.
Hold or wrap dry tissue around each joint, or tuck a folded piece under it.
With the valve fully open, wait about 10 to 15 minutes (for reference), using the tap or flushing the toilet a few times.
Any damp spot is a leak until you prove otherwise.
Close and reopen the valve once to confirm it shuts off fully and the spindle stays dry.
Leave a dry tissue on the cabinet floor or under the toilet connection and ask the client to check it, or send a photo, the next day. Some thread leaks only appear after hours under pressure or after temperature changes on a hot line.
Troubleshooting
Water at the wall thread
Weep from the thread right away: too little tape, tape wrapped the wrong way, the valve was backed off, or the thread was dirty. Shut off, remove, clean and re-seal.
Leak that starts after a day or two: check whether the wall fitting has cracked. A split plastic adapter often weeps from the face of the fitting or from behind the tiles, not from the thread itself.
Damp on the ceiling below or inside the wall: the leak may be in the wall pipework. Investigate before closing up.
Cracked female adapter or spinning PPR insert
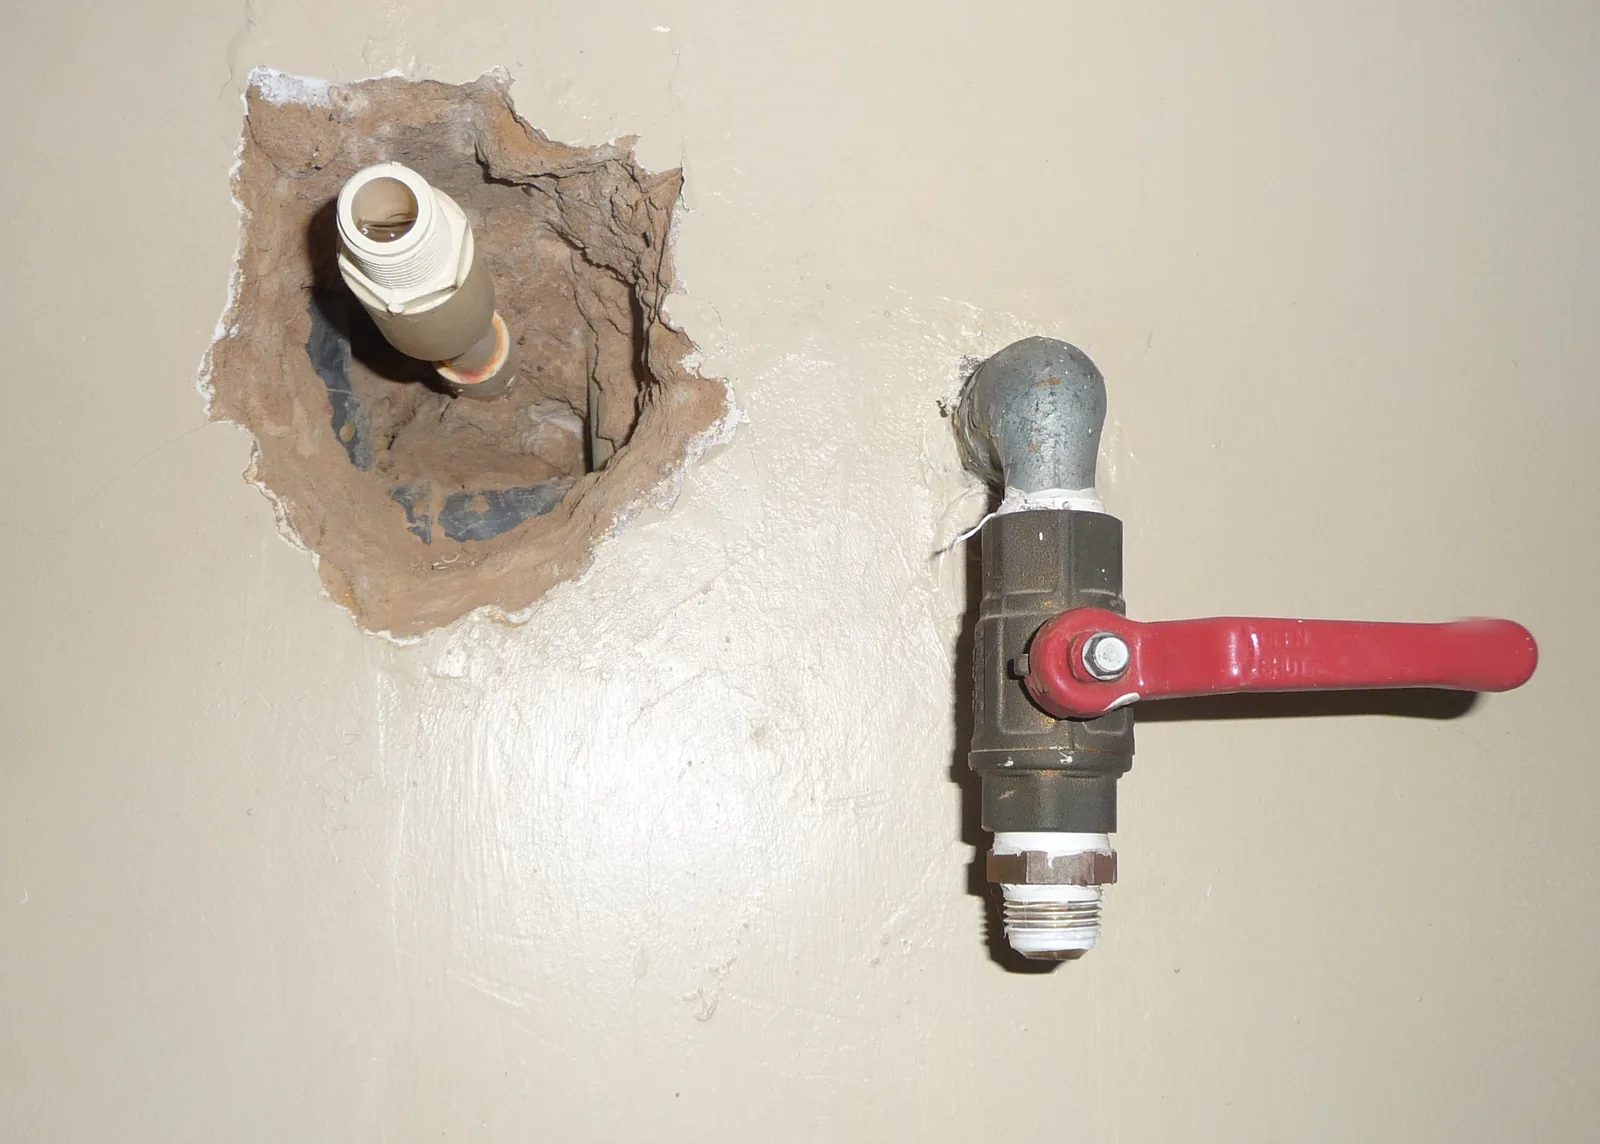
Figure 4. A wall opened up to reach a plastic pipe with a male-threaded plastic adapter (left), next to a brass quarter-turn ball valve with a red lever on a galvanised elbow (right), with white thread tape visible on its joints. When a threaded fitting fails inside the wall, the repair means opening the wall like this. Mark on the lever blurred. (Photo: Wilfredor, Wikimedia Commons, CC BY-SA 3.0; resized, mark blurred)
If the female adapter is cracked or its insert turns:
Leave the supply off and show the client what you found, with a photo.
The fix is to open the tiles around the point, cut out the damaged fitting and fit a new one with the correct method for the pipe material (fusion welding for PPR, solvent cement for PVC). Do this only if you are trained in that method; otherwise, hand it over to someone who is.
After the repair, pressure-test the pipe before the wall is closed up, then fit the angle valve as described above.
Do not try to seal a cracked adapter with glue, epoxy or extra tape. It may hold for a short time, then fail inside the wall.
Valve will not shut off fully
New valve: debris may be on the seat or ball. Open and close it a few times with water flowing; if it still passes, return it to the supplier.
Old multi-turn valve: the washer or seat is worn. On most cheap angle valves, replacement is better than repair.
Reference table: common problems and fixes (for reference only)
Symptom or job | Likely cause | What to do | Notes (reference only) |
|---|---|---|---|
Handle seized | Valve not operated for years, scale | Replace valve; do not force with pliers | Know where the main or branch valve is before you start |
Drip at handle when open | Worn gland or O-ring | Replace valve (gland adjustment only if designed for it) | Cheap sealed valves usually cannot be serviced |
Trickle with valve closed | Worn washer or seat, damaged ball, debris | Replace valve | New valve: flush debris first |
Wet at wall thread | Too little tape, wrong wrap direction, valve backed off, dirty thread | Remove, clean, re-seal, refit | Start with about 5–8 wraps of thin tape on 1/2" and adjust |
Leak days later at wall | Cracked female adapter (over-tightening, excess tape) | Open wall and replace fitting | Do not glue or tape over cracks |
Insert turns with valve | Brass insert loose in PPR body | Stop; replace the fitting | Avoid sharp, sudden force |
Hose nut drips | Missing or damaged washer, cross-thread, over-tight | New washer or hose; snug plus small turn | About 1/4–1/2 turn past hand-tight, per maker |
Worked example: a kitchen sink valve in a Hanoi townhouse
The job. In a four-storey townhouse, the ground-floor kitchen cabinet is damp. The cold angle valve under the sink is green with corrosion, weeps at the handle and will not turn. Water comes from a stainless roof tank with a booster pump.
Survey. The trainee dries the area and puts tissue round the joints. Within minutes the tissue at the handle is wet; the wall thread and hose nuts stay dry. The hose braid has rust spots. With a torch, the trainee sees a PPR female adapter in the wall.
Isolation. There is no kitchen branch valve, so the trainee closes the tank outlet valve, switches off the pump at its breaker and tells the family the whole house is off. The kitchen tap and the ground-floor bathroom tap are opened until they stop running.
Removal. Holding the valve with a second wrench, the trainee removes the hose, then unscrews the valve with steady force while watching the wall fitting. The insert stays firm and there are no cracks. Old tape is picked out; the thread is brushed and dried.
Fitting. The client chooses a quarter-turn valve with 1/2-inch male inlet and outlet and a new braided hose. The trainee wraps about six turns of tape clockwise, starting one thread back, starts the valve by hand and tightens it until firm with the outlet straight up. The hose goes on with its washers, hand-tight plus a small turn.
Testing. With the angle valve closed, the tank valve is opened slowly and the pump switched on. The angle valve is opened slowly and the tap run to clear air. After 15 minutes, every tissue is dry, and the valve shuts off fully. The next morning the family send a photo of the dry tissue left on the cabinet floor, and the job is closed.
Safety checklist
I know which valve isolates this point, and I have closed it before starting.
Any booster pump on the line is switched off at its switch or breaker.
On a hot supply, the water heater is switched off and the water has cooled.
I hold the valve with a second wrench whenever I turn a hose nut.
I use steady force on the old valve and stop if the wall fitting moves or cracks.
Tape is wrapped the right way, in a sensible amount, starting back from the end.
The valve was started by hand and never backed off to align it.
The hose is in good condition, has washers and is not over-tightened.
Water was restored slowly, and the heater was only switched back on after the hot line was full.
Every joint passed a dry-tissue test, and a next-day check is arranged.
Frequently Asked Questions
Can I just tighten a leaking angle valve instead of replacing it?
At the hose nut, check the washer and tighten slightly. At the wall thread, extra tightening risks cracking a plastic fitting; the reliable fix is to remove, clean and re-seal. A leak at the handle, or a valve that will not shut, usually means a new valve.
How many wraps of PTFE tape should I use?
There is no single right number, because tape thickness and thread fit vary. As a reference, around 5 to 8 wraps of standard thin tape on a 1/2-inch thread is a common starting point. Use less on a tight thread and on plastic female fittings, and check the maker's advice for the valve and the sealant.
Which way do I wrap the tape?
The same way the valve turns when you screw it in. For a normal right-hand thread, looking at the end of the thread pointing towards you, that is clockwise. Wrapped the wrong way, the tape unravels as you tighten.
Should I put tape on the flexible hose nut?
Not on a hose nut that seals with a flat rubber washer. The washer does the sealing. Tape on the thread does not help and can stop the washer seating evenly.
Practice Exercises
Exercise 1: Identify the fittings. Find five angle valves and note for each the inlet and outlet size, the operating type and what it is screwed into (PPR, PVC or metal).
Exercise 2: Tape practice. Wrap a spare 1/2-inch male fitting with four, six and ten wraps of tape, screw each into a metal female fitting by hand and note the feel. Explain why ten wraps would be risky in a plastic adapter.
Exercise 3: Full replacement on a rig. Under supervision, isolate and drain a practice supply, replace an angle valve and hose, restore water slowly and complete a 15-minute dry-tissue test. Have your trainer check each joint.
Exercise 4: Fault finding. Your trainer prepares three faults: a missing hose washer, tape wrapped the wrong way and a valve that has been backed off. Find each fault using dry tissue, explain the cause and correct it.