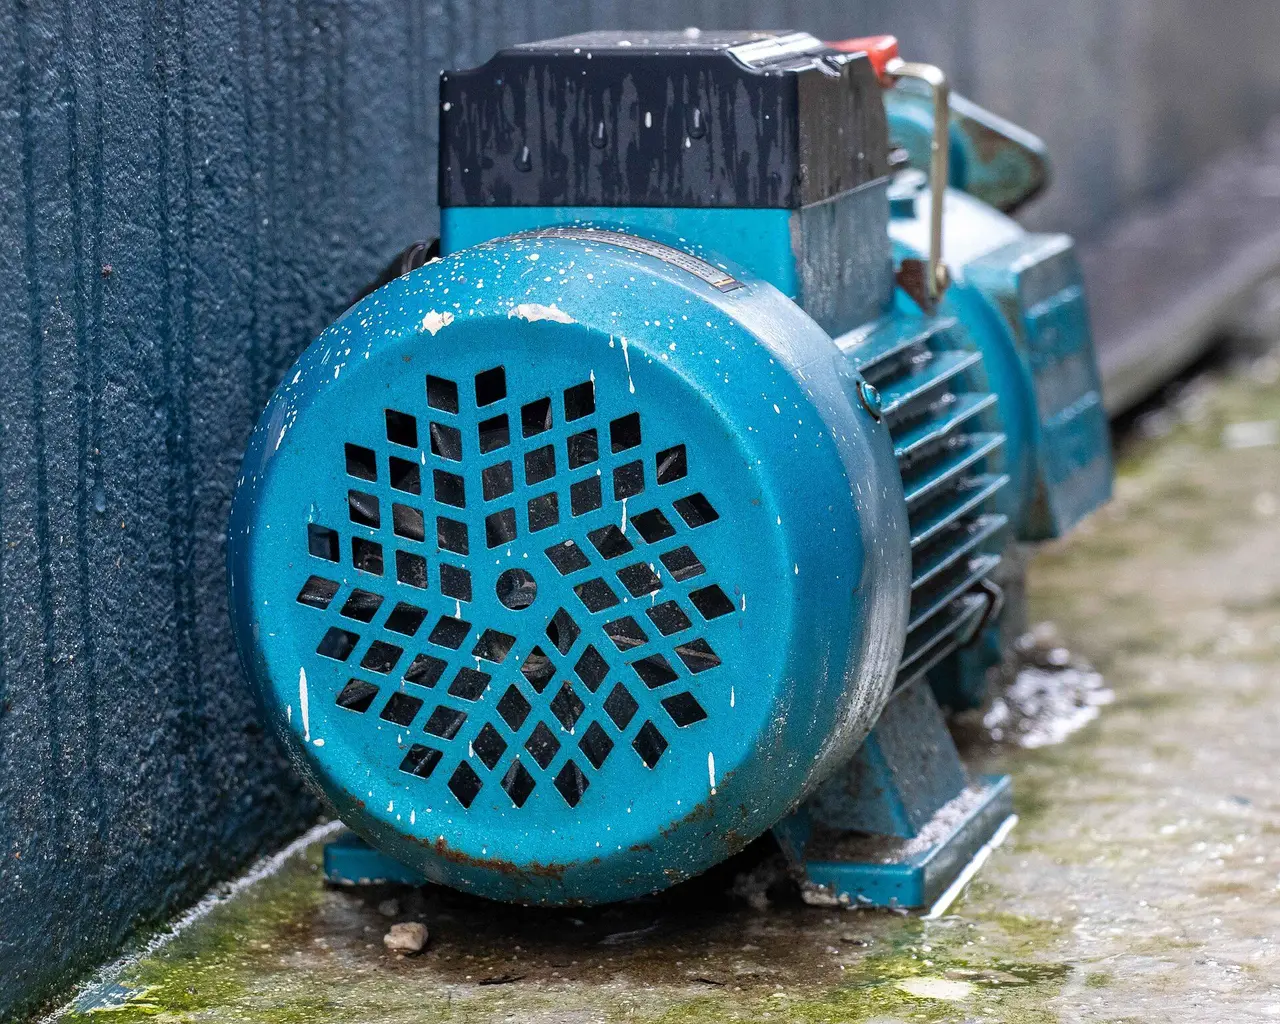
When a water pump hums but will not start (the shaft stays still), the cause is almost always one of four things: a failed capacitor (the most common), a seized shaft or impeller from scale, rust, debris or broken bearings, voltage too low at start-up, or a burnt or shorted motor winding. The first thing to do is switch it off within a few seconds, because a humming motor draws 4–6 times its normal current and heats up very quickly. This is a completely different fault from "the pump runs but no water comes out", where the shaft turns smoothly and only the water side is wrong, and it is fixed in a different way.
By the end of this lesson, you will be able to:
- Tell apart three symptoms: a silent pump, a pump that hums without turning, and a pump that turns but delivers no water.
- Make the pump safe before opening it: isolate, discharge the capacitor, confirm 0 V.
- Turn the shaft by hand, test the capacitor on the µF range and measure the three winding pairs, and read the results correctly.
- Prime the pump properly and find air leaks on the suction pipe once the pump turns again.
- Decide with real measurements whether to repair or replace, and quote the customer accordingly.
Learning the plumbing trade? This lesson belongs to the step "Pumps, water tanks & water heaters" in NAMBIN's 8-step roadmap for residential plumbers. When a new pump is needed, use the pump and pipe calculator to pick the right power and pipe size before you quote.
Pump hums but won't start vs. pump runs but no water
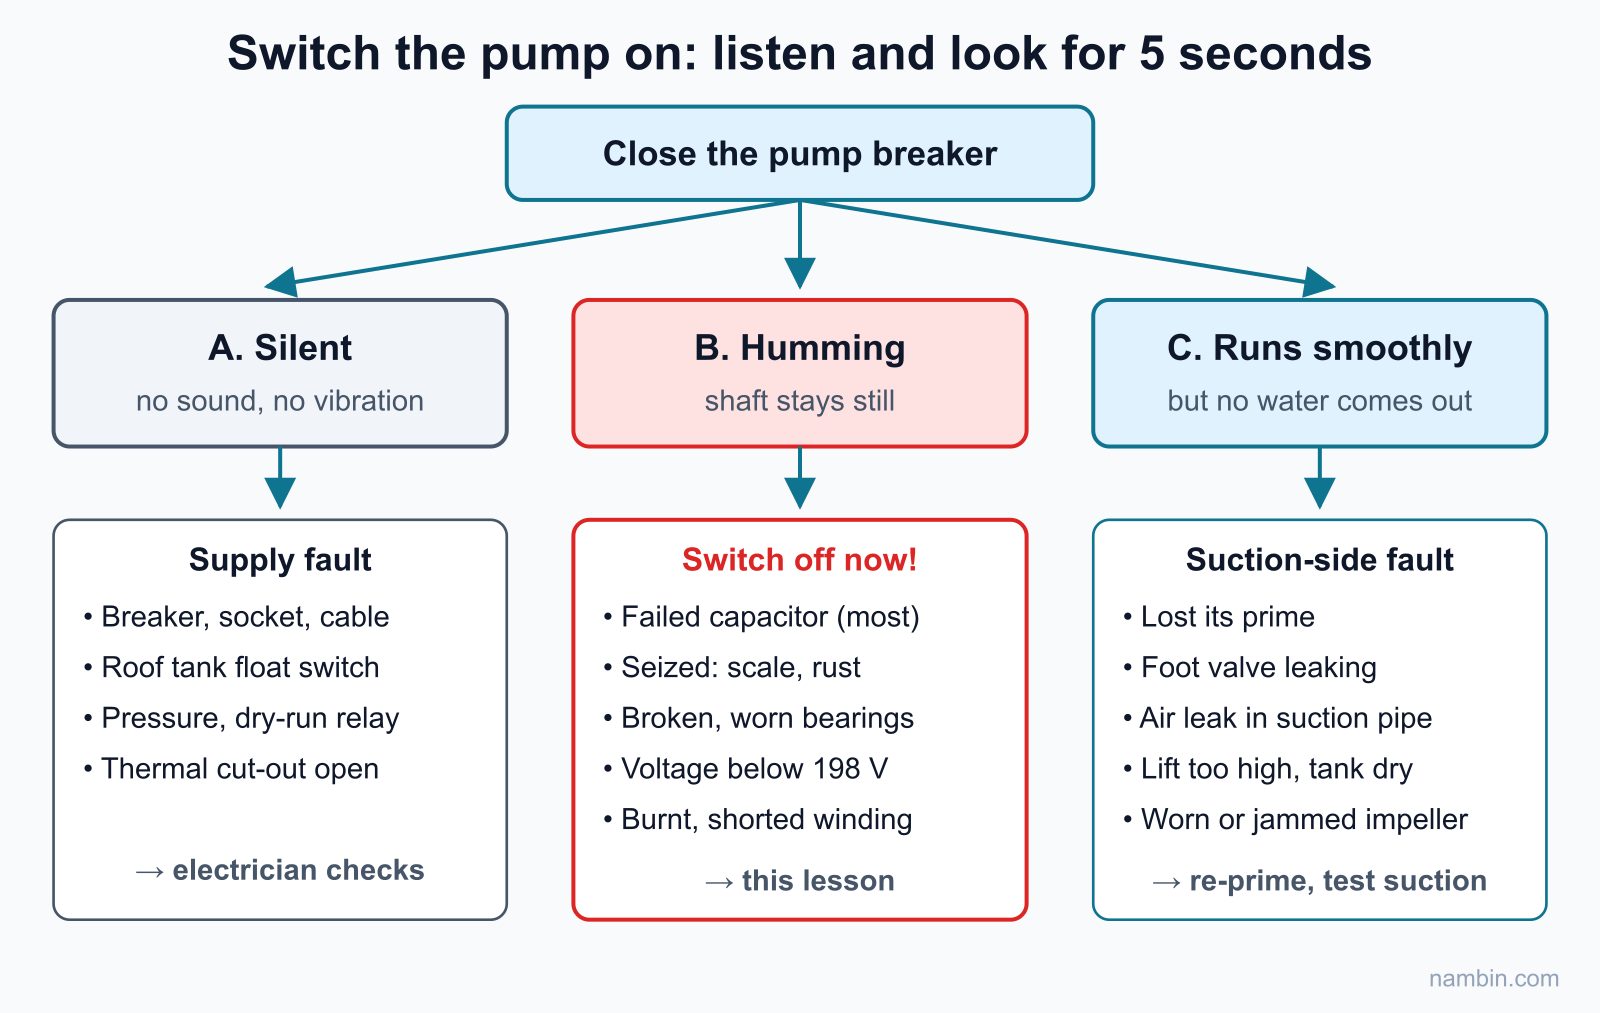
Customers usually say the same thing on the phone: "the pump isn't pumping water". A plumber has to ask more questions and listen for himself, because that sentence covers three faults with completely different causes. Figure 1 shows how to separate them the moment you close the pump breaker.
Three symptoms, three lines of checks
- A. Completely silent: no sound, no vibration. Power is not reaching the motor: a tripped breaker, the roof tank float switch is open, the pressure switch or dry-run relay has not closed, or the motor's internal thermal cut-out is open because it just overheated.
- B. Humming, shaft not turning: current reaches the windings but the motor cannot start on its own. This is the subject of this lesson.
- C. Turning smoothly, air blowing from the fan, but no water: the motor is fine and the fault is on the water side — lost prime, foot valve, air leaks in the suction pipe, lift too high. For that case, read water pump runs but delivers no water, which goes through the suction side step by step.
How to be sure the shaft is not turning
Watch the cooling fan at the back of the motor through the slots in its plastic cover for no more than 3–5 seconds after switching on. If it stays still or only twitches, the shaft is not turning. Never push a finger, stick or screwdriver into the slots while the pump is live.
Why it matters to tell them apart early
With a humming pump the rotor stands still, the current shoots up and the windings get hotter every second. Letting it hum for 1–2 minutes a few times is enough to turn a capacitor job worth a few dollars into a motor rewind.
Why does a single-phase pump motor hum without turning?
Almost every 220 V household pump in Vietnam uses a single-phase induction motor. A little theory explains why the capacitor is the first suspect.
Run winding, start winding and the capacitor
The motor has two windings: the run (main) winding and the start (auxiliary) winding. The run winding alone produces a field that only pulses back and forth. It can keep a turning rotor going, but it cannot pull a stationary rotor into motion. The capacitor in series with the start winding shifts the current in that winding out of phase with the run winding, which creates a rotating field that starts the rotor. Without the capacitor, or with an open start winding, the rotor stays still and all you hear is the iron core humming at 50 Hz. How to identify the common, run and start leads and how to wire the capacitor are covered in how to wire a fan capacitor and a single-phase pump capacitor.
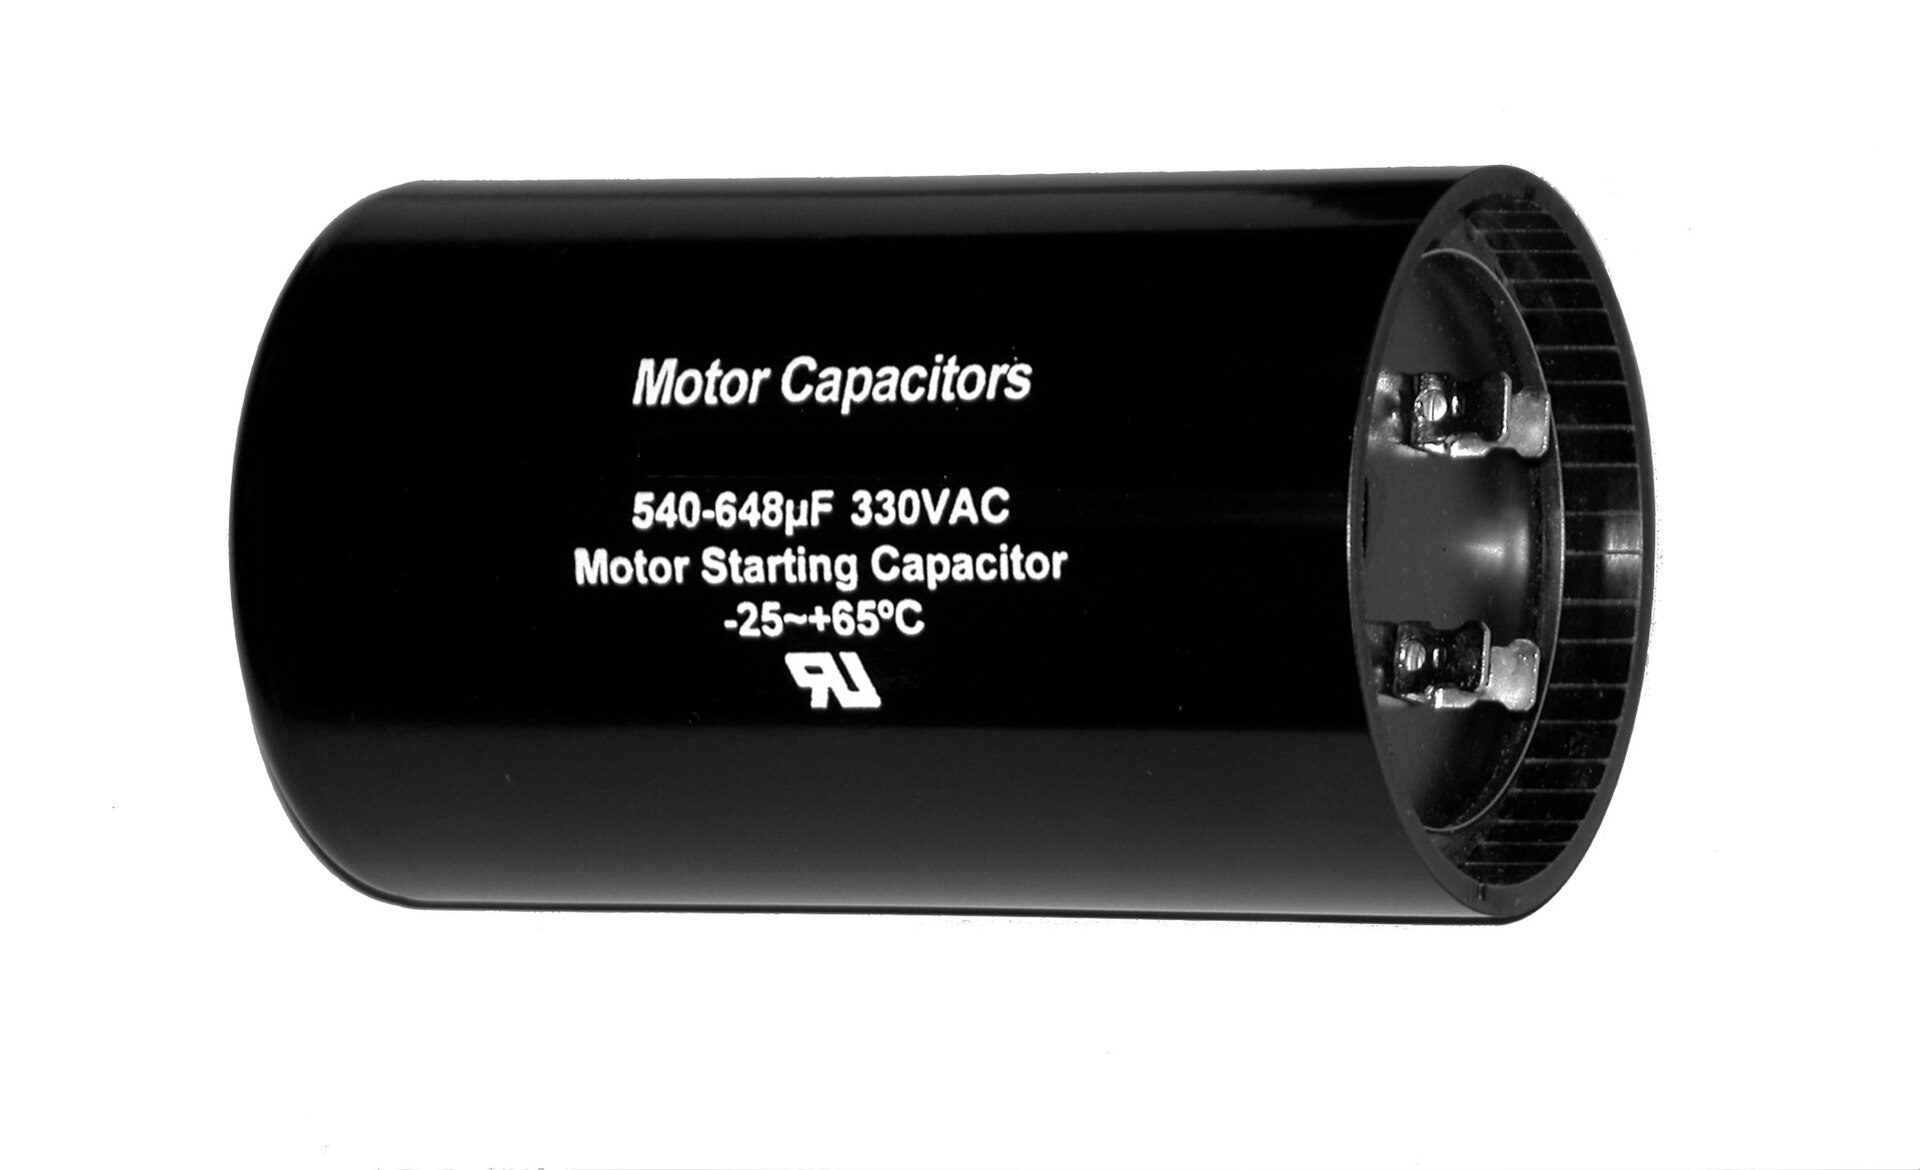
Photo: Elcap / Wikimedia Commons, CC0
Locked-rotor current and the thermal cut-out
When the rotor cannot turn, the motor draws what is called locked-rotor current, typically 4–6 times the rated current on the nameplate. A 370 W pump rated at 3.2 A may draw 13–15 A while humming. Many pumps have a thermal cut-out buried in the winding: it opens when the motor gets hot and closes again after 10–20 minutes of cooling. That is why customers often say "it hums for a while, goes quiet, then hums again" — the cut-out is saving the winding; the pump has not "fixed itself".
Four groups of causes
- Failed capacitor: capacitors dry out and lose µF over the years, especially on pumps standing in the sun. A weak capacitor may still start the pump when it is cool, then fail on hot days or when the supply is weak.
- Mechanical seizure: a pump left idle for weeks (a family away for Tet, a closed-up house) can have scale and rust gluing the impeller to the casing or the seal faces to each other; grit or small stones can jam the impeller; bearings can break or run dry.
- Low voltage: end of a long line, undersized supply cable, peak hours. Below roughly 198 V (220 V minus 10%) the starting torque drops sharply, and even a good capacitor may not be enough.
- Winding fault: an open start winding, shorted turns after repeated long humming, or moisture in the winding. Usually there is a burning smell, an unusually hot body, and the breaker may trip.
How to check a humming water pump: 6 steps
The checks go from those needing no tools to those needing meters, as in Figure 3. Following the order keeps you from stripping a whole pump because of a capacitor.
Tools to bring
- Voltage tester and a multimeter with AC volts, ohms and capacitance (µF) ranges.
- Clamp meter; a 500 V insulation tester if you have one.
- A capacitor discharge resistor of 10–20 kΩ, 5 W, on insulated clip leads.
- Screwdrivers, spanners, gloves, a funnel and a bucket of clean water.
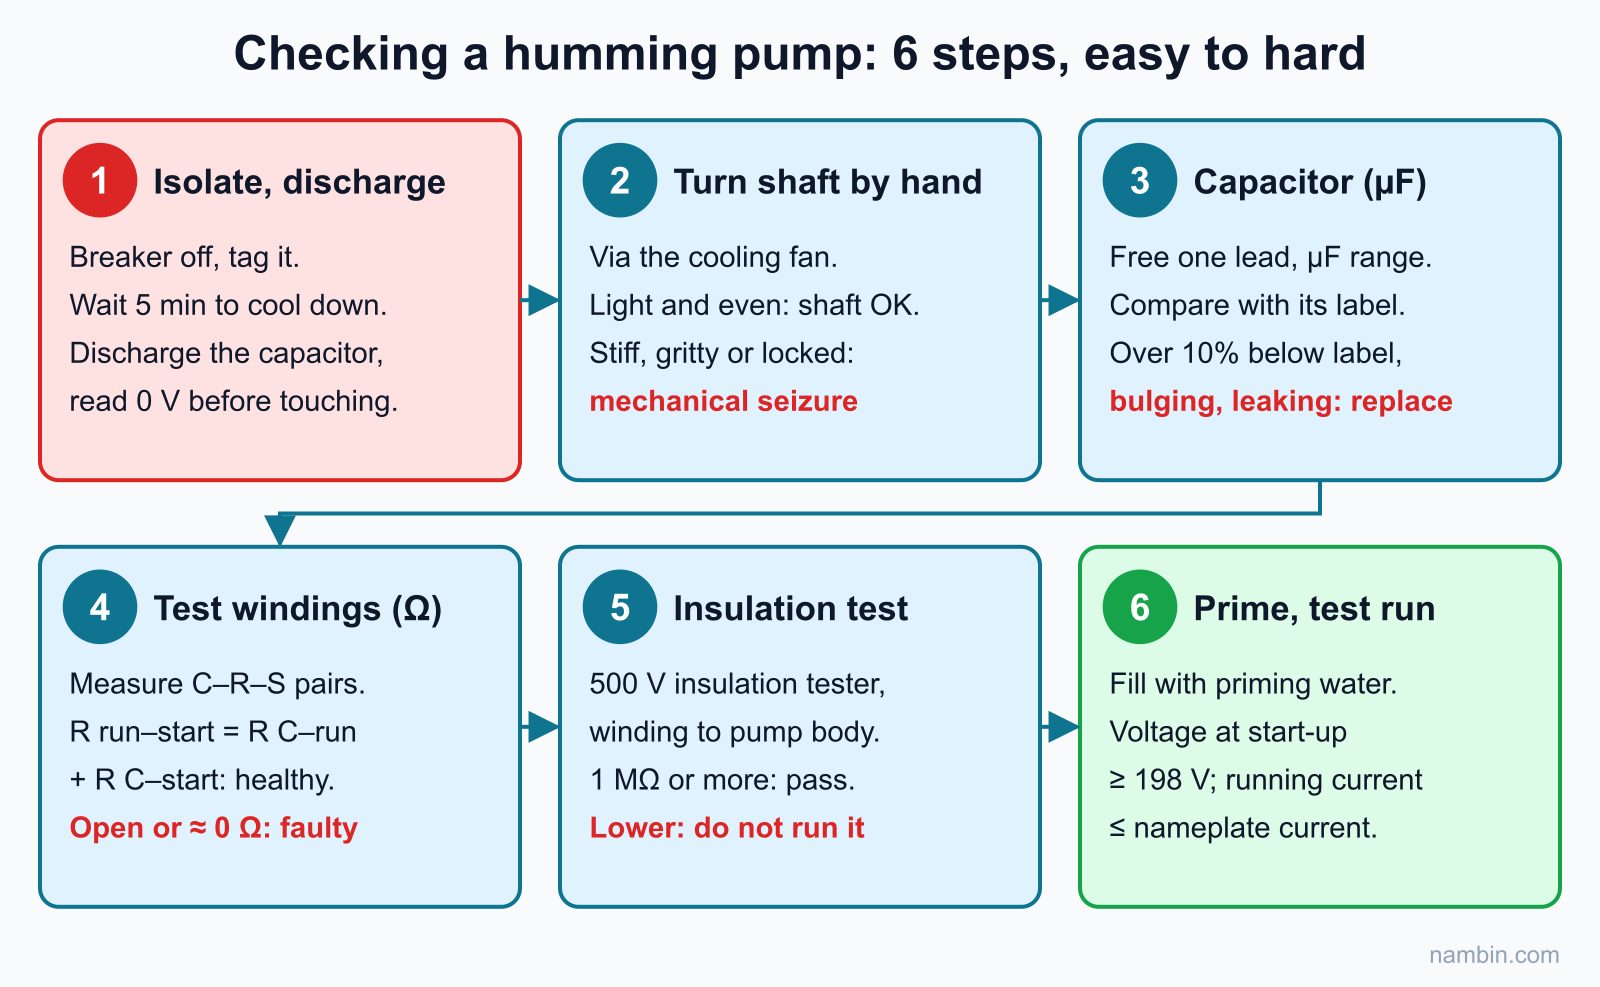
The steps
- Isolate and discharge. Switch off the pump's own breaker, unplug it if it has a plug, and hang a "work in progress" tag. Wait about 5 minutes for the motor to cool. Open the capacitor box, clip the discharge resistor across the capacitor terminals for 5–10 seconds, then measure across them: only touch once it reads 0 V.
- Turn the shaft by hand. Remove the fan cover and turn the fan by hand. If the shaft is light and even and coasts a few turns, the mechanical side is fine. Stiff all the way round means scale or rust; heavy at certain points or gritty means debris or bearings.
- Test the capacitor. Disconnect one lead and measure on the µF range, then compare with the value printed on it. More than 10% below the label, or a bulging top, cracked case or leaking oil, means a new capacitor with the same µF and an equal or higher voltage rating.
- Test the windings. Disconnect the leads from the capacitor and the supply and measure the resistance of the three pairs. In a healthy motor, R run–start equals R common–run plus R common–start, and R common–start is higher than R common–run. An open circuit on one pair means a broken winding; close to 0 Ω or far off the norm means shorted turns.
- Test the insulation. Use a 500 V insulation tester between a winding lead and the pump body. 1 MΩ or more passes for a household pump; anything lower means a damp or damaged winding, so do not switch it on again.
- Prime and test run. Reassemble, fill with priming water and switch on. Measure the voltage at the pump terminals at the moment of starting (198 V or more), and clamp the supply lead: the running current must not exceed the nameplate figure.
Reading the results
Shaft seized but capacitor and windings fine: a mechanical fault. Shaft free but capacitor low on µF: a new capacitor fixes most cases. Windings open, shorted or poorly insulated: send the pump to a motor rewinder or replace it. Low voltage at start-up: fix the supply cable, not the pump.
Safety warning: always switch off the breaker and confirm with a tester before opening the capacitor box or the fan cover. A capacitor can stay charged after the supply is off: discharge it through a resistor and never short the terminals with a screwdriver. Never push the shaft to "help it start" while it is live. Outdoor pumps need an earth connection and a 30 mA RCD. Reconnecting the supply, running new cable or replacing the breaker should be left to an experienced electrician.
Quick reference: symptom, cause, fix
The last column shows which jobs a plumber can do and which need an electrician or a motor rewinder.
| Symptom | Usual cause | Check | Fix | Who |
|---|---|---|---|---|
| Hums; shaft turns freely by hand; starts if the fan is pushed | Failed capacitor, low µF | Measure µF against the label | Replace with the same µF | Plumber with a meter |
| Hums; shaft stiff after the pump stood idle | Scale or rust gluing impeller or seal | Turn the shaft, open the casing | Free it, clean, replace a leaking seal | Plumber |
| Hums; shaft heavy at points, gritty | Debris jamming the impeller; broken bearing | Open the casing, rock the shaft | Remove debris, replace bearings | Plumber or pump repairer |
| Hums at peak hours, starts early in the morning | Low voltage, undersized cable | Measure voltage at start-up | Larger cable, voltage stabiliser | Electrician |
| Hums, burning smell, breaker trips | Shorted or burnt winding | Ohms on three pairs, insulation test | Rewind or replace the pump | Motor rewinder |
| Hums, goes quiet, hums again | Thermal cut-out opening and closing | As rows 1–3 | Find the root cause; stop the cycling | Depends on the cause |
Fixing each cause
Failed capacitor: same µF, same or higher voltage
Fit a capacitor with the same µF as the old one or the pump nameplate, rated for an equal or higher voltage (450 V can replace 400 V, not the other way round). Do not fit a bigger one to make the pump "stronger": the start winding will be overloaded and can burn out within weeks. Test new capacitors before fitting them, as low-value parts are not rare. Take a photo of the wiring before you disconnect anything.
Shaft seized by scale and rust after standing idle
Pumps that stand unused in damp places or with hard water seize easily: the impeller sticks to the casing and the seal faces stick together (see Figure 4). To free it: isolate, drain, and rock the cooling fan back and forth a little at a time. If it is very stiff, many pumps have a slot in the end of the shaft where you can seat a flat screwdriver and tap gently. If that fails, open the pump casing, clean out the scale and check the mechanical seal: if water has been seeping from the shaft, replace the seal at the same time.
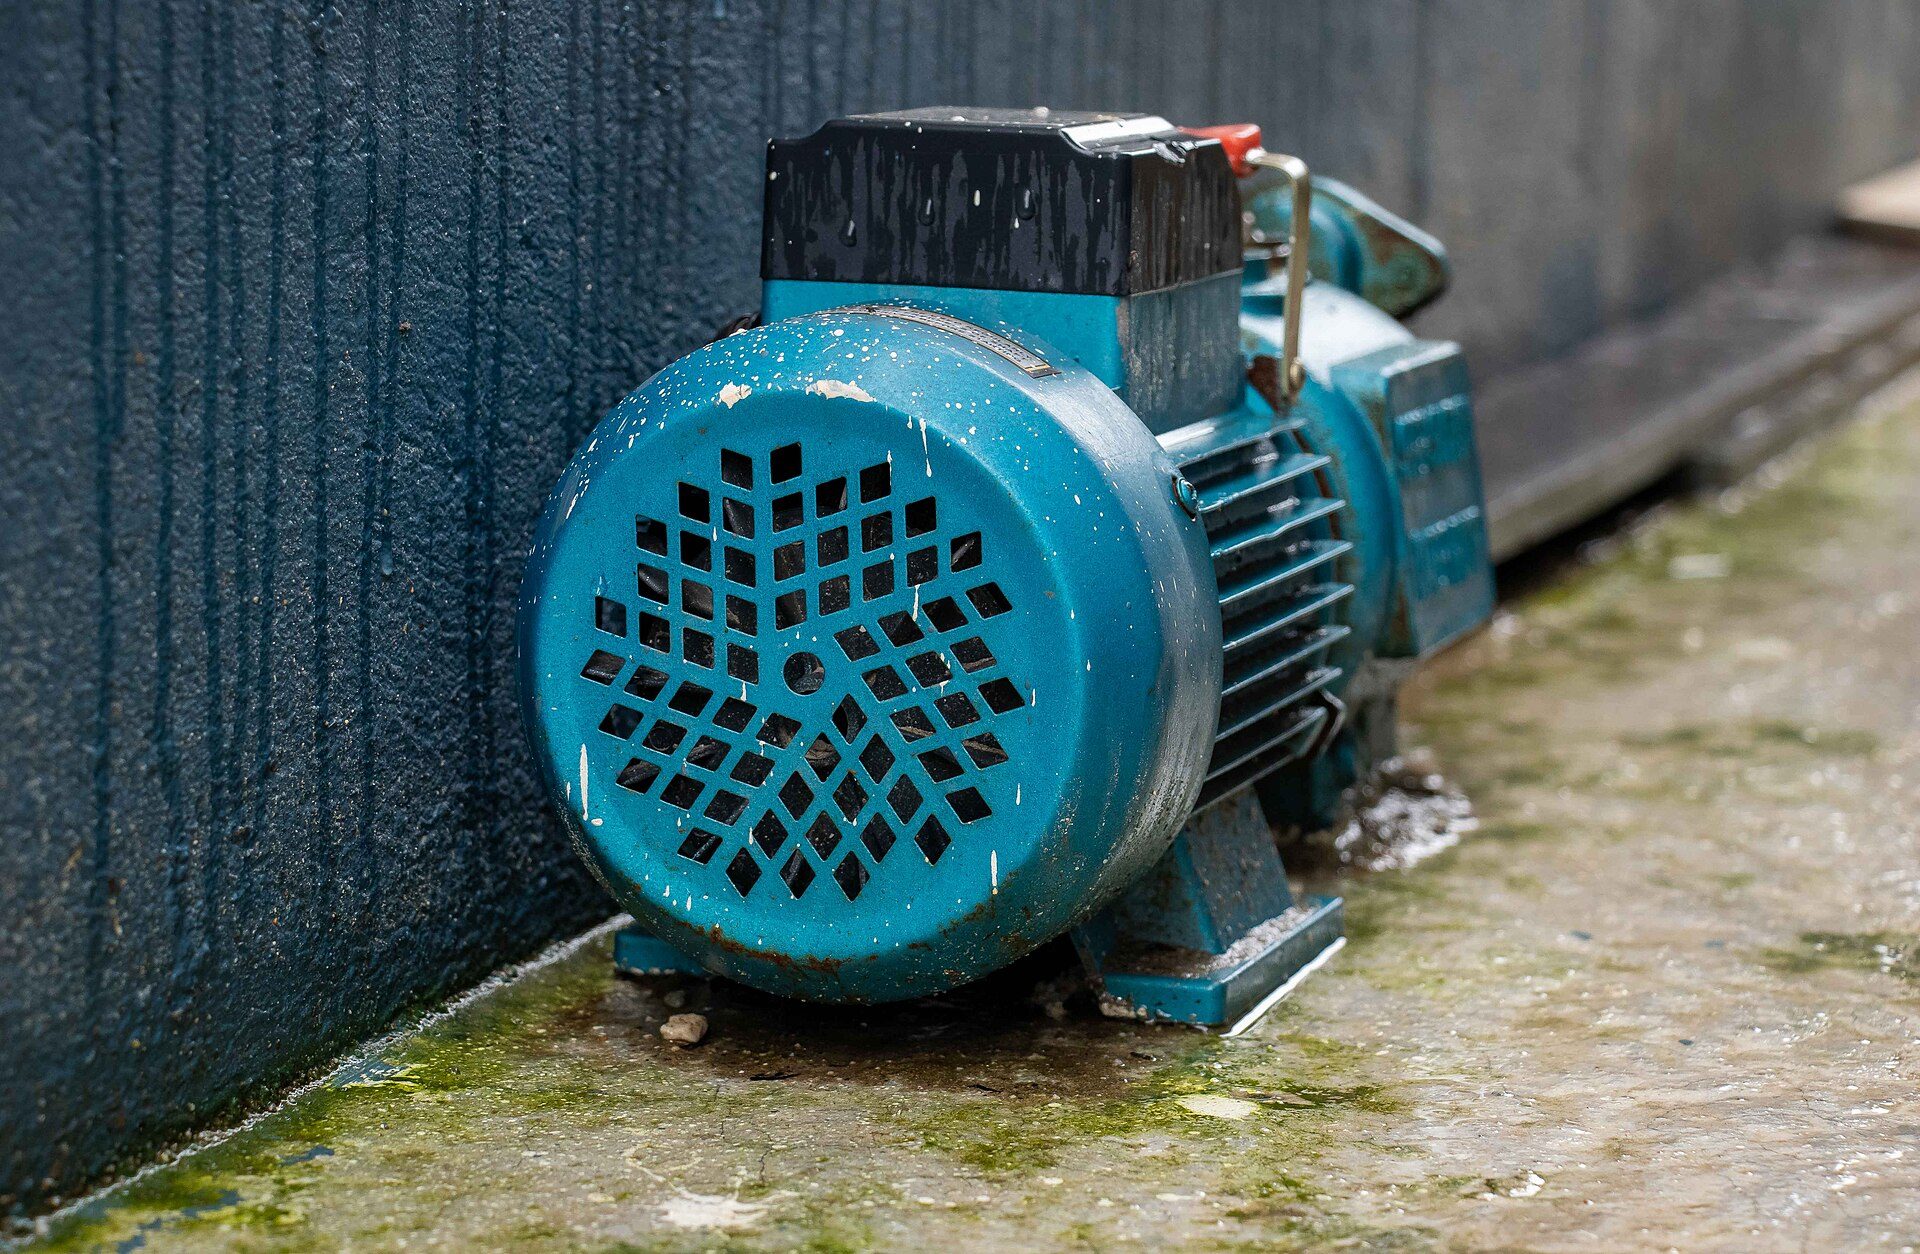
Photo: Bijay Chaurasia / Wikimedia Commons, CC BY-SA 4.0
Jammed or worn impeller and failed bearings
Pumps drawing from an underground tank without a strainer, or with a torn one, often swallow grit, plastic string or snail shells that jam the impeller. Open the casing, remove everything and check the impeller for cracks or chipped vanes (Figure 5 shows the shapes of different impellers). Rock the shaft sideways: play, or a rough feel when turning it by hand, means the bearings are gone and both should be replaced. Running on with failed bearings lets the rotor rub against the stator and burns the winding.
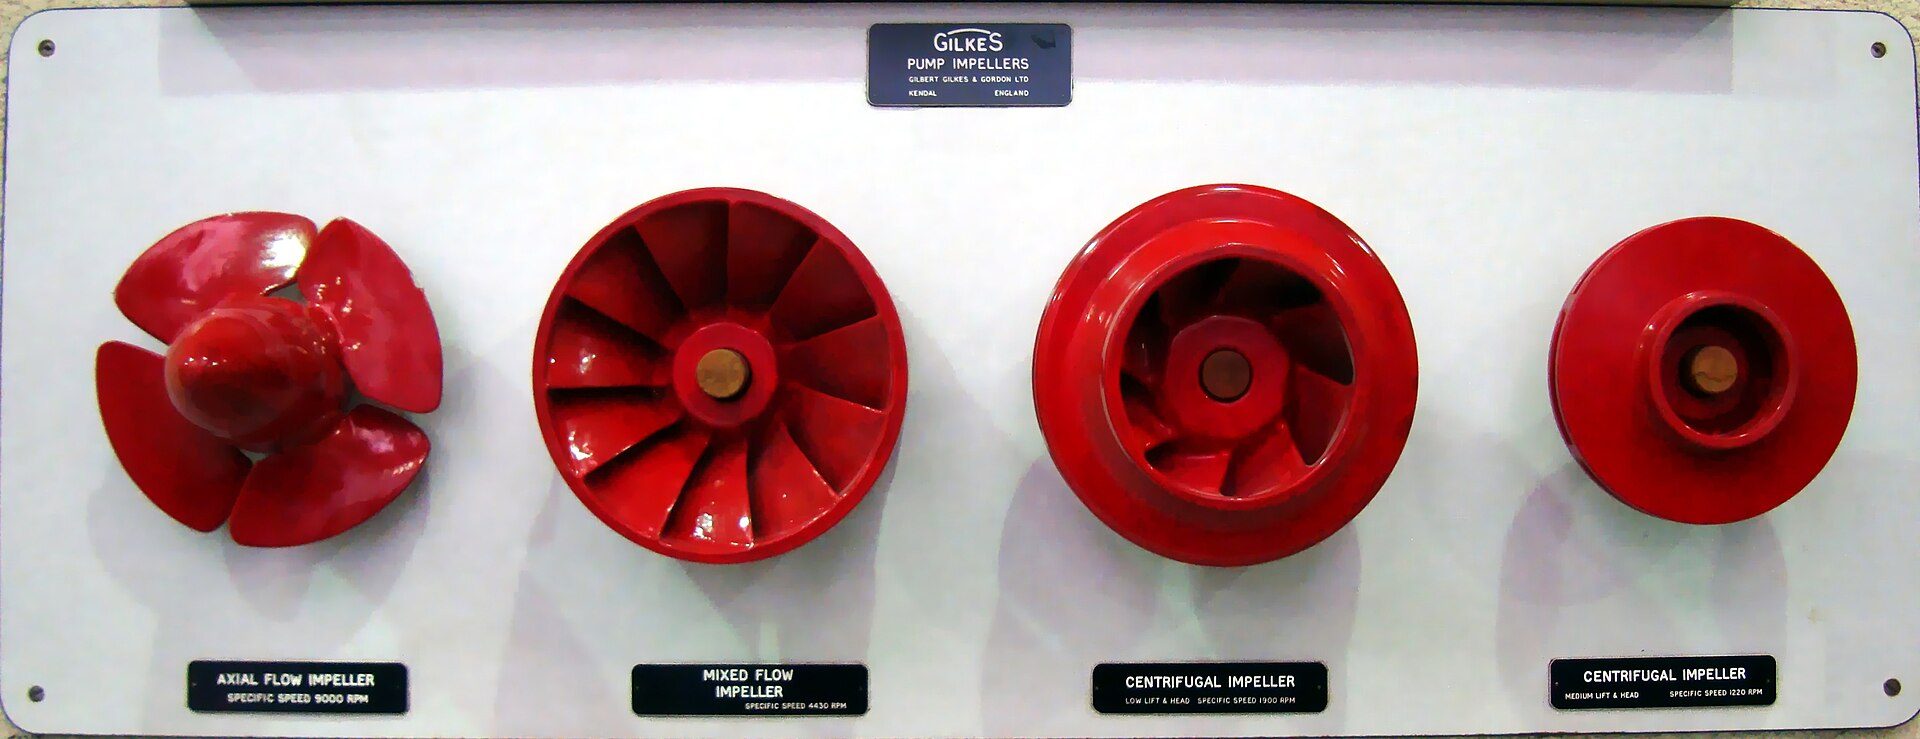
Photo: Meisam / Wikimedia Commons, CC BY-SA 3.0
Low voltage and burnt windings
A pump installed far from the house, as in Figure 6, has a long and often thin supply cable. At start-up the voltage can sag badly even though it reads a full 220 V with no load. That is why you measure at the pump terminals at the moment of switching on. Below 198 V, ask an electrician to upsize the cable or run a dedicated circuit. If the winding is burnt, shorted or below 1 MΩ insulation, the plumber stops there: compare the price of a rewind with a new pump of the same type and let the customer choose. For pumps under 0.5 kW a new pump usually makes more sense.
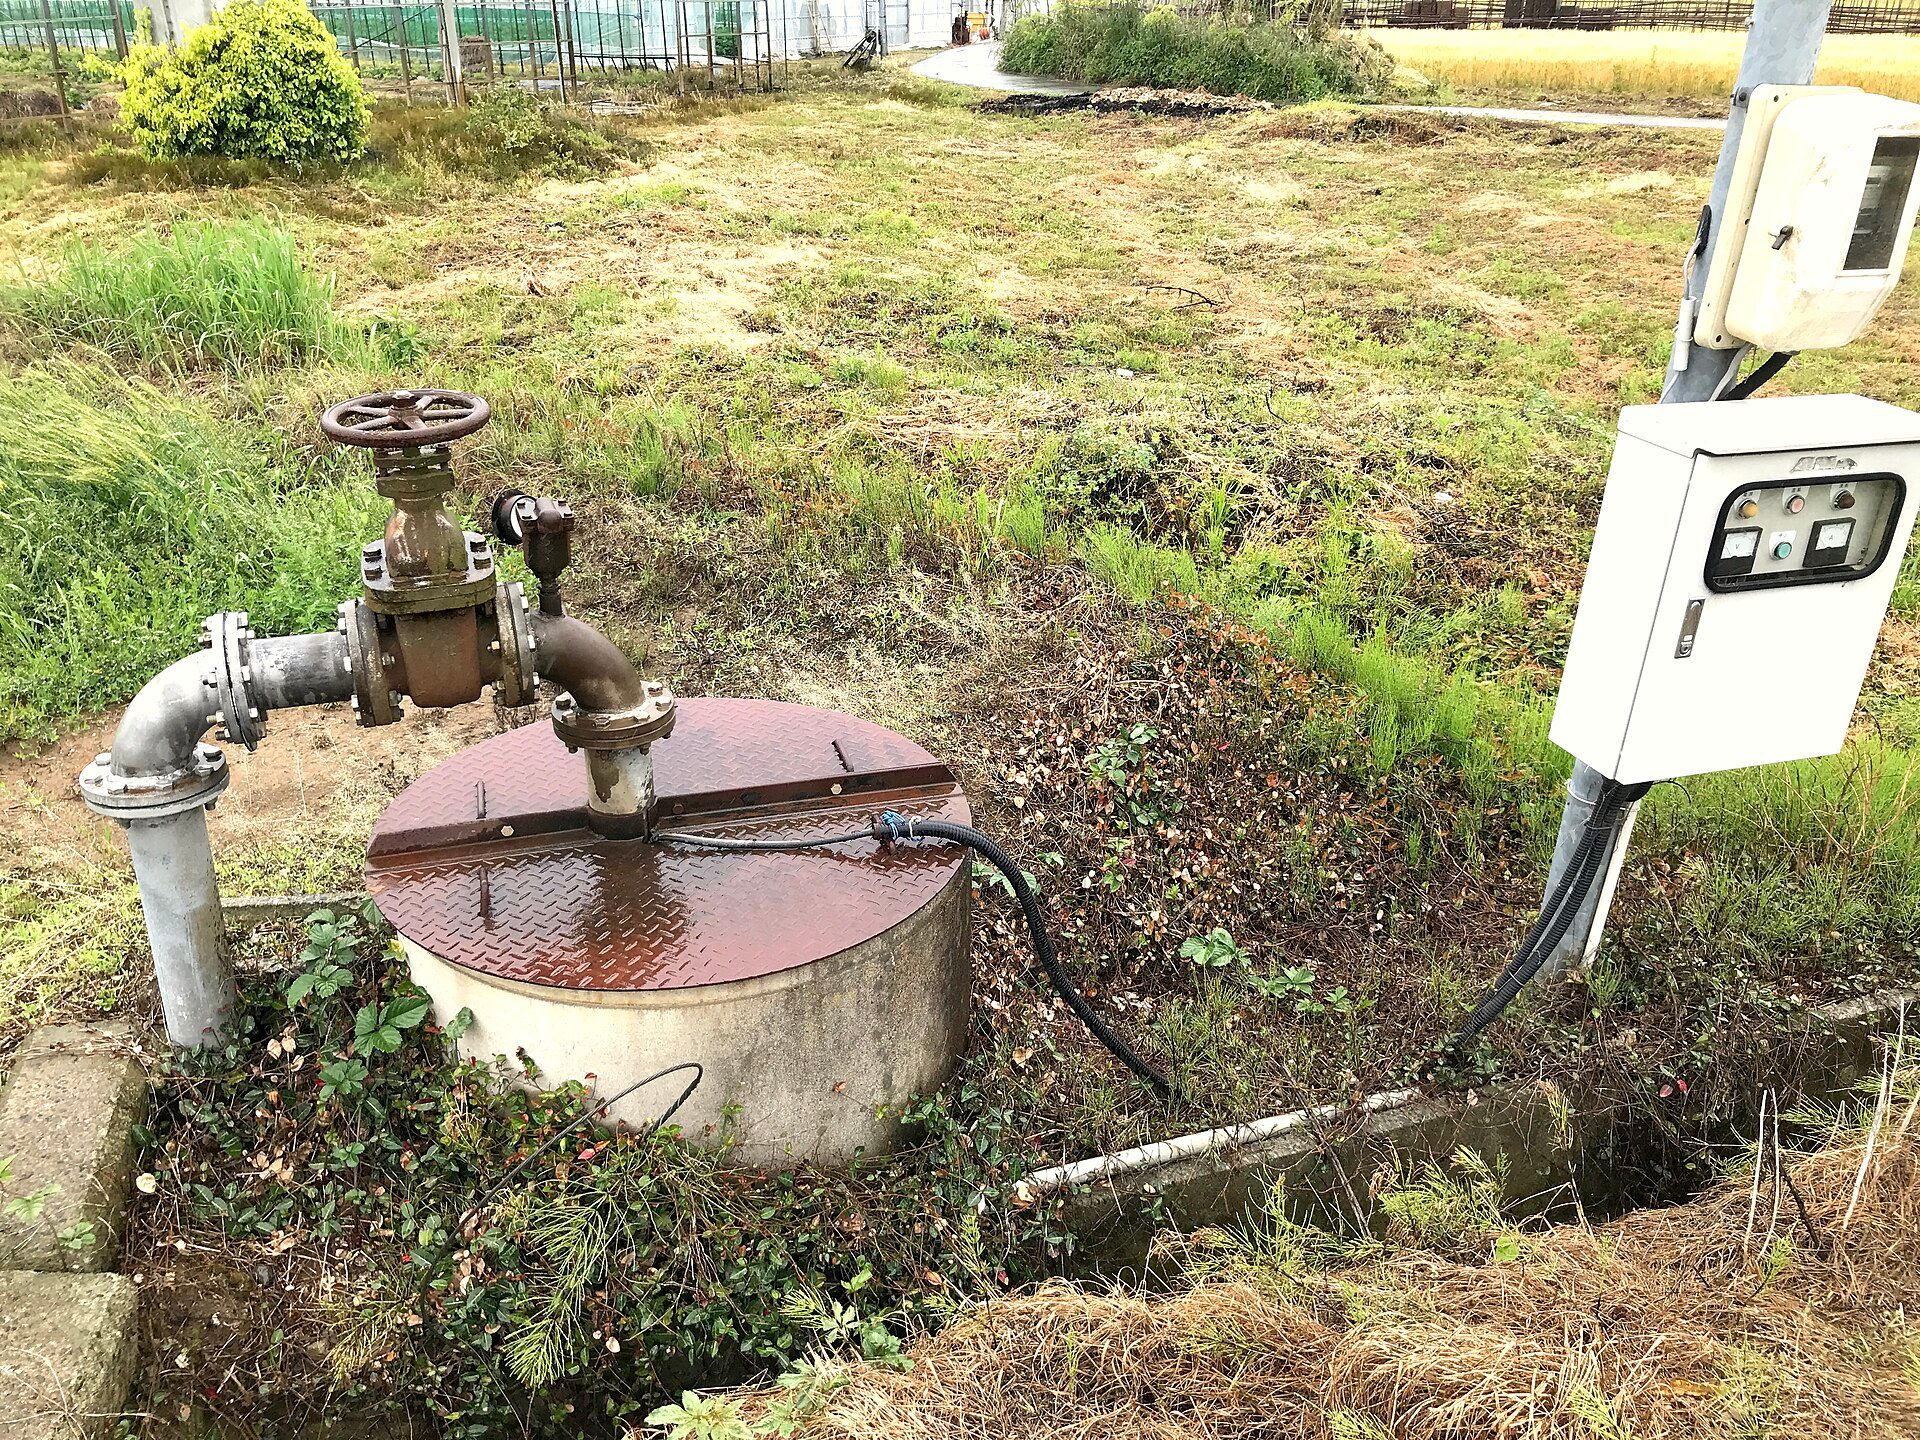
Photo: Peka / Wikimedia Commons, CC BY-SA 4.0
Once the pump turns again: priming and checking the suction pipe
After the repair, the pump may turn but still deliver no water because the priming water drained out when it was opened. That is not a new fault.
How to prime a water pump
- Switch off. Open the priming plug on top of the pump body; if the delivery pipe has a valve, close it so water does not run back.
- Pour clean water slowly through a funnel until it overflows the priming hole with no more air bubbles. With a long suction pipe you will need several rounds, as water keeps running down to fill it.
- Screw the priming plug back tight with its washer, open the delivery valve and switch on.
- Watch for 1–2 minutes. No water: switch off and prime once more. If the second attempt fails, the suction side has a fault; do not keep running it.
Finding air leaks on the suction pipe
The suction pipe is below atmospheric pressure, so a leak does not drip water; it draws air in and is hard to see. With the pump running, brush thick soapy foam or shaving foam onto each joint, thread and the foot valve neck within reach: where the foam is sucked in or you hear a faint hiss, air is getting in. If the pump is fully primed overnight and the water level has dropped by morning, the foot valve or suction pipe is leaking. For foot valves and suction lift limits, see water pump runs but delivers no water.
Never let the pump run dry for long
The mechanical seal is lubricated and cooled by water; a few minutes of dry running overheats and cracks the seal faces, and then water seeps into the bearings and the motor. A pump drawing from an underground tank should have a float or dry-run relay to stop it when the tank is empty; how to fit floats, pressure switches and where to place the pump is in installing the water pump, rooftop tank and water heater in a townhouse.
Worked example: a 3-storey house pump humming after a holiday
A 3-storey townhouse has a 370 W (0.5 HP) pump lifting water from an underground tank to the roof tank. The nameplate reads 220 V – 3.2 A and the capacitor is marked 12 µF 450 V. The owners were away for 3 weeks; when they switched the pump on it hummed, and they tried it on and off 4–5 times. The house uses a 25 mm delivery pipe as in pipe size for a 3-storey house, so the pipework is not the first suspect.
Steps 1–2: safety and turning the shaft
Breaker off, wait 5 minutes, discharge the capacitor and confirm 0 V across it. With the fan cover off, the shaft is a little stiff at first but frees up after rocking it a few times and then turns smoothly. There was light sticking after 3 weeks idle, but it is free now, with no grittiness and no play.
Steps 3–5: capacitor, windings, insulation
- Capacitor: 3.1 µF against a label of 12 µF, only about 26% left (3.1 ÷ 12 ≈ 0.26). Failed.
- Windings: common–run 9.8 Ω; common–start 18.6 Ω; run–start 28.4 Ω. Check: 9.8 + 18.6 = 28.4 Ω, which matches; the start winding is higher than the run winding, as it should be. The windings are fine.
- Insulation from winding to body: above 100 MΩ, a pass.
Step 6: new capacitor, priming, test run
Before replacing it, one 3-second trial with the clamp meter shows 13.5 A while humming, about 4.2 times the nameplate (13.5 ÷ 3.2 ≈ 4.2) — consistent with locked-rotor current. A new 12 µF 450 V capacitor is fitted (it measures 12.2 µF), the pump is primed and switched on. Voltage at start-up is 212 V, water arrives after about 40 seconds and the running current is 2.9 A, below the 3.2 A on the nameplate. Pass.
| Item | Time | Cost (reference 2026, varies by area) |
|---|---|---|
| Isolate, discharge, free the shaft | 10 min | — |
| Test capacitor, windings, insulation | 15 min | — |
| Replace the 12 µF 450 V capacitor | 10 min | 45,000 VND (parts) |
| Prime, test run, measure current | 10 min | — |
| Call-out labour | — | 200,000 VND |
| Total | 45 min | 245,000 VND |
Check: 10 + 15 + 10 + 10 = 45 minutes; 45,000 + 200,000 = 245,000 VND (about US$9–10). Capacitor prices range roughly from 30,000 to 80,000 VND depending on size and type, and labour is about 150,000–300,000 VND per call-out, as a 2026 reference that varies by area. If the winding had been burnt, you would give the customer two options with a price for each: rewind or a new pump.
Common mistakes when repairing a humming pump
Switching it on and off "to see if it starts"
Sign: the motor is scorching hot from repeated tries. Cause: thinking the pump is just "stubborn". Avoid it: limit each try to 3–5 seconds; if it does not turn, switch off and follow the 6 steps.
Pushing the fan with a stick while it is live
Sign: the pump runs after someone pokes a stick into the fan slots. Cause: a failed capacitor; the push does the capacitor's job. Avoid it: this is only a diagnostic clue, not a repair, and it risks trapped fingers and electric shock. Switch off and replace the capacitor.
Not priming after replacing the capacitor
Sign: the pump turns smoothly with no water and the plumber suspects the new capacitor. Cause: the priming water ran out when the pump was opened. Avoid it: always prime fully before the test run and watch for water within 1–2 minutes.
Frequently asked questions
What does it mean when a water pump hums but won't start?
Most often a failed capacitor; next, a shaft or impeller seized by scale, rust, debris or bearings; less often low voltage or a burnt winding. Switch off at once, turn the shaft by hand, then test the capacitor to narrow it down.
My pump hums and no water comes out. Has it lost its prime?
No. A pump that has lost its prime still turns smoothly; it just delivers no water. Humming with a still shaft is an electrical or mechanical fault, and no amount of priming will help.
The pump runs but no water comes out. What should I check?
Check the suction side: tank water level, priming water, foot valve and strainer, air leaks in the suction pipe, suction lift and a worn impeller — following the dedicated lesson linked above.
How do you prime a water pump?
Switch off, open the priming plug on top of the pump, pour in clean water until it overflows with no bubbles, screw the plug back tight, switch on and watch for 1–2 minutes. If two primings fail, there is a leak on the suction side or the foot valve is not sealing.
Practical exercise and self-assessment
Exercise
- On a single-phase pump (an old one or your own): isolate it, discharge the capacitor, measure and record the voltage across it.
- Turn the shaft by hand and note whether it is light, stiff, gritty or has play.
- Measure the capacitor in µF, compare with the label and work out the percentage left.
- Measure the three winding pairs and check whether R common–run + R common–start equals R run–start.
- Prime, test run, measure the start-up voltage and running current; draw up a time and cost table like the example.
Self-assessment criteria
- Pass: 0 V confirmed before touching the capacitor; each powered try lasts no more than 5 seconds.
- Pass: correctly concludes one of the four groups of causes with measurements to back it up; the resistance sum and cost table add up.
- Not yet: pushes the fan while live, fits a capacitor of a different µF, or test-runs without priming.
Diagnosing pumps correctly is part of the step Pumps, water tanks & water heaters. The next step on the roadmap is Fixing common leaks & blockages, where you practise the same "listen, measure, narrow it down" approach on leaking taps, concealed pipes and household blockages.
Want to learn plumbing properly? Follow NAMBIN's 8-step roadmap for residential plumbers — from choosing pipe and welding PPR to supply lines, pumps and taking on jobs. When a customer's pump has a burnt winding and must be replaced, open the pump and pipe calculator to pick a pump with the right head and flow.