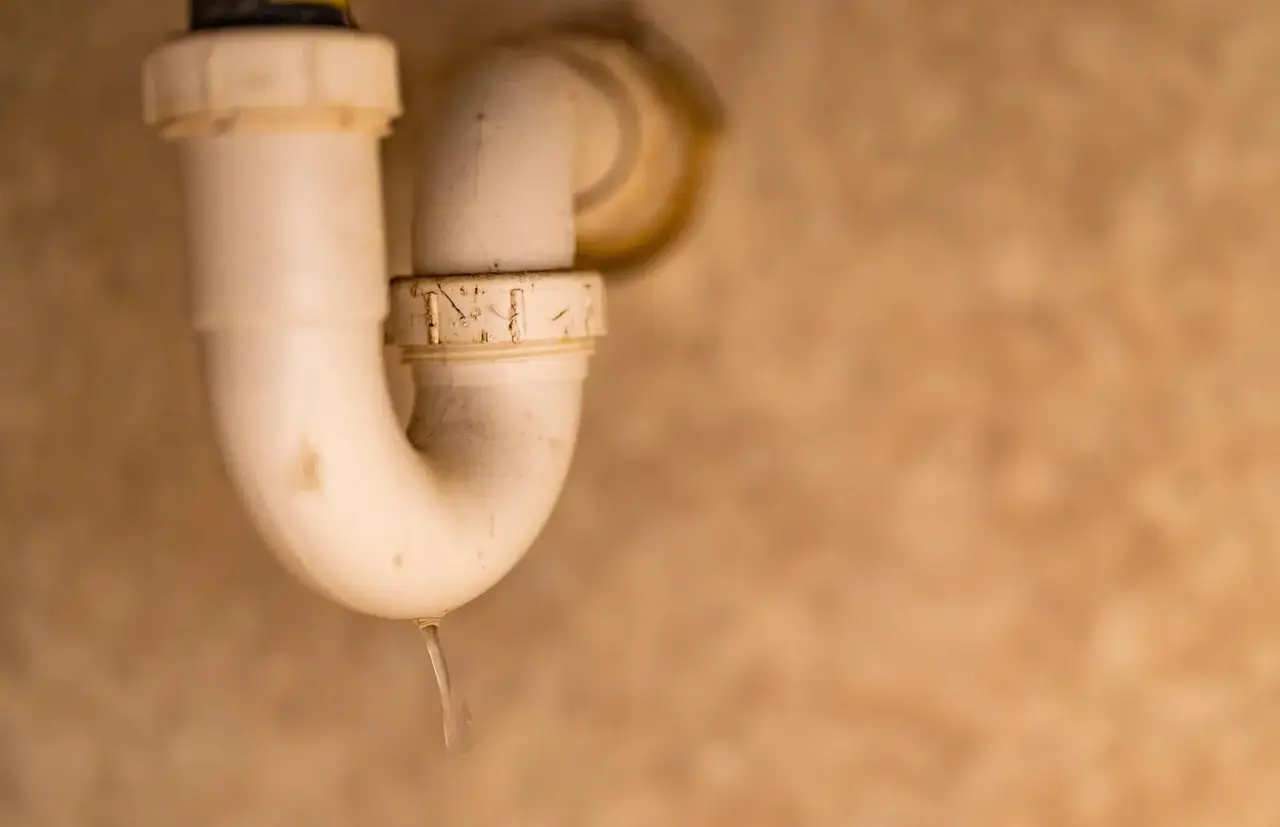
A wet cabinet floor under a basin or kitchen sink is one of the most common call-outs for a residential plumber. "The sink is leaking" can mean four different things: a supply connection under pressure, a drain joint that leaks only when water runs away, an overflow that leaks only when the bowl is full, or water getting past the rim of the sink. Each has a different fix, so a good plumber first finds exactly where the water comes from, and only then picks up a spanner.
This guide covers the drain side: slip-joint nuts and washers, kitchen basket strainers, basin pop-up (click-clack) wastes, the connection into the wall or floor pipe, leak testing, replacing parts and customer handover.
Before you start. Unplug anything electrical in the sink cabinet (water heater, RO purifier pump, waste disposer) and wear gloves: trap water is dirty and may contain drain chemicals. Sizes and tightening amounts here are for reference only; follow the instructions supplied with the parts you fit.
What this article does not cover
Related jobs have their own NAMBIN articles: fixing a dripping faucet and unclogging a bathroom sink, replacing a kitchen sink mixer tap (supply hoses and angle valves), drain pipe slope and bathroom odours and installing washbasins and other fixtures.
Tools and materials
Tools: torch; dry paper towels or tissue (your best leak detector); a shallow tray or bucket; old towels; gloves and safety glasses; large adjustable (water-pump) pliers with cloth-wrapped jaws; an adjustable spanner; a plastic scraper; an old toothbrush; a phone camera to record how things were assembled.
Materials: assorted tapered slip-joint washers, flat washers and O-rings, plumber's putty suited to the sink material or neutral-cure sanitary silicone, degreaser, and a spare plastic bottle trap and waste hose. Buy exact parts after inspection.
Step 1: Make it safe and dry everything
Isolate electrics. Unplug the water heater, RO unit or disposer, or switch them off at their breaker. Never touch a cabinet socket with wet hands.
Ask about chemicals. If drain cleaner has been used, assume the trap water is corrosive: wear glasses and gloves, open joints slowly over a bucket and flush with plenty of water. Never add a second chemical; mixing products (for example bleach with an acid cleaner or ammonia) can release dangerous gases.
Empty the cabinet and photograph the base board. Swollen chipboard means a long-term leak.
Dry every surface: pipes, nuts, the underside of the bowl and the cabinet floor. You cannot find a small leak on wet pipework.
Watch the edges. The underside of a stainless sink and a stone worktop cut-out can be very sharp; keep gloves on.
Step 2: Locate the drip – supply, drain, overflow or rim?
Water runs along pipes before it falls, so where the drop forms is often not where the water escapes: a drip at the bottom of a U-bend can come from a nut higher up, a tap hose or even the worktop. Work from the top down, one source at a time, with dry tissue wrapped around each joint.
Test A: supply side (under pressure)
With the tap closed, wrap tissue around each angle valve, hose nut and the tap's fixing area and wait a few minutes. Supply leaks continue even when nobody uses the sink. Wet tissue here means a valve, hose or tap problem, not the drain (see the mixer tap article).
Test B: drain side (only when water flows)
Run the tap for a minute with the plug open. Check the tissue at each joint from the top: the waste or strainer under the bowl, the tail-to-trap joint, the trap's own joints and pot, and the outlet into the wall or floor pipe. A drain leak appears only while water flows or shortly after.
Test C: overflow (only when the bowl is full)
Fill the basin until water enters the overflow, with tissue around the waste body underneath. A leak that appears only now points to the seal around the waste's overflow slot or, rarely, a cracked overflow channel inside the basin.
Test D: rim and worktop
If all three tests are dry, splash water around the tap and sink edge as the customer would, then look under the worktop. Water can pass a failed silicone bead around an inset sink or countertop basin and appear underneath, far from any pipe. That is a rim re-sealing job, not a drain repair.
Record which test produced water and where; it stops you replacing parts that were never faulty.
Step 3: Understand the trap you are working on
Tubular P-traps and S-traps
Kitchen sinks and many basins use a tubular trap: a plastic (or, in older homes, chrome-plated brass) U-bend joined to the waste tail and outlet pipe by slip-joint nuts. An outlet into the wall makes it a P-trap; one turning down into the floor, an S-trap. Each nut squeezes a tapered washer into the gap between pipe and fitting.
Bottle traps
Plastic bottle traps are very common under bathroom basins in Vietnam. Water drops down a central tube into a "bottle" with a screw-off lower pot, then rises and leaves through a side outlet. The pot seals with a flat washer or O-ring and can be opened to clear hair.
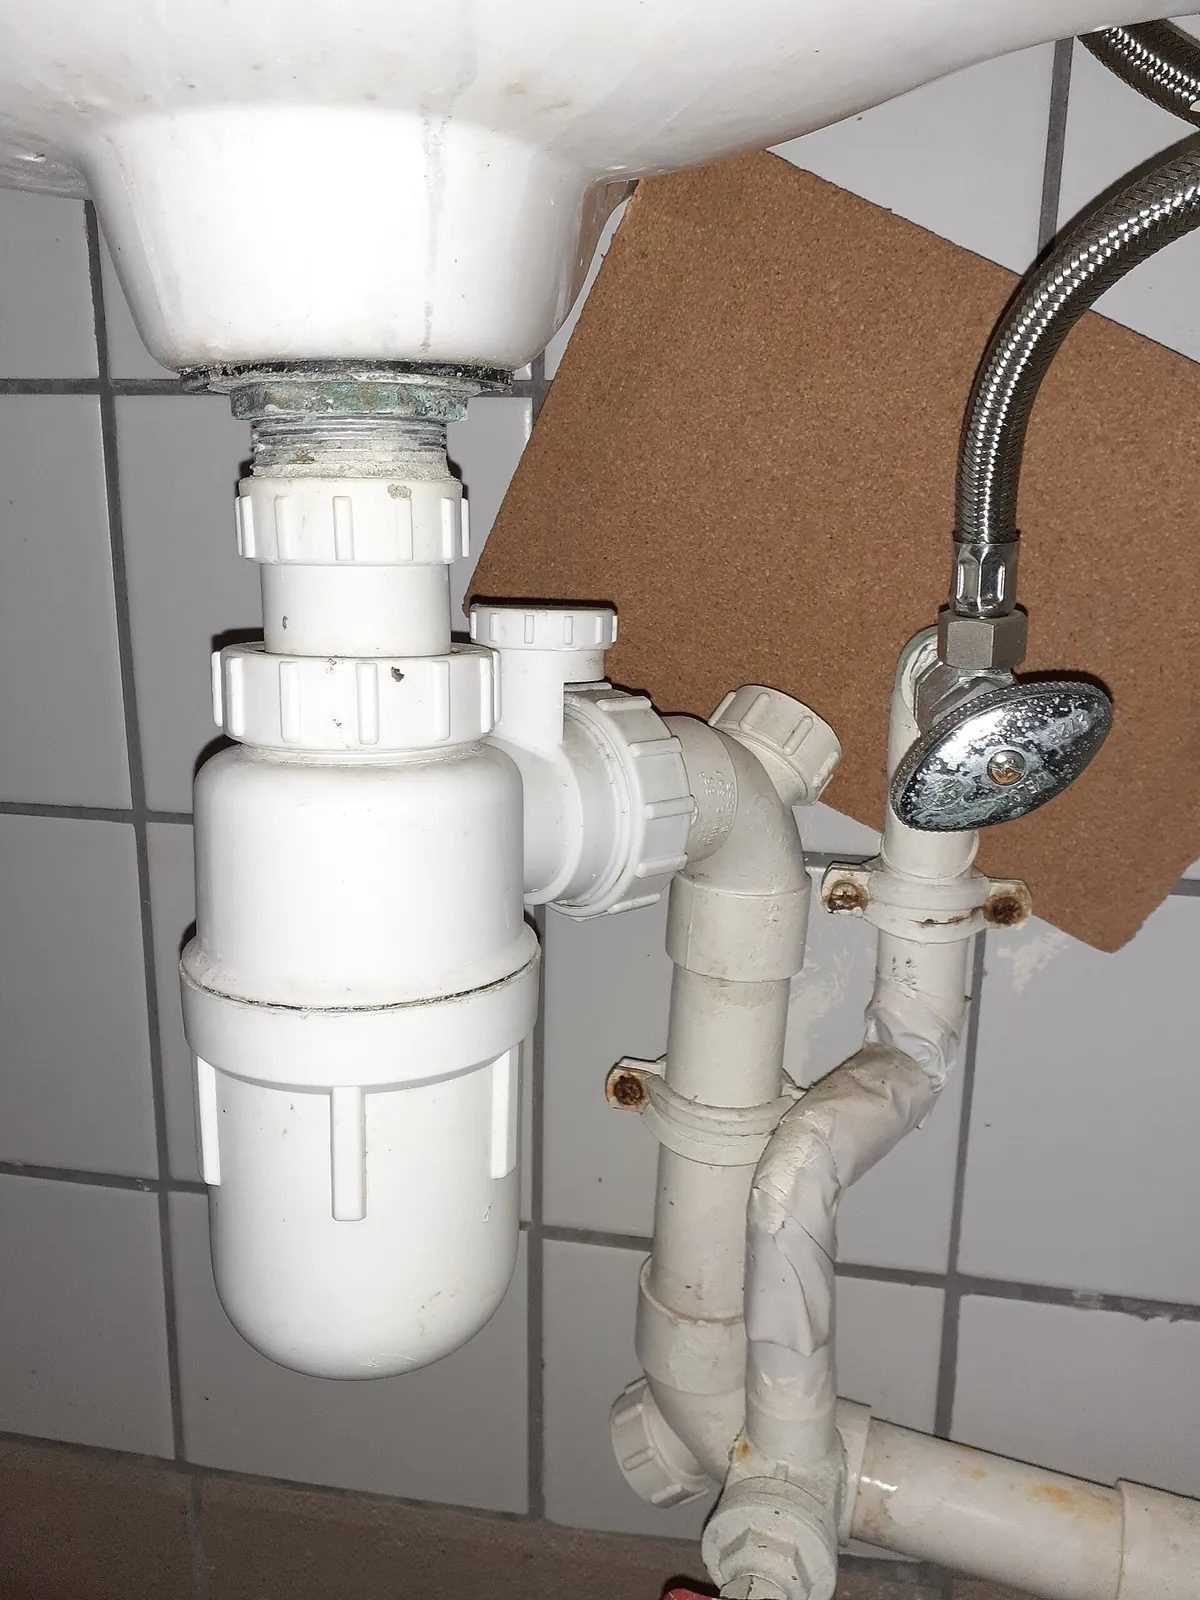
Figure 1. A plastic bottle trap under a wash basin. The waste tail drops into the trap through a slip nut, the lower pot unscrews for cleaning, and the side outlet leads to the waste pipe. Note the corrosion on the metal tail and backnut, a sign to check those parts closely. (Photo: HODmsl SVUR, Wikimedia Commons, CC BY-SA 4.0)
Flexible waste hoses
Many Vietnamese sinks drain through a ribbed flexible plastic hose pushed into a floor or wall pipe. Some hoses form a water-holding bend; others do not, and without a trap anywhere in the line you can expect smells too.
Step 4: Repair slip-joint nuts and washers
Most drain leaks come from slip joints: a nut, a tapered washer and two pipes. They leak when the washer is old, missing, reversed or the wrong size, or when the pipes are not lined up.
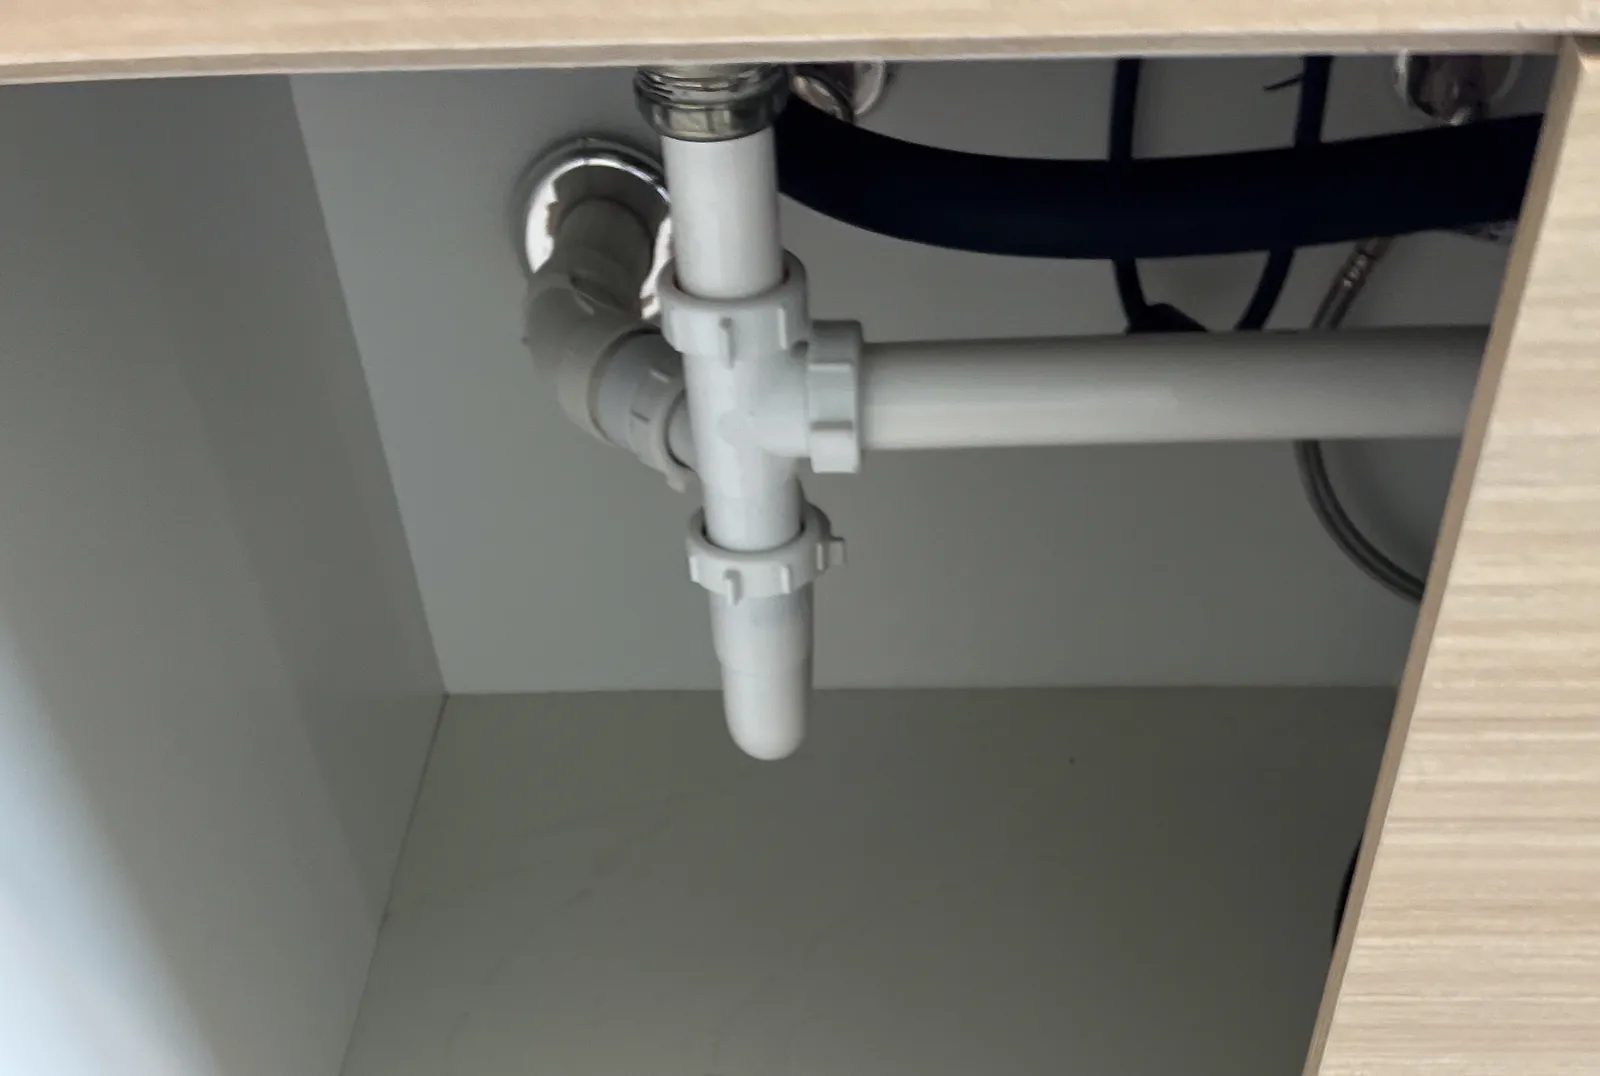
Figure 2. Plastic waste pipework under a sink, with a tee, a U-bend and an outlet into the wall. Every ridged nut here is a joint sealed by a washer inside, not by thread tape. (Photo: Tony Webster, Wikimedia Commons, CC BY 2.0)
Take the joint apart correctly
Put the tray under the trap; it is full of water.
Loosen the nuts by hand if possible, or with cloth-wrapped pliers, holding the pipe so the assembly does not twist.
Lower the trap, empty it into the bucket and brush it clean.
Inspect each washer. Replace any that is hard, cracked, flattened or split, matching size and type.
Fit the washer the right way round
A slip-joint washer is tapered (bevelled) on one side. The bevel points into the joint, toward the threaded fitting the nut screws onto. On the tail-to-trap joint, slide the nut onto the tail first, then the washer with its bevel facing down into the trap; on the trap outlet, the bevel faces the wall or floor fitting. A reversed washer cannot wedge into the gap and is a classic cause of a slow drip.
Some plastic traps use a flat washer or O-ring instead; fit what the manufacturer supplies, as its instructions show.
Line up the pipes first
Slide the pipes together straight and fully engaged before starting the nut. Never use the nut to pull a pipe into line: a trap under strain soon leaks again. Adjust the tail or trap arm instead, cutting plastic tube square and deburring it.
Tighten: hand-tight plus a little
Plastic slip-joint nuts are made for hand tightening. Screw them on until firm; if the joint still weeps in the test, add a small extra turn (about a quarter turn, for reference) with cloth-wrapped pliers. Over-tightening crushes the washer, cracks the nut or distorts the pipe. Metal nuts on brass traps take a little more: small steps, then test.
PTFE tape does not belong here. Thread tape is for joints that seal on their threads. A slip joint seals on its washer, so tape does nothing for the leak and can make the nut feel tight before the washer is compressed. Fix the washer or alignment instead.
Bottle trap pot and outlet
Unscrew the pot, clean out debris, check that the washer or O-ring sits fully in its groove, and screw the pot back by hand only. Treat the outlet nut like any slip joint. A hairline crack in a plastic bottle trap cannot be repaired properly; replace the trap.
Step 5: Re-seal a kitchen basket strainer
Water around the outside of the strainer body, directly under the bowl, means the flange seal has failed. Tightening the locknut rarely fixes this for long; re-seal it.
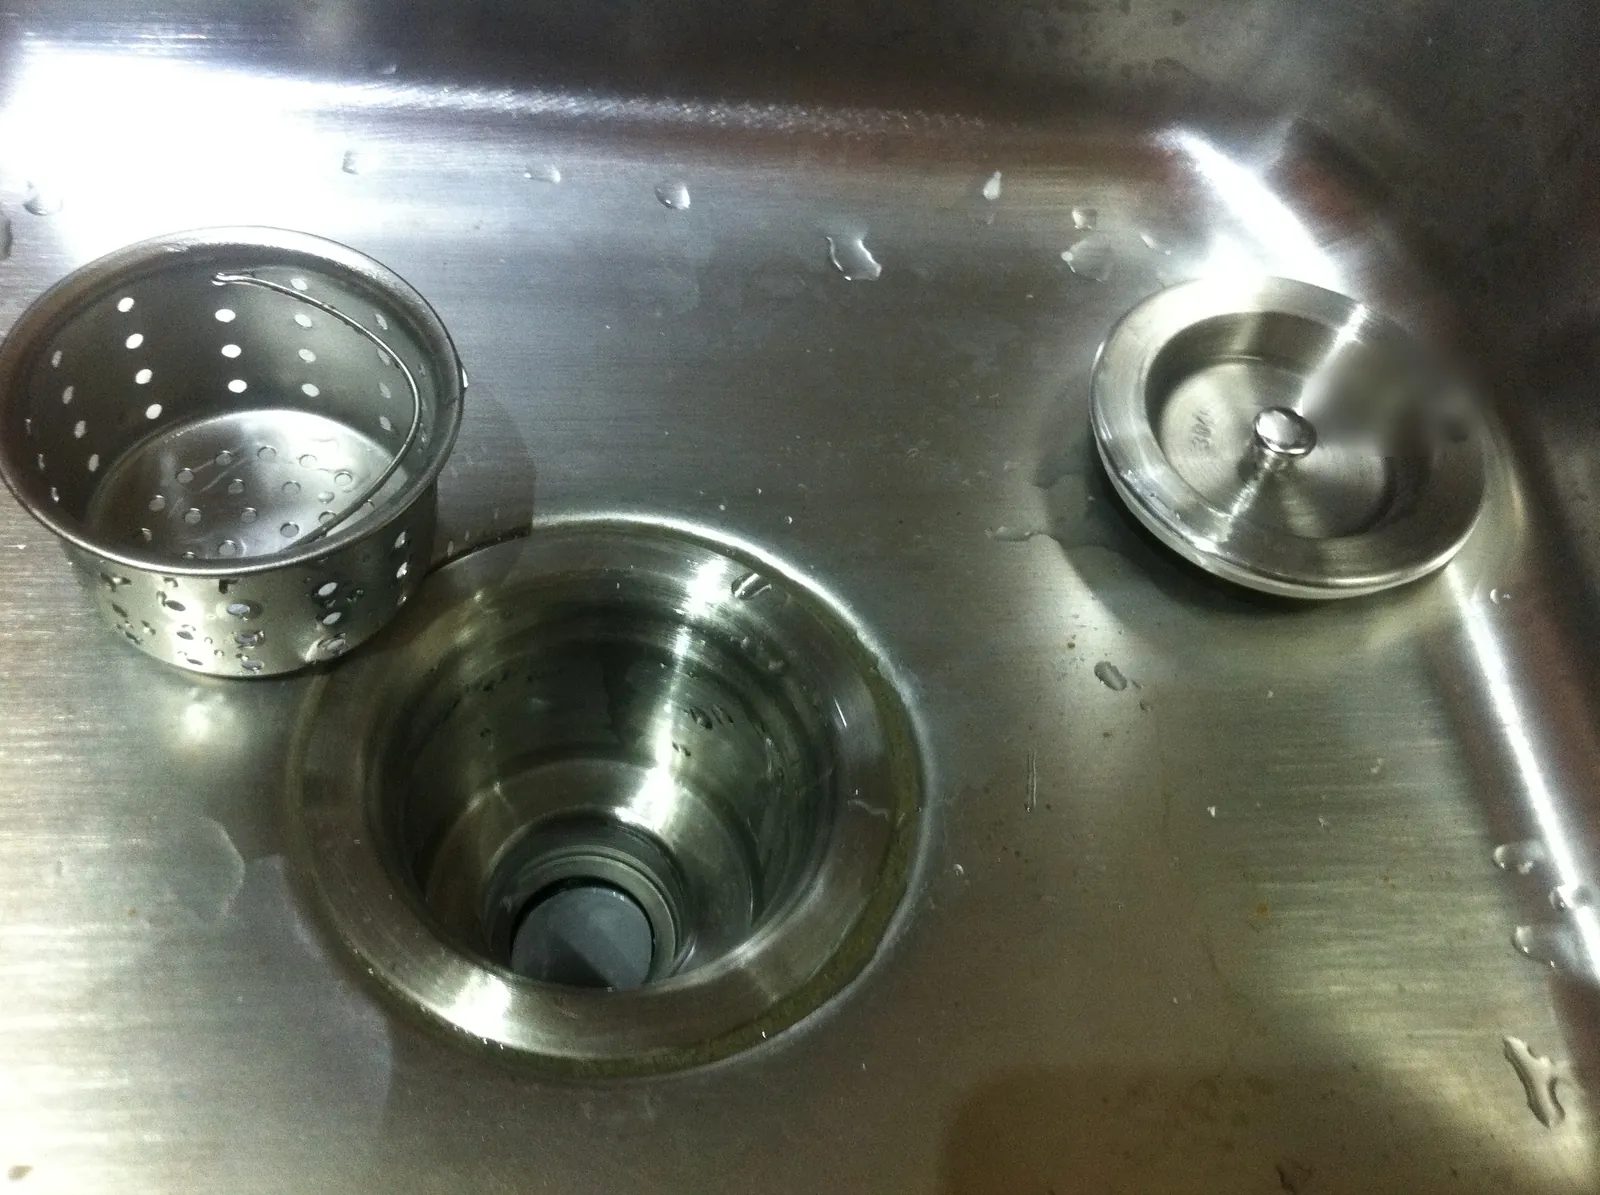
Figure 3. A kitchen sink basket strainer: the removable basket (left), the strainer body seated in the sink outlet (centre) and the stopper (right). Leaks around the outside of the body come from the seal under its flange. Lettering on the stopper rim has been blurred. (Photo: Belchers Albert, Wikimedia Commons, CC BY-SA 3.0)
Remove the strainer
Disconnect the trap from the strainer tail.
Undo the large locknut underneath (some types use screws pressing on a ring instead). Ask a helper to hold the strainer from above so the body does not spin.
Push the body up out of the sink and collect the rubber gasket and friction washer (often fibre or paper-like) from underneath.
Clean and inspect
Scrape all old putty or silicone off the sink and flange with a plastic scraper, then degrease both surfaces and let them dry. Replace the gasket if split or flattened, and the whole strainer if the body is cracked or pitted or the threads are damaged.
Choose the sealant: putty or silicone?
Plumber's putty is the traditional seal on stainless sinks and stays soft, so the strainer can be removed later. Ordinary putty can stain stone, granite and some composite sinks, and some putties are not recommended on certain plastics. Check the sink and strainer instructions; if in doubt, use a putty labelled stain-free for that material, or silicone.
Silicone (neutral-cure sanitary type) suits stone and composite sinks but bonds firmly, making the next removal harder. Let it cure for the time on the cartridge before use.
Gasket only. Many strainer kits are designed to seal with the supplied rubber gasket alone. If the instructions say so, do not add putty; it can stop the gasket seating evenly.
Refit
Press a rope of putty around the underside of the flange (or a thin, even bead of silicone, or seat the gasket), then push the strainer into the hole from above, centred. Underneath, fit the rubber gasket, friction washer and locknut in the order the manufacturer shows, and tighten evenly while the helper stops the body turning. Wipe away the putty that squeezes out inside the bowl, then reconnect the trap with a fresh washer.
Step 6: Re-seal a basin pop-up or click-clack waste
A basin waste is a threaded tube clamped through the basin's outlet hole: a flange on top, a seal above and a washer below the ceramic, and a backnut underneath. The trap screws onto its tail.
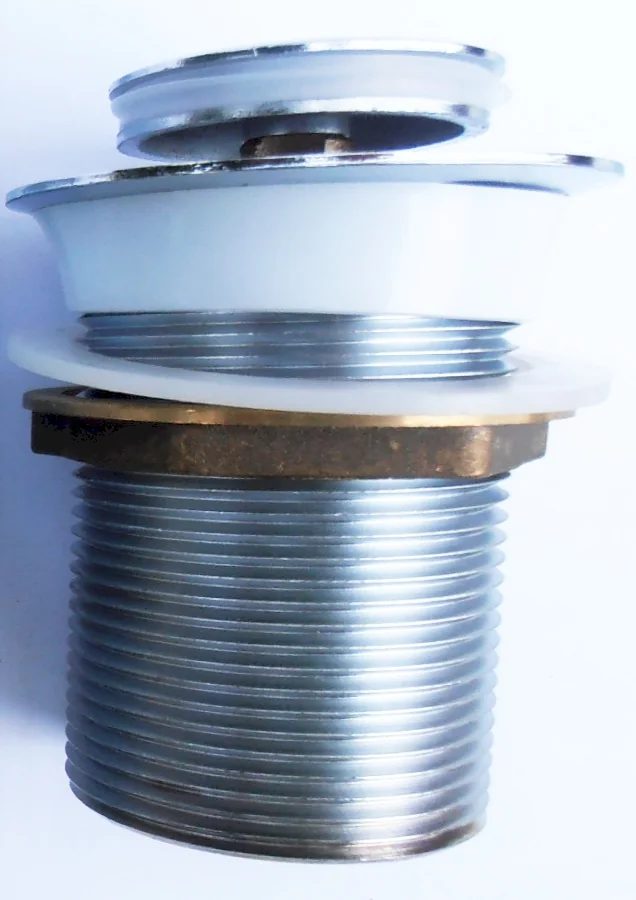
Figure 4. A pop-up basin waste: the flange and its seal sit inside the basin, the flat washer and backnut clamp it from below, and the trap connects to the tail. (Photo: Sarang, Wikimedia Commons, Public domain)
Signs that the waste needs re-sealing
Water appears around the threaded body or backnut under the basin, or only when the basin is full. There may also be a dark line of dirt or a gap around the flange inside the bowl.
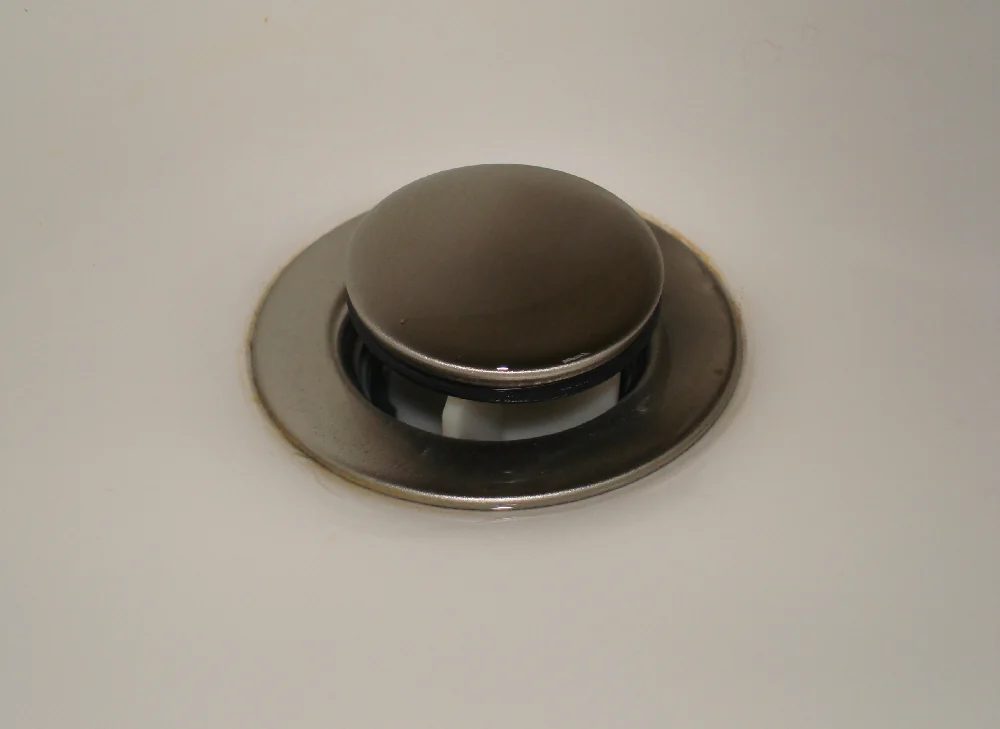
Figure 5. A click-clack plug in a basin waste. A dark line of dirt or a gap around the flange can show that the seal under it has failed. (Photo: Stilfehler, Wikimedia Commons, CC BY-SA 3.0)
Remove and inspect
Disconnect the trap from the waste tail.
Undo the backnut. Corroded metal backnuts are common; use penetrating oil and patience. If the body spins, hold it from above as the waste's instructions describe.
Lift the waste out, clean all old sealant from the ceramic and check around the hole for cracks.
Slotted or unslotted? Line up the overflow
A basin with an overflow needs a slotted waste, with the slot lined up with the overflow channel. An unslotted waste, or sealant smeared over the slot, stops the overflow draining properly. If the leak appears only when the basin is full, check this alignment and the seal around it first.
Refit the waste
Fit the top seal (or a thin bead of silicone or putty, as the waste maker specifies) under the flange, push the waste in and line up the slot. Underneath, fit the flat washer against the ceramic, then the backnut. Tighten firmly but not hard, holding the flange so the slot stays aligned: ceramic cracks if a metal backnut is forced. Refit the trap and check that the click-clack plug opens, closes and seals cleanly.
Step 7: Check the drain connection into the wall or floor
The last joint is where the trap outlet or waste hose enters the building's pipe, in Vietnam often a uPVC pipe in the floor or wall, commonly 34, 42 or 60 mm outside diameter (for reference; measure what you find). Common problems:
A loose hose in an oversized pipe. A hose pushed into a larger floor pipe, the gap stuffed with cloth or tape, leaks when the pipe backs up and lets smells in. Use a proper rubber reducing seal or compression adaptor sized for both pipe and hose.
A wall outlet with a slip nut or compression fitting. Treat it like any other slip joint: correct washer, pipes in line, hand-tight plus a little.
A solvent-cemented joint. A cracked or leaking glued uPVC joint cannot be fixed by wrapping it. Cut it out and replace the fitting with the correct solvent cement, following the manufacturer's instructions. Cement and primer fumes are strong and flammable: ventilate, no flames, and let joints cure for the stated time before running water.
If water appears at the floor pipe only when the sink drains fast, ask whether other fittings on the same pipe back up: the cause may be a partial blockage further down, not a bad seal.
Step 8: Leak test – the fill-and-release test
A quick run of the tap is not enough: plastic joints often drip only under a full rush of water or when warm. Use this test after every drain repair:
Dry and wrap every joint in dry tissue, with a paper towel on the cabinet floor.
Fill the bowl nearly to the overflow (a kitchen sink without one: a few centimetres below the rim). On a basin, let some water enter the overflow.
Release the plug. The rush of water gives the joints the heaviest flow they will see.
Inspect every tissue with the torch. A damp spot means remaking the joint, not just tightening it.
Repeat with hot water if available. Warm plastic expands slightly and a marginal joint may weep only now.
Double bowls: fill and release both at the same time.
Leave a dry paper towel on the cabinet floor for the customer to check the next day.
If you used silicone, let it cure as the cartridge states before filling the bowl.
Reference table: symptom, likely cause and fix
Symptom | Likely cause | Fix |
|---|---|---|
Wet cabinet even when the sink is unused | Supply side: angle valve, hose nut or tap connection | Not a drain leak; check hoses and valves |
Drip at the bottom of the trap while water runs | Water from a joint higher up, or a cracked trap | Dry and wrap each joint; trace from the top down |
Drip at a slip nut | Washer worn, missing, reversed or wrong size; pipes misaligned | Remake: correct washer, bevel into the joint, pipes aligned, hand-tight plus a little |
Slip nut weeps only with hot water | Marginal washer or pipe under strain | New washer; remove the strain |
Water around the kitchen strainer body | Failed putty, silicone or gasket under the flange | Remove, clean, re-seal, refit evenly |
Leak around the basin waste body | Failed flange seal or washer; loose or corroded backnut | Remove, clean, refit with new seals |
Leak only when the basin is full | Slot not aligned or sealed; unslotted waste; cracked overflow | Align and re-seal; fit a slotted waste; replace a cracked basin |
Bottle trap pot drips | Washer dirty, out of its groove or worn | Clean, reseat or replace; hand-tight only |
Water at the floor or wall pipe entry | Loose hose in oversized pipe; cracked glued fitting; blockage downstream | Proper reducing seal; replace fitting; clear blockage |
Wet only after splashing | Failed rim or worktop silicone | Remove, clean and re-seal the rim |
When to replace parts instead of re-sealing
Re-seal when the parts are sound and only washers or sealant have failed. Replace when:
a plastic trap, nut or bottle pot is cracked, or the threads are stripped or cross-threaded;
a chrome-plated brass tail or trap is corroded through or very thin (it often crumbles when the nut is undone);
a strainer or waste body is pitted, bent or has damaged threads;
a flexible waste hose is split, hardened or permanently kinked;
the parts are mismatched sizes held together with tape;
the basin or sink itself is cracked, which is a replacement job the customer must be told about.
Plastic traps cost little compared with repeat visits, so replacing an old, brittle one is often the professional choice; agree the price first.
Practical worked example
The call: an apartment in Ho Chi Minh City. The basin cabinet floor is always wet and the board has started to swell. A plastic bottle trap sits under a ceramic basin with an overflow; a flexible hose feeds a single-lever tap.
Diagnosis: after emptying, photographing and drying the cabinet, Test A (supply) stays dry for five minutes. Test B: water collects at the bottom of the bottle trap, but the pot seal is dry; moving the tissue upward shows the tail-to-trap nut is wet. Test C: with the basin filled into the overflow, a second, slower drip appears around the waste body.
Repair: the top nut's washer is found upside down and flattened; a new tapered washer goes on with the bevel facing down into the trap. The waste's top seal has hardened and its slot is a quarter turn out of line with the overflow. The plumber cleans the ceramic, fits new seals, lines up the slot, tightens the backnut firmly without forcing it and reconnects the trap hand-tight plus a small turn.
Test and handover: two cold and one hot fill-and-release test, all dry. The plumber shows the old washer, points out the board damage and leaves a paper towel to check next morning.
Safety checklist
Electrical appliances in the cabinet (water heater, RO pump, disposer) unplugged or switched off at the breaker
Customer asked about drain chemicals; gloves and glasses on; no mixing of chemicals
Gloves on around sharp sink edges and worktop cut-outs
Ventilation, no flames and correct curing time if solvent cement or primer is used
Plastic nuts tightened by hand plus a little, never forced with a long spanner
No PTFE tape on slip-joint nuts
Putty or silicone checked against the sink manufacturer's instructions (stone, composite, plastic)
Fill-and-release test with cold and, where present, hot water
Appliances plugged back in, cabinet dry and clean, before you leave
Client handover
Show which joint leaked and the old part you replaced.
Explain that slip nuts and bottle-trap pots are hand-tight only, and that the pot can be unscrewed over a bowl to clear hair.
Ask them not to store heavy items pressed against the trap; knocks loosen joints.
Leave a dry paper towel on the cabinet floor and ask them to call if it is damp after 24 hours.
Write down any work you advised but did not do (an ageing supply hose, a corroded backnut) on your invoice or message.
Frequently Asked Questions
Should I wrap PTFE tape around a slip-joint nut to stop a leak?
No. A slip joint seals on its tapered washer, not on the threads. Take the joint apart and check the washer's type, size and direction, and that the pipes are in line.
Which way does the tapered washer go?
The bevelled side points into the joint, toward the threaded fitting the nut screws onto: between a waste tail and a trap, bevel down into the trap. If a product's diagram shows otherwise, follow it.
Plumber's putty or silicone under a strainer?
Putty is traditional on stainless sinks and easy to remove later. On stone, granite or composite sinks, ordinary putty can stain, so use a putty specified for that material or neutral-cure sanitary silicone. If the kit seals with its rubber gasket alone, add nothing.
The basin only leaks when it is full. Why?
Probably the overflow: check that the waste is slotted, the slot lines up with the overflow channel and the seal around it is intact. A cracked overflow channel is rare but means a new basin.
Can I just tighten the nut harder?
Not beyond hand-tight plus a small turn. Plastic nuts crack and washers crush. Take the joint apart and find the real cause: a worn, reversed or missing washer, or misaligned pipes.
Practice Exercises
Exercise 1: Four-test diagnosis. On a training sink, dry all pipework and carry out tests A to D (supply, drain, overflow, rim) with tissue strips. Record each result and the joints you checked.
Exercise 2: Washer identification. Sort five different slip-joint washers and O-rings: where does each belong (tail-to-trap, trap outlet, bottle-trap pot) and which way round does it fit? Have your supervisor check.
Exercise 3: Remake a trap. Remove, clean and refit a plastic P-trap or bottle trap with new washers, hand-tight plus a little, then do a cold and warm fill-and-release test.
Exercise 4: Basin waste. On a bench-mounted basin, remove a pop-up waste, clean the ceramic, refit it with new seals, line up the overflow slot and test with the basin filled to the overflow.