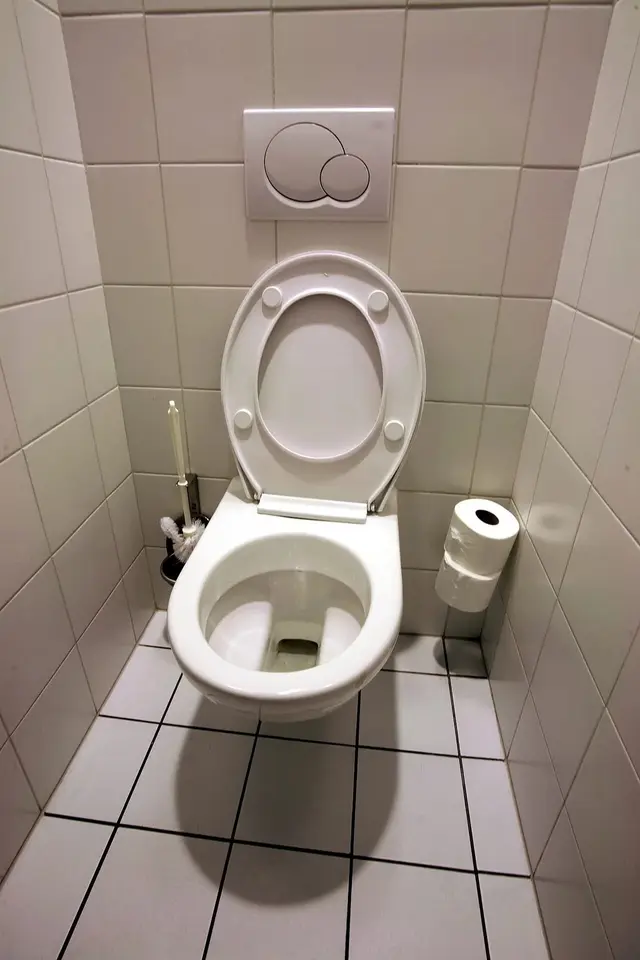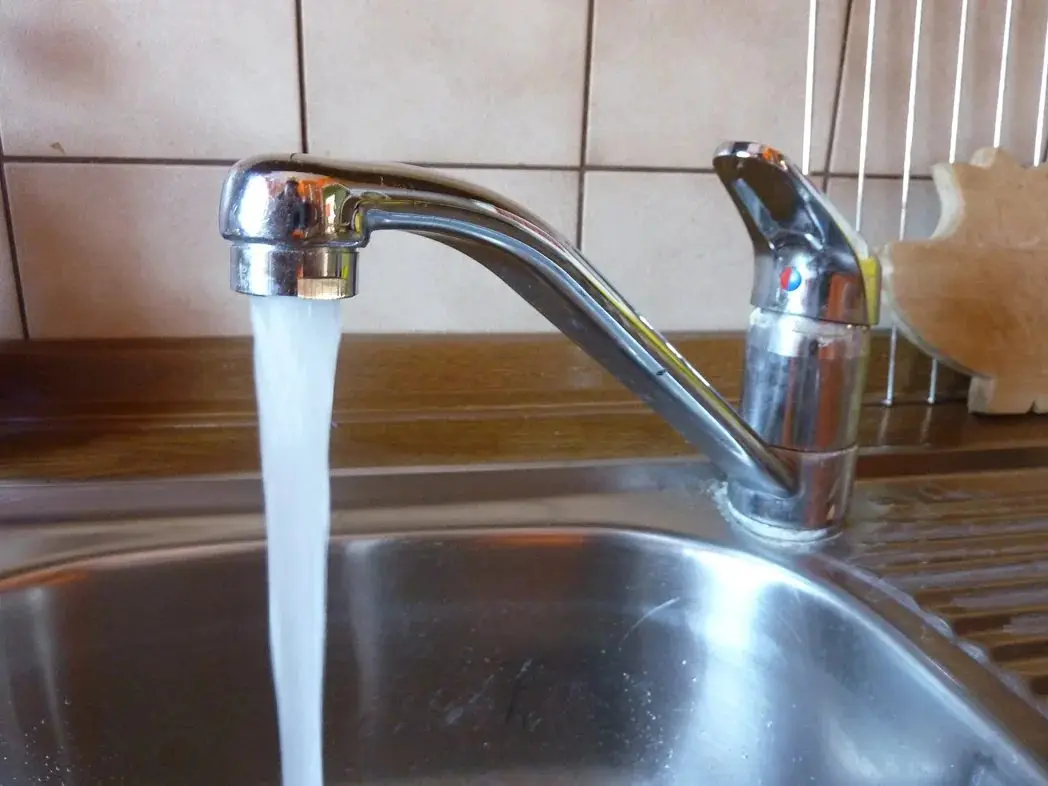
A dripping, wobbly or cracked kitchen tap is one of the most common calls a residential plumber gets, and replacing it is a job every learner should be able to do cleanly in an hour or two. The steps are simple: shut off the water, disconnect the old tap, fit the new one with fresh flexible hoses, then test for leaks. What separates a professional job from a call-back is the detail: checking that the shut-off valves really close, matching thread sizes before you start, not over-tightening, keeping thread tape off joints that seal on a washer, and flushing the lines so grit does not damage a brand-new cartridge. This guide takes you through the whole job, with Vietnam-specific examples and a checklist for site use.
Water and electricity share the space under a kitchen sink. Before you start, unplug or switch off at the breaker anything electrical in or near the sink cabinet (water purifier pump, garbage disposal, dishwasher, booster pump), and switch off the electric water heater if you will touch the hot line. Keep a bucket and towels ready and never work with wet hands near sockets. Sizes in this article are for reference only; always follow the instructions supplied with the tap and hoses you are installing.
Tools and parts checklist
Prepare everything before you shut off the water, so the customer's kitchen is not out of action while you run to the shop.
Tools: two adjustable spanners (one to hold, one to turn); a basin wrench for nuts behind the bowl; screwdrivers and Allen keys (many lever handles have a grub screw); a torch and a phone camera; penetrating oil, a plastic scraper and cloths; a bucket, a shallow tray, old towels and paper towels for leak checks; a tape measure; gloves and safety glasses, because limescale and rust flakes fall straight down when you work upwards.
Parts: the new tap with its base seal (gasket or O-ring) and fixing kit (threaded studs, horseshoe or U-shaped plate and nuts, or one large shank nut); new flexible hoses if the tap does not include them; spare hose washers; PTFE thread tape; and, if the inspection shows they are faulty, new angle stop valves. If a water purifier is connected, have the right tee or feed fitting so it can be reconnected.
Step 1: Identify the tap type
Look at both the old tap and the new tap before you touch a valve. The type decides where the connections are and which tools you need.
Single-hole deck mixer
The most common kitchen tap in Vietnamese homes and apartments: one body on the sink deck, a single lever for hot and cold, and a swivel spout. It is clamped from below by threaded studs with a plate and nuts, or by one large nut on a threaded shank. Two flexible hoses hang down from the body, one for hot and one for cold. A cold-only kitchen tap has a single hose.
Wall-mounted mixer
Common in older townhouse kitchens where the pipes come out of the tiled wall above the sink. The mixer joins the wall fittings through two offset (eccentric) connectors with chrome cover plates, so there are no flexible hoses and no deck nuts. The offset connectors can only adjust within a limited range of centre distances, so measure the distance between the two wall fittings and compare it with the product before buying.
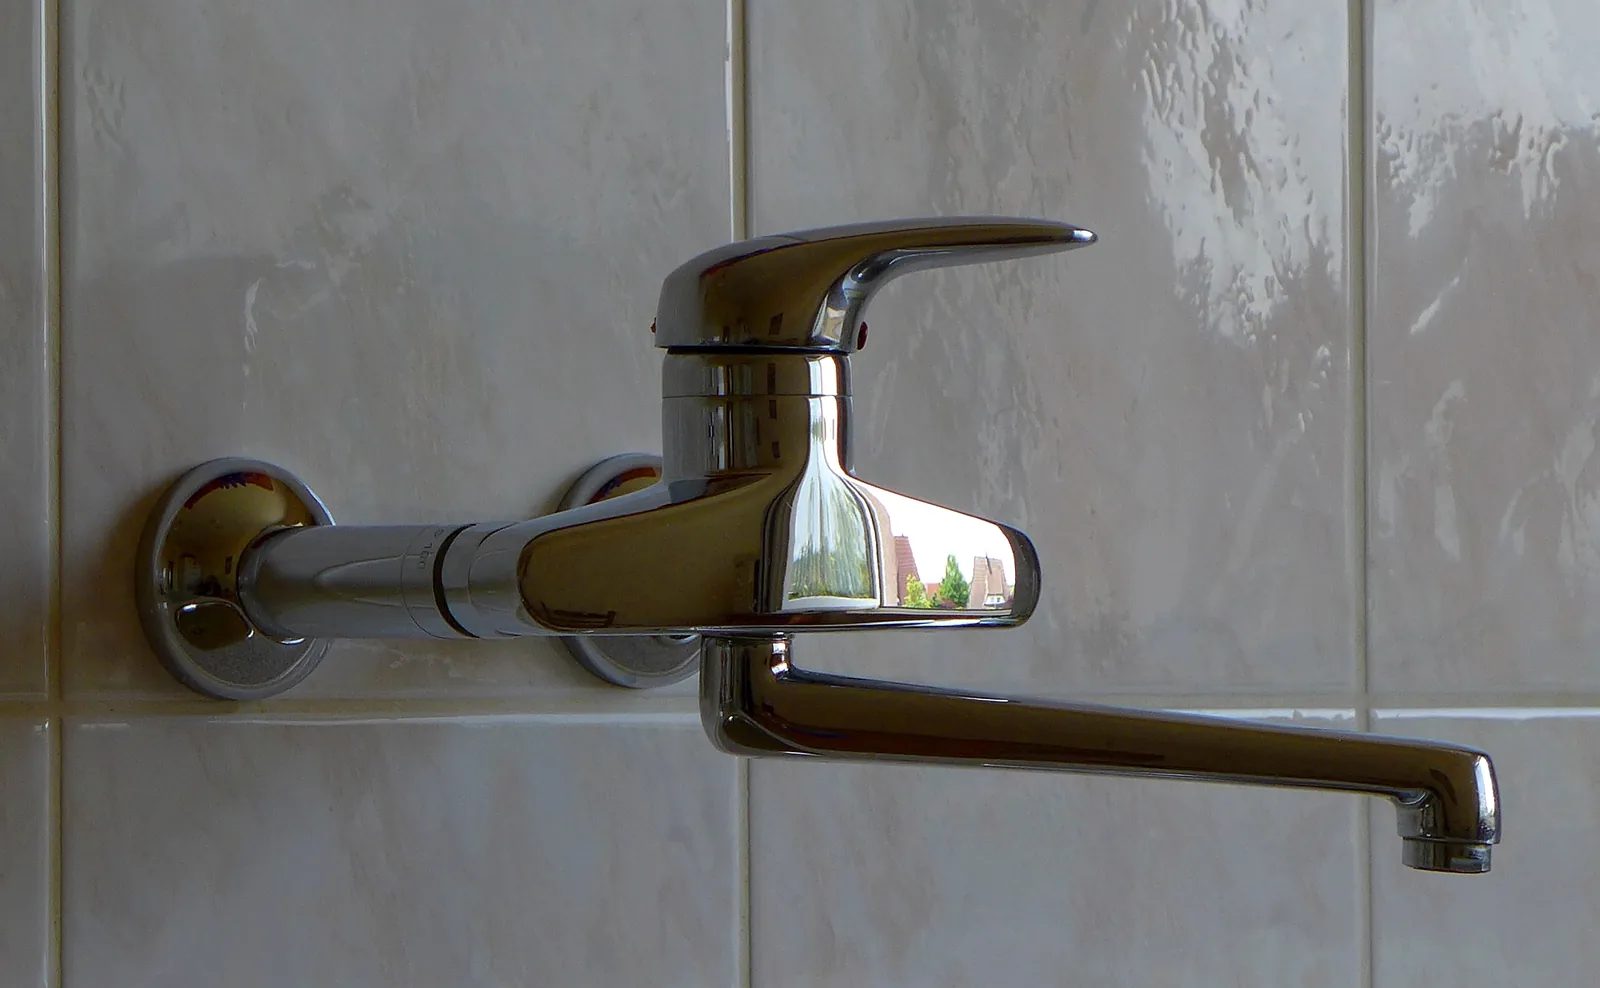
Figure 1. A wall-mounted single-lever kitchen mixer with a long swivel spout. The two chrome offset connectors with round cover plates screw into the hot and cold fittings in the wall, so this type has no flexible hoses under the sink. (Photo: Oxfordian Kissuth, Wikimedia Commons, CC BY-SA 3.0)
Pull-out or pull-down mixer
The spray head pulls out on a hose that runs down through the tap body and loops under the sink, usually with a clip-on weight so it retracts. It fits a normal deck hole, but the hose loop and weight need clear space to move. In a crowded cabinet with a purifier, filter housings and a waste trap, check this before the customer buys.
Before you start, photograph the existing connections and note anything that shares the valves (purifier, dishwasher) and the sink material. Thin stainless sinks can flex when you tighten the fixing, which is why many taps include a stiffening plate.
Step 2: Check that the angle stop valves really shut off
Most kitchen sinks have two small angle stop valves (van khóa góc) under the bowl, one on the cold line and one on the hot line if there is hot water. Many have not been turned for years.
Identify hot and cold by following the pipes, not by the colour of the handles, which are often swapped.
Close each valve slowly by hand. A quarter-turn valve is closed when the lever is at right angles to the pipe; a multi-turn valve closes clockwise. Do not attack a stiff handle with pliers: a valve that breaks, or an old pipe that snaps inside the wall, turns a simple job into an emergency.
Prove the shut-off. Open the old tap fully on hot and cold. The flow should stop completely within a few seconds. A trickle that keeps running means the valve is not sealing.
Look for weeping at the valve spindle and at the joint into the wall. An old valve often starts to weep once it has been turned.
If a valve does not close fully or leaks, the professional answer is to replace it. Shut off upstream instead (the main valve from the rooftop tank or at the water meter, and for the hot side, the cold inlet valve of the water heater) and tell the customer about the extra work before you start. Our article on technical assessment, quoting and taking on jobs for residential plumbers covers how to explain extra items.
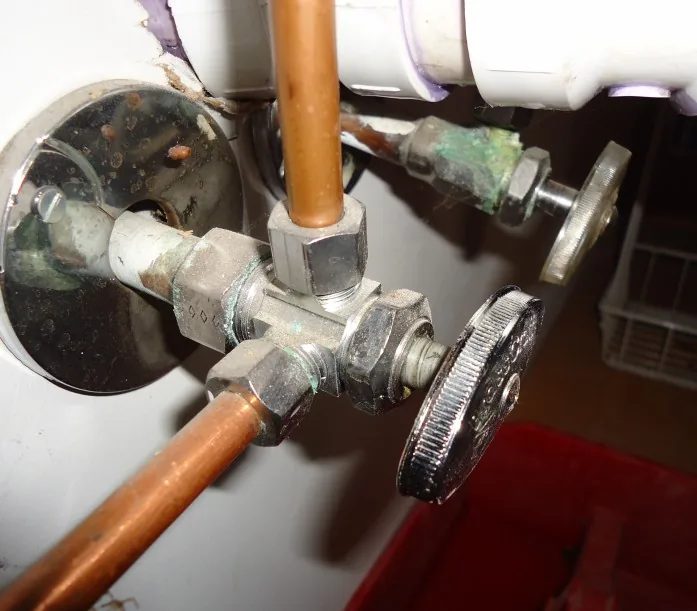
Figure 2. Old stop valves under a kitchen sink, with green corrosion on the brass bodies and nuts and copper pipes running to the tap and, according to the photographer, a dishwasher. According to the photographer, the valve in the foreground was leaking and was replaced. Corrosion like this is a warning that a valve may not close fully or may start to leak once it is disturbed. (Photo: Tomwsulcer, Wikimedia Commons, CC0)
Vietnam context: rooftop tank, booster pump and water heater
Rooftop tank (gravity supply). Many townhouses are fed from a tank on the roof. The upstream valve is usually at the tank outlet or where the down pipe enters the house. When you open a joint, the water left in the pipe drains out, so keep the bucket ready.
Booster pump. If a booster pump (máy bơm tăng áp) is fitted, switch it off before you start so it does not cycle against closed valves, and switch it back on for the leak test. A joint that is dry under gravity pressure can still drip under pump pressure.
Electric water heater. Switch the heater off at its breaker or double-pole switch before touching the hot line, and let the water cool. Closing the heater's cold inlet valve leaves the heater full; do not drain it unless the job requires it. A storage heater must always be completely full of water before power goes back on. For how hot and cold lines are normally run, see installing hot and cold water supply pipes and pressure testing before plastering.
Step 3: Measure the hole and the connections
Matching sizes before you start avoids the classic mistake of discovering under the sink that the new hoses do not fit the old valves.
Deck hole: measure it and compare it with the tap specification. Enlarging a hole in stone or composite is a separate job with the correct cutter.
Deck thickness: the studs or shank must pass through the deck plus any worktop or stiffening plate and still take the nut.
Valve outlet and hose nut: they must match. Test the new hose nut on the valve by hand if you can.
Hose length: measure from the underside of the tap to the valve outlet and allow a gentle curve. A hose should never be stretched tight or bent sharply; buy a longer hose rather than adding adaptors.
Reference table: common sizes and connections
Item | Common size or type (for reference) | What to check on site |
|---|---|---|
Single-hole tap deck hole | Roughly 32–35 mm | Measure the old hole; read the new tap's specification |
Angle stop valve outlet | Often a 1/2-inch male thread | Size marked on the valve, or a hand fit with the new hose nut |
Flexible hose, valve end | Often a 1/2-inch female nut with a rubber washer | Washer present and undamaged; nut turns freely by hand |
Flexible hose, tap end | Often a small metric thread with an O-ring, or factory-fitted | Use the hoses made for that tap |
Wall-mixer offset connectors | Adjustable within a limited range | Centre distance of the wall fittings versus the tap's range |
Thread standards differ between manufacturers and countries, so treat these as typical values and check the product. When in doubt, take the old hose or valve to the shop and test the fit.
Step 4: Remove the old tap
Shut off and relieve pressure. Close both valves (or the upstream valves), then open the tap on hot and cold to let the lines drain.
Clear the cabinet, put a tray or towel under the valves and position the bucket.
Disconnect the hoses at the valves. Hold the valve body with one spanner and turn the hose nut anticlockwise with the other. If you turn the nut alone you can twist the valve and loosen its joint in the wall, which may leak inside the wall later.
Undo the fixing nuts under the deck with the basin wrench. Spray penetrating oil on seized threads a few minutes beforehand.
Lift the tap out, feeding the hoses up through the hole.
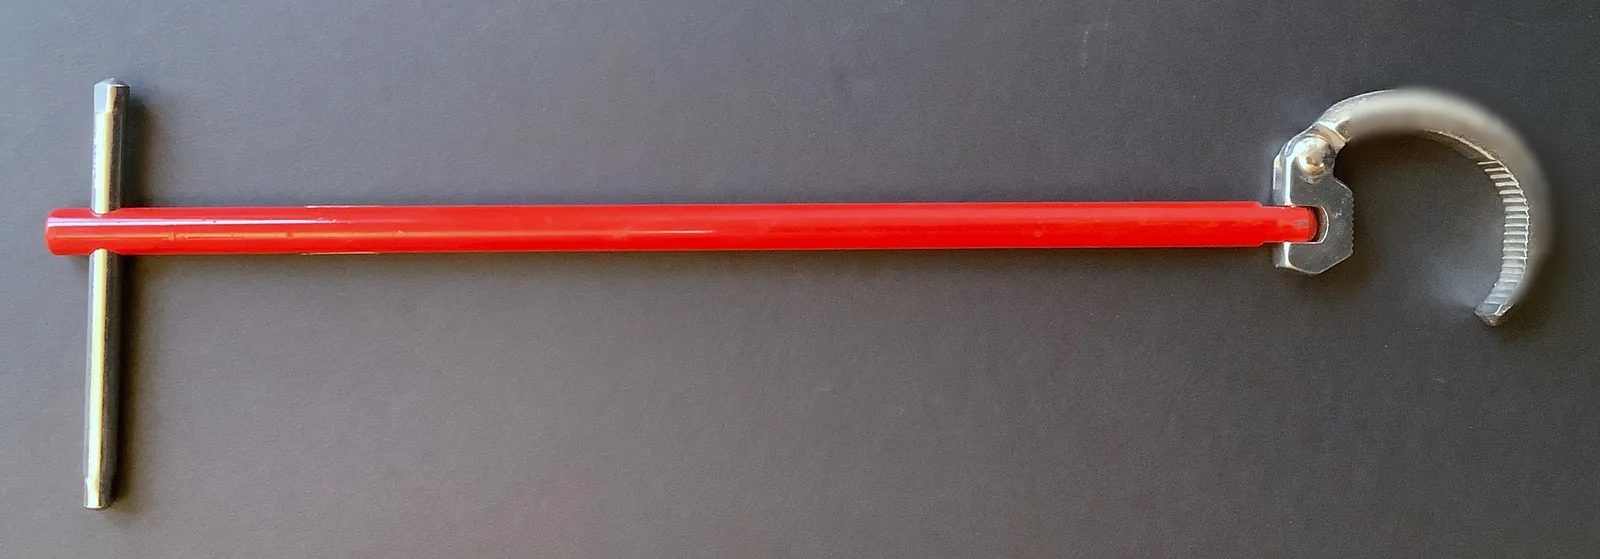
Figure 3. A basin wrench: a long shaft with a T-bar handle at one end and a curved, toothed pivoting jaw at the other. The jaw grips a fixing nut in the narrow space behind a sink bowl while you turn the handle from below. The maker's lettering on the jaw has been blurred. (Photo: Lambtron, Wikimedia Commons, CC BY-SA 4.0)
When nuts will not move: give the oil more time and tap the nut lightly. A seized plastic nut can be cut carefully with a hacksaw blade without touching the sink. If the hoses are seized into the old tap, cut them (water off, lines drained) and remove the tap with the stubs. Never lever against a stone worktop or a thin stainless sink.
Step 5: Clean and inspect the deck
Scrape off old sealant and limescale with a plastic scraper (a metal blade can scratch stainless steel and leave a leak path under the new seal), then wipe and dry the surface. Check the edge of the hole for cracks or thin, corroded metal. While you are underneath, look at the waste trap and the cabinet base for signs of old leaks, and report anything you find to the customer.
Step 6: Fit the new tap
Pre-assemble on the worktop. Screw separate hoses into the underside of the tap by hand, or as the instructions say. These small threads usually seal on an O-ring and strip easily, so do not use a spanner unless the manual says so.
Fit the base seal supplied with the tap in its seat. Most taps seal on the gasket alone; add silicone only if the manufacturer recommends it, and never as a substitute for a missing gasket.
Feed the hoses and studs through the hole without twisting the hoses.
Position the tap so the spout clears the wall and swings over both bowls, and the lever can move fully without touching the splashback.
Tighten the fixing from below, evenly and alternately if there are two studs, until the tap is firm and does not rotate. Check the position again from above before the final turn. Over-tightening can distort a thin sink or crack stone.
Pull-out models: connect the pull-out hose as the manual shows, clip on the weight at the stated position, and check that the hose runs freely.
Step 7: Connect the flexible hoses to the valves
Thread tape versus rubber washers
A threaded joint seals in one of two ways:
On a washer. Most flexible hose nuts contain a rubber washer that presses against the flat end of the valve outlet. The threads only hold the nut. Do not put PTFE tape on these threads: it does not help and can stop the washer seating evenly.
On the threads. A male thread screwed into a female fitting without a washer, such as an angle valve screwed into the wall fitting, seals on the threads. These joints need PTFE tape (or another suitable thread sealant), wrapped in the direction the thread tightens so it does not unwind.
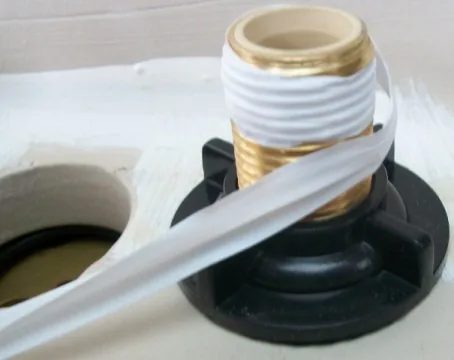
Figure 4. PTFE thread tape wound onto a male threaded brass connection, photographed under a bathroom sink according to the photographer's description. Tape belongs on joints that seal on the threads. A hose nut that seals with its own rubber washer does not need it, so check how each joint seals before reaching for the tape. (Photo: Tomwsulcer, Wikimedia Commons, CC0)
Hand-tight, then a little more
Check that each nut has its washer, seated flat and undamaged.
Start the nut by hand and run it up hand-tight. If it will not turn freely, stop: it is cross-threaded or the threads do not match.
Hold the valve with one spanner and give the nut a small extra turn with the other, typically around a quarter turn. Some manufacturers specify hand-tight only, so follow the product instructions.
If a joint leaks, do not keep tightening. Over-tightening crushes the washer and can crack the nut. Shut off, undo, inspect the washer and valve face, and remake the joint.
Route hot to hot and cold to cold (check the tap's own markings), with no kinks, no twisting and no contact with sharp edges or the moving pull-out hose.
Step 8: Flush the lines, then fit the aerator
Turning old valves and working on pipes releases grit and rust flakes. If they reach the new cartridge or the aerator screen, you can have a dripping tap or weak flow on day one.
Remove the aerator from the spout (some taps are packed with it separate).
Open the angle valves slowly.
Run cold, then hot, until the water is clear.
Close the tap, clean the aerator screen if needed and screw it back on by hand.
Some installers flush the supply lines into a bucket before connecting the hoses at all, which keeps debris out of the tap completely. Either way, the aerator goes on last.
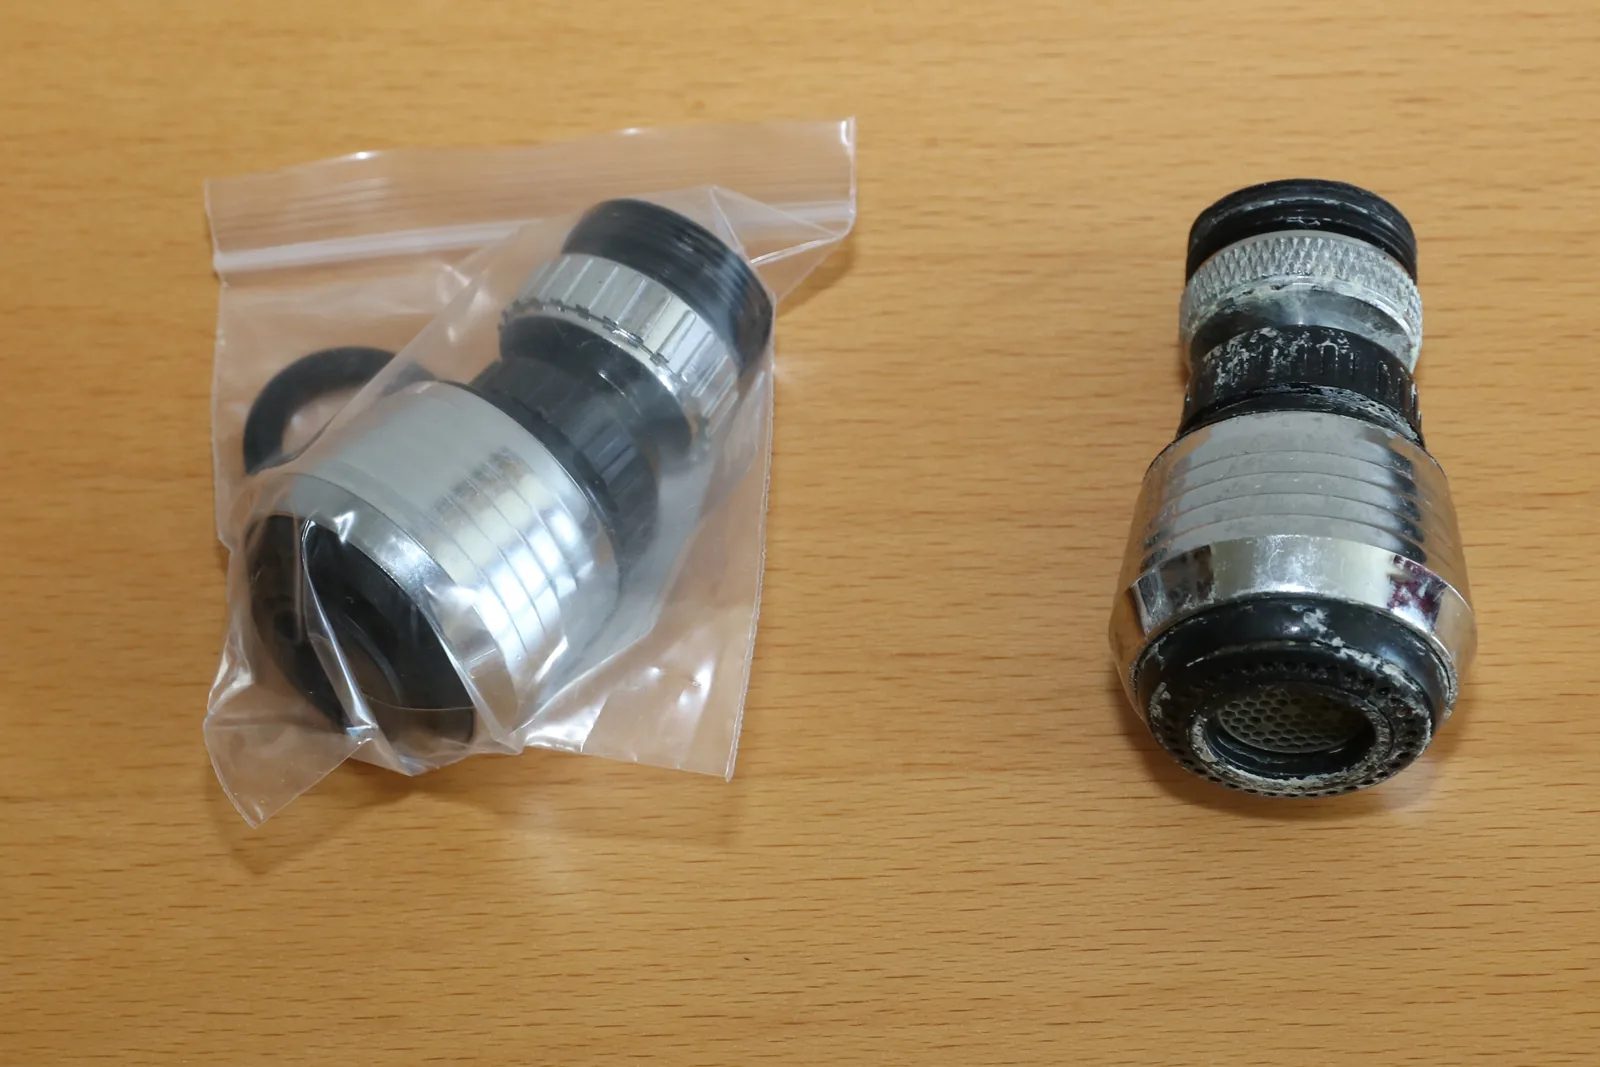
Figure 5. A new tap aerator still in its bag (left) and an old one with limescale deposits and, according to the photographer, damaged threads (right). Fitting the aerator only after flushing the lines keeps grit out of the fine screen. (Photo: MKFI, Wikimedia Commons, Public domain)
Step 9: Leak test and the 24-hour re-check
Restore normal pressure. Switch the booster pump back on if there is one. Switch the water heater on only when the hot line is full and water flows steadily from the hot side.
Dry every joint and the cabinet base.
Static test. With the tap closed and valves open, wrap a dry paper towel around each joint (hose nuts, valve-to-wall joints, tap-end connections) and wait a few minutes. A damp spot shows a leak you would not see by eye.
Flow test. Run hot, cold and mixed, swing the spout across its range, and for a pull-out mixer pull the head out and let it retract several times.
Check the top around the base seal and under the lever.
Re-check after 24 hours. A slow weep at a washer can take hours to show. Leave a dry paper towel on the cabinet floor and ask the customer to look the next day, or message them yourself.
Reference table: problem, likely cause and fix
Symptom | Likely cause | Fix |
|---|---|---|
Drip at the hose nut on the valve | Washer missing, damaged or not seated; tape on a washer joint; cross-threaded nut | Shut off, undo, remove tape, fit a new washer, remake hand-tight plus a small turn |
Weep where the valve enters the wall | Valve twisted while tightening the hose | Shut off upstream; remake with new thread tape or replace the valve |
Water around the tap base | Base seal missing or pinched; fixing loose; splash from the spout | Check the gasket seat, re-tighten evenly, dry and re-check |
Tap rotates on the deck | Fixing loose; thin sink flexing | Tighten evenly; fit the stiffening plate if supplied |
Weak flow from the new tap | Debris in the aerator; valve partly closed; kinked hose | Clean the aerator, open the valves fully, re-route the hose |
No hot water or hot on the wrong side | Heater off or valve closed; hoses swapped | Check heater and valves; swap the hoses |
Spout drips after installation | Grit in the cartridge from unflushed lines | Clean or replace the cartridge as the manual describes |
For drips that develop later in an older tap, see fixing a dripping faucet and unclogging a bathroom sink without breaking tiles.
Step 10: Hand over to the customer
Show the customer where the angle valves are and how to close them in an emergency. Demonstrate the lever, the swivel and, for pull-out models, how the head retracts. Explain the 24-hour check and how to clean the aerator when the flow drops. Leave the cabinet clean and dry, reconnect and switch on anything you unplugged, and hand over the tap's instructions and warranty papers.
Practical examples
Example 1: Old townhouse kitchen with a corroded cold valve
The cold angle valve is covered in green crust and its handle will not turn by hand. Rather than forcing it, the plumber explains that the valve should be replaced, quotes the extra work, and closes the main valve at the rooftop tank outlet. With the line drained into a bucket, the old valve is unscrewed while the pipe fitting in the wall is supported so it does not turn. The new valve goes in with fresh PTFE tape on its male thread, then the tap is fitted. The leak test is done with the tank valve fully open and repeated the next day.
Example 2: Hot water from an electric storage heater
The heater is in the cabinet next to the sink. The plumber switches it off at its double-pole switch, lets the water cool and closes both angle valves. The hot valve still lets a trickle through, so the heater's cold inlet valve is closed as well. After fitting, the plumber opens the inlet valve, runs the hot side until the flow is steady and free of air, and only then switches the heater back on.
Example 3: RO purifier sharing the cold valve
A reverse-osmosis purifier is fed from a tee on the cold angle valve outlet, and its pump is plugged into a socket in the cabinet. The plumber unplugs the purifier first and keeps the socket dry, photographs the tee and the feed tube, then disconnects the tap hose from the tee without disturbing the tee itself. After connecting the new tap, the plumber checks the tee, the feed tube and the purifier's feed valve for leaks, plugs the purifier back in and lets it run so the customer can see it working.
Safety checklist
Purifier pump, garbage disposal, dishwasher and booster pump unplugged or switched off at the breaker; sockets kept dry.
With a garbage disposal, power off at the breaker before any hand or tool goes near it.
Water heater switched off before touching the hot line; hot water allowed to cool.
Angle valves proven to shut off, or the upstream valve closed instead.
Floor protected, bucket and towels in place, no water spreading towards sockets or cables.
Gloves and safety glasses worn when working upwards behind the sink.
No forcing of seized valves or old pipes in the wall.
Leak test done at normal working pressure, including pump pressure if fitted.
Heater switched back on only after the hot line is full.
Customer shown the shut-off valves and told about the 24-hour check.
Frequently Asked Questions
Do I need thread tape on the flexible hose connections?
Usually not. Most hose nuts seal with a rubber washer against the end of the valve outlet, and tape on those threads can stop the washer seating properly. Use PTFE tape on joints that seal on the threads, such as an angle valve screwed into a wall fitting. If there is a rubber washer inside the nut, do not tape it.
How tight should the hose nuts be?
Hand-tight, then a small extra turn with a spanner while a second spanner holds the valve, typically around a quarter turn. Some products specify hand-tight only, so read the instructions. If a joint still leaks, take it apart and check the washer instead of tightening harder.
Can I reuse the old flexible hoses?
It is not recommended. Old hoses may have hardened washers, corroded nuts or damage under the braid that you cannot see. New hoses cost little compared with water damage, and many taps include them.
What if the angle valve will not close?
Do not force it. Close the main valve (at the rooftop tank outlet or the water meter) and, for the hot line, the water heater's cold inlet valve. Replace the faulty angle valve while the water is off, after telling the customer about the extra work.
Why is water collecting around the base of the new tap?
First rule out splash from the spout. Otherwise the base seal may be missing, pinched or not seated, or the fixing may be loose. Water appearing from under the lever usually points to the cartridge or its seals. Dry the area, run the tap and watch where the water first appears.
How long should I wait before calling the job finished?
The immediate test shows that most joints are good, but a slow weep at a washer can take hours to appear. Re-check after 24 hours, or ask the customer to look under the sink using a dry paper towel on the cabinet floor.
Practice Exercises
Exercise 1: Identify and record. Under a sink at home or at a training bench, identify the hot and cold lines, the type of angle valves and anything else connected. Sketch the layout and mark which joints seal on a washer and which seal on the threads.
Exercise 2: Valve test. With a supervisor, close each angle valve and prove that it shuts off by opening the tap. Record whether each valve is working, stiff, weeping or passing water, and write what you would tell the customer.
Exercise 3: Bench installation. On a training board or an old sink fixed to a bench, fit a single-hole mixer with new hoses to two angle valves. Tighten hand-tight plus a small turn while holding the valve, flush the lines, fit the aerator and do a paper-towel leak test. Your supervisor then checks every joint.
Exercise 4: Fault finding. Your supervisor sets up three faults: tape on a washer-sealed hose nut, a missing washer and a kinked hose. Find and correct each one using the problem table, explaining your reasoning out loud.